God of War Ragnarok has a unique collection of armor and side-quest pieces, one of which is Hunter’s Armor set, which is supposedly crafted with the use of Hunter’s brand. And in my Hunter’s Brand guide, I will uncover everything you need to know in detail about Hunter’s brand.
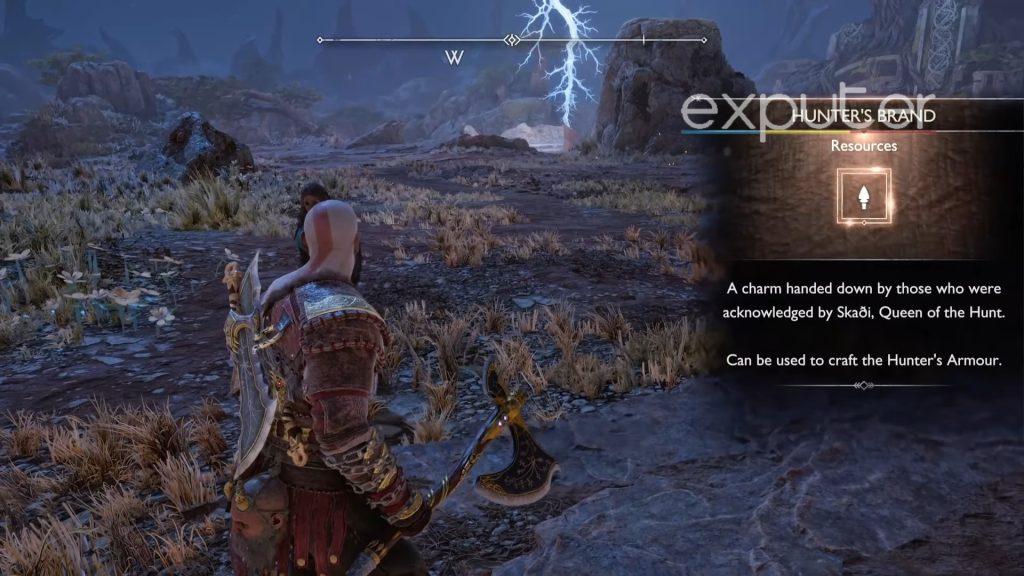
In God of War Ragnarok, the Hunter’s Brand is essential for crafting the Hunter’s Armor Set. There are three Hunter’s Brands that players can obtain:
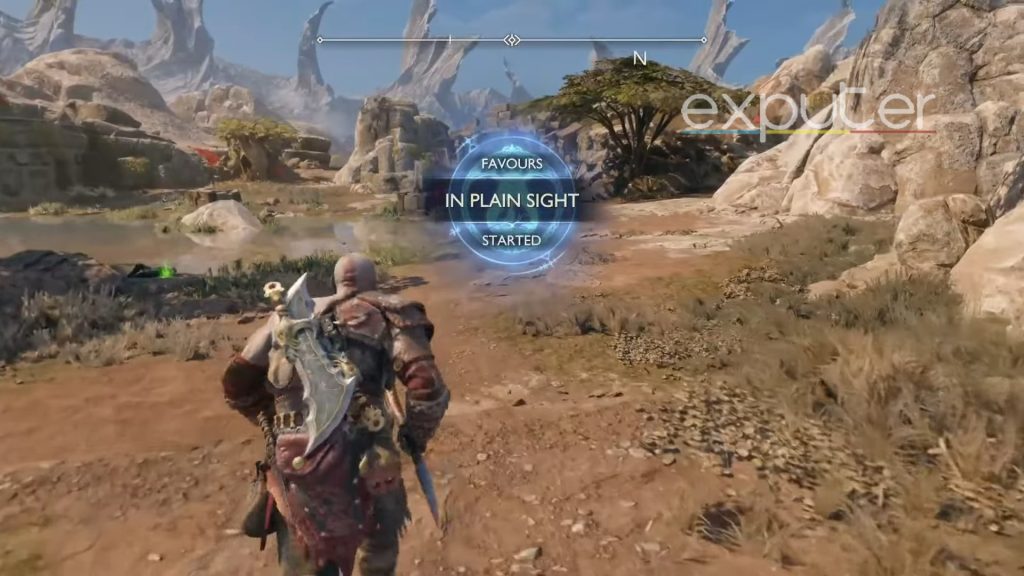
- First Hunter’s Brand: You can acquire the first Hunter’s Brand by completing the “In Plain Sight” favor quest. To initiate this quest, interact with a corpse in The Plains, located in Vanaheim.
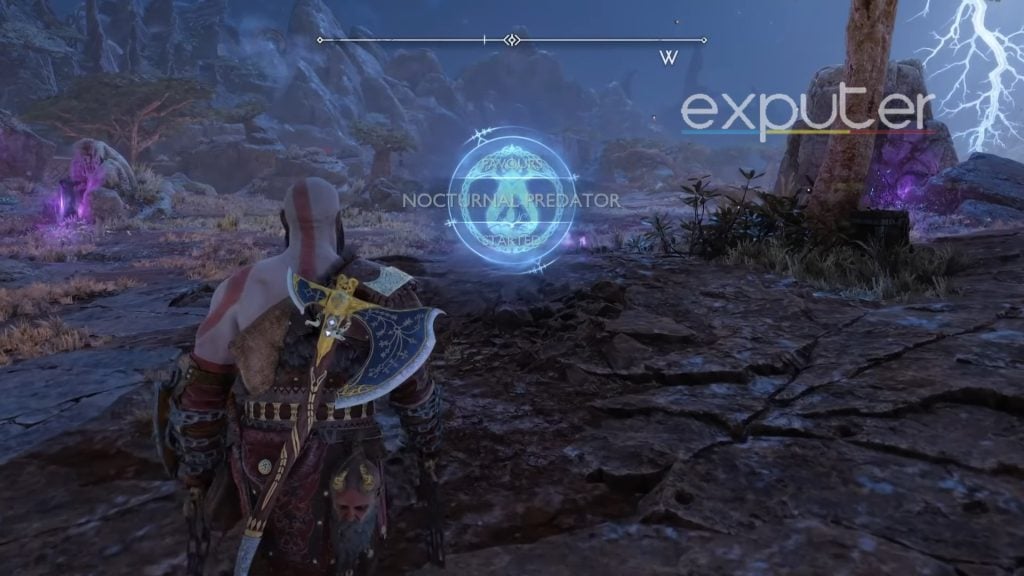
- Second Hunter’s Brand: The second Hunter’s Brand is obtained after completing the “Nocturnal Predator” favor quest. To start this quest, you need to catch a Wisp that roams around The Plains in Vanaheim.
- Third Hunter’s Brand: The final Hunter’s Brand can be acquired by defeating an Untamed Fury boss. This boss should not pose a significant challenge, so you can take it down relatively easily.
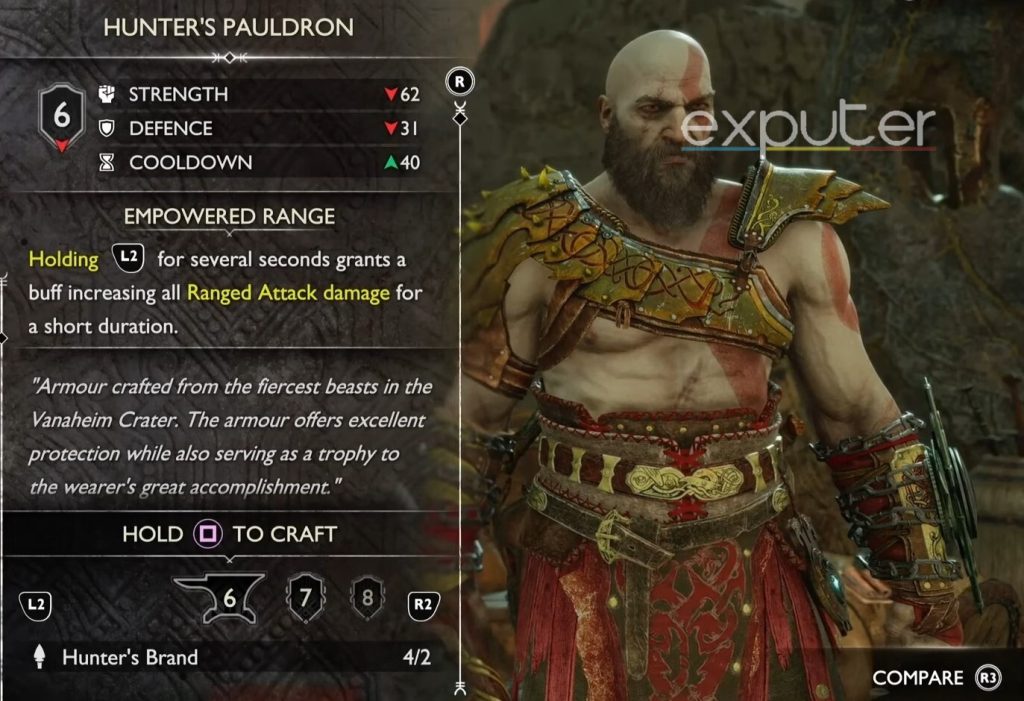
Once you’ve met the requirements and obtained all three Hunter’s Brands, head to Brok and Sindri’s forge to craft your Hunter’s Armor Set. This set will provide you with valuable advantages in combat and help you face the challenges that await in the game.
How To Get Hunter’s Brand
Before players go ahead in the search to know the location of the Hunter’s Brand, they need to keep in mind that there will be a few favors that will be attached to the Hunter brand pieces. The hunter brand pieces are used to craft a full set of the hunter’s armor, which can be used in combat to protect players.
The two main favors that players will be required to complete will be known as In Plain Sight as well as Nocturnal Predator, which I will go in-depth about as you progress further. After all of these items have been collected, players are allowed to head over to any blacksmith of their choice to craft their brand-new armor set.
First Hunter Brand
One of the first Hunter brand pieces that players will be able to attain will be through the in Plain slight favor.
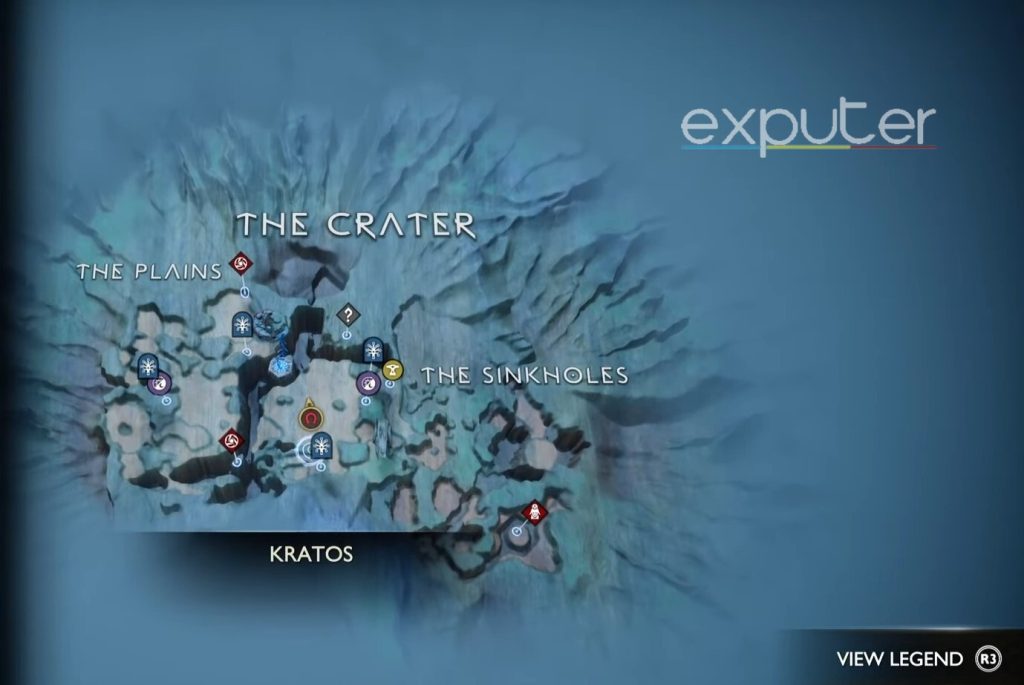
First things first, players will need to have access to the crater area that is present in Vanaheim, which can only be accessed after you complete the 13th main mission. So make sure to have progressed that farther into the main storyline; otherwise, the brand pieces won’t be attainable.
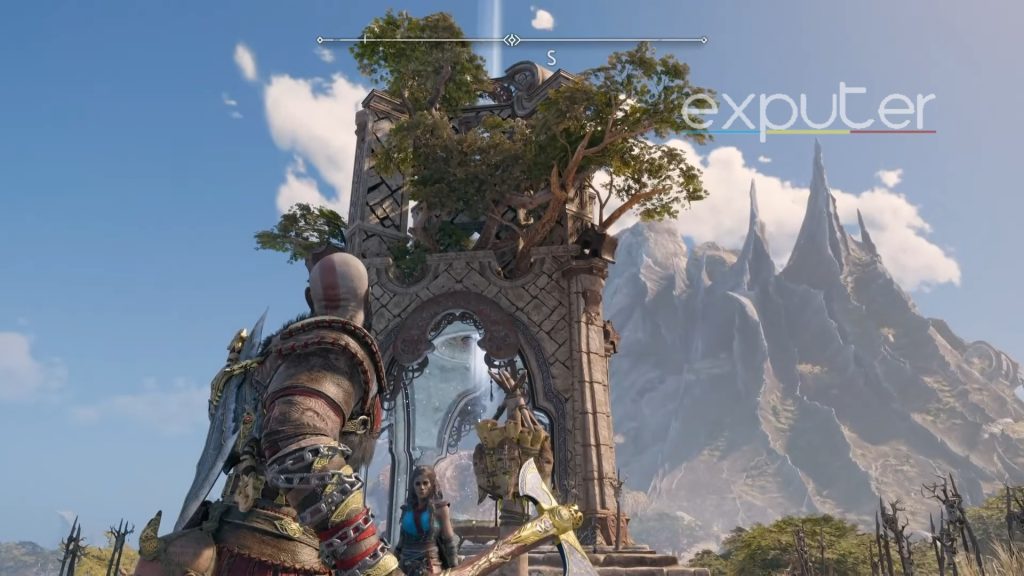
From your mini-map, make your way over to the mystic gateway that is present at the crater entrance. The mystic gateway, as well as the crater entrance, will be showcased on your minimap, and it will be represented with a blue door-like symbol. Through there, you will have to go all the way to the celestial altar that is present in the plains, and the celestial altar will be represented by a purple orb on the map.
Starting From The Mystic Gateway
Start at the mystic gateway in the crater entrance. Pan the camera ahead to spot Freya and a giant platform. Run towards the stone wall with symbols, equip the blades of chaos, and press O to ascend. From the elevated position, observe the open landscape and the path ahead. Reach the platform’s edge, jump down, and direct the camera left to spot a burning torch in the distance. Head towards the torch, jump down to the ground and continue running forward.
Starting The Favor
Follow the mountain’s edge to a steep cliffside with a narrow path ahead. Continue along the path until you reach a gap that has broken the way. Jump across to the other side.
Directly above you, find a tree branch extending forward. There’s a small red structure on the edge of the branch that you can hang from to jump forward. Keep running ahead.
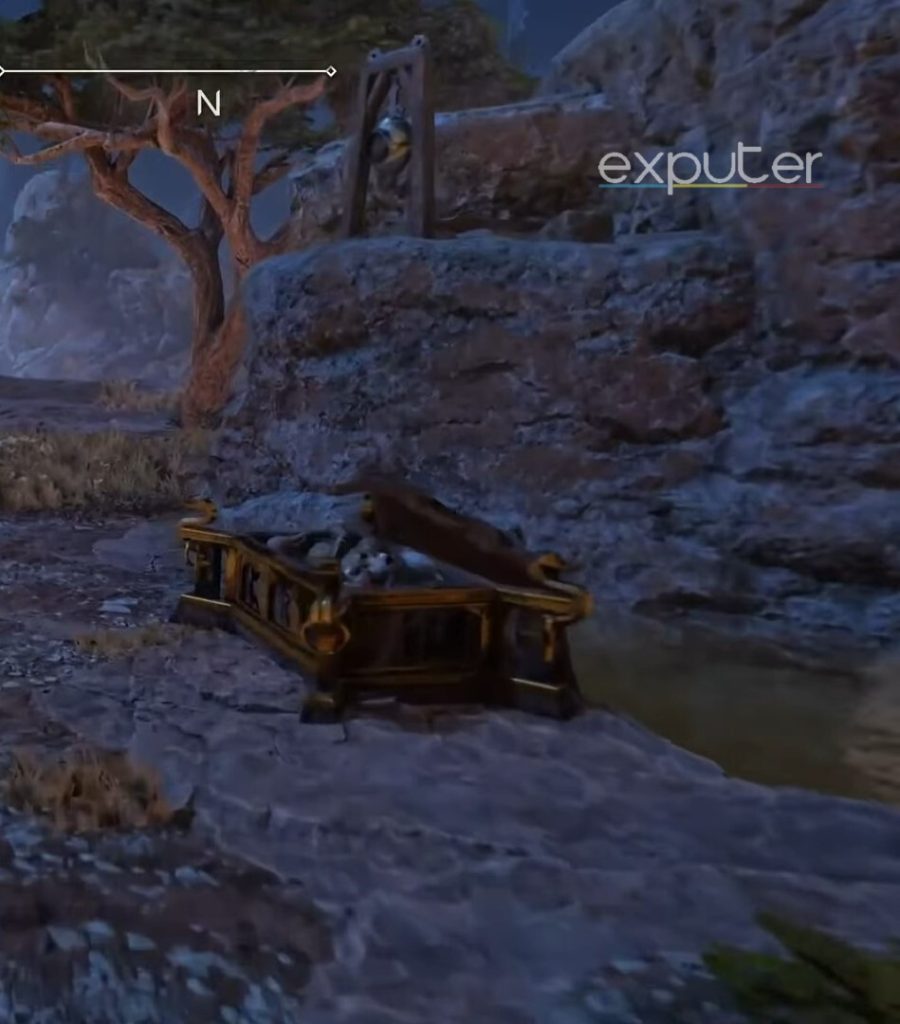
Use your blades to grab onto the wall ahead and climb up. Proceed straight until you come across a dead animal. Kratos will remark, “Something is wrong with this kill,” triggering the In Plain Sight favor.
Now, turn back, go around the tree with the carcass, and head toward another tree a few feet ahead, marked by red flowers on the left.
Finding Evidence of Soul Eater

When you get closer to the tree, you’ll get a prompt for “find more evidence of soul eater activity”, which you can easily track. The marker will be placed in front of a small stone near the tree. Go close to it, and investigate it, which will prompt Kratos to say, “Another kill”, and Freya will say that there is ample danger ahead.
From there, turn back, and the next prompt will be to “slay the soul eater”. The creature will be present a few feet towards the right of the original kill that I mentioned earlier. Equip your Draupnir Spear and launch it at the soul eater, which will cause it to get triggered.
Boss Fight
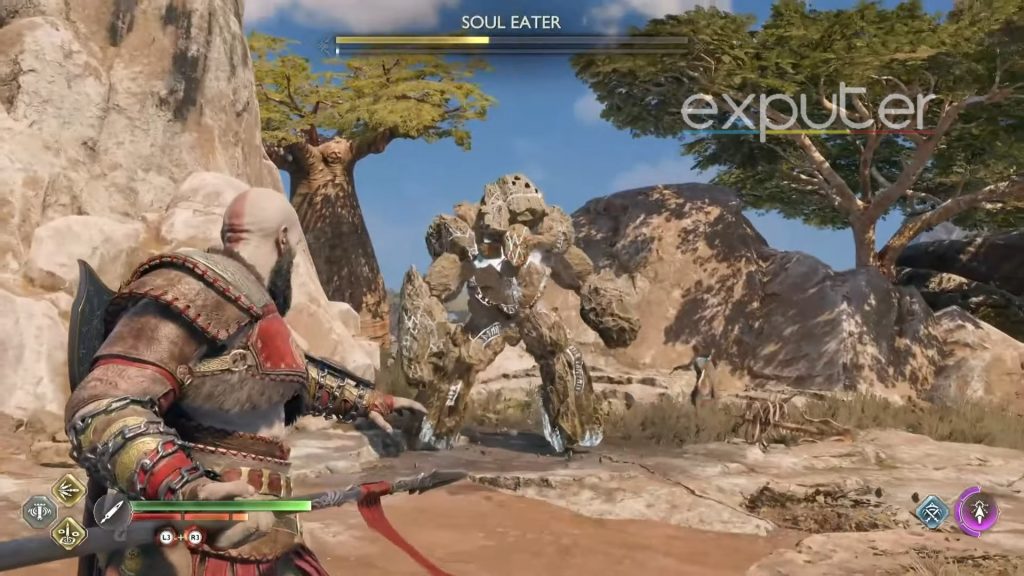
A minor boss fight will occur with the soul rate after that, through which Freya will also assist you and defeat it. After defeating it, you will be able to get the first hunter brand.
Second Hunter Brand
To obtain the second hunter brand, complete the Nocturnal Predator favor. Begin near the northern mystic gateway in the Crater.
In front of you, find a two-story ruin/building. Ascend the stairs, and in the middle, you’ll discover a soundbath. Interact with it.
Kratos will engage with the sound bath, altering the sky’s shape and color. Exit the area, head down the stairs, and proceed forward.
Continue until you reach an edge on your platform. Jump down from there.
Nornir Chest
From there, pan your camera a little to the right and start heading past the nornir chest that you can open now or later. Keep heading towards the tree that is present in front of the nornir chest, and at that moment, Freya will say, “That wisp is feeding on a gazelle”.
You want to take your blades of chaos to take it out, which will cause the gazelle to be saved. From there, turn back around, and the Nocturnal Predator questline will be triggered to start.
Nocturnal Predators Quest
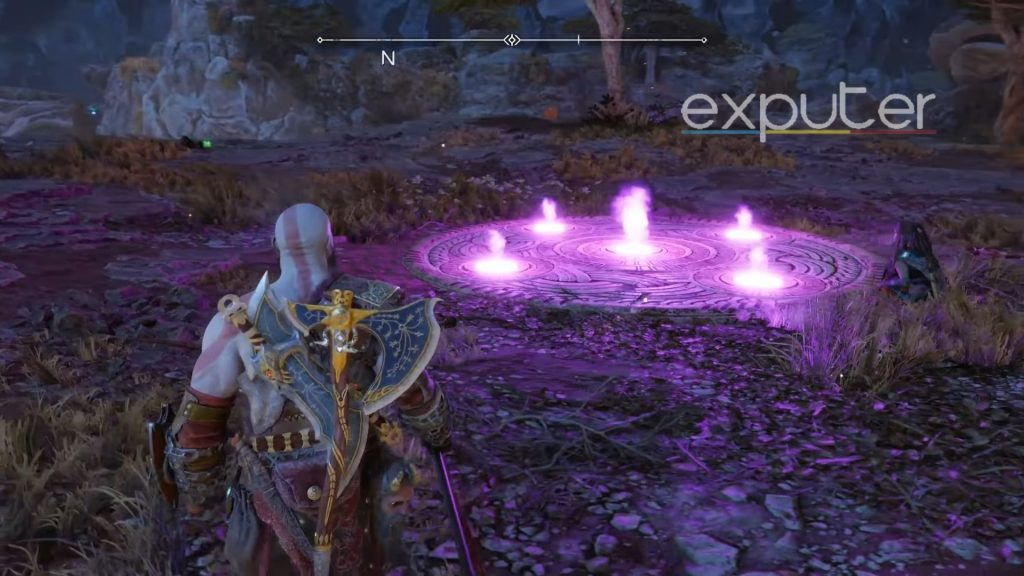
Go to the circle with three purple lights. Pan right and approach the large rock with a purple orb entangled in vines. Use the blades of chaos to set the vines on fire, restoring the sigils. Pan left and move towards the distant purple orb. Eliminate the wisp near the glowing light, marking the second out of three wisps.
Turn back, face the building with the soundbath, and approach the large stone in front. Freya mentions another wisp. Use the blades of chaos to dispel the green bubbles, revealing the third wisp feeding on an animal. Capture it.
Return to the sigil plate, a metal plate with glowing purple runes. Freya questions the wisdom of returning the wisps here.
Flame Phantom
Unfortunately, the ending won’t be all that easy for the player, as instead of returning the wisps to the runes, a flame phantom boss will appear instead, ready to take you alive. You need to get rid of the flame phantom in order to receive the second hunter’s brand.
Final Hunter’s Brand
As for the last piece to the puzzle, you will need to be at the mystic gateway, which is a bit on the southern end of the crater. From there, Freya will be in front of you, and you will need to jump off a platform and get on the ground.
However, right as you do, you will be faced with a boss that is called the untamed fury, and surprisingly its attacks won’t be all that difficult to figure out.
Winning The Fight
After you’ve taken out the boss, start heading for the tree that has a seemingly hollow trunk that has been ripped out and cross it to head forward. When you do so, there will be another platform that you will need to jump off of, and right in front of you, there will be a circular entrance that you will need to go towards.
Keep running until you are able to come to the edge of the platform and can encounter a rope that you can zipline onto. Get off the zipline, and turn to the left to head between the path between two mountain cliffs. Keep heading forward until you encounter the untamed fury once again.
You need to keep going on its trail until you inevitably find her again for the third time and finally defeat her, this time for good.
And there you have it, the best way to get Hunter’s brands and what they can be used for! And with that, I will wrap up my God of War Ragnarok Hunter’s Brand guide!
Up Next:
- God of War Ragnarok How To Get Asgardian Ingot
- God of War Ragnarok How To Unlock All Realms
- God of War Ragnarok How To Get Petrified Bone
Thanks! Do share your feedback with us. ⚡
How can we make this post better? Your help would be appreciated. ✍