Just like any action RPG, there are formidable bosses you have to face in order to obtain some of the best armor or weapons in V Rising. These bosses in the game are called V Blood carriers. That is our guide entails all you need to know about Terah location, the boss fight, and the rewards.
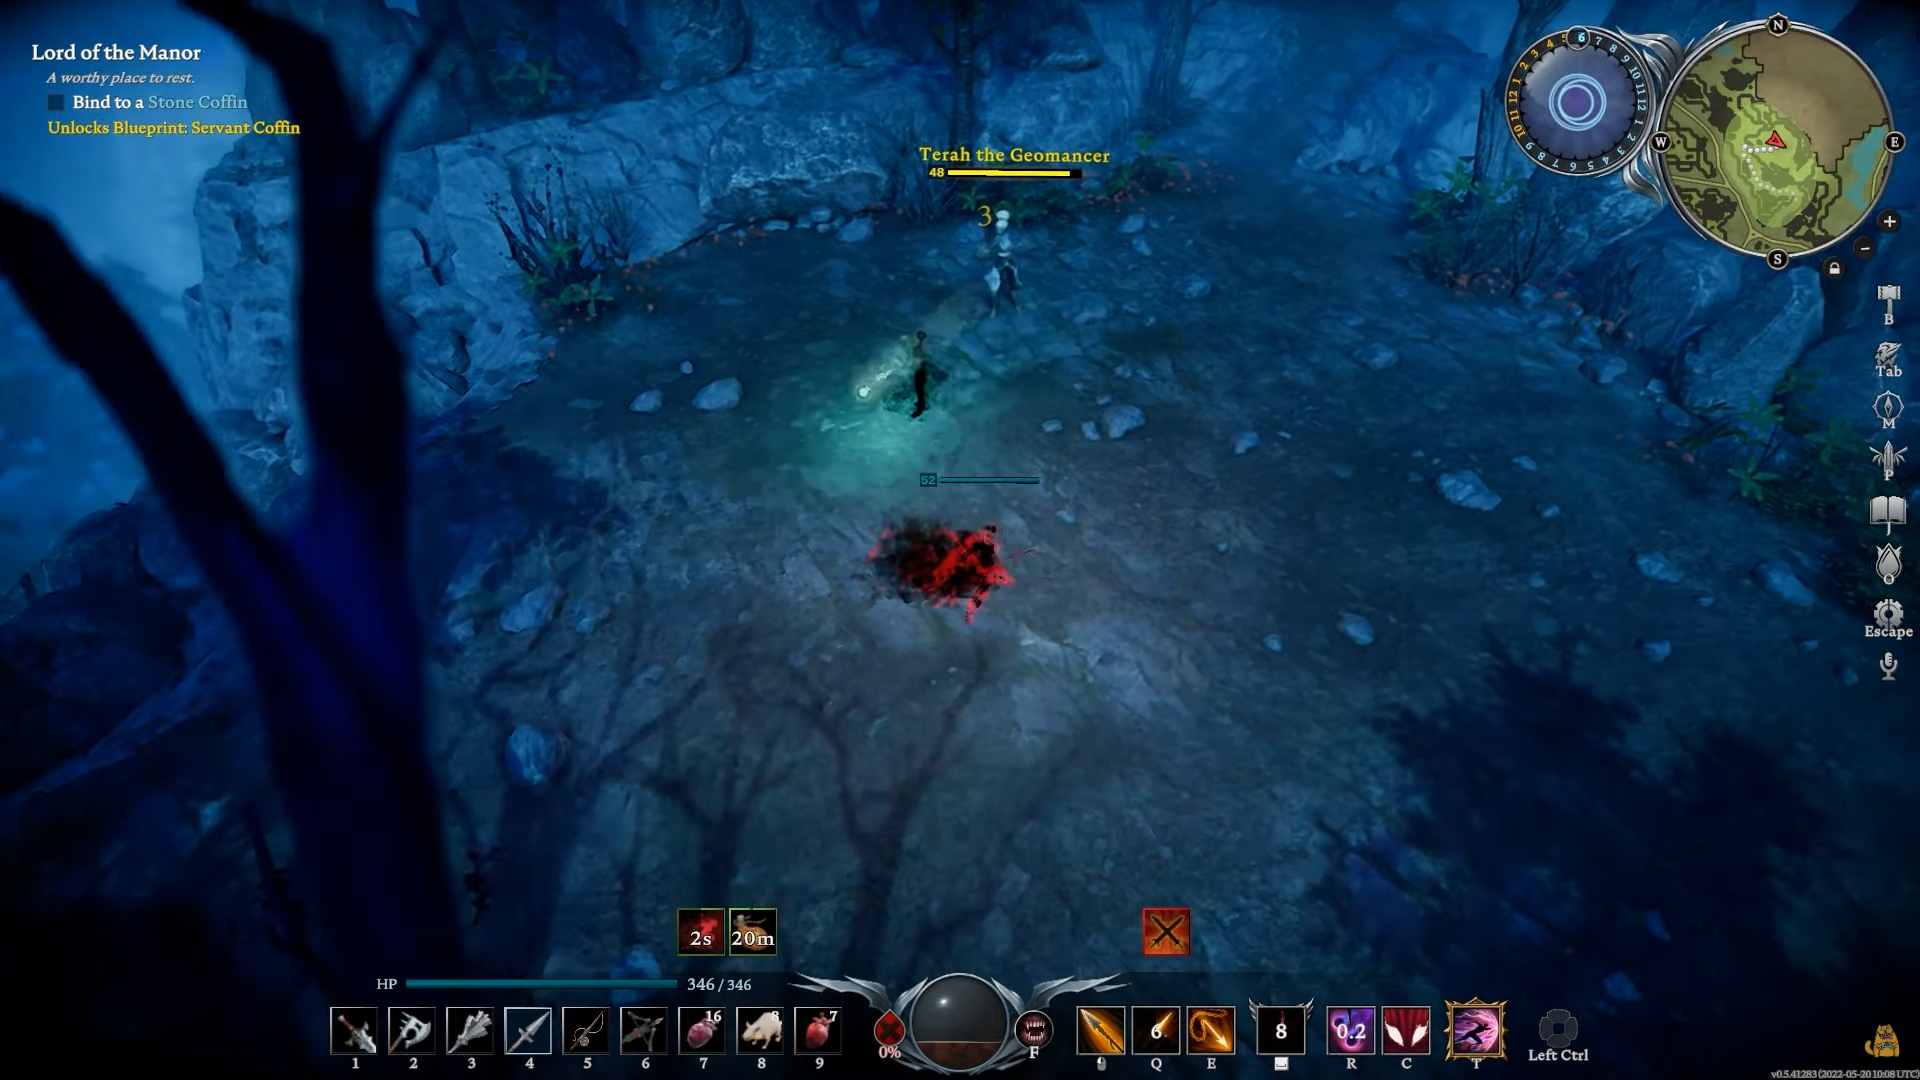
- Terah the Geomancer is the most formidable level 48 V Blood Boss in V Rising. You must be on level 46 or above to fight Terah.
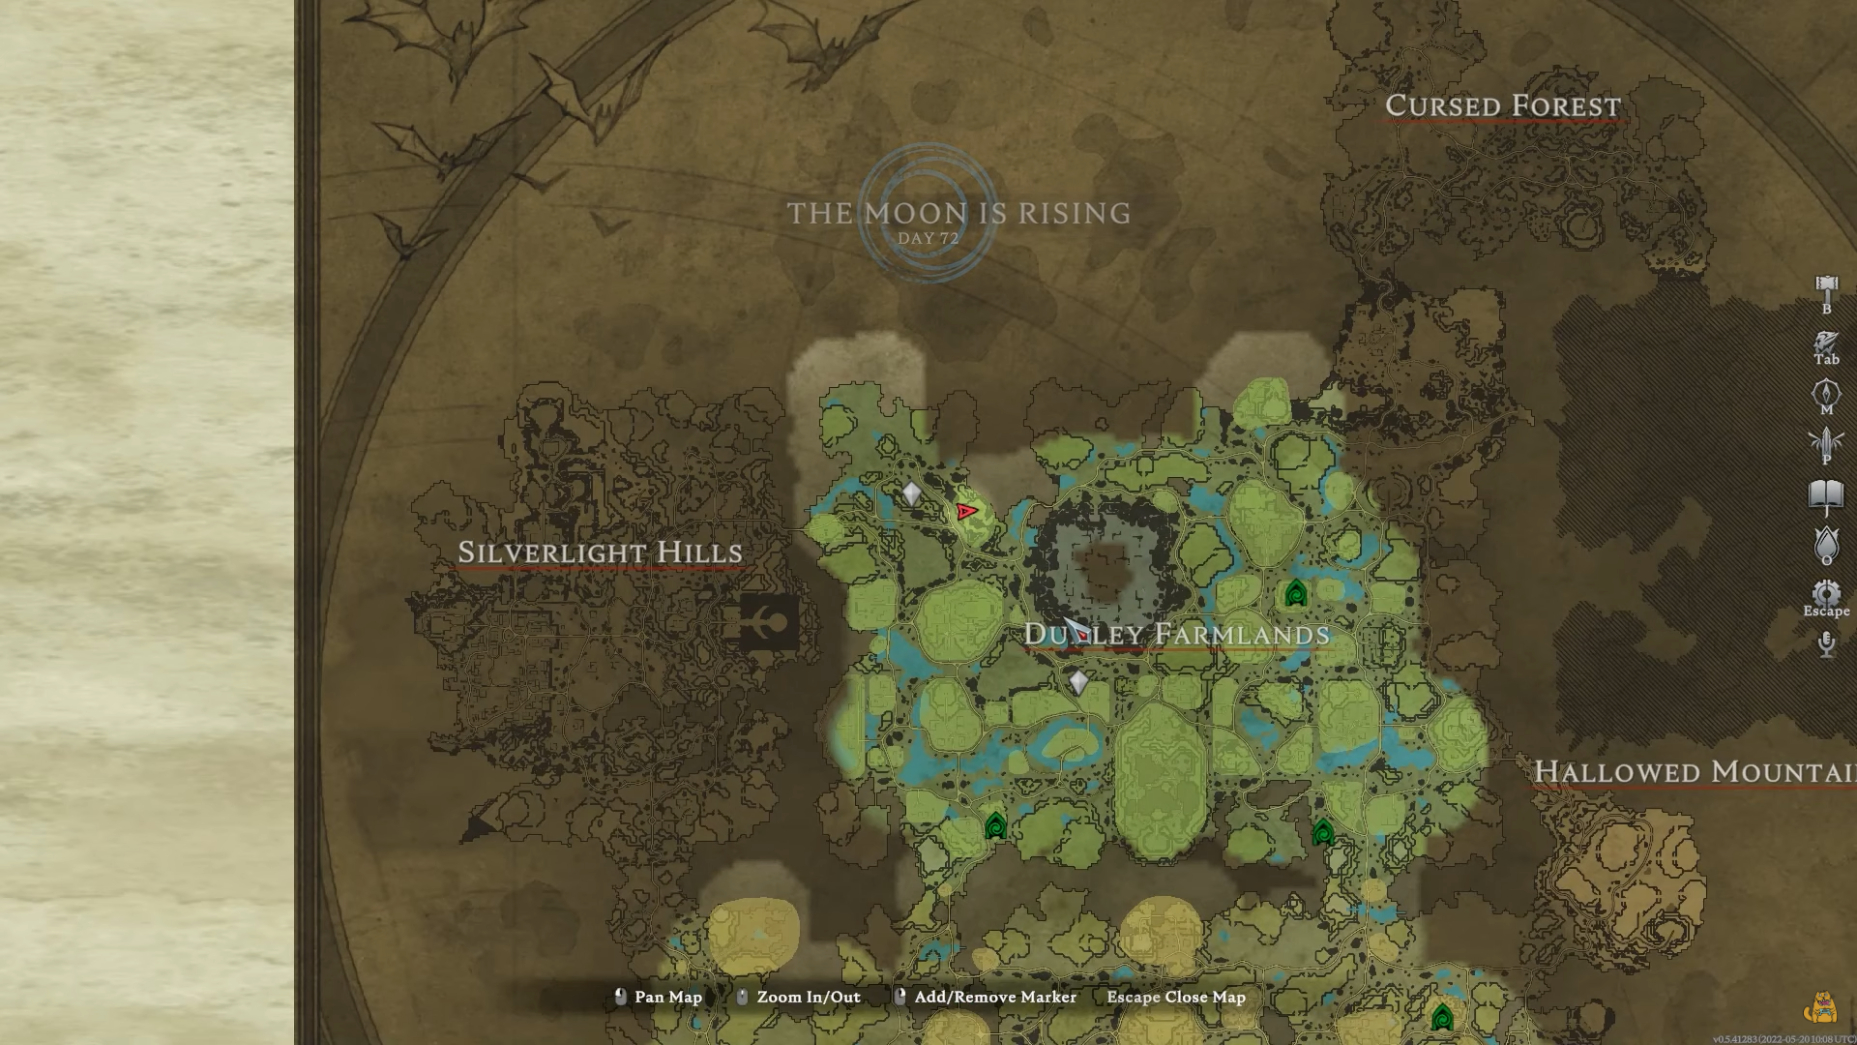
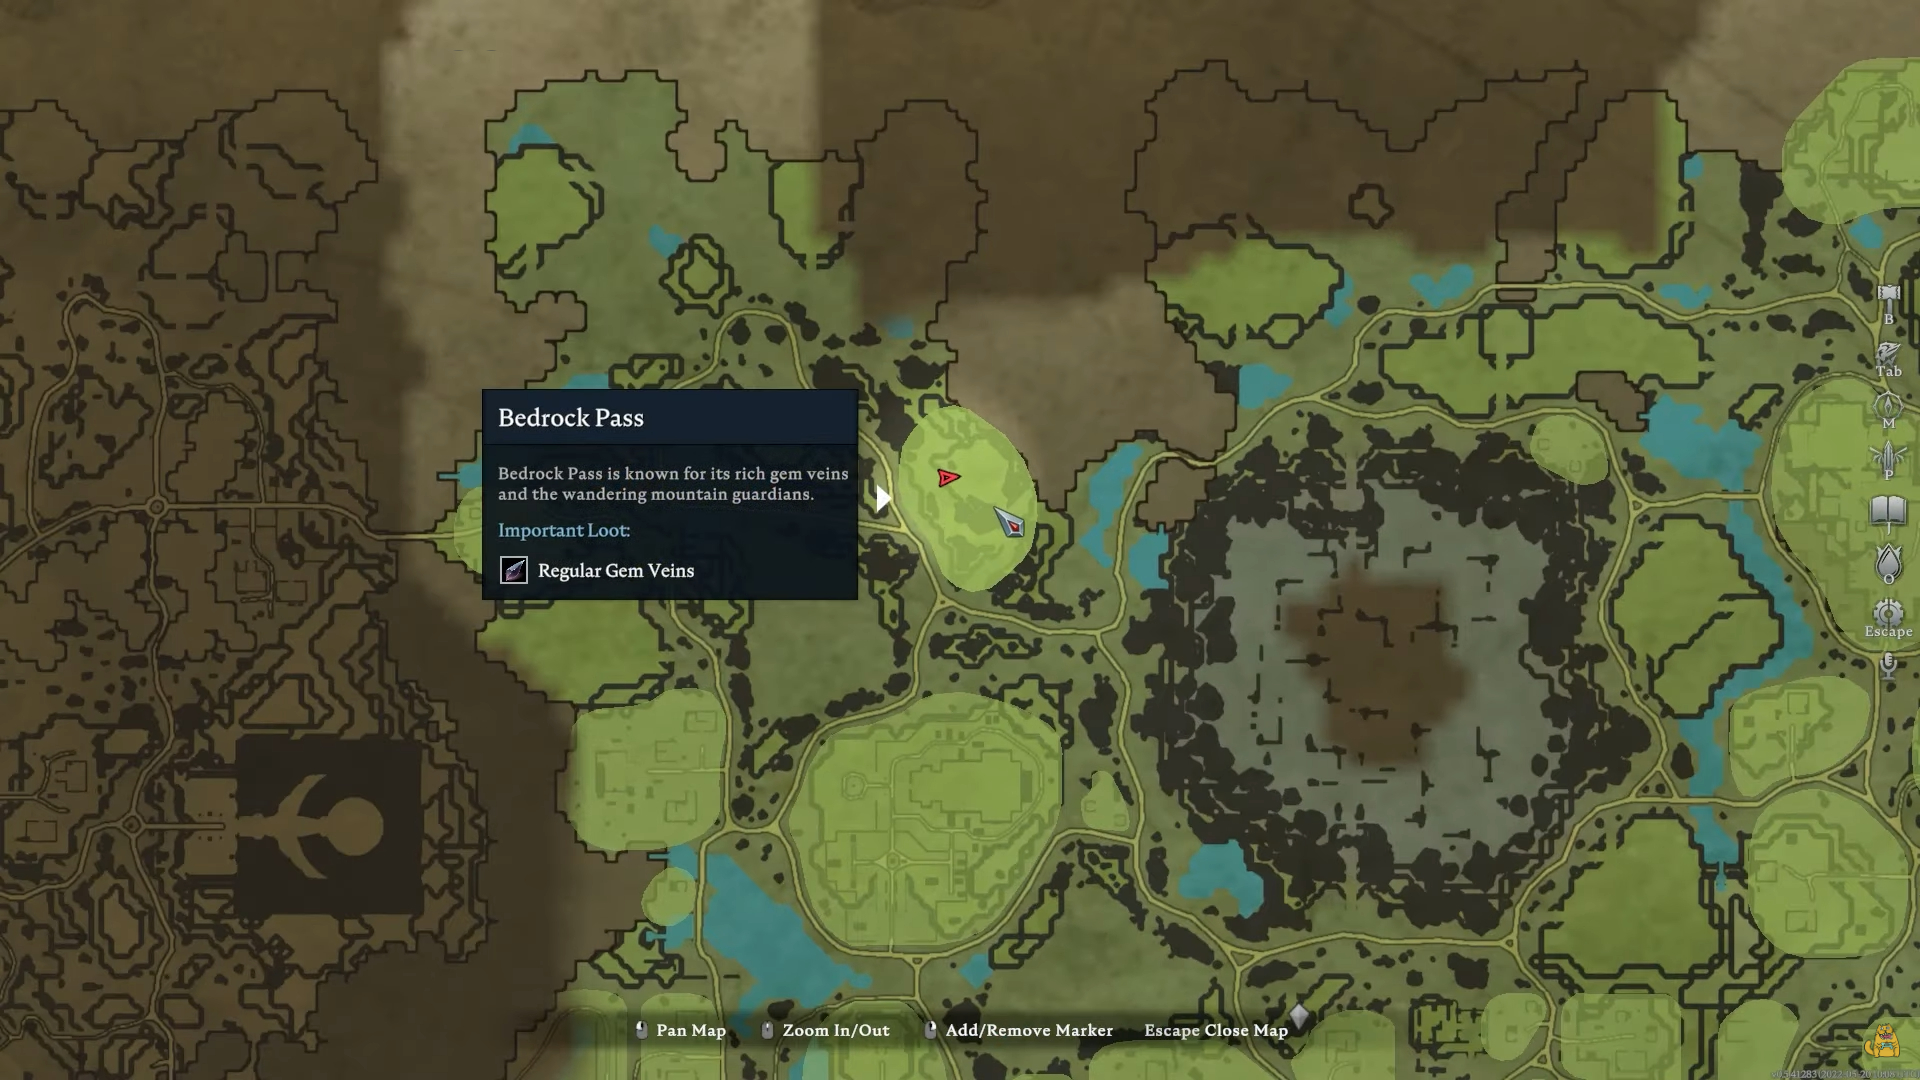
- She can be found strolling in the Bedrock Pass, located in the Northwestern part of Dunley Farmlands. You can also track her through the Blood Altar tracking system.
- After defeating Terah, you’ll unlock some rewards, which include a Recipe for Siege Golem Stone, Vampire power of Spectral Guardian, and Structure Gem Cutting Table.
Location of Terah The Geomancer
Your encounter with Terah the Geomancer is inevitable in the land plagued by monstrosities and creatures that come out when the sun is down. Unlike the Putrid rat, Terah the Geomancer can be tracked from the Blood Altar.
Tracking the boss through Blood Altar can be a hassle, and if you don’t want to go through that, keep following our guide.
If you’re looking for Terah’s location, she can be found strolling in the Bedrock Pass. It’s located in the North-Western part of the Dunley Farmlands. The location of Bedrock Pass is marked on the map below:
Terah The Geomancer Boss Fight

Terah, the Geomancer, is of the most formidable V Blood carriers you’ll face. So naturally, having your best abilities and gear on you is a given. We’ll recommend having ranged weapons and spells on you. Also, ensure you are at least level 46 or above before facing Terah the Geomancer.
This is a multiple-phase boss fight with a wide variety of attacks, so make sure to read till the end in order to trump this foul beast.
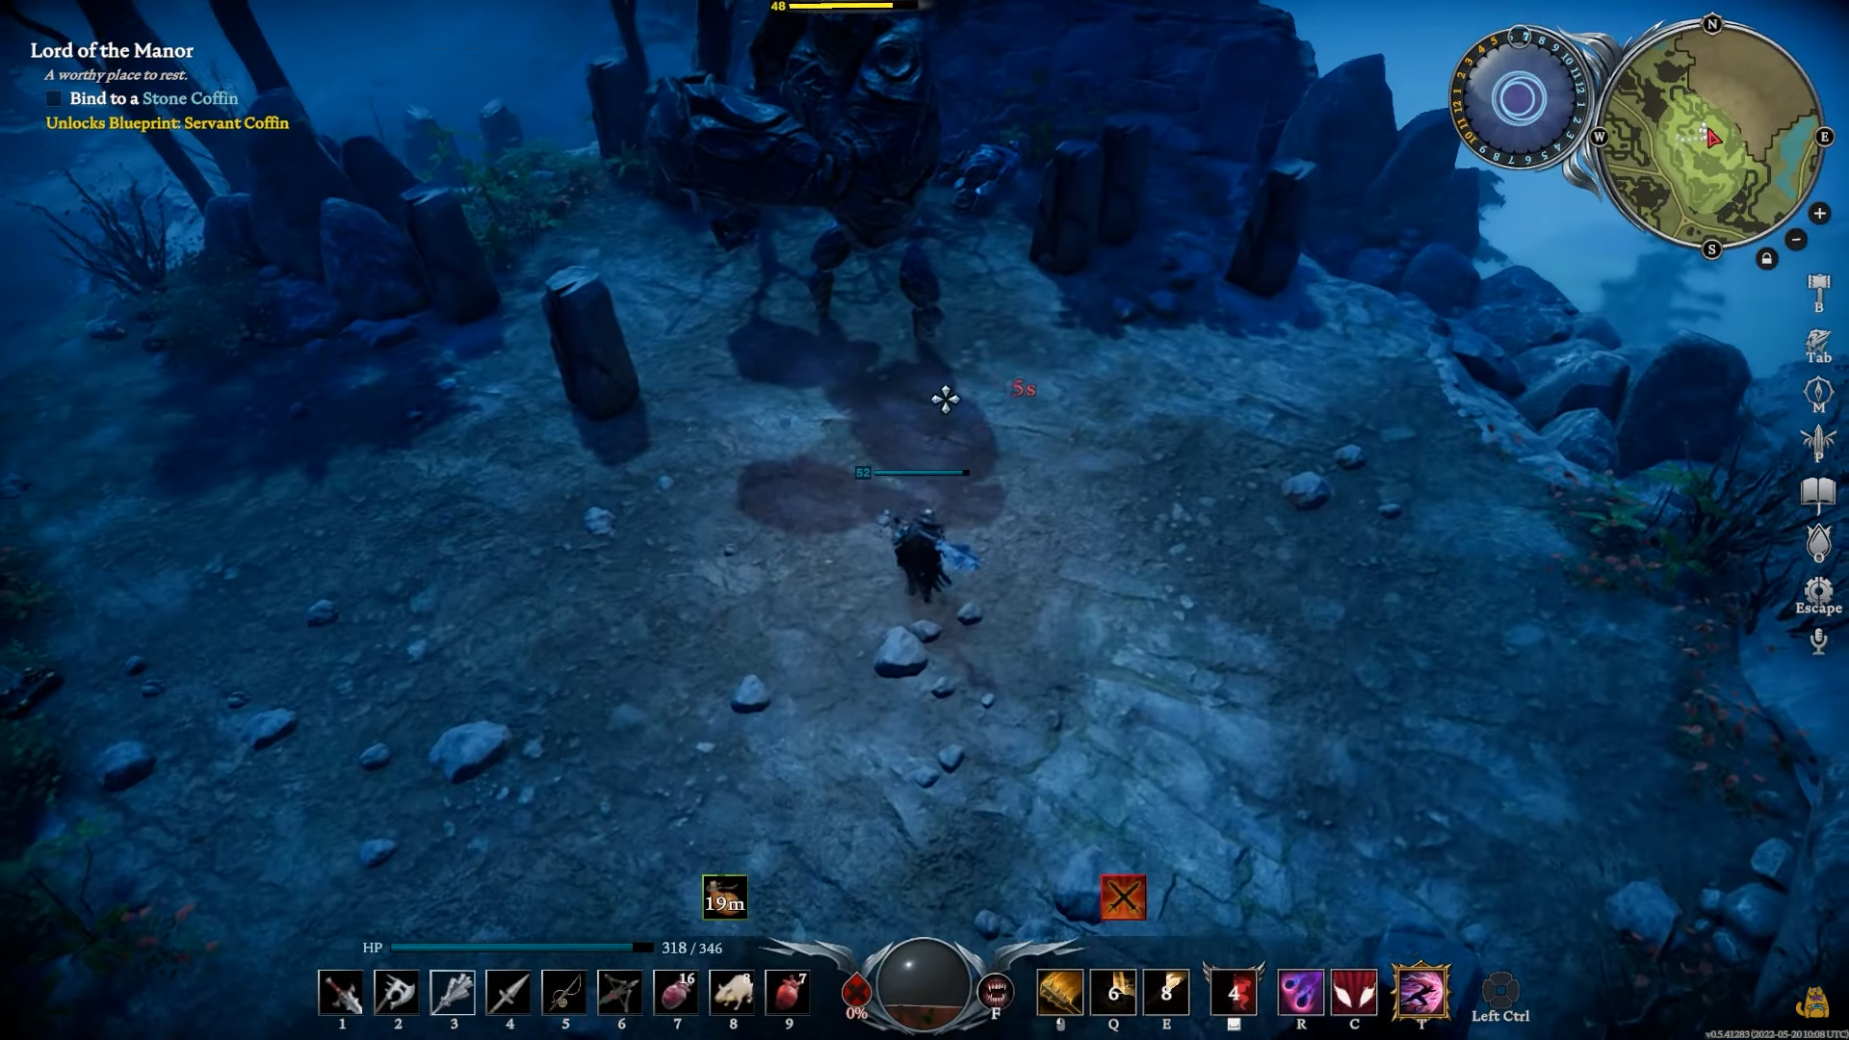
Phase 1
- Terah starts in her normal form with one spell attack.
- Be aggressive and focus on dealing damage.
Phase 2
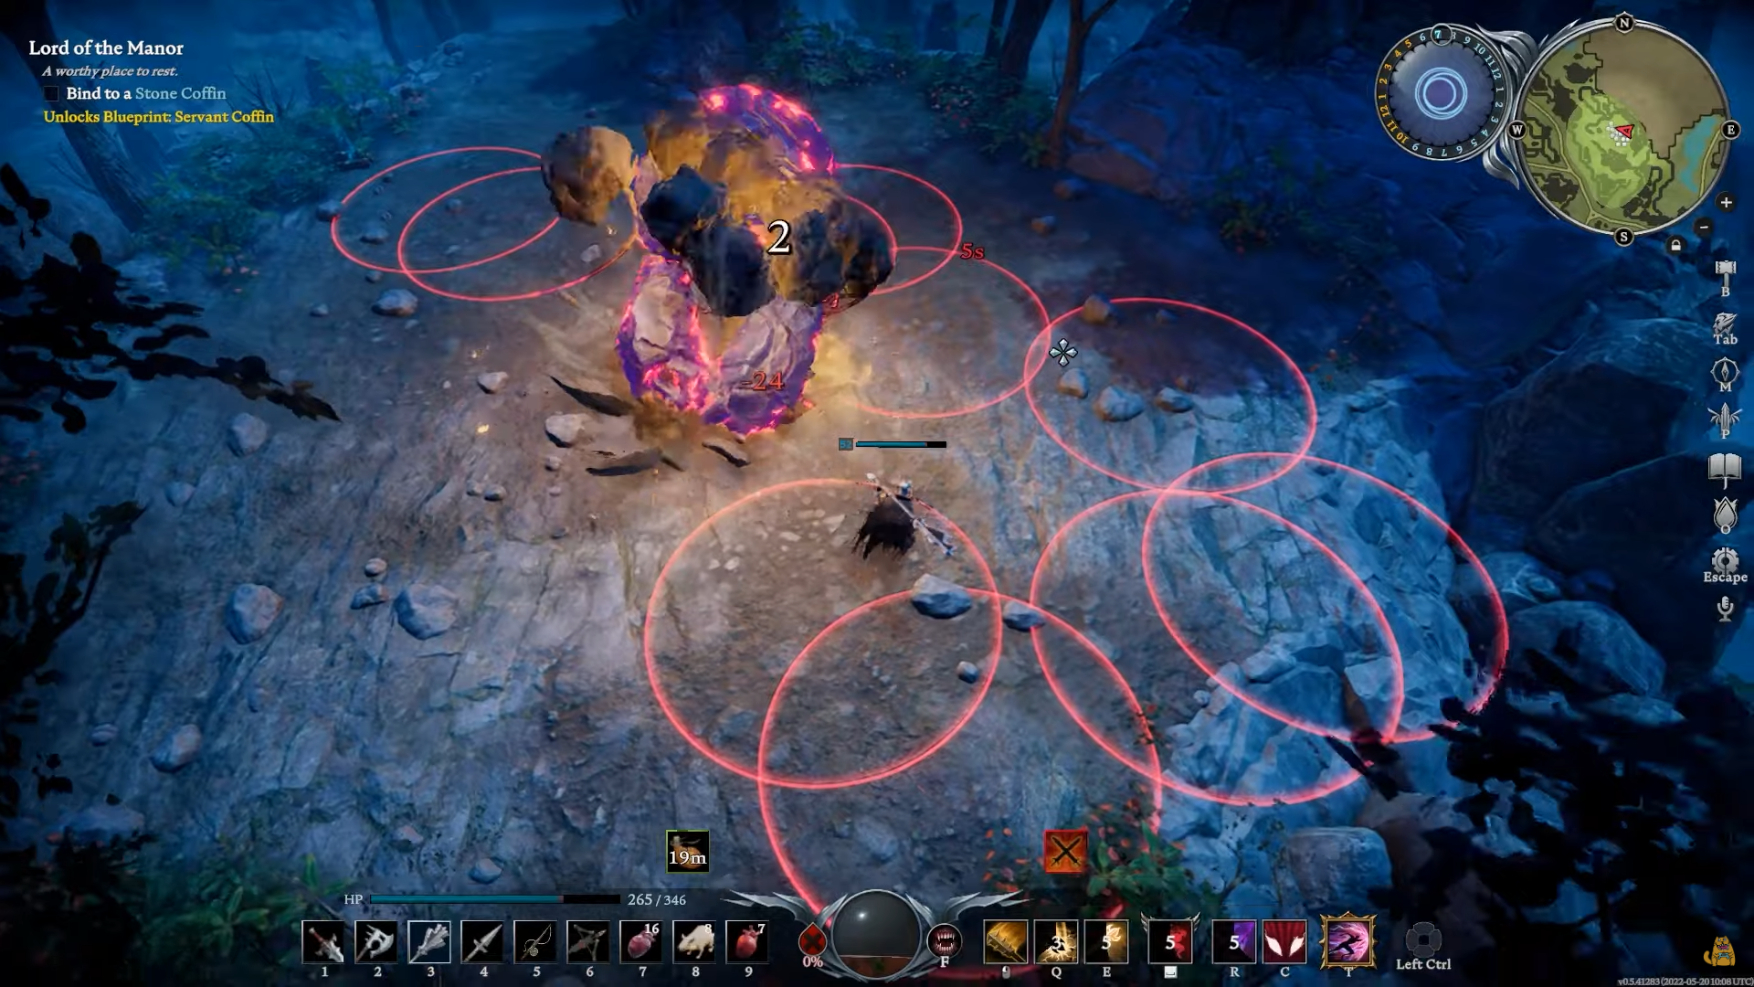
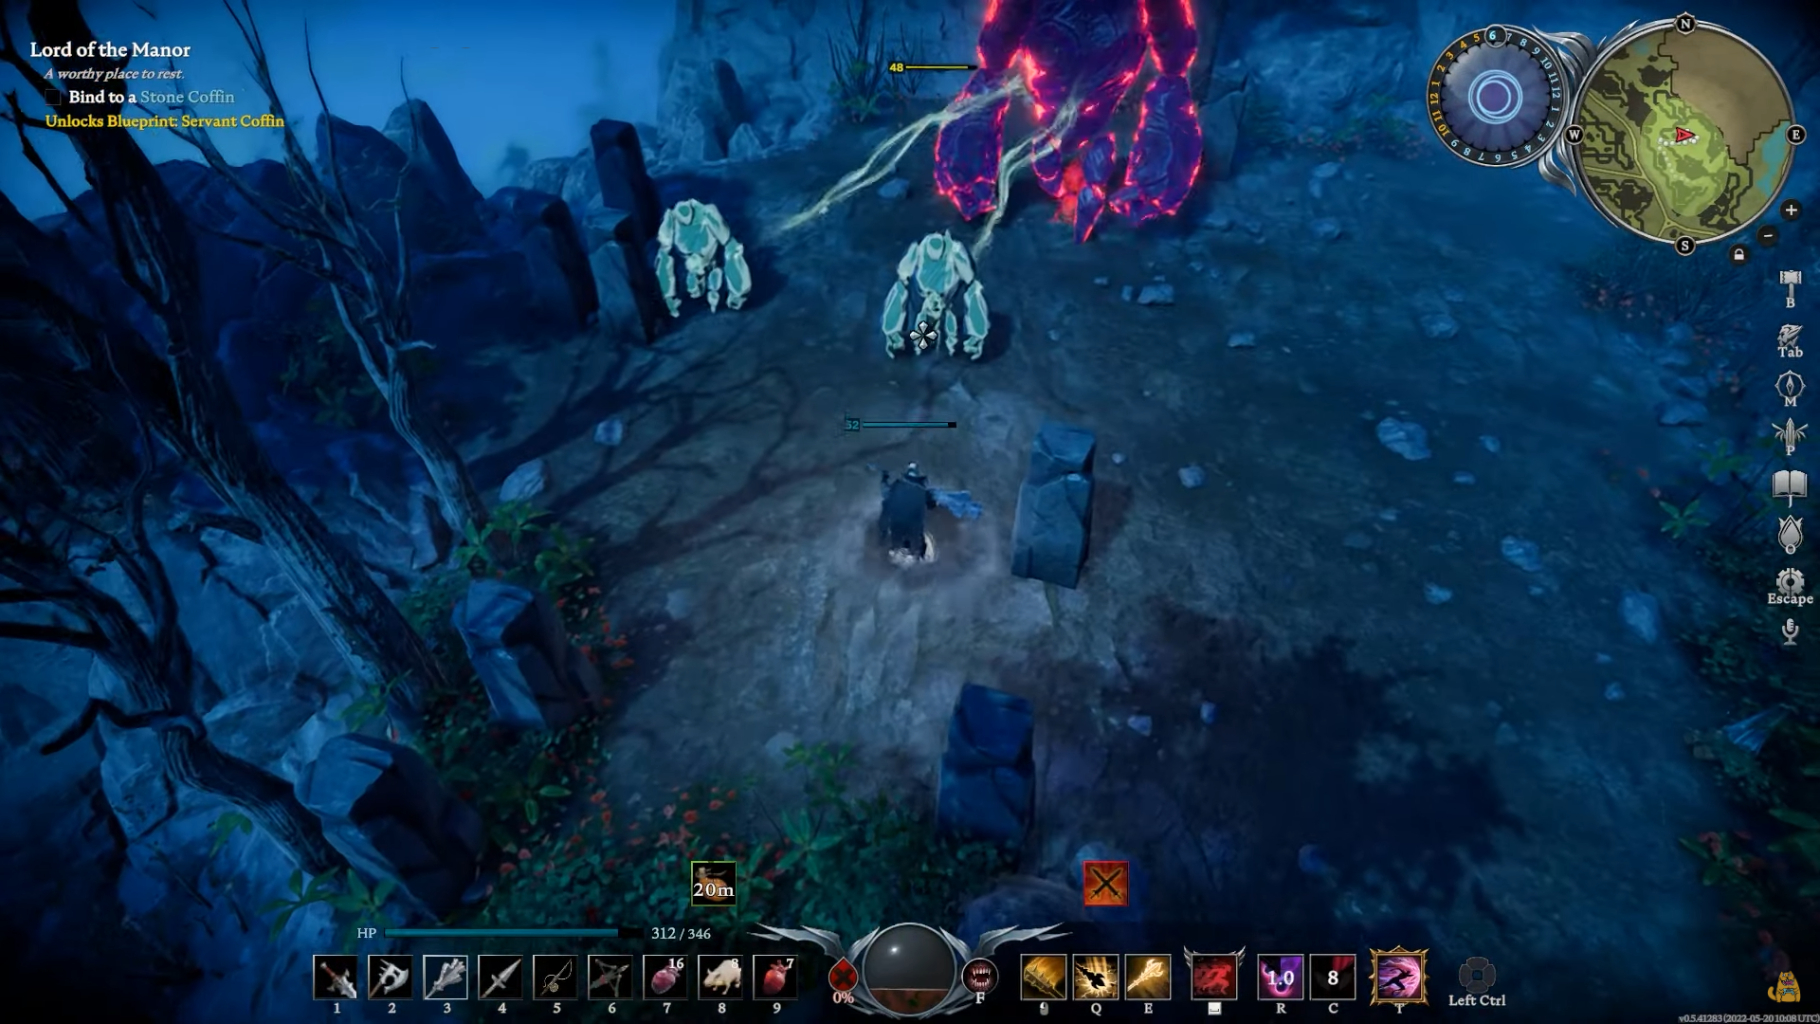
- Terah transforms into a huge golem.
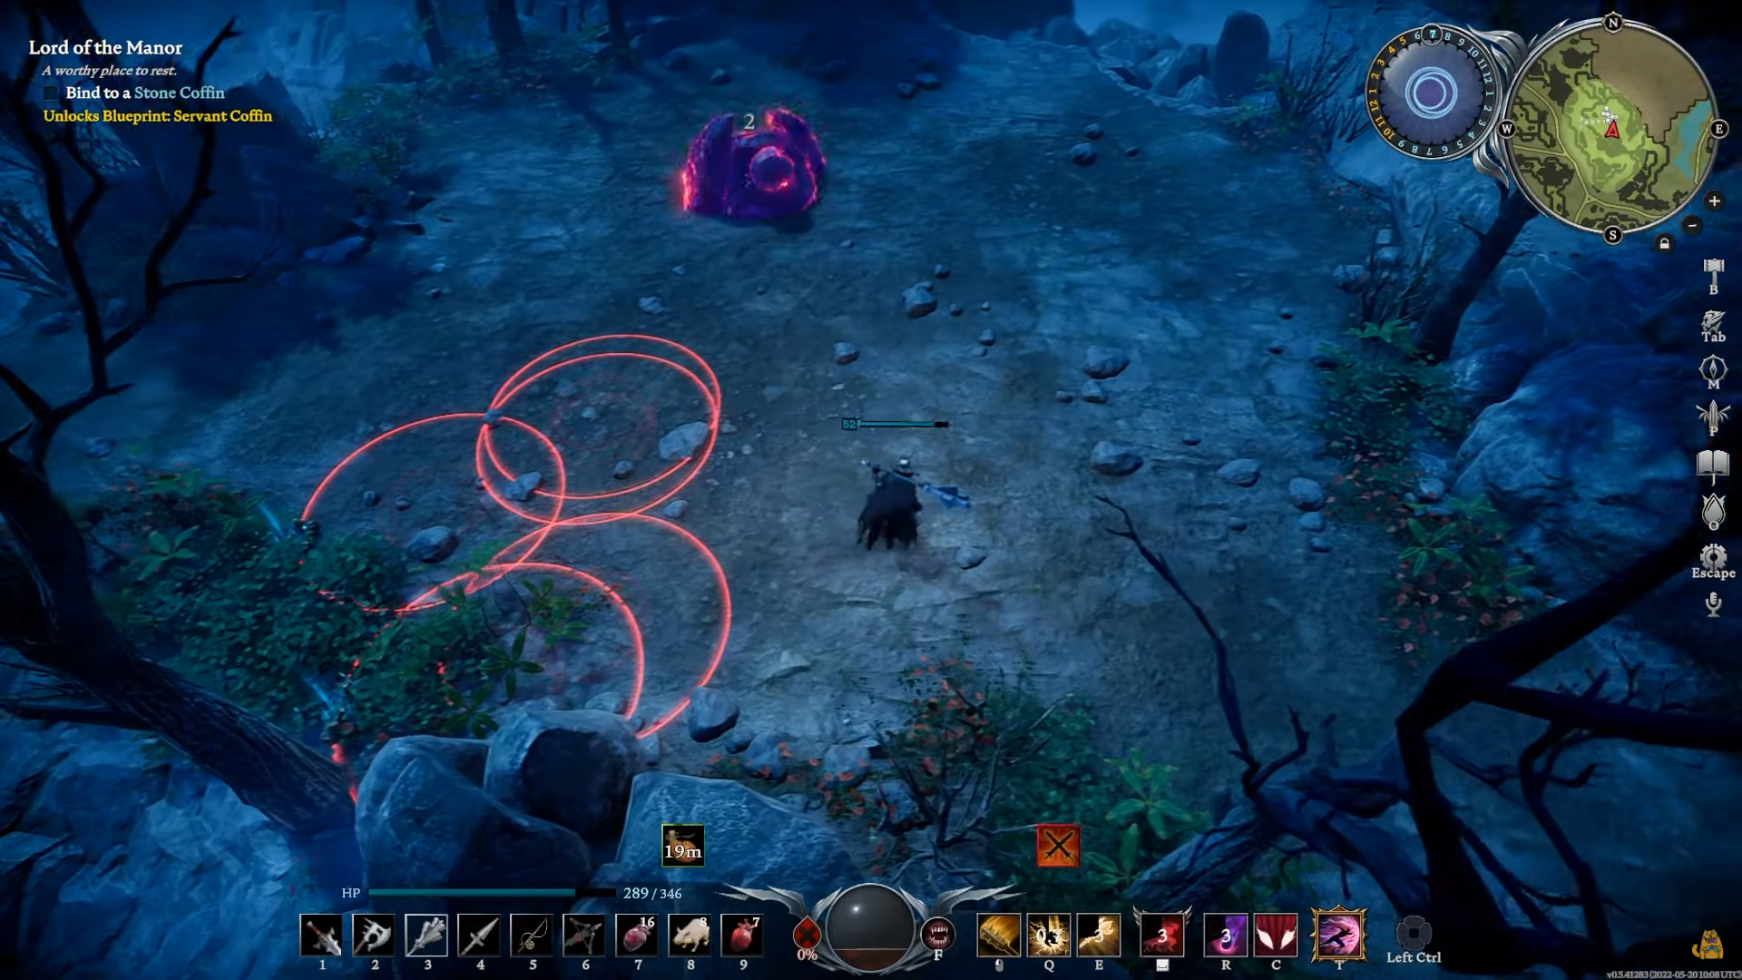
- Avoid her rock shower attack indicated by red circles on the ground.

A simpler Rock Shower attack telegraphed by Terah the Geomancer in V rising. - Deal with the two smaller golems she summons first.

Golem summoned smaller variants of herself to fight by her side - Watch out for her forward arm slash, ground spikes, and faster rock shower attack.

Forward arm slash attack telegraphed by Terah. - Focus on dealing damage to Terah after defeating the smaller golems.
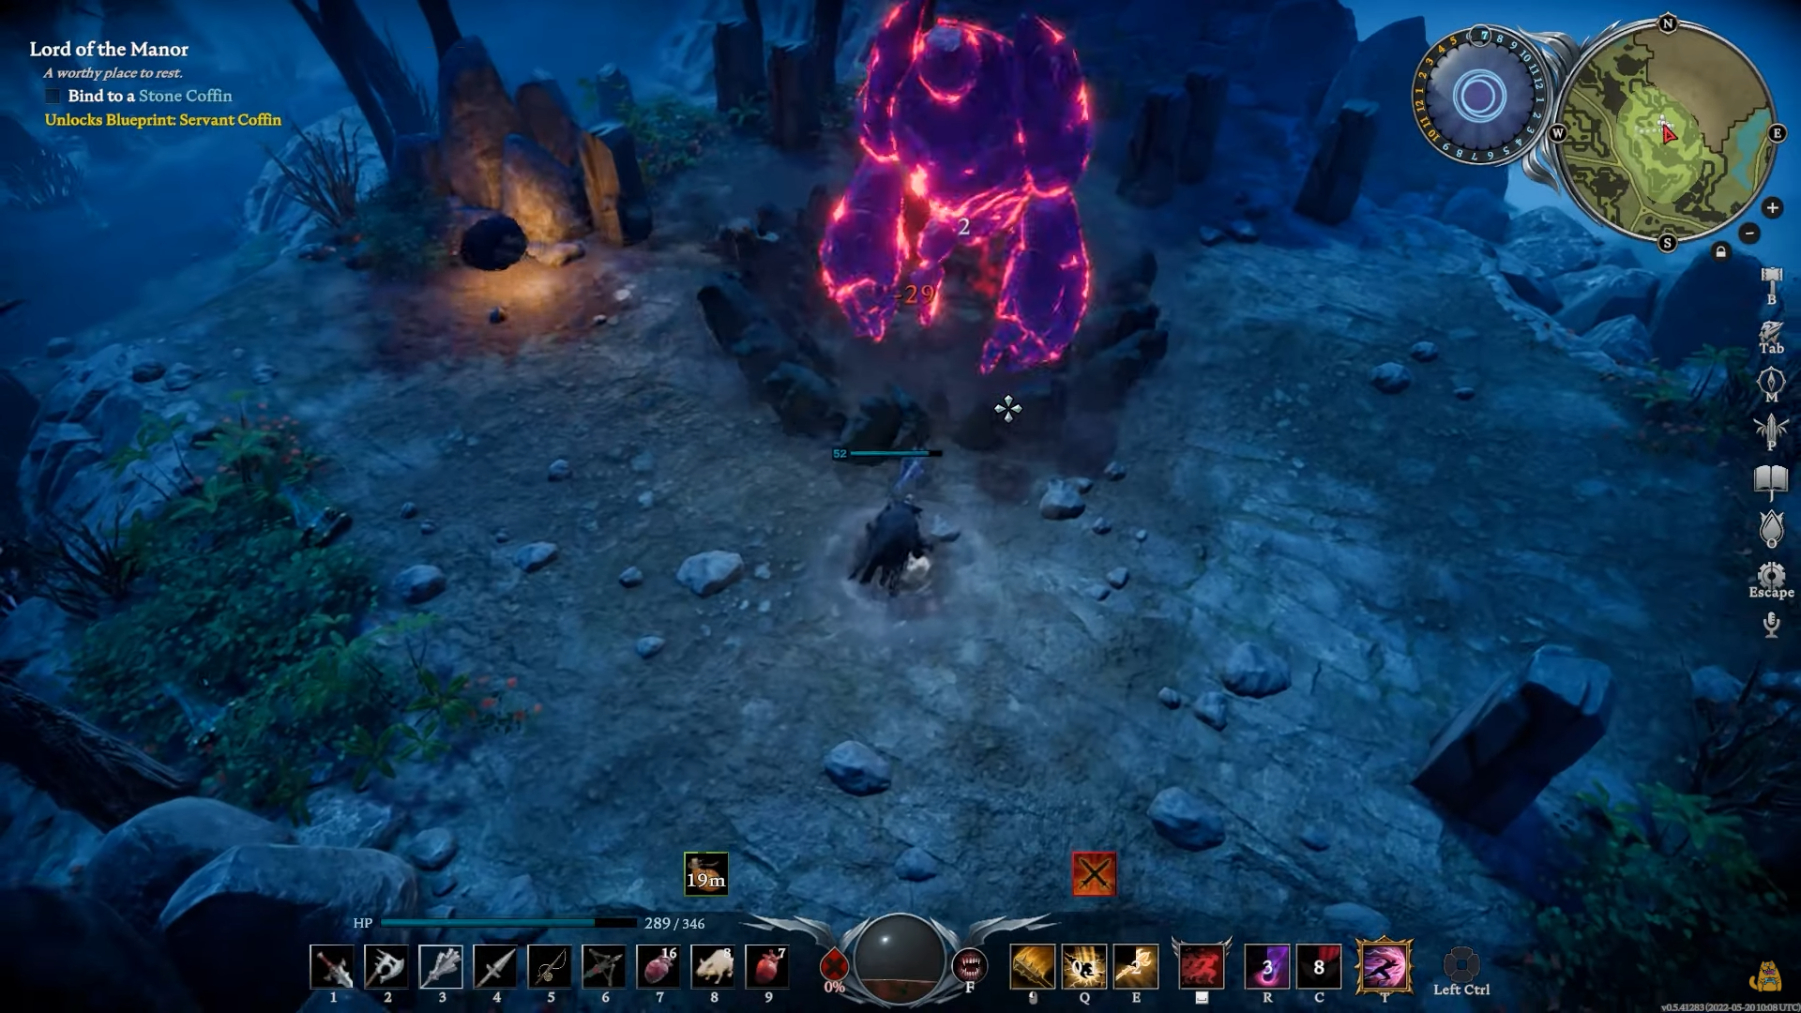
Phase 3
- Terah returns to her normal form, regenerating some health.

Terah, the Geomancer, shoots with a barrage of ground spikes - Repeat the strategy from Phase 1.
- When she transforms back into a golem, watch out for her new attack: a barrage of ground spikes telegraphed by a loud screech.
- Stay alert for her increased aggression and the variations in her rock shower attacks.

A deadlier Rock Shower attack telegraphed by Terah the Geomancer in V rising. - Dodge promptly to avoid damage and continue dealing damage until Terah is defeated.
Are you struggling with Terah’s location and defeating strategy? Maybe you don’t have the proper build. So, consider reading our guide, V Rising’s Best Builds.
Rewards For Defeating Terah The Geomancer
Just like all the other V Blood carriers, after defeating and extracting the blood of Terah, the Geomancer materials and recipes are very useful in your ventures in the land of Vardoran.

Once you defeat Terah the Geomancer, you get the recipe for Siege Golem Stone and Regular Gems. You gain the Vampire Power of Spectral Guardian. You also gain the Structure Gem Cutting Table.
Again, as a reminder for battling Terah the Geomancer, ensure you have a good ranged weapon, and at least one ranged spell. Terah is sluggish, but her strikes are powerful. Maintain your distance.
This wraps up our guide for V Rising Terah Location & How To Defeat Her. Let us know what you think about this fight in the comments below.
Next: V Rising Pristine Hide
Thanks! Do share your feedback with us. ⚡
How can we make this post better? Your help would be appreciated. ✍