The Wind Temple Tears of the Kingdom is an interesting boat-shaped dungeon. It has five different locks situated at different positions to unlock and progress. You will be carrying Tulin as your companion in the game, whose Wind power will be used to unlock these locks. Furthermore, a frosty beast will be facing you in the boss fight at the end so preparation is advised.
- The Wind Temple Tears of the Kingdom is one of the dungeons you will find as a part of the quest Tulin Of Rito Village.
- The temple contains five locks which you will unlock through Tulin’s wind power and Ultrahand.
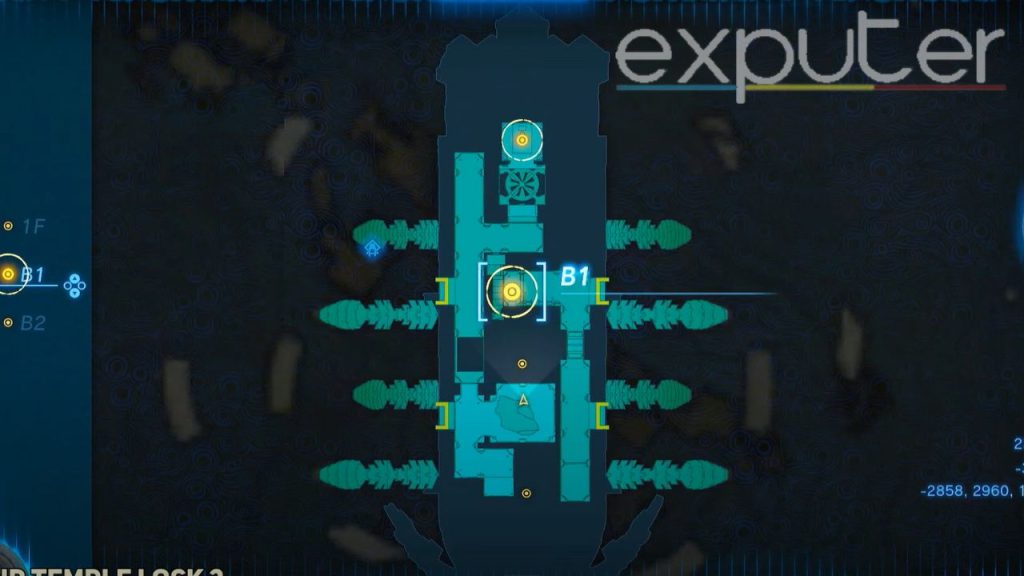
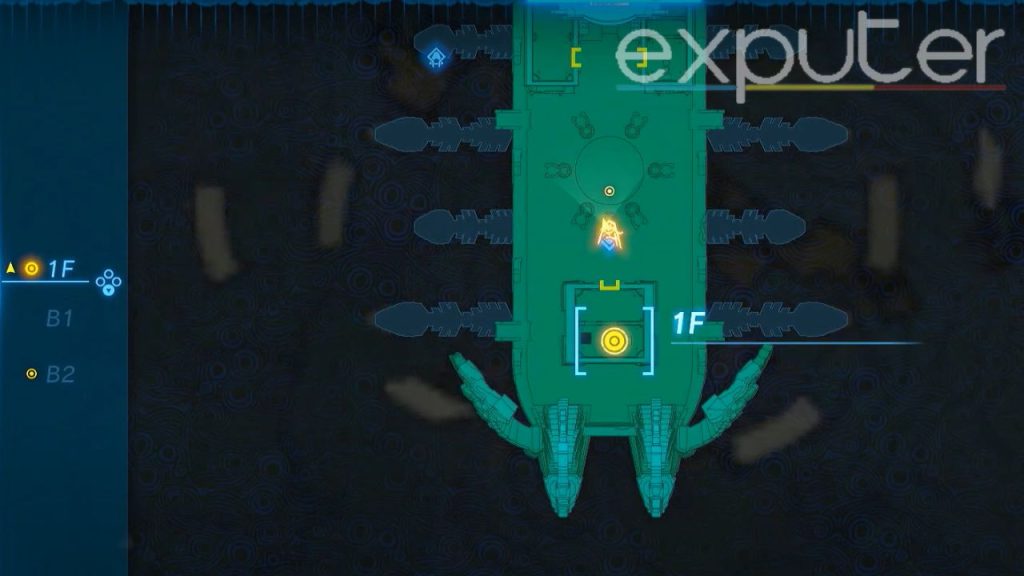
- The five locks are located at locations of 1F, B1, and B2
- After solving all the locks, you will engage in a boss fight with Colgera
- Colgera is an icy creature who fights aerially by throwing crystal spikes at you.
- You can defeat it by attacking it at its flat underbelly
- You get several rewards at the end, which include access to Rito Village, Vol of Tulin, Sage of Wind, and a heart container.
- You need to melt ice, so have flint and wood in abundance.
- The temperature is frigid outside, so have cold-resistant armor or potions ready.
- Keep Aerocruida Wings and cold-resistant food for the boss fight to restore health.
What Is The Wind Temple In Tears of the Kingdom?
The Wind Temple is one of the starting temples in Zelda Tears of the Kingdom. You will be exploring this during the quest Tulin Of Rito Village. The Temple is on Stormwind Ark, a boat-liked shape above the Hebra region and Rito Village.
At the center, you will notice gushes of chilly breeze coming towards Bird-People’s Land. Also, you will be going there along with Tulin, whose Gust Wind Power will be used to solve the locks in the temple. This one is fascinating to explore, like the dungeons in Breath of the Wild.
Activating The Locks In The Wind Temple
There are a total of 5 locks that need to be activated to unlock the ship’s center and halt the storm. You can pursue the locks in any order. Moreover, if you are lost, use the fast travel or the Purah Pad to reach the entrance of the Temple. The location of each lock and how to unlock it in the Wind Temple Tears of Kingdom are given below
1st Lock
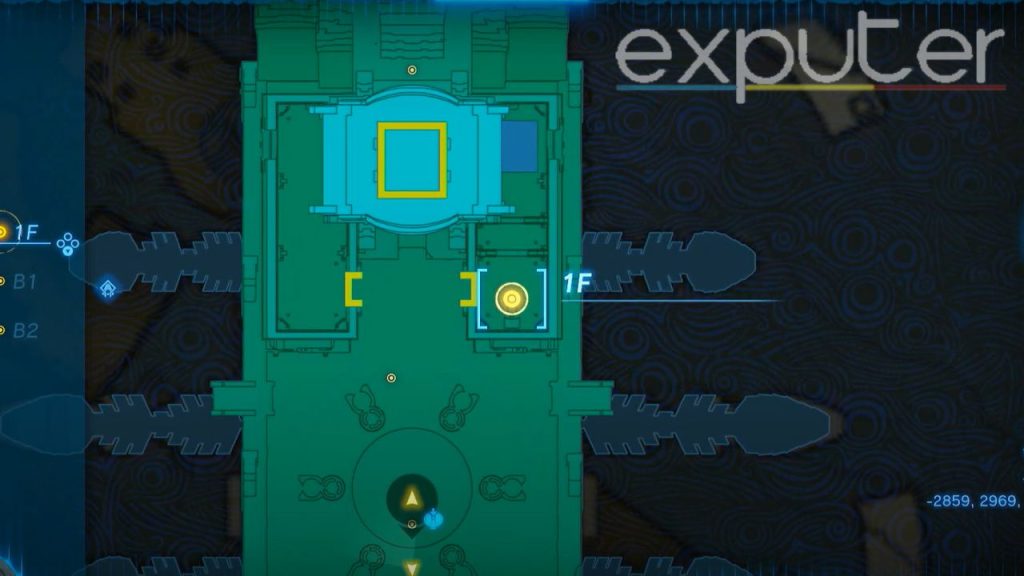
- Go to the location marked on 1F at the front of the temple.
- As you go there, two rooms will be situated, facing each other, with metal gates blocking their entrance.
- Towards the room on the right side, pick an ice chunk on the ground via the Ultrahand and stick it to the wheel outside the gate.
- Use it to pull the lever to the left to open the entrance
5. Unlock the first lock by using gusts of wind through Tulin
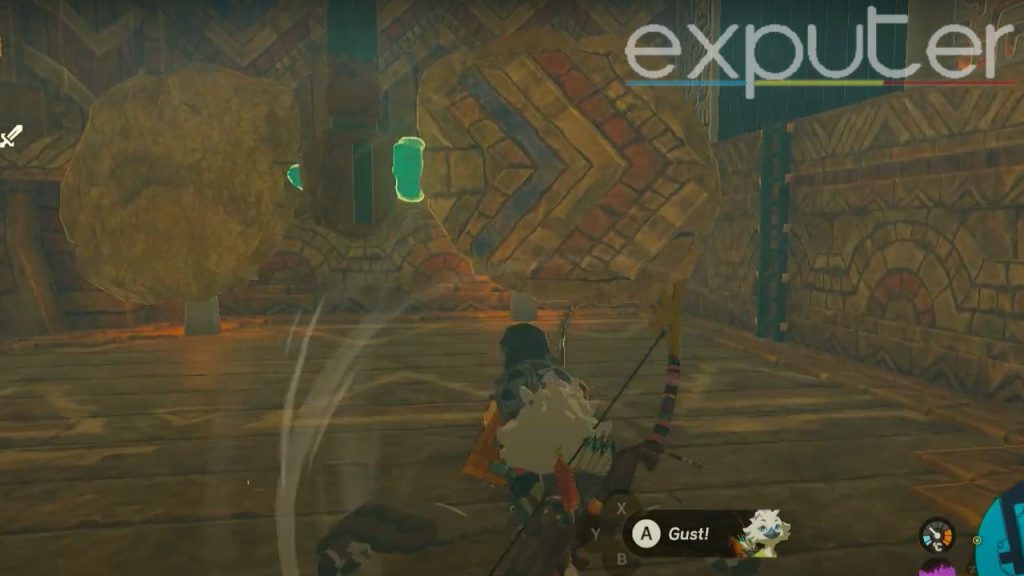
2nd Lock
- Exit the area and go toward the location on the left of the boat
- Go aerially to the icy hole at the side of the ship
- Avoid the lasers pointing at you
- Destroy the ice hanging to clear the entrance
- Clear off any enemies attacking you.
- Head straight in towards B1
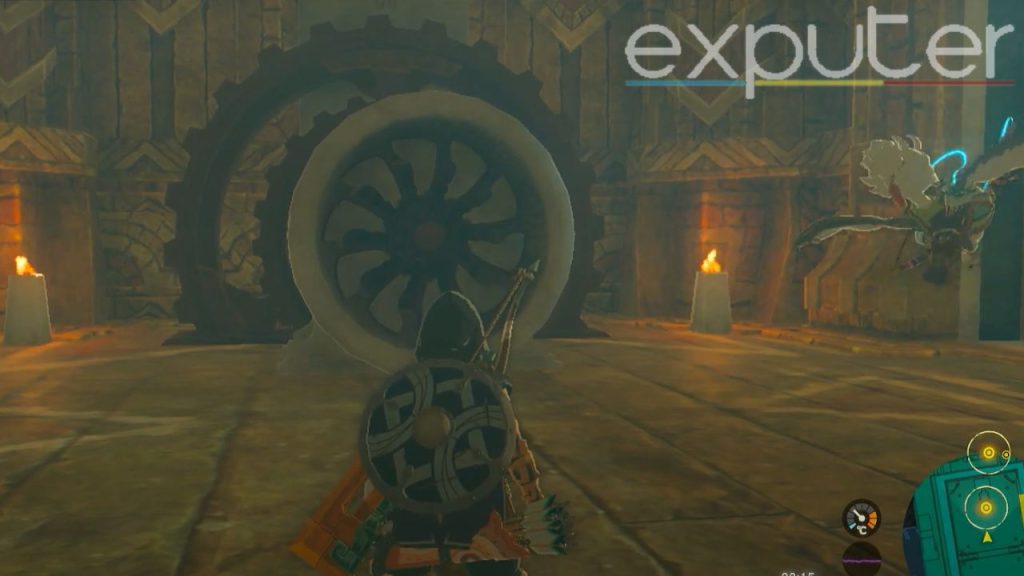
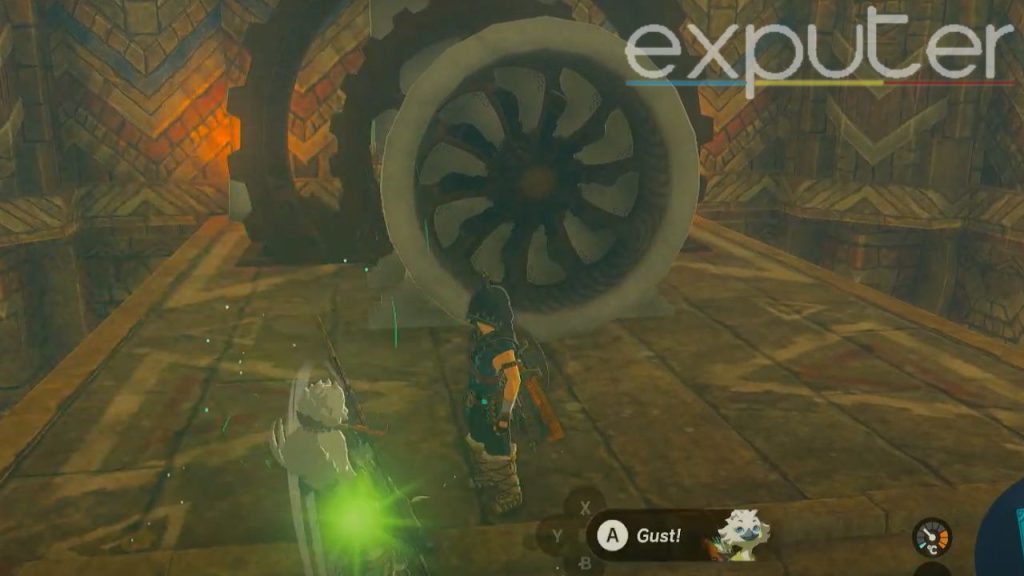
- You will see a gigantic Spinning wheel; use Recall power on it.
- Walk on it to go to the next room
- You will notice the gear system on the wall misses a link to connect.
- Connect this by breaking the crystal chunks on the Ceiling
- Use the Ultrahand to place those icicles on the gap to connect the gear system. At least two of them are required.
- You will find the second lock in the room next to you.
- Again use the gusts of wind to unlock it.
- Go to the stairs and reach the next floor via Ascend
- The corridor will be filled with lasers; avoid those by crouching.
- Go ahead to find a chest that includes a Ruby.
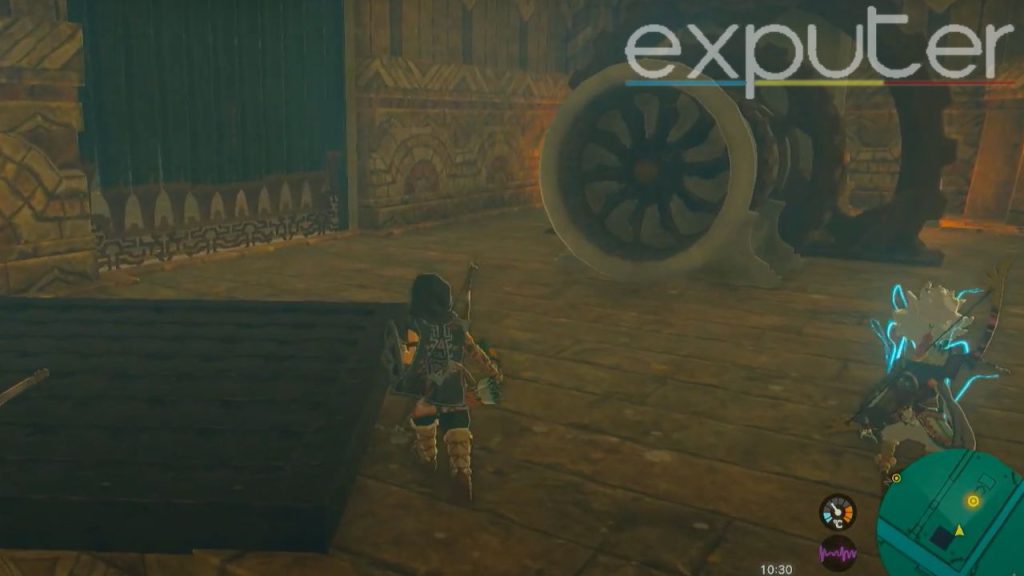
3rd Lock
- Go back to 1F by jumping below on the left side of the boat
- Glide through the ice-covered hole
- Observe the wheels with a hinge sticking out. Also, there will be large blocks of stone with arrows on them.
- Besides the stone slab, a chest will be placed with a Captain I Reaper.
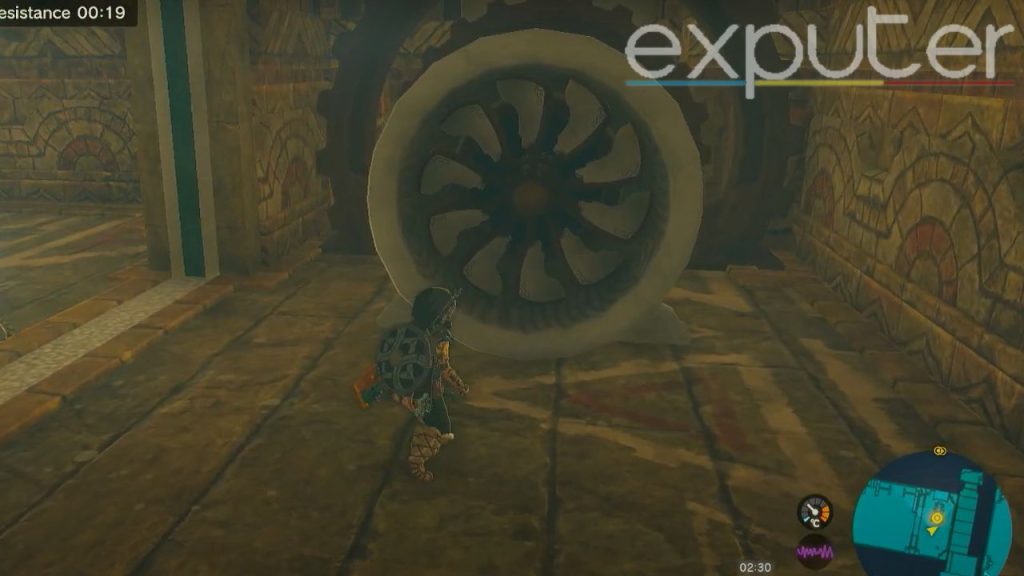
- Through Ultra Hand, place and join the slabs at the rod. Use Tulin’s wind power to make them run like a turbine.
- The gate will open towards the right.
- Go to it to find the third lock
- Use the wind power to unlock it.
4th Lock
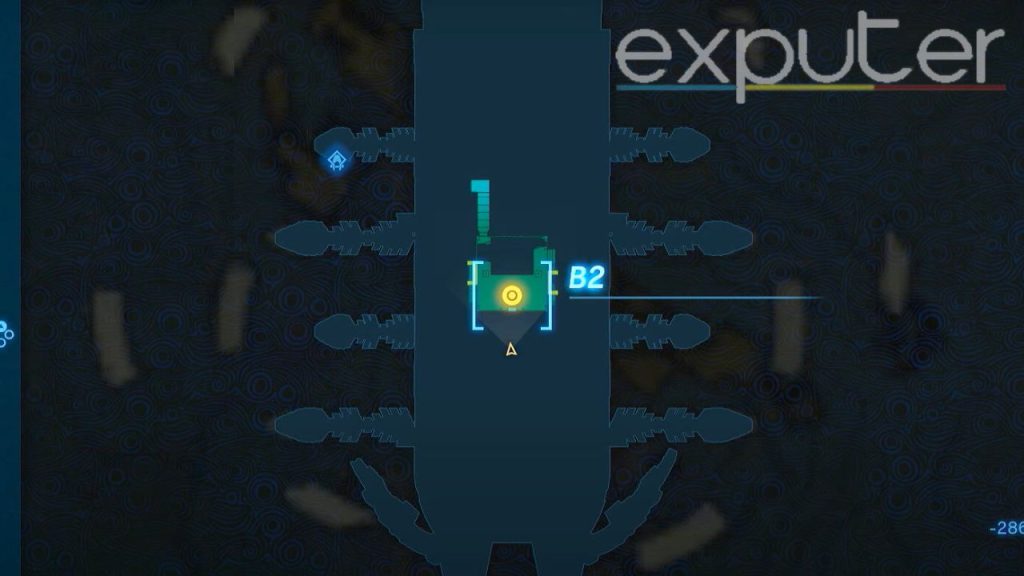
- This lock is fairly simple to find. Go under the ship and find lock B2
- You can go towards the right from B1 or the ship’s deck.
- Similar to before, use the gusts of wind to open the lock.
5th Lock
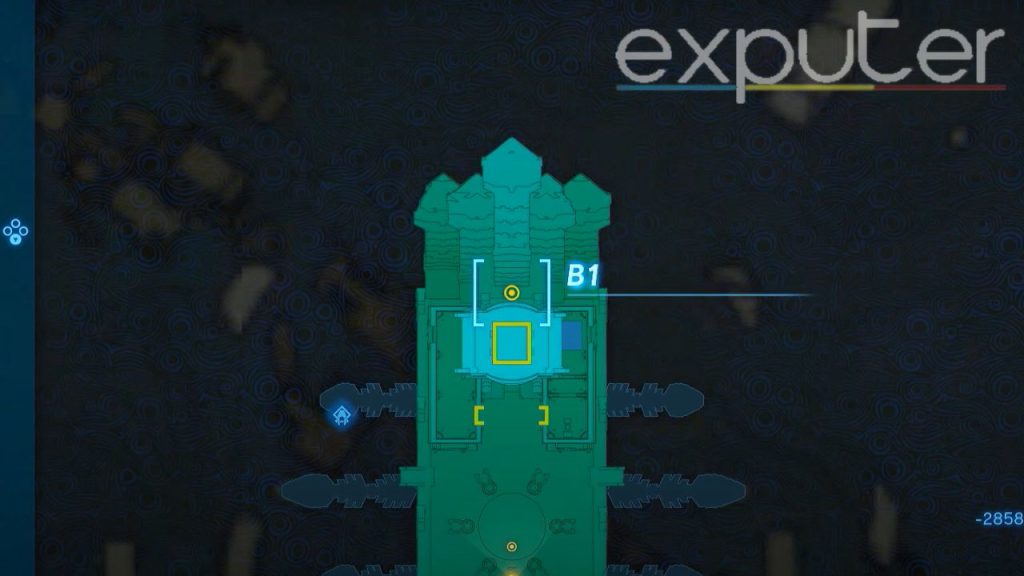
- Go back to 1F through the stairs nearby the B2 lock or use Ascend.
- A turbine is below the hatch; ride along with the wind through your glider.
- Go towards the peak of the ship.
- Via Ultrahand to access the doors at the top.
- Go through and land on the north side platform.
- When diving, be cautious while crossing the lasers. Try not to get penetrated by it.
- Go in and activate the 5th lock by opening the chest.
- Again use wind power to run it.
After unlocking the final lock, Tulin will direct you back to the shop. While discovering the Zonai terminal, interact with Altar in the middle of the temple, and you will find Colgera.
Colgera Boss Fight Strategy
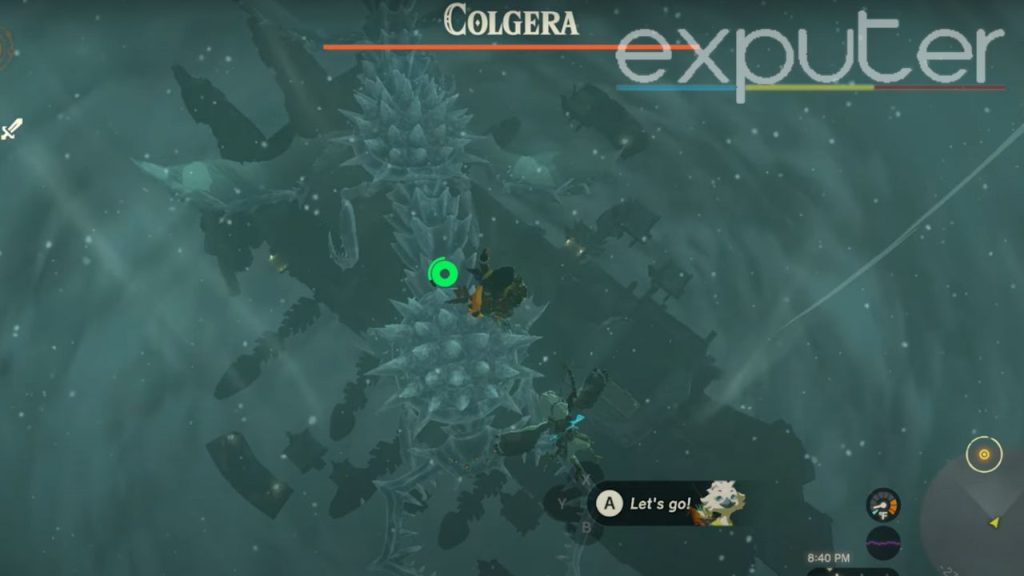
Colgera is a gigantic icy creature that fights aerially. It has spikes behind it, which are resistant to attacks. However, it has an exposed underbelly that can be attacked. During the fight, you will be shooting in the air towards it.
Colgera swiftly flies in and out. Moreover, it shoots its spikes toward you and creates tornadoes for damage. As its health drops to its half, it becomes more lethal. Attacks become fatal, and movement is quicker. Use the following tactics to defeat it.
- Use the 14-damage bow along with the Aerocuda wing to give heavy damage. You can shoot consecutively twice also and hit the exposed part.
- Also, use fire and fruit-based materials if icy blasts are not available.
- You can attack the Colgera when it throws the icy spikes at you. During this time, the top part becomes vulnerable to attack.
- Also, shoot at the flat underbelly through fire arrows to melt the ice quicker.
After defeating Colgera, you get access to Rito Village, Vol of Tulin, Sage of Wind, and a heart container that increases the number of hearts you can possess. Moreover, you can call Tulin to join any battle and use his Gusts of Wind power and his horizontal boost ability for gliding. Another bonus you get is that the storm in Hebra Mountain comes to a halt so you can go there easily.
This marks the end of the Wind Temple Tears of the Kingdom walkthrough. I hope this will help you ace this complicated quest and the boss fight at the end. This part of the quest is a little confusing but exciting. The Legend of Zelda Tears of the Kingdom has these amazing locations. Speaking about locations, learn more about the location of the Archaic tunic. Moreover, know where and how to get the Paraglider to travel to different areas quickly.
Next:
Thanks! Do share your feedback with us. ⚡
How can we make this post better? Your help would be appreciated. ✍