Diablo Immortal: All Side Quests
My Side Quests guide will showcase Bilefen, Library of Zoltun Kulle, Shassar Sea, and more quests!
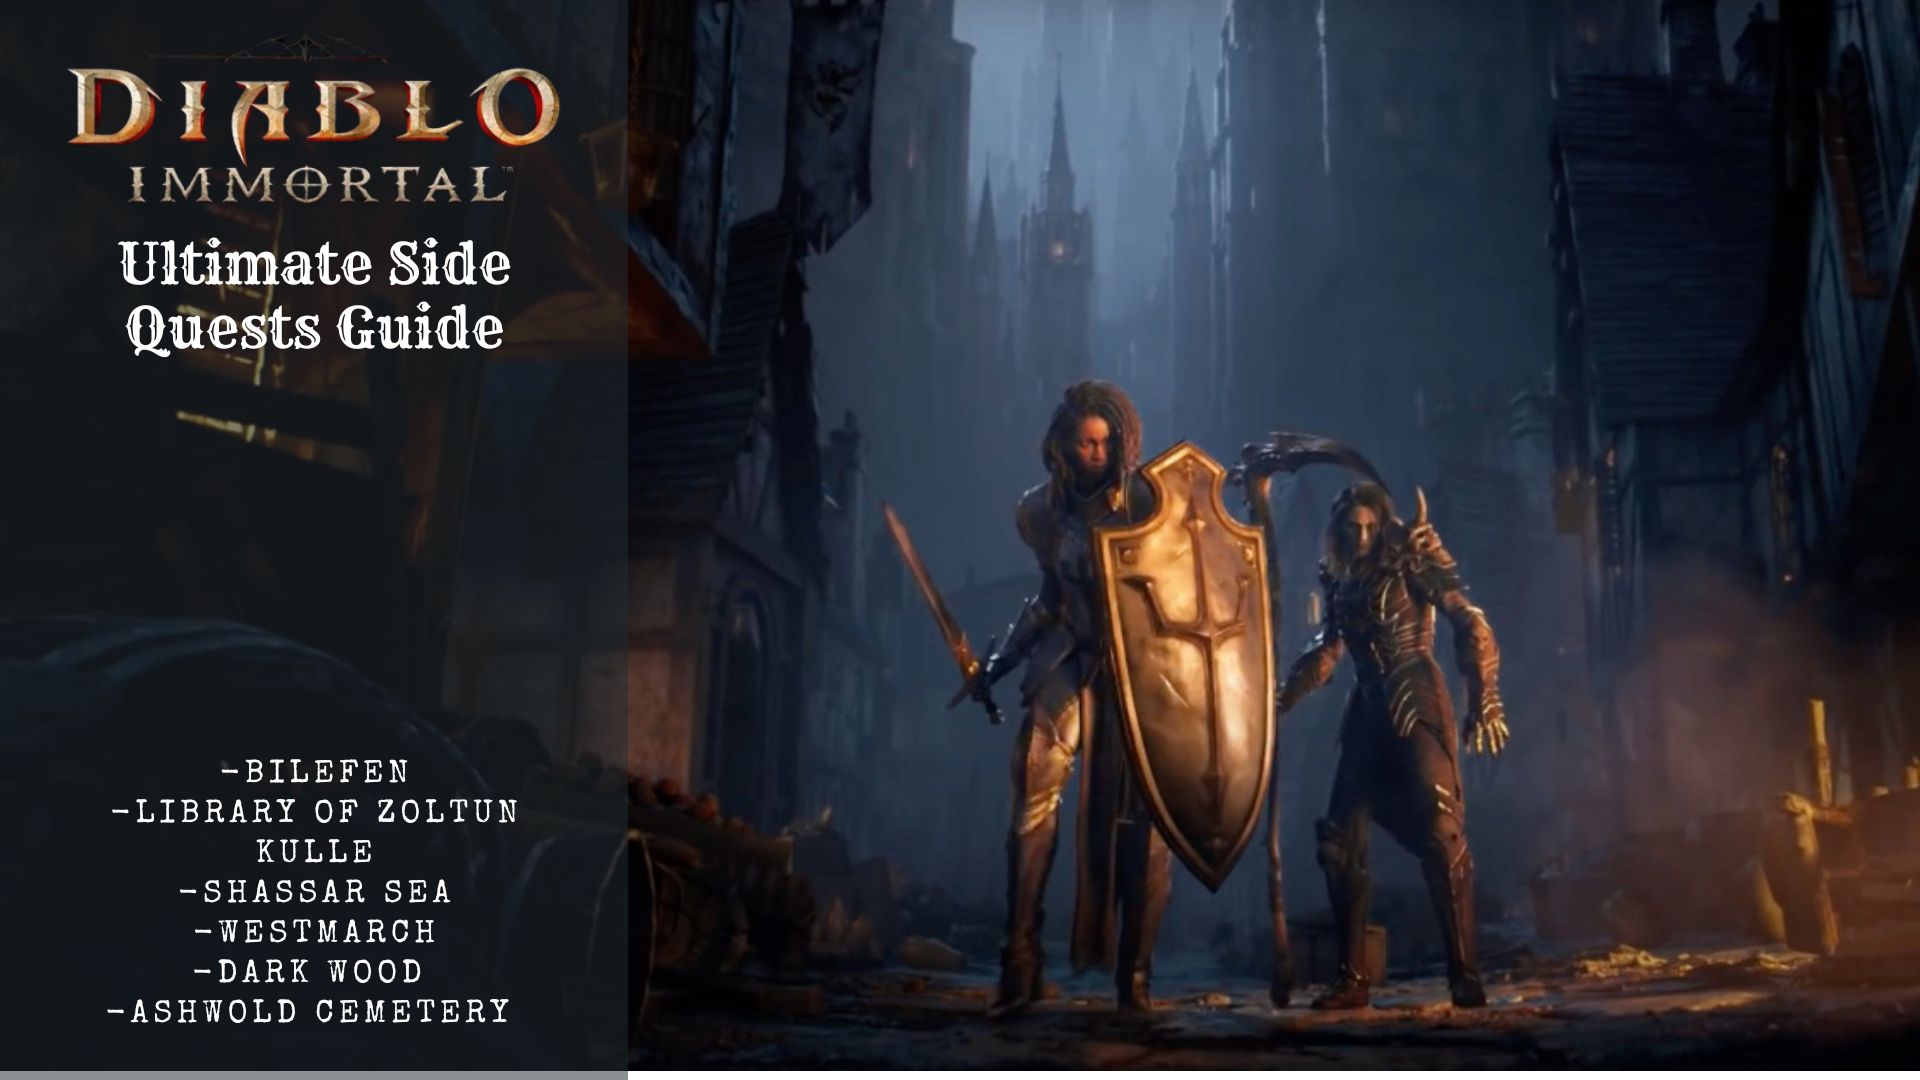
Diablo Immortal is a game filled with enticing lore aspects, combined with a storyline that involves players traveling from one end to the other to progress through the early game. Half of the progress consists of completing main and side quests, which I will cover in my Diablo Immortal Side Quests and main quests guide!
- Diablo Immortal comes with a main storyline to follow and just like many games with a storyline, they also come with many side quests for some rewards.
- When you finish with the main story, you can find the side quests on the six main zones of the Diablo Immortal map.
- These are locations where you will find the quests along with how many:
- Bilefen Island (9 side quests)
- Library of Zoltun Kulle (11 side quests)
- Shassar Sea (9 side quests)
- Westmarch (13 side quests)
- Dark Wood (9 side quests)
- Ashwold (8 side quests)
- All of these side quests will differ and also be found at different locations after you reach certain conditions.
Diablo Immortal Location-Based Quests
The game itself consists of many different locations, and as far as the release, there has been little to no information released fully. Therefore, I have compiled the main and the side quests in 6 main locations: Ashwold Cemetery, Dark Wood, Westmarch, Bilefen, Library of Zoltun Kulle, and Shassar Sea. With that, let’s get started!
Here’s a summarized table of all the information about quests:
| Quest | Location | Recommended Level | Unlocked | Rewards |
|---|---|---|---|---|
| The Final Summoning | Bilefen | 41 | After you exit the solo Story Dungeon, Rhodri's Private Docks | 64,330 EXP, 2,250 Gold, Gift of the Nephalem (Main-Hand), Bilefen Auto-Navigation |
| Parlay With Peril | Bilefen | 41 | After you exit the Kikuras Rapids dungeon | 42, 886 EXP |
| Heart of The Jungle | Bilefen | 41 | At the end of "Among the Bodies" quest | Survivor's Chain (Waist), Geli's Gratitude (Neck) |
| Among The Bodies | Bilefen | 41 | After you exit the solo Story Dungeon version of Port Justinian. | Refugee's Boots (Feet), 16-42,886 EXP |
| The Demon’s Lair | Bilefen | - | - | - |
| Hostile Territory. | Bilefen | - | - | - |
| Blazing Raid | Bilefen | 40 | Once you reach the outskirts of Port Justinian in "Overgrown Temple" | 42,900 EXP, 1,500 Gold |
| Overgrown Temple | Bilefen | 40 | After speaking to Talva silvertongue during "Welcome To The Jungle" | 16k EXP |
| Welcome To The Jungle | Bilefen | 40 | After the events of the main quest "Heart of the unknown" | 16k EXP |
| Library Beneath The Sand | Library of Zoltun Kulle | 35 | After unlocking the entrance to the Library of Zoltun Kulle | - |
| Unseen Guardian | Library of Zoltun Kulle | 35 | After entering the Library of Zoltun Kulle during the previous quest | 34.8k EXP |
| Restoring Order | Library of Zoltun Kulle | 35 | After defeating the Curator during the previous quest | 7k EXP |
| Lost Rune | Library of Zoltun Kulle | 35 | After inspecting the pedestal during the previous quest | 6-34,810k EXP, 1300 Gold, Grimaldi's Ruin (Helm), Cloudy Mirror-Sliver (Neck) |
| Central Core | Library of Zoltun Kulle | 35 | After placing the three runes on the pedestal during the previous quest, Lost Runes. | 7k EXP |
| Well of Knowledge | Library of Zoltun Kulle | 35 | After reaching the central core and defeating its guardians during the previous quest | 7-34.8k EXP |
| The Eternal Guardian | Library of Zoltun Kulle | 35 | After you turn in the Master's Journal to the Curator at the Central Core | 34,810 EXP |
| Reforging The Soul | Library of Zoltun Kulle | 35 | Defeat the Eternal Guardian | - |
| Recalling The Past | Library of Zoltun Kulle | 35 | After completing the previous quest | Discordant Plates (Chest Armor),3,900 Gold |
| The Dark Exile | Library of Zoltun Kulle | 35 | After you reach the entrance of the Destruction's End dungeon | Horadric Brand (Main-Hand Weapon) |
| The Heart of The Unknown | Library of Zoltun Kulle | 40 | After you speak to the Curator at the end of Dark Exile | Library of Zoltun Kulle Auto-Navigation, Curator's Gift (Ring) |
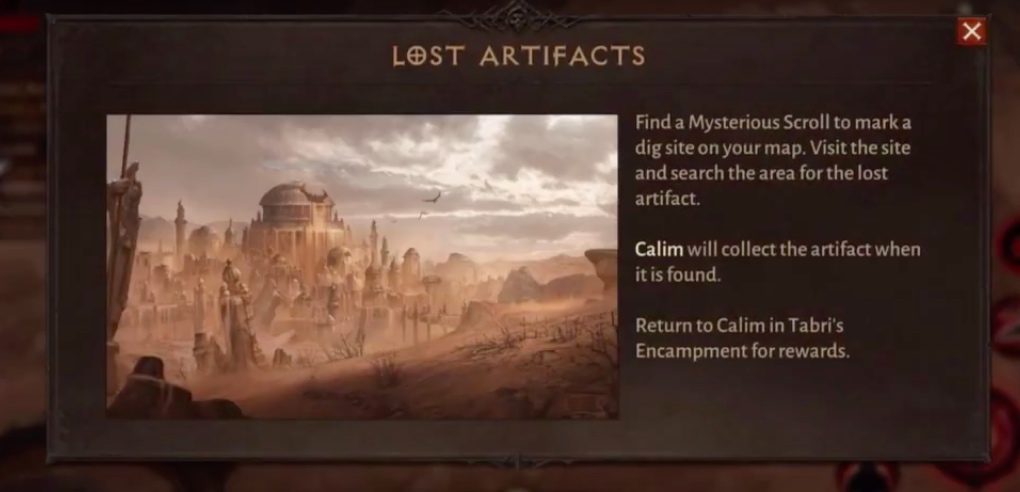
| Revealing The Path | Shassar Sea | 31 | After giving Tabri the third scepter piece during the "Final Fragment" quest | 34.6k EXP, 800 Gold, Magic Feet piece |
| Final Fragment | Shassar Sea | 30 | After giving Tabri the second scepter piece during "Fahir's Legacy" quest | 62.3k EXP, 2.4k Gold, Rare Chest piece |
| Fahir’s Legacy | Shassar Sea | 30 | After giving Tabri the first scepter piece during the "Wisdom's Fragment" | 23.1k EXP, Fahir's Visage |
| Wisdom Fragment | Shassar Sea | 30 | After taking the first map piece during "Loyalty's Price" quest | 23.1-41.5k EXP, 2.4k Gold, Fahir's Command, Magic Hand piece |
| Loyalty’s Price | Shassar Sea | 29 | After finding Tabri during the "Lacuni's Roar" quest | 11.5-23.1k EXP, 800 Gold, 3 Tourmaline |
| Lacuni’s Roar | Shassar Sea | 29 | After talking to the injured lookout during the "Amber Blades" quest. | 11.5k EXP |
| Amber’s Blades | Shassar Sea | 29 | After saving Zov from the bandits during the"A Trail in the Sand" quest | - |
| A Trail In The Sand | Shassar Sea | 29 | After finding the bandit group during the 'Sea of Fire" quest | 11.5k EXP |
| Sea of Fire | Shassar Sea | 29 | Upon arriving at Shassar Sea after talking to Captain Rehm | - |
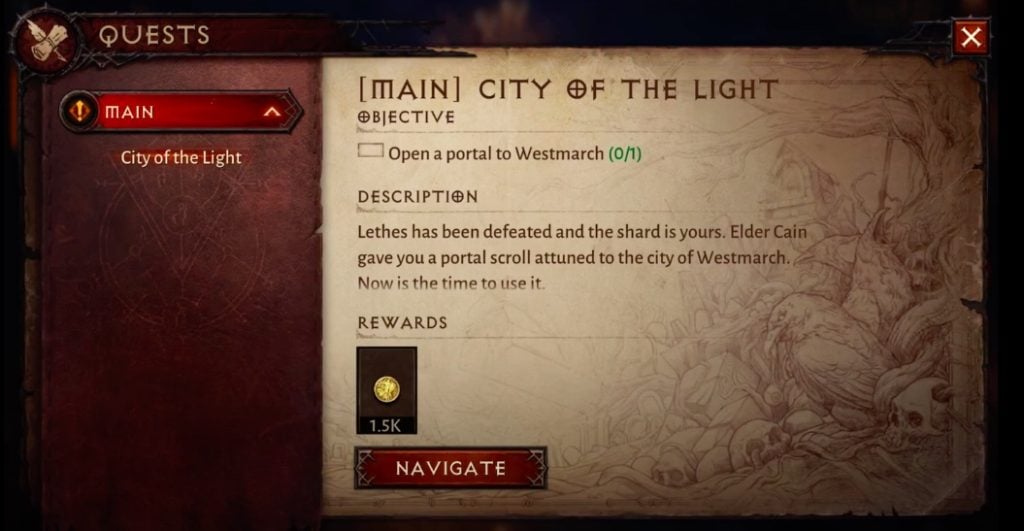
| Cain’s Request | Westmarch | - | - | - |
| Fragments of The Past | Westmarch | 46 | After completing the "Shard bearer" quest | Robe of Insight (Chest), 21,621 EXP |
| A Walk Through Westmarch | Westmarch | 28 | After completing the Delivering the Shards quest | - |
| Rift of The Elders | Westmarch | 29 | After completing the previous quest | - |
| Diamond in The Rough | Westmarch | 22 | While doing the Bounties Abroad main quest. | 6,000 EXP, 200 Gold |
| Tools of The Trade | Westmarch | 23 | After saving Vic in the previous quest | Charsi's Gift, 20,000 EXP, 750 Gold |
| Trading At The Market | Westmarch | 29 | After completing the previous quest | - |
| Honorable Rewards | Westmarch | - | - | - |
| Answers in The East | Westmarch | 29 | After the quest The Hilts Trader, | - |
| A Captain’s Need | Westmarch | 29 | After completing the previous quest | 20,000 EXP, 750 Gold |
| Bounties Abroad | Westmarch | 21 | After Completing the "Braving the Rift"Quest | 6,000 EXP, 200 Gold |
| Docks of Westmarch | Westmarch | 29 | After Completing the "To the Docks"Quest | - |
| Blackstone Village | Dark Wood | 24 | After passing through the portal to Dark Wood during the previous quest | - |
| Lucian’s Hope | Dark Wood | 24 | After picking up Lucian's letter during the previous quest | 4.1k EXP, 800 Gold, Magic Head piece |
| Bloodsworn Den | Dark Wood | 25 | After checking on Alyssa at the end of the previous quest | 4.1-16.4k EXP |
| The Horadic Bestiary | Dark Wood | 25 | After defeating Lakrii during the previous quest | 4.1-4.5k EXP, 800k Hold, Magic Shoulder piece, Magic Main Hand weapon |
| Gathering The Reagents | Dark Wood | 25 | After talking to Hemlir during the previous quest | 18k EXP, 1.6k Gold, Magic Chest Piece |
| Between Two Evils | Dark Wood | 26 | After ter giving Hemlir the three quest items during the previous quest | 18-19.7k EXP, 1.6k Gold, Magic Leg piece, Magic Head piece |
| Tree of Inifuss | Dark Wood | 26 | After getting the Ember of Dark Magic during the previous quest | 5.3k -21.3k EXP, 1.6k Gold, Magic Main Hand weapon, Magic Shoulder piece, Rare Belt |
| Blood Ressurection | Dark Wood | 27 | After the fight at the end of the previous quest | 3.46k EXP, 37.3 EXP |
| Delivering The Shards | Dark Wood | 28 | After completing the Blood Resurrection quest | - |
| The Risen Dead | Ashwold | 11 | After getting the World Map and completing the Prologue | 5k EXP, 1k Gold, Magic Off Hand Weapon |
| The Exiled Apprentice | Ashwold | 11 | After completing the previous quest | 2.7k EXP |
| Consulting The Guards | Ashwold | 12 | After talking to Guard Bramden during the previous quest | 6.3k EXP, 1k Gold, Red Leg Armor |
| The Handmaiden | Ashwold | 12 | Automatically unlocked after the previous quest | 3.8k EXP |
| The Tomb of The Queen | Ashwold | 13 | Automatically unlocked after the previous quest, | 12.6k EXP |
| Into Ashwold Manor | Ashwold | 14 | After clearing Queen Asylla's Tomb during the previous quest | 11.3k EXP, 1k Gold, Magic Waist Armor |
| Masters of Death | Ashwold | 15 | After destroying the third Death Ritual during the previous quest | 12.6k EXP |
| Battle For The Shard | Ashwold | 20 | After leaving Mad King's Breach during the previous quest | 2.34k EXP, Rare Shoulder Piece |
Bilefen Quests
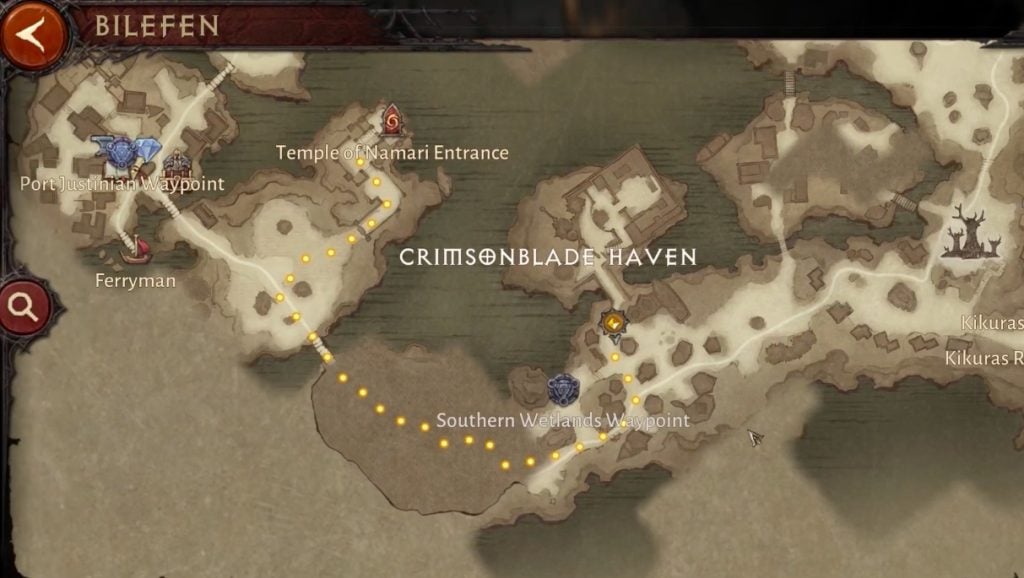
The Bilefen Island is located across the southern location of Aranoch in Diablo Immortal. It has about 9 or so quests, including both side quests in Diablo Immortal and others.
The Final Summoning
| Location | Bilefen |
| Recommended Level | 41 |
| Unlocked | Unlock after leaving solo Story Dungeon, Rhodri’s Private Docks |
| Rewards | 64,330 EXP, 2,250 Gold, Gift of the Nephalem (Main-Hand), Bilefen Auto-Navigation |
Starting with The Final Summoning, it entails the player exiting the Rhodri’s Ship and heading into the Temple of Namari Dungeon, which will contain a few storylines and dialogues to complete. Place down some beacons, talk to NPC Namari, and return to Jin to complete it.
Parlay With Peril
| Location | Bilefen |
| Recommended Level | 41 |
| Unlocked | Unlock after leaving the Kikuras Rapids dungeon |
| Rewards | 42, 886 EXP |
For this quest, Diablo Immortal players will need to go to the Crimsonblade Haven, come across Jin, and talk to him. After which, he will lead you to Rhodri’s Private dock, from where you can go into the ship. Investigate the cabin, Desk, and Iron cage, and get rid of Rhodri the Red. Talk to the NPC again and go out of the ship.
Heart of The Jungle
| Location | Bilefen |
| Recommended Level | 41 |
| Unlocked | Unlocked after completing the Among the Bodies quest |
| Rewards | Survivor’s Chain (Waist), Geli’s Gratitude (Neck) |
For this one, players will come across some survivors and have to communicate with an NPC named Watts. After going into the “Fetish Village,” there will be 3 survivors that players will need to rescue. Try to find Geli, talk to him, and go to the Kikuras Rapids and enter it.
Among The Bodies
| Location | Bilefen |
| Recommended Level | 41 |
| Unlocked | Unlocked after passing the solo Story Dungeon version of Port Justinian |
| Rewards | Refugee’s Boots (Feet), 16-42,886 EXP |
The quest “Among the Bodies” entails players in Diablo Immortal to find the NPC Cadeus, talk to him, follow him, and investigate a Corpse, from where you will need to kill 6 Maggot enemies. Communicate with Cadeus again, and find the corpses in the river. Get rid of Maggot Brood, go to the Abandoned Village, talk to Cadeus again, and kill Elder Owen.
The Demon’s Lair
| Location | Bilefen |
| Recommended Level | N/A |
| Unlocked | N/A |
| Rewards | N/A |
This particular quest, known as “The Demon’s Lair,” is not one of the Side Quests but the main one, and it will cause players to go into the Court of Madness. After entering it, they will need to obliterate the Purus the Decimator.
Hostile Territory
| Location | Bilefen |
| Recommended Level | N/A |
| Unlocked | N/A |
| Rewards | N/A |
Yet another important quest is the Hostile Territory, which will have the players in Diablo Immortal venture close to the Abandoned Village, whereby they will come across a few enemies whenever they go in. There will be 50 monsters, which players will need to decimate.
Blazing Raid
| Location | Bilefen |
| Recommended Level | 40 |
| Unlocked | Unlocked after reaching the Port Justinian in “Overgrown Temple” |
| Rewards | 42,900 EXP, 1,500 Gold |
For The Blazing Raid, it will mean that this particular side quest in Diablo Immortal will have the player talk to an NPC by the name of Jin; from here, they will need to find Talva Silvertongue and then murder the Soul Killer Shaman. Talk to her again, and then go out of Port Justinian.
Overgrown Temple
| Location | Bilefen |
| Recommended Level | 40 |
| Unlocked | Unlocked after speaking with Talva silvertongue during “Welcome To The Jungle” |
| Rewards | 16k EXP |
The Overgrown Temple aims to make the player head over to the Temple of Namari, then kill the guardians that stand outside the temple. After that, talk to Jin, then Namari again, and then Jin again to exhaust their long dialogues, and then return to Port Justinian. Yet another important one of side quests will be finished. The Vitaath Boss fight might be difficult for many people; therefore, referring to our Diablo Immortal Vitaath Guide might be useful!
Welcome To The Jungle
| Location | Bilefen |
| Recommended Level | 40 |
| Unlocked | Unlocked after completing quest “Heart of the unknown” |
| Rewards | 16k EXP |
Last but not least, go into the jungle, talk to its inhabitants, talk to Sandro the Mouth and then go over to the Talva Silvertongue NPC and talk to her, exhaust her dialogues, and then the quest is done. With that, the Bilefen quests in Diablo Immortal are all done!
Library of Zoltun Kulle Quests
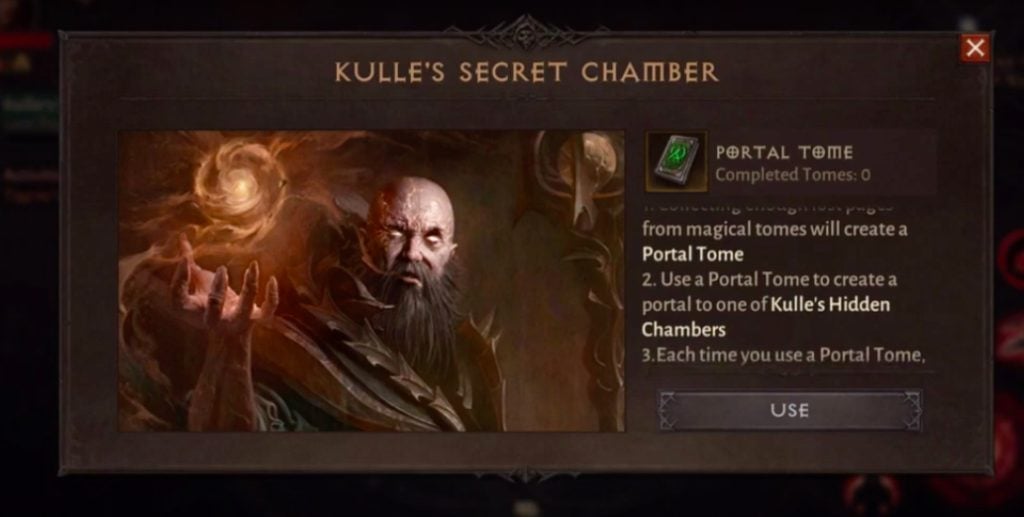
As for the the side quests in the Library of Zoltun Kulle, the Library itself is present in Kehjistan and is known to be an area of the Zoltun Kulle.
Library Beneath The Sand
| Location | Library of Zoltun Kulle |
| Recommended Level | 35 |
| Unlocked | Unlock the entrance to the Library of Zoltun Kulle to get this side quest |
| Rewards | N/A |
Starting with the first Diablo Immortal side quest, it requires the player to go into an area known as the Unseen Guardian, which will be present near the Library of Zoltun Kulle itself. There isn’t much information about this particular quest yet; apart from that, players need to head into the Library.
Unseen Guardian
| Location | Library of Zoltun Kulle |
| Recommended Level | 35 |
| Unlocked | Enter the Library of Zoltun Kulle to unlock it |
| Rewards | 34.8k EXP |
To progress through this quest in question, players need to venture forth again and make their way over to the Unseen Guardian, where they will come across 12 Mysterious Phantom’s enemies. From there, murder them off and get rid of The Curator, who will complete the quest.
Restoring Order
| Location | Library of Zoltun Kulle |
| Recommended Level | 35 |
| Unlocked | Defeat the Curator during the previous quest for unlocking it |
| Rewards | 7k EXP |
Next up, the Restoring Order quest entails communicating with the NPC by the name of The Curator, after which when they enter the Library, there will be 12 different monsters. From here, go to the Statue located in the Library itself, and there, the Pedastal will be present, and Diablo Immortal players will need to inspect it.
Lost Rune
| Location | Library of Zoltun Kulle |
| Recommended Level | 35 |
| Unlocked | Inspect the pedestal during the Restoring Order quest |
| Rewards | 6-34,810k EXP, 1300 Gold, Grimaldi’s Ruin (Helm), Cloudy Mirror-Silver (Neck) |
After coming across the First Rune, light up by solving the lamps puzzle in Diablo Immortal, and grab the rune. Place two different runes, and a boss will appear by the name of Grimaldi. Kill it, and get the second rune. After finding the third rune, inspecting it, and illuminating it, players will need to place it and then wait for an NPC Curator.
Central Core
| Location | Library of Zoltun Kulle |
| Recommended Level | 35 |
| Unlocked | Place the three runes on the pedestal during the Lost Rune quest, Lost Runes |
| Rewards | 7k EXP |
The next series of side quests also include the Central Core, where the players need to reach the Central Core itself. Try to find the Curator, where there will be around Core’s Guardians, which you will need to defeat. After doing so, go back and talk to the NPC again. If you are planning to main as a Demon Hunter, read up on our Diablo Immortal Demon Hunter build guide!
Well of Knowledge
| Location | Library of Zoltun Kulle |
| Recommended Level | 35 |
| Unlocked | All you need to do is reach the central core and defeat its guardians |
| Rewards | 7-34.8k EXP |
For this one, players in Diablo Immortal will yet again need to venture and find the Curator and then go into the Well of Knowledge to get their hands on the Master’s journal. After that, obliterate 16 Arcane Trails, and go back to the Curator and hand him the Master’s Journals.
The Eternal Guardian
| Location | Library of Zoltun Kulle |
| Recommended Level | 35 |
| Unlocked | After leaving the Master’s Journal to the Curator at the Central Core |
| Rewards | 34,810 EXP |
To complete this quest, go into the Chaos Engine, kill 12 undead enemies, find some Golem’s Remains, and find the NPC Insightful Sands. Come across the Eternal Guardian, and kill more Undead. Activate the mechanisms, get rid of the Eternal Guardian, and get out of the area.
Reforging The Soul
| Location | Library of Zoltun Kulle |
| Recommended Level | 35 |
| Unlocked | Eliminate the Eternal Guardian |
| Rewards | N/A |
This quest is tied in part to the Library quests in Diablo Immortal. For this, go into the Chaos Engine and place in some remains, after which you can activate the orbs while killing some Burning Dead enemies. After the Chaos Engine has charged, get the Spark of Life, and these Side Quests are also done.
Recalling The Past
| Location | Library of Zoltun Kulle |
| Recommended Level | 35 |
| Unlocked | Complete the previous quest for unlocking it |
| Rewards | Discordant Plates (Chest Armor),3,900 Gold |
Now, players will deliberately have to carry on from the previous quest and hand over the Spark of Life to the NPC Curator for this quest. After communicating with him, go into the Archive of Secrets, where you can find him, and talk to him again. He leads you to the Alcove, so make sure to follow him.
The Dark Exile
| Location | Library of Zoltun Kulle |
| Recommended Level | 35 |
| Unlocked | Unlocked by reaching the Destruction’s End dungeon’s entrance |
| Rewards | Horadric Brand (Main-Hand Weapon) |
This quest doesn’t have many details attached to it, and it just ties into the rest of the side quests in Diablo Immortal. Simply head over to the Curator and talk to him and stand next to him for this one. After that, he will talk to you.
The Heat of The Unknown
| Location | Library of Zoltun Kulle |
| Recommended Level | 40 |
| Unlocked | Talk to the Curator at the end of Dark Exile for getting it |
| Rewards | Library of Zoltun Kulle Auto-Navigation, Curator’s Gift (Ring) |
To complete the last quest, you will need to have to force a conversation with the same NPC over and over again until the quest gets completed.
Shassar Sea Quests
The next location that I would like to mention is the Shassar Sea, which players can find whenever they go into the eastern area of Kehjistan when they cross Caldeum.
Revealing The Path
| Location | Shassar Sea |
| Recommended Level | 31 |
| Unlocked | Give Tabri the third scepter piece for unlocking this side quest during the “Final Fragment” quest |
| Rewards | 34.6k EXP, 800 Gold, Magic Feet piece |
The first of the side quests is the Revealing The Path, for which you will need to interact with an NPC known as Peth, after which you will need to follow him and inevitably have to rescue him. After that, go to the Library with him, exhaust his dialogue, and go into the Library of Zoltun Kulle.
Final Fragment
| Location | Shassar Sea |
| Recommended Level | 30 |
| Unlocked | Give Tabri the second scepter piece for unlocking this side quest during the Fahir’s Legacy quest |
| Rewards | 62.3k EXP, 2.4k Gold, Rare Chest piece |
This is yet another important quest without which players can’t progress through the game. To get through this, Diablo Immortal players will need to go to the Chamber of Truth, after which a secret entrance will lead into the Prison of the Scorpion. Hand over the Light of Fahir to NPC Tabri and interact with the NPC.
Fahir’s Legacy
| Location | Shassar Sea |
| Recommended Level | 30 |
| Unlocked | Give Tabri the first scepter piece for unlocking this side quest during the Wisdom’s Fragment quest |
| Rewards | 23.1k EXP, Fahir’s Visage |
With that, this is another crucial quest that can’t be ignored. Therefore players in Diablo Immortal should complete it. Go into the Tomb of Fahir, try to find a Scepter Piece, and go back to the Sereth Outpost. From there, hand over the Fahir’s Visage to the NPC Tabri and then talk to the NPC.
Wisdom Fragment
| Location | Shassar Sea |
| Recommended Level | 30 |
| Unlocked | Get the first map piece during the Loyalty’s Price quest to unlock it |
| Rewards | 23.1-41.5k EXP, 2.4k Gold, Fahir’s Command, Magic Handpiece |
The fourth of the Shassar Sea side quests is Wisdom Fragment, for which you need to go to the Chamber of Wisdom and investigate it. Get rid of some undead enemies, open up the chamber, find lingering souls, kill Watep, then kill off Corphet the Venom wing and take control of the Fahir’s Command. Talk to the Zov NPC to complete the quest.
Loyalty’s Price
| Location | Shassar Sea |
| Recommended Level | 29 |
| Unlocked | Locate Tabri during the “Lacuni’s Roar” quest |
| Rewards | 11.5-23.1k EXP, 800 Gold, 3 Tourmaline |
After going back to Zov, save the Amber Blade, and murder Alvas, after which you will need to behead the Lacuni Pack Leader. From there, Diablo Immortal players will need to give the head to NPC Tabri, hang the skin of Lacuni, and then follow NPC Zov to Peth. Talk to him after that. If you are confused about what class to play as, why not check out the Diablo Immortal Best Solo Class guide?
Lacuni’s Roar
| Location | Shassar Sea |
| Recommended Level | 29 |
| Unlocked | Speak with the injured lookout during the quest “Amber Blades” |
| Rewards | 11.5k EXP |
This quest itself will require players in Shassar Sea quests to kill off the Lacuni enemy, after which they will need to search for the Tabri NPC. From there, the questline will further continue.
Amber’s Blades
| Location | Shassar Sea |
| Recommended Level | 29 |
| Unlocked | You need to save Zov from the bandits during the quest “A Trail in the Sand” |
| Rewards | N/A |
For this one, this is another sequel to the the side quests, which will have the travelers follow up with the NPC named Zov, and they will need to head over to a lookout which will have some injured people located there. From there, interact with them.
A Trail In The Sand
| Location | Shassar Sea |
| Recommended Level | 29 |
| Unlocked | Spot the bandit group during the quest ‘Sea of Fire” |
| Rewards | 11.5k EXP |
This particular quest connects to the quest that I mentioned before, known as “Amber’s Blades,” and for it to be complete, players will need to interact with the NPC Zov and ask him for further directions.
Sea of Fire
| Location | Shassar Sea |
| Recommended Level | 29 |
| Unlocked | Speak with Captain Rehm after reaching the Shassar Sea |
| Rewards | N/A |
To complete the Sea of Fire, players completing the Shassar Sea quests will need to find the Zoltun Kulle’s Library and then murder Thiago and his members. After that, mention it to Zov NPC, and then search up Thiago’s Corpse to get your hand on a key and then free up Zov. For Crusader mains, our Diablo Immortal Crusader Guide is the best guide for you!
Westmarch Quests
Moving on with the Side Quests, below are the 13 quests for this particular location that players in DIablo Immortal can access.
Cain’s Request
| Location | Westmarch |
| Recommended Level | N/A |
| Unlocked | N/A |
| Rewards | N/A |
Starting with this one, go to Westmarch, interact with Lieutenant Dunn, talk to Piri, and find Charsi, who will be located in the area known as “Rakkis Plaza.”
Fragments of The Past
| Location | Westmarch |
| Recommended Level | 46 |
| Unlocked | Complete the “Shard bearer” quest to unlock it |
| Rewards | Robe of Insight (Chest), 21,621 EXP |
After finding Charsi, go to Cain’s Workshop in Diablo Immortal, talk to him, and just wait it out until his ritual is complete. After that, talk to him again, and help him out with the ritual. With that, murder demons and then interact with Cain yet again.
A Walk Through Westmarch
| Location | Westmarch |
| Recommended Level | 28 |
| Unlocked | Complete the “Shard bearer” quest to unlock it |
| Rewards | Robe of Insight (Chest), 21,621 EXP |
Go to Charsi, who will be just outside the shop, talk to him, and follow him until you come across the Elder rift in Westmarch. Inspect the general area, talk to the NPC Charsi again, and get rid of the Brigands.
Rift of The Elders
| Location | Westmarch |
| Recommended Level | 29 |
| Unlocked | Complete the Delivering the Shards quest to unlock it |
| Rewards | N/A |
The Rift of The Elders isn’t a quest but rather a dungeon.
Diamond in The Rough
| Location | Westmarch |
| Recommended Level | 22 |
| Unlocked | Complete the Bounties Abroad main quest to unlock it |
| Rewards | 6,000 EXP, 200 Gold |
After this, you will need to go back to Charsi, after which he will ask you to follow him to Rakkis Square, where you will murder the Brigands yet again. From there, help out NPC Vic, talk to him, go over to Seril, an Apprentice jeweler, and talk to Vic again.
Tools of The Trade
| Location | Westmarch |
| Recommended Level | 23 |
| Unlocked | Save Vic in the previous quest to complete it |
| Rewards | Charsi’s Gift, 20,000 EXP, 750 Gold |
The Tools of The Trade quest will be completed when you venture over to Charsi, follow him until you reach Smithy, and then interact with him again. From there, you will need to inspect an Armor Rack.
Trading At The Market
| Location | Westmarch |
| Recommended Level | 23 |
| Unlocked | Complete the Tools of The Trade quest to unlock it |
| Rewards | N/A |
Next up, the Trading at The Market entails the Diablo Immortal players going to the Wynton’s Grand Market and then interacting with the NPC Day, after which you will simply leave the market.
Honorable Rewards
| Location | Westmarch |
| Recommended Level | N/A |
| Unlocked | N/A |
| Rewards | N/A |
This quest will instantly connect with the Answers in the East, which I will talk about later. You just need to communicate with Lieutenant Fizriah and exhaust his dialogue for this quest.
Answers in The East
| Location | Westmarch |
| Recommended Level | 29 |
| Unlocked | Unlocked after completing The Hilts Trader quest |
| Rewards | N/A |
Go back to Cain’s Workshop, after which you will need to talk to him and then examine a scroll on his bookshelf; go back to Cain, and get out of his workshop. Go to the Wolf City Tavern, and communicate with the Bartender there.
A Captain’s Need
| Location | Westmarch |
| Recommended Level | 29 |
| Unlocked | Complete the Answers in The East quest |
| Rewards | 20,000 EXP, 750 Gold |
Go into a tavern, interact with the Bartender there, and when you go back out, get rid of the Pirates, communicate with the Jacktar Brute, and then to Captain Rehm and complete their dialogues.
Bounties Abroad
| Location | Westmarch |
| Recommended Level | 21 |
| Unlocked | Complete the “Braving the Rift” quest for unlocking it |
| Rewards | 6,000 EXP, 200 Gold |
The name itself suggests that it is a liminal quest, not worthy of being called one either, as the only thing the Diablo Immortal player has to do here is examine a Bounty Board. For complete beginners, the Diablo Immortal Max Leveling guide is where it’s at!
Docks of Westmarch
| Location | Westmarch |
| Recommended Level | 29 |
| Unlocked | Complete the “To the Docks” quest to unlock it |
| Rewards | N/A |
Next up, to get done with the Docks of Westmarch quest, go to the docks, interact with Cain, then Captain Rehm, the same NPCs that I mentioned before in the previous quests, then go to the Shassar Sea. With that, you are done with these quests as well!
Dark Wood Quests
The next location is the Dark Wood Area, moving right along with the side quests.
Blackstone Village
| Location | Dark Wood |
| Recommended Level | 24 |
| Unlocked | Pass the portal to Dark Wood during the Docks of Westmarch quest |
| Rewards | N/A |
For the Blackstone Village quest, head over to Dark Wood and keep going until you encounter an Injured man. Help him out, then talk with Lucian, and he will give you a particular letter which you can take from him.
Lucian’s Hope
| Location | Dark Wood |
| Recommended Level | 24 |
| Unlocked | Obtain Lucian’s letter during the Blackstone Village quest to unlock it |
| Rewards | 4.1k EXP, 800 Gold, Magic Headpiece |
Continues investigating the Blackstone area, murders the Bloodsworn enemies, and saves Alyssa from the debris that she is stuck in. Talk to her, take her to Kashya, kill more Bloodsword, and then inspect her health.
Bloodsworn Den
| Location | Dark Wood |
| Recommended Level | 25 |
| Unlocked | Look out for Alyssa at the end of the previous Lucian’s Hope quest |
| Rewards | 4.1-16.4k EXP |
After inspecting Alyssa in Diablo Immortal, go to Kashya, talk t him, and go into the Bloodsworn den. Save Hemlir, then interact with Kashya again, and then find Lakrii and murder her. With the 6 classes that are available to choose from, make sure to not miss out on our Diablo Immortal best class Guide!
The Horadic Bestiary
| Location | Dark Wood |
| Recommended Level | 25 |
| Unlocked | Look out for Lakrii during the previous Bloodsworn Den quest |
| Rewards | 4.1-4.5k EXP, 800k Hold, Magic Shoulder piece, Magic Main Hand weapon |
Interact with Flavie, go over to the Rogue Battlecamp, and talk to Liene. From there, Diablo Immortal players can kill even more Demon enemies, and then report back to Kashya. Interact with Akara and then with Hemlir.
Gathering The Reagents
| Location | Dark Wood |
| Recommended Level | 25 |
| Unlocked | Speak with Hemlir during the previous Horadric Bestiary quest |
| Rewards | 18k EXP, 1.6k Gold, Magic Chest Piece |
Head over to the Arach’s Den, get your hands on the eye, and go to the Swamp, from there, take a look at the blood flower and take its thorns. Go into the fallen village and go to the Bonfire, from there find and take the blackened branch and take it to Hemlir.
Between Two Evils
| Location | Dark Wood |
| Recommended Level | 26 |
| Unlocked | Give Hemlir the three quest items in the duration of the previous quest |
| Rewards | 18-19.7k EXP, 1.6k Gold, Magic Leg piece, Magic Headpiece |
For Between Two Evils quests, talk to Hemlir, Akara, and Hess, after which you can go to the Cult of Damnation and find out where the Dark Magic is sourcing from. Take the Ember, then find Hemlir and murder Bloodsworns.
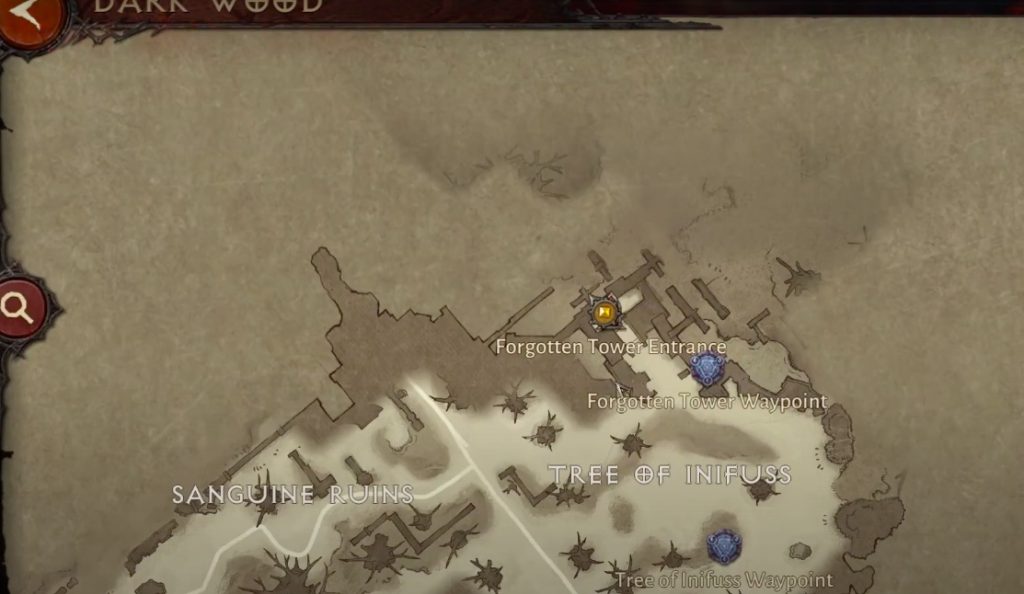
Tree of Inifuss
| Location | Dark Wood |
| Recommended Level | 26 |
| Unlocked | After receiving the Ember of Dark Magic in Between Two Evils Quest |
| Rewards | 5.3k -21.3k EXP, 1.6k Gold, Magic Main Hand weapon, Magic Shoulder piece, Rare Belt |
Interact with NPC Hemlir, wait for his ritual to get done, then obliterate his clone, and talk to him again. After that, go ahead to communicate with the NPC Flavie.
Blood Ressurection
| Location | Dark Wood |
| Recommended Level | 27 |
| Unlocked | Complete the previous quest to unlock it |
| Rewards | 3.46k EXP, 37.3 EXP |
After communicating with Flavie, Diablo Immortal players will need to go to Sanguine Ruins, interact with Liene, go into the Lair of Blood Rose, and kill the Blood Roses. Leave the area, interact with Akara, and then go into the Forgotten Tower.
Delivering The Shards
| Location | Dark Wood |
| Recommended Level | 28 |
| Unlocked | Complete the previous quest to unlock it |
| Rewards | N/A |
The Delivering The Shards isn’t part of the side quests. It only involves the players in Diablo Immortal talking to Kashya and going to the Westmarch area in the game.
Ashwold Cemetry
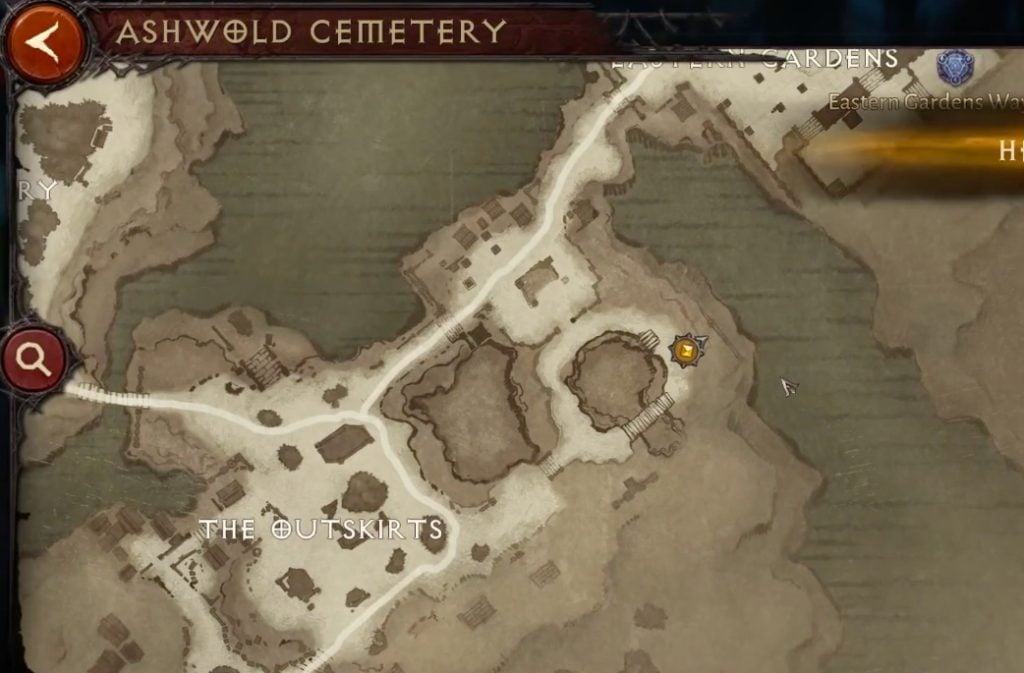
Last but not least, these are the few Ashwold Cemetry quests.
The Risen Dead
| Location | Ashwold |
| Recommended Level | 11 |
| Unlocked | Get the World Map, as well as complete the Prologue for unlocking the Thai side quest |
| Rewards | 5k EXP, 1k Gold, Magic Off-Hand Weapon |
To complete it, go to Ashwold Cemetery, kill off Grave Robbers, talk to Samina, go to the groundkeeper’s home, and then murder Gordon and then interact with Ulric.
The Exiled Apprentice
| Location | Ashwold |
| Recommended Level | 11 |
| Unlocked | Complete the Risen Dead quest to unlock it |
| Rewards | 2.7k EXP |
Communicate with Ulric, go to the Crypt of the Honored Dead, kill them off, interact with Xul, and then with the Guard Bramden.
Consulting The Guards
| Location | Ashwold |
| Recommended Level | 12 |
| Unlocked | Speaking with Guard Bramden during the Exiled Apprentice quest |
| Rewards | 6.3k EXP, 1k Gold, Red Leg Armor |
Talk to the Guard Bramden once again, go to Guard’s Watch, murder the Undead, interact with Captain Azmir, talk to Paulie, and then go back to Captain Azmir.
The Handmaiden
| Location | Ashwold |
| Recommended Level | 12 |
| Unlocked | Complete the previous quest to unlock it |
| Rewards | 3.8k EXP |
Go back to Captain Azmir, and then go to the Handmaiden’s Cottage, decimate the Undead located there, find the Handmaiden, kill Ambushing Undead, and talk to Xul. For those who are interested in experimenting with the Necromancer class, why not take help from our Diablo Immortal Necromancer Build!
The Tomb of The Queen
| Location | Ashwold |
| Recommended Level | 13 |
| Unlocked | Complete the previous quest to unlock it |
| Rewards | 12.6k EXP |
After talking to Xul, Diablo Immortal players will go to the Queen’s Tomb, enter it, search it, inspect the Burial Vault, slaughter the Skeletal Mage, and leave the area.
Into Ashwold Manor
| Location | Ashwold |
| Recommended Level | 14 |
| Unlocked | Clear Queen Asylla’s Tomb in the previous quest to unlock it |
| Rewards | 11.3k EXP, 1k Gold, Magic Waist Armor |
Go into the area located, murder the guards, talk to NPC Xul, and follow him to murder the Bone Golem.
Masters of Death
| Location | Ashwold |
| Recommended Level | 15 |
| Unlocked | Destroy the third Death Ritual during the Into Ashwold Manor quest |
| Rewards | 12.6k EXP |
Behead the Simulacrum, stop the ritual from taking place, interact with Xul, and then go into the Mad King’s Breach.
Battle For The Shard
| Location | Ashwold |
| Recommended Level | 20 |
| Unlocked | Exit the Mad King’s Breach during the Masters of Death quest to unlock it |
| Rewards | 2.34k EXP, Rare Shoulder Piece |
Interact with Xul once again, follow Lethes, and take the Shard of Worldstone, then go to Dakrwood. With that, I will wrap up with my Diablo Immortal Side Quests. Let me know what you think! If no class works out for you, then the Diablo Immortal Barbarian class might be for you!
Thanks! Do share your feedback with us. ⚡
How can we make this post better? Your help would be appreciated. ✍