Looking for Minecraft’s best XP farm? XP farms help you gain more XP while performing less of the work. You can design these structures to get help in farming experience points in large quantities. This makes it easier for you to progress, as XP is the main ingredient in enchanting your weapons. Here is a list of some farms in Minecraft for XP for different game stages to help you level up like a pro. Build these farms to master the art of XP farming and dominate your world in Minecraft!
- XP, also known as experience points, are essential for performing various game tasks such as Sword enchantment, repairing, and renaming items.
- There are different ways of getting XP. Players build farms to perform these tasks to get XP points more efficiently and quickly.
- The effectiveness of an XP farm depends on the stage of where the player is in terms of progression.
- Some of the best end-game farms include Wither skeleton farm, Enderman Farm, and Silver Fish Farm.
- Why Trust Us: With 280+ hours in the game, Daniyal is a trusted source for Minecraft guides!
Best XP Farms In Minecraft
XP farms are an essential part of Minecraft gameplay. They provide a reliable source of experience points. These points are necessary for enchantments, repairing and renaming items, and unlocking game advancements.
- In the early game, you can use makeshift farms to generate resources quickly and XP using simple materials.
- Towards the midgame, more advanced farms can be built to generate a greater amount of XP and valuable resources.
- In the endgame, the player can build highly efficient farms that generate a massive amount of XP and valuable materials.
The need for XP farms increases as the player progresses through the initial hours. The amount of XP required to enchant items and progress through game advancements becomes higher with a higher level. With the right knowledge and strategy, XP farms can be a highly effective tool for players to progress and unlock its amazing features.
Farms For Early Game
Early games in Minecraft can be tough, especially when it comes to leveling up and gaining experience points. However, XP farms can be an excellent way for players to gain valuable XP and level up quickly. In early games, players may not have access to advanced materials or knowledge of complex farming techniques. Therefore, it’s best to focus on simple, low-cost farms that can be built using basic materials.
Typically the XP farms in Minecraft for the early game are makeshift farms. These farms may not be as efficient as more advanced XP farms, but they are still a great way for players to level up and gain valuable resources without investing much time and effort.
Here are some of the Best XP Farms in 1.19.
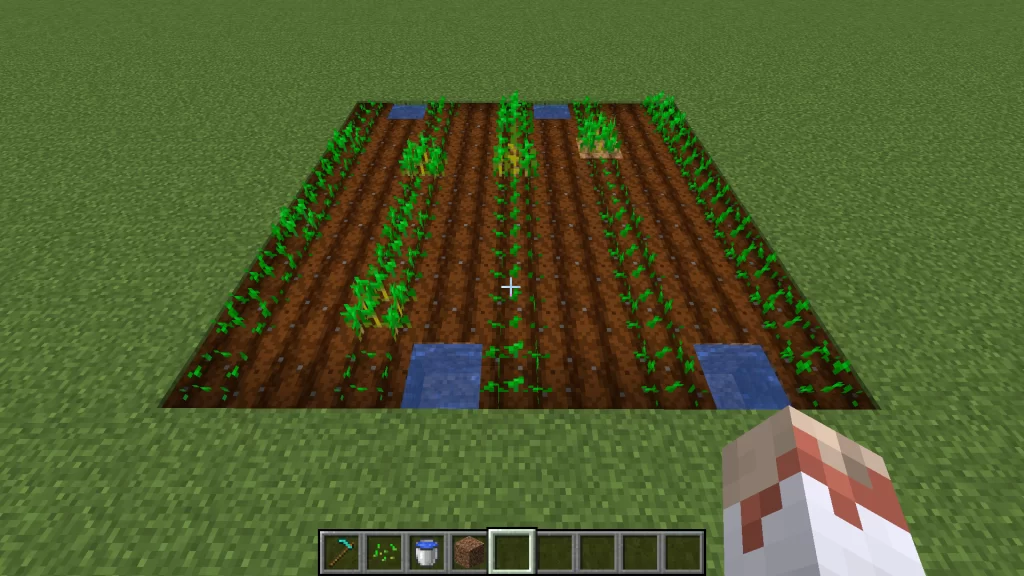
1. Basic Wheat Farm
| Materials | Quantity |
|---|---|
| Dirt blocks | 40 |
| Water bucket | 1 |
| Wheat seeds | 1-2 |
| Wooden hoe | 1 |
Here is how you can build a basic wheat farm:
- Find a suitable location to build your XP farm. Look for a flat area that is close to a water source. You can also place water around the dirt blocks without a water source.
- The farm can be built on any type of block, but it’s best to use dirt blocks since they are the most suitable for growing crops.
- Use a wooden hoe to till the soil by right-clicking the dirt blocks. This will turn the dirt into farmland suitable for growing crops.
- Take the wheat seeds and right-click on the farmland blocks to plant them. You can use one or two wheat seeds per block.
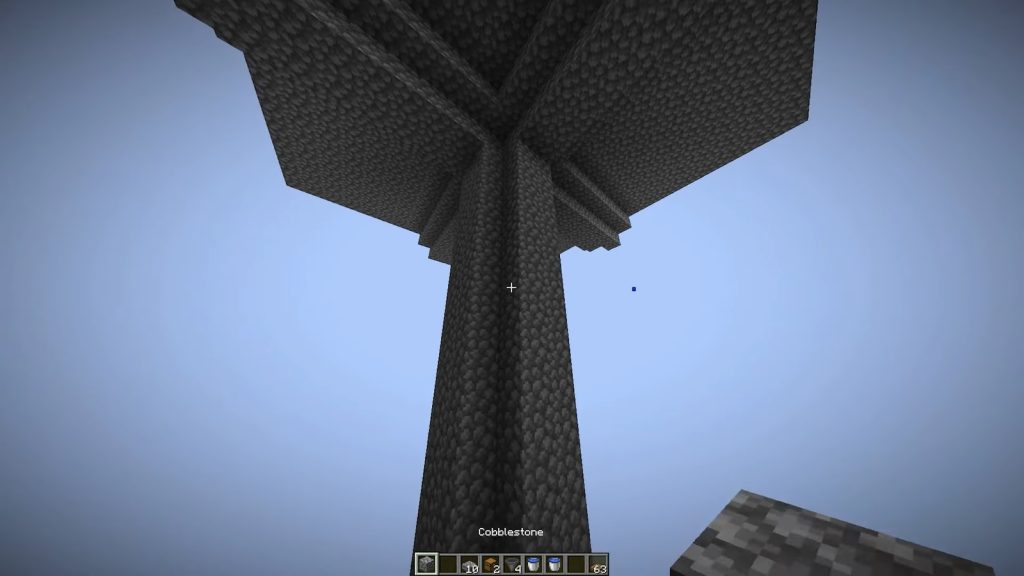
2. Manual Mob Grinder
| Materials | Quantity |
|---|---|
| Building blocks (cobblestone, dirt, or other solid block) | 150+ |
| Hoppers | 2-3 |
| Chests | 1-2 |
| Ladders | 10-20 |
| Water buckets | 2-3 |
| Signs | 3-5 |
| Slabs | 10-20 |
| Torches | 10-20 |
| Fencing or walls (optional) | 20+ |
Here is how you can build a manual mob grinder:
- Look for a dark area where mobs are likely to spawn, such as a cave or a room that is at least two blocks tall and three blocks wide.
- Use building blocks to build a platform that is at least 20 blocks above the ground. This platform should be at least two blocks tall and three blocks wide, and it should have a 2×2 hole in the center.
- Build a funnel around the spawning platform using slabs, blocks, or fencing. This funnel should slope towards a collection point at the bottom of the grinder.
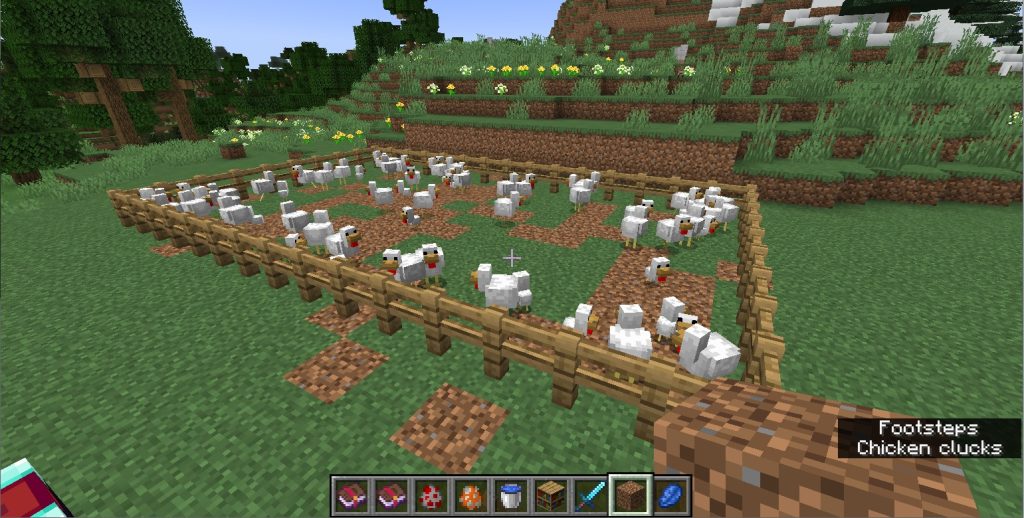
3. Simple Chicken Farm
| Materials | Quantity |
|---|---|
| Fencing | 16+ |
| Gates | 1-2 |
| Torches | 2+ |
| Wheat seeds | 1-2 |
| Chicken eggs | 2-3 |
Here is how you can build a simple chicken farm:
- Look for a flat area that is close to your base or wherever you want the XP farm to be. You can build the farm outdoors or indoors if there is enough space for the chickens to move around.
- Use fencing blocks to build a pen that is at least 2 blocks tall and 3 blocks wide. You can make the pen as big as you want, but ensure it is large enough to hold a few chickens.
- Place a gate on one side of the pen, so you can enter and exit the pen as needed.
- Use chicken eggs to spawn chickens inside the pen. You can also lure chickens into the pen with wheat seeds.
Farms For Mid-Game
As you progress through Minecraft and enter the mid-game, your access to resources and materials expands, allowing you to create more efficient and productive XP farms. At this stage, players can explore the world, discover new structures, and obtain more advanced materials to construct better farms.
Mid-game farms offer a balance between efficiency, resource gains, and XP output. Remember to optimize the designs based on your personal preferences, and always ensure the farms are safe to use. Players can pick any best XP farm 2024 for midgame in the following.
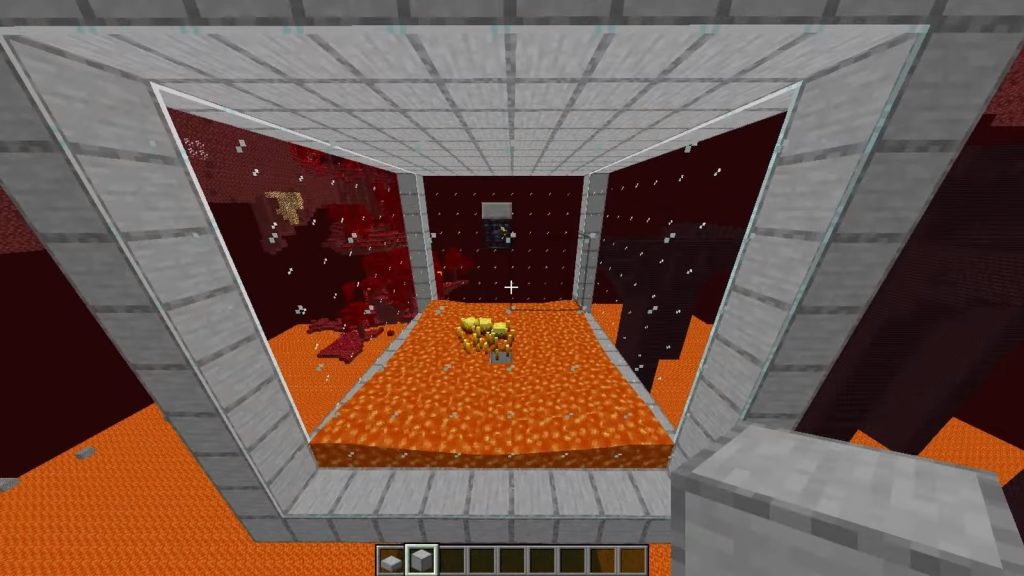
1. Blaze Farm
| MATERIALS | QUANTITY |
|---|---|
| Obsidian and Nether blocks | 90-120 |
| Glass Blocks | 200-300 |
| Hoppers and chest | 20-30 |
| Lava buckets | 3-4 |
| Water buckets | 1-2 |
Here is a step-by-step guide on how you can build a blaze farm:
- Locate a blaze spawner in a Nether Fortress.
- Identify blaze spawners by bright orange flames.
- Build a spawning platform with netherrack blocks, one wall of glass.
- Ensure platform is spacious for mob movement and player maneuvering.
- Create adjacent kill zone with clear line of sight to blazes; protect with walls.
- Implement water and lava system to push blazes toward kill zone.
- Place water source blocks on platform, use signs to prevent flooding.
- Add lava source blocks near kill zone to kill blazes and collect drops.
- Use hoppers to gather Blaze Rods and other drops, such as gunpowder, coal, and bones.
- Design XP farm with magma blocks at bottom of drop chute.
- Use hoppers under magma blocks to collect XP orbs.
- Set up AFK spot near blaze farm to stay within spawn range.
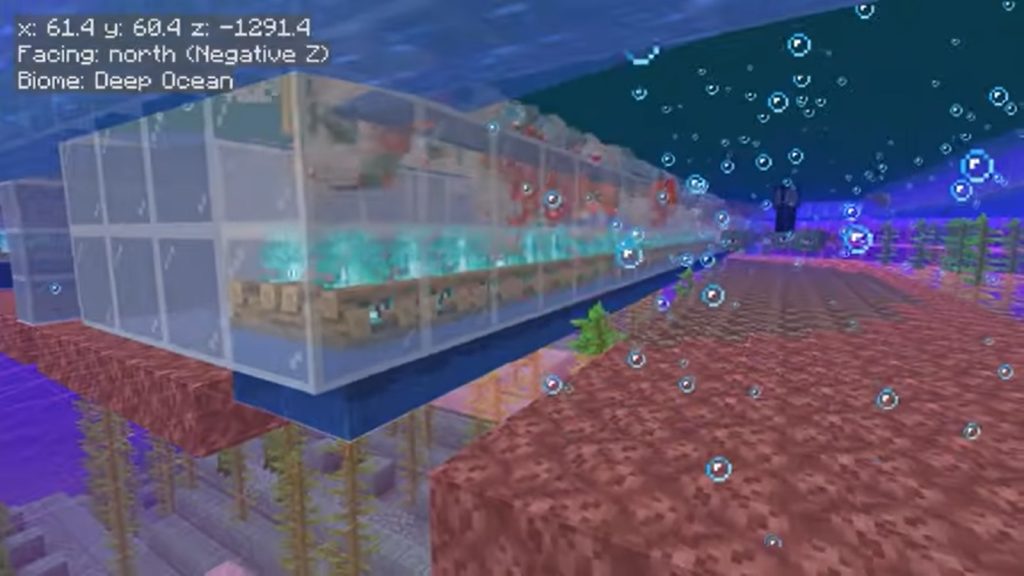
2. Guardian Farm
| MATERIALS | QUANTITY |
|---|---|
| Prismarine blocks | 300-500 |
| Soul sand | 50 |
| Fences | 100 |
| Nether brick slabs | 100 |
| Chests | 4 |
| Hoppers | 8 |
| Signs | 50 |
| Water buckets | 10 |
Here is how you can build a guardian farm for XP:
- Locate Ocean Monument underwater, inhabited by guardians and elder guardians.
- Prepare for combat; eliminate all guardians and elder guardians.
- Use potions of water breathing and night vision for assistance.
- Construct large flat platform above monument with prismarine blocks, 30×30 size with 2-block gap.
- Divide platform into 3-block wide sections using fences; place signs to prevent water flow.
- Fill sections with water to create currents pushing guardians to center.
- Create 3×3 hole in center; place soul sand at bottom surrounded by fences to keep guardians inside.
- Soul sand generates bubble column, transporting guardians upwards.
- Build 3×3 platform at top of column with nether brick slabs; surround with fences to contain guardians.
- Place chests below killing chamber, connect to hoppers to collect drops.
- Stand near killing chamber to attract guardians; watch as they’re transported and dropped onto platform.
- Collect XP orbs and drops as guardians die.
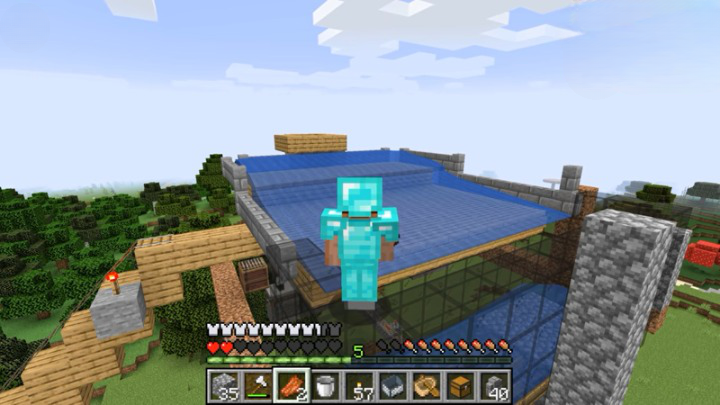
3. Iron Golem Farm
| MATERIALS | QUANTITY |
|---|---|
| Iron blocks | 100-120 |
| Lava Bucket | 10 |
| Glass | 200-300 |
| Fences | 100 |
| Slabs | 100 |
| Chests | 4 |
| Hoppers | 8 |
| Signs | 50 |
| Water buckets | 10 |
| Villagers (trapped) | 3 |
| Zombie (trapped) | 1 |
Here is how you can build an iron golem farm for resources and XP:
- Choose flat area close to base for farm.
- Create two 16×16 spawning platforms with iron blocks, 2-block gap.
- Construct water channels with glass and fences between platforms; place signs to prevent water flow.
- Fill sections with water to push iron golems toward center.
- Create 3×3 hole in center; surround with fences to contain iron golems.
- Iron golems fall into drop chute.
- Build 3×3 platform at chute’s bottom with slabs; surround with fences.
- Use lava with signs to kill iron golems if preferred.
- Place chests below killing chamber; connect to hoppers for drops collection.
- Trap three villagers in nearby enclosure, protect from threats.
- Trap zombie close to villagers but out of reach.
- Zombie presence prompts iron golem spawning.
- Stand near killing chamber to attract iron golems.
- Observe as they’re pushed into water currents, fall into drop chute, and land on killing platform.
- Collect XP orbs and drops from iron golem demise.
Farms For Endgame
Endgame farms focus on maximizing efficiency, resource gains, and XP output. These farms often utilize complex mechanisms and extensive infrastructure to achieve the best results. These farms are usually very difficult to build and require a lot of effort to be built. Once established, players can benefit a lot from these farms in terms of material and experience points. You can find Minecraft best XP farm 2024 for the endgame in the list below.
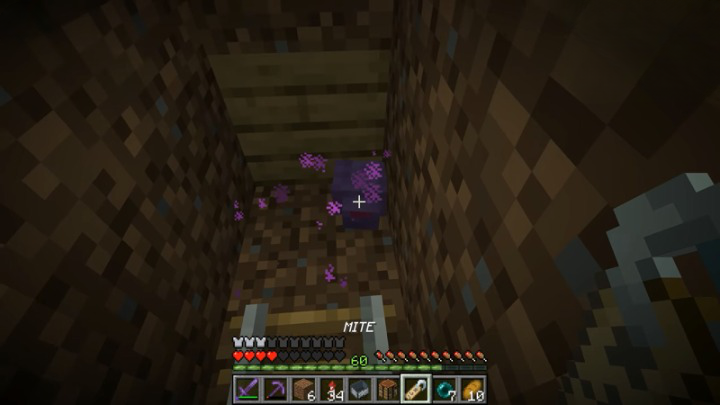
1. Enderman XP Farm
| MATERIALS | QUANTITY |
|---|---|
| End stone | 300-400 |
| Glass | 200-300 |
| Fences | 100 |
| Slabs | 100 |
| Chests | 4 |
| Hoppers | 8 |
| Signs | 50 |
| Ladders | 20 |
| Trapdoors | 20 |
| Endermite (trapped) | 1 |
| Minecart | 1 |
| Rails | 10 |
| Name tag | 1 |
Another Minecraft best xp farm 1.19 is Enderman XP Farm. Here is how you can build an Enderman XP farm for resources and XP:
- Choose End location 128 blocks from main island to avoid Enderman spawns.
- Construct two 16×16 end stone platforms, 2-block gap, 24 blocks from solid blocks.
- Surround with glass wall to prevent Endermen from falling.
- Spawn, trap, and name endermite above gap between platforms.
- Build roof with slabs to limit height, prevent Endermen teleportation.
- Place trapdoors on platform edges to force Endermen into 2-block high space.
- Place chests below killing chamber; connect to hoppers for drops.
- Create enclosed platform above farm with ladders for safety.
- Stand on AFK spot to attract Endermen; watch as they’re lured to endermite, fall into killing chamber, and become trapped.
- Kill Endermen, collect XP and drops.
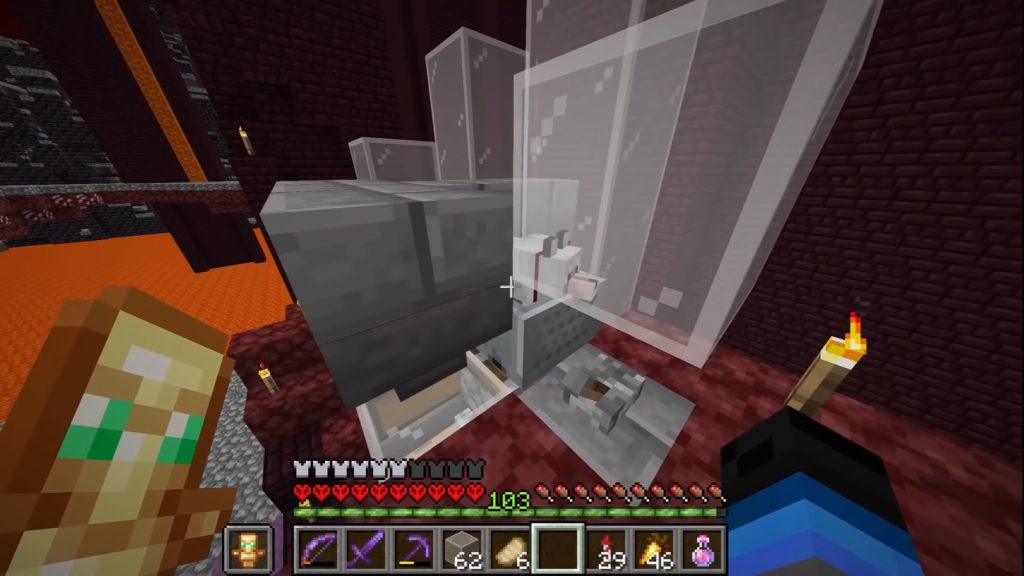
2. Wither Skeleton XP Farm
| MATERIALS | QUANTITY |
|---|---|
| Nether brick | 300-400 |
| Glass | 200-300 |
| Fences | 100 |
| Slabs | 100 |
| Chests | 4 |
| Hoppers | 8 |
| Signs | 50 |
| Ladders | 20 |
| Trapdoors | 20 |
| Wolf (tamed) | 1 |
| Soul sand | 20 |
| Wither roses | 20 |
Here is how you can build a wither skeleton XP farm for resources and XP:
- Choose Nether Fortress location for wither skeleton farm.
- Construct two 16×16 nether brick spawning platforms, 2-block gap, 24 blocks from solid blocks.
- Remove other spawnable spaces for efficiency.
- Surround platforms with glass wall to prevent wither skeletons from falling into hazards.
- Bring tamed wolf from Overworld to Nether, place on raised platform in farm center.
- Place soul sand below platforms, plant wither roses on it.
- Wither skeletons will be attracted to wolf and fall onto wither roses, taking damage.
- Place chests below killing chamber; connect to hoppers for drops collection.
- Create small enclosed platform above farm with ladders for safety.
- Stand on AFK spot to attract wither skeletons; watch as they’re lured to wolf, fall onto roses, and take damage.
- Collect XP orbs and drops as wither skeletons die.
3. Ender Dragon Farm
Note that Ender Dragon Farm is one of the Minecraft best XP farms in 2024 but it is not feasible to build. Mainly as the ender dragon can only be respawned by placing end crystals on the exit portal, and the dragon’s behavior makes it impossible to create a farm similar to other mob farms. Furthermore, the ender dragon can destroy blocks in its path, which would compromise the structural integrity of any farm design.
However, you can still obtain a substantial amount of XP from defeating the ender dragon each time it respawned. Here is a simple guide on how to respawn and defeat the ender dragon for XP:
| MATERIALS | QUANTITY |
|---|---|
| End crystals | 4 |
| Bow | 1 |
| Arrows | 64 |
| Ender pearls | 16 |
| Food | 20 |
| Armor (preferably diamond or netherite) | 1 set |
Here are the steps that you need to follow to build an ender dragon spawn:
Respawning The Ender Dragon
- Travel to the End, where you previously defeated the ender dragon.
- Place one end crystal on each side of the exit portal, aligning them with the portal’s bedrock frame.
Defeat The Ender Dragon
- As the ender dragon respawns, it will regenerate the obsidian pillars and end crystals that heal it.
- Destroy the end crystals on top of the obsidian pillars by shooting them with your bow and arrow. Ender pearls can be used to reach the top of the pillars, if necessary, quickly.
- Attack the ender dragon while avoiding its breath attacks and projectiles.
- Collect the XP orbs dropped by the ender dragon upon its defeat.
You can obtain many experience points each time you defeat the ender dragon. Although it is not an automated farm, it is still an effective way to gather XP for leveling up and enchanting.
My Thoughts On The Best XP Farm For Beginners
Personally, I think Manual Mob Grinder is one of the best early-game farms for XP mining. Manual Mob Grinders are easy to build, don’t require a lot of materials, and have a high yield compared to other early game farms mentioned in this article. You can also get other useful loot like bones, arrows, and enchanted armor.

You can increase Manual Mob Grinders’ drop rate by simply building the farm 200 blocks above the ground and lighting up the farm roof to prevent mobs from spawning on the roof. You can also build multiple mob spawning sections for a higher yield
In conclusion, Minecraft offers a variety of XP farms to cater to different stages, from the early game to the end game. These farms not only help players level up more efficiently but also provide valuable resources to aid in their in-game progression. As you advance, your access to resources and materials will expand, enabling you to create more advanced and productive XP farms.
By building and optimizing these farms based on your current progression, you can become a true, experienced farming professional and dominate your world in Minecraft. So, get ready to explore, discover, and build experience point farms, as there is no limit to your creativity in the world of Minecraft!
Up Next:
Thanks! Do share your feedback with us. ⚡
How can we make this post better? Your help would be appreciated. ✍