Unlike previous FromSoft games, where you could summon real players to fight enemies, Elden Ring introduces Spirit Ashes, which are summonable NPCs who fight alongside you during combat. When you find these Ashes, you can also upgrade them later to make them more reliable and tanky. However, upgrading Spirit Ashes in Elden Ring first requires the progression of certain NPC questlines and finding the resources needed to upgrade the Spirit Ash itself.
- Spirit Ashes are found in chests and dropped by minibosses in dungeons and caves.
- You can summon Spirit Ashes during combat in PvE when you see a Rebirth Monument statue on your screen.
- Start upgrading Spirit Ashes after completing Roderika’s questline in Limgrave.
- Upgrade them with Roderika at Roundtable Hold using Gloveworts, which are special plants found in the Elden Ring.
- Gloveworts come in various types, some infinitely farmable and some limited.
- For the final upgrades, you’ll need rarer items.
- Spirit Ashes can draw enemy aggro, allowing you to heal and strategize.
- There are 64 Spirit Ashes in total, 42 common Ashes, and 22 Special Ashes in the Elden Ring.
- Why Trust Us: Huzaifa has spent over 500 hours in Elden Ring, making his guides trustworthy!
How To Start Upgrading Spirit Ashes
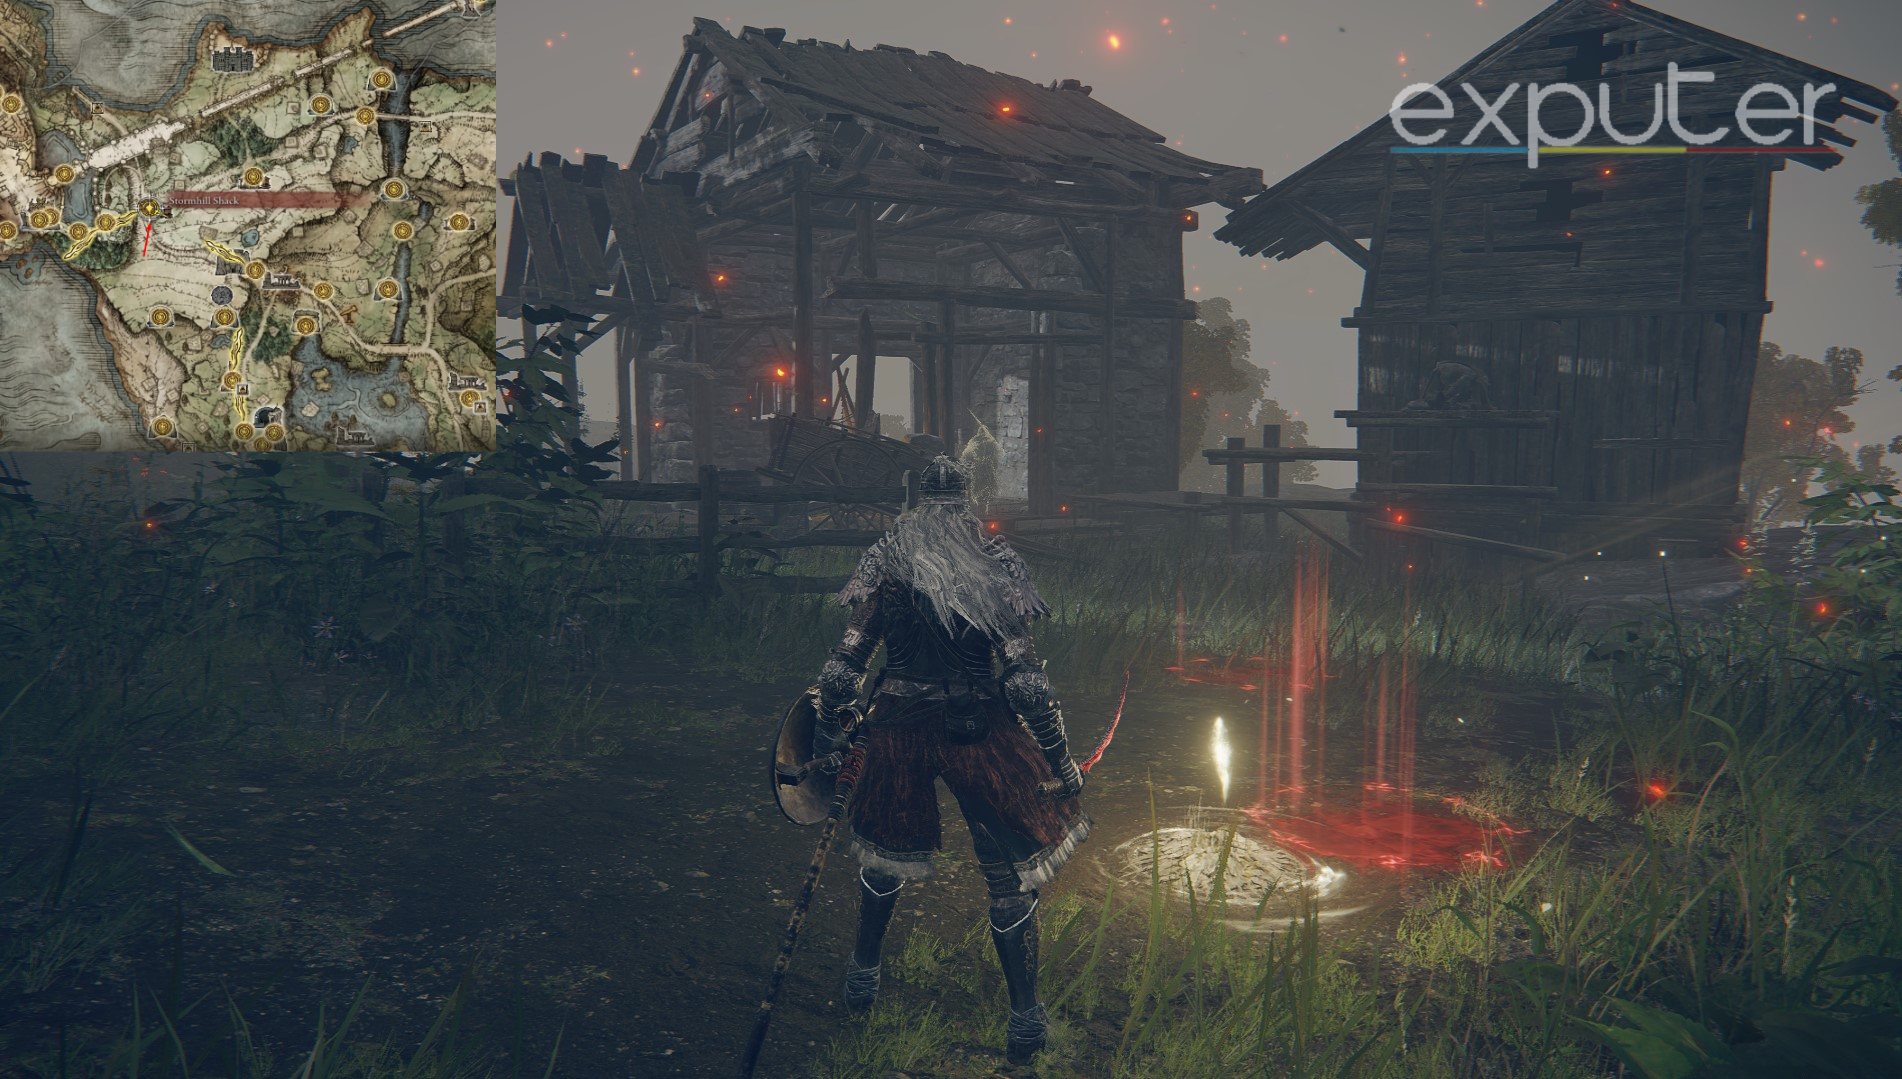
To upgrade Spirit Ashes in Elden Ring, you first need to meet Roderika, who’s found relatively early into the game. You can find her near the Gatefront Site of Grace in Stormhill towards Limgrave’s northeast. This will likely be your third Site of Grace, so you can meet Melina first to get the Spirit Steed Whistle. This whistle allows you to summon your mount, Torrent, with whom you can get to Roderika in a much shorter time.

Where To Find Roderika
To find Roderika, follow the steps I’ve listed below:
- Head inside the massive gate leading to Stormveil Castle.
- Keep your guard up as there are going to be several archers trying to shoot you off your house, as well as a giant chasing you down.
- Ignore all these hostiles and run along the trail laid out in front.
- At one point, you’ll notice the environment suddenly become windy, indicating that you’ve reached Stormhill.
- Stay on the trail, and to your right, you’ll see the Stormhill Shack Site of Grace, where you’ll also find Roderika sitting inside the shack.
Get Roderika To The Roundtable Hold
When you first meet Roderika, she will act weakened and depressed. Exhausting her dialogue will award you with the Sitting Sideways gesture and your first Ashes, the Spirit Jellyfish.
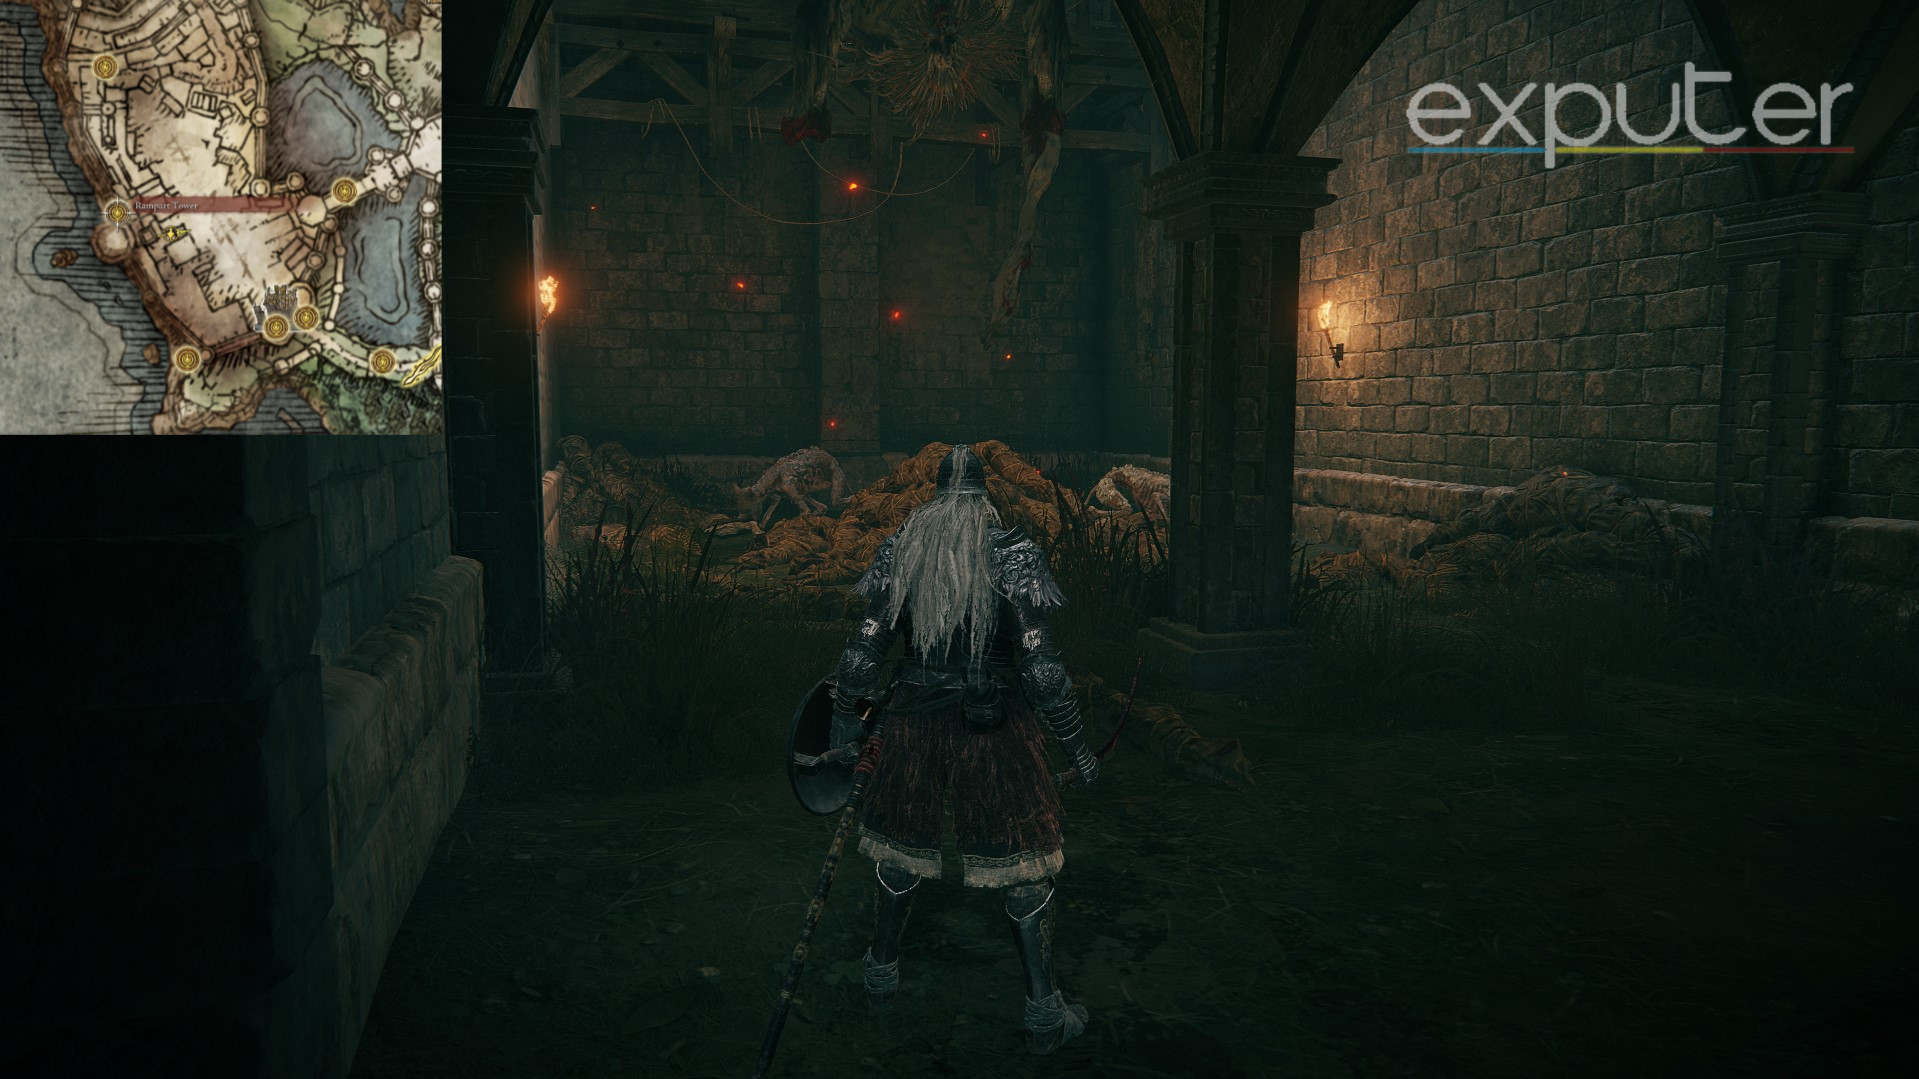
She will move to the Roundtable Hold after you offer her Chrystalid’s Memento found inside Stormveil Castle. The memento will be lying atop the pile of corpses inside, surrounded by a few dogs.
Another way I found to get her to the Roundtable Hold is by resting at any Site of Grace in Liurnia of the Lakes. If you defeat Godrick the Grafted in Stormveil Castle and get to the Lake-Facing Cliffs Site of Grace early, Roderika will automatically move to the Roundtable Hold.
Making Roderika A Spirit Tuner
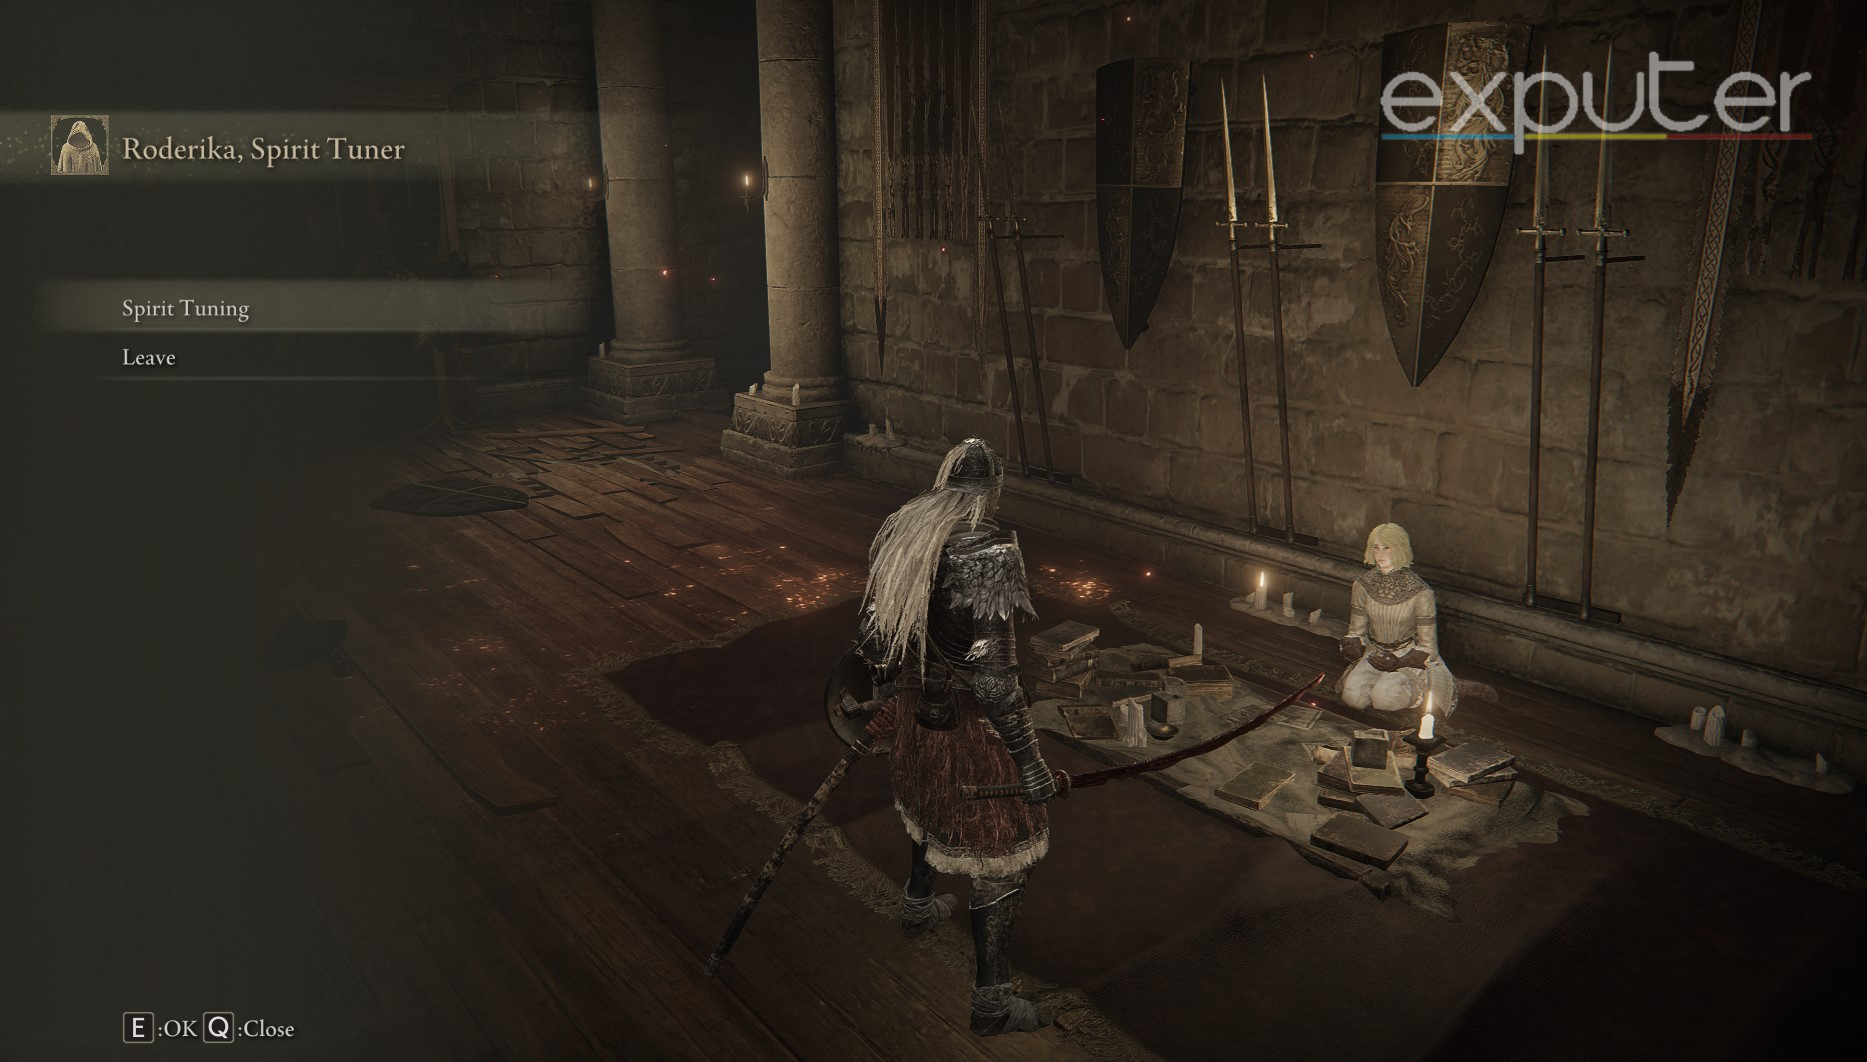
After reaching the Roundtable Hold and following the steps, find Roderika by the fireplace in the table room. Speak to her to learn if she wants to work with Blacksmith Hewg due to his personality.
Discuss Roderika’s partnership with Hewg. Keep alternating between their dialogues. Eventually, you’ll find Roderika as a Spirit Tuner opposite Hewg at the Roundtable. She can now enhance your Spirit Ashes in Elden Ring.
Items Needed To Upgrade Spirit Ashes
Based on my experience, you only require 4 types of items to upgrade your Spirit Ashes in Elden Ring, which I have listed below:
- Grave Glovewort to upgrade Common Ashes
- Ghost Glovewort to upgrade Legendary Spirit Ashes
- Great Grave Glovewort to upgrade Common Ashes to + 10
- Great Ghost Glovewort to upgrade Legendary Spirit Ashes to + 10
Grave and Ghost Gloveworts can be either found naturally in specific environments or bought after giving the Glovewort Picker’s Bell-Bearings to the Twin Maiden Husks in the Roundtable Hold. On the other hand, their Great Glovewort counterparts are extremely rare with a limited supply, and can only be found in specific areas.

Grave and Ghost Gloveworts can’t be farmed from enemies; you’ll find them in specific game areas, mainly Catacombs and Hero’s Graves, sometimes in bulk.
To buy Gloveworts, gather 3 Bell-Bearings for each. There are 9 rarities for both Gloveworts, and one Bell-Bearing unlocks 3 new rarities.
Grave Glovewort Bell-Bearings
The first Grave Glovewort Bell-Bearing is in The Altus Plateau. Start from the Seethewater River Site of Grace in western Altus. From there, I would recommend following the mountain wall, which will lead to a tiny creek that is the Wyndham Catacombs. The boss at the end, the Erdtree Burial Watchdog, will drop the Glovewort Picker’s Bell-Bearing [1].

The second Grave Glovewort Bell-Bearing is near the start of the Mountaintops of the Giants. From the large chain that you see at the beginning of the area, take a natural right rather than traversing the chain. On the side of the cliff are the Giants Mountaintops Catacombs.
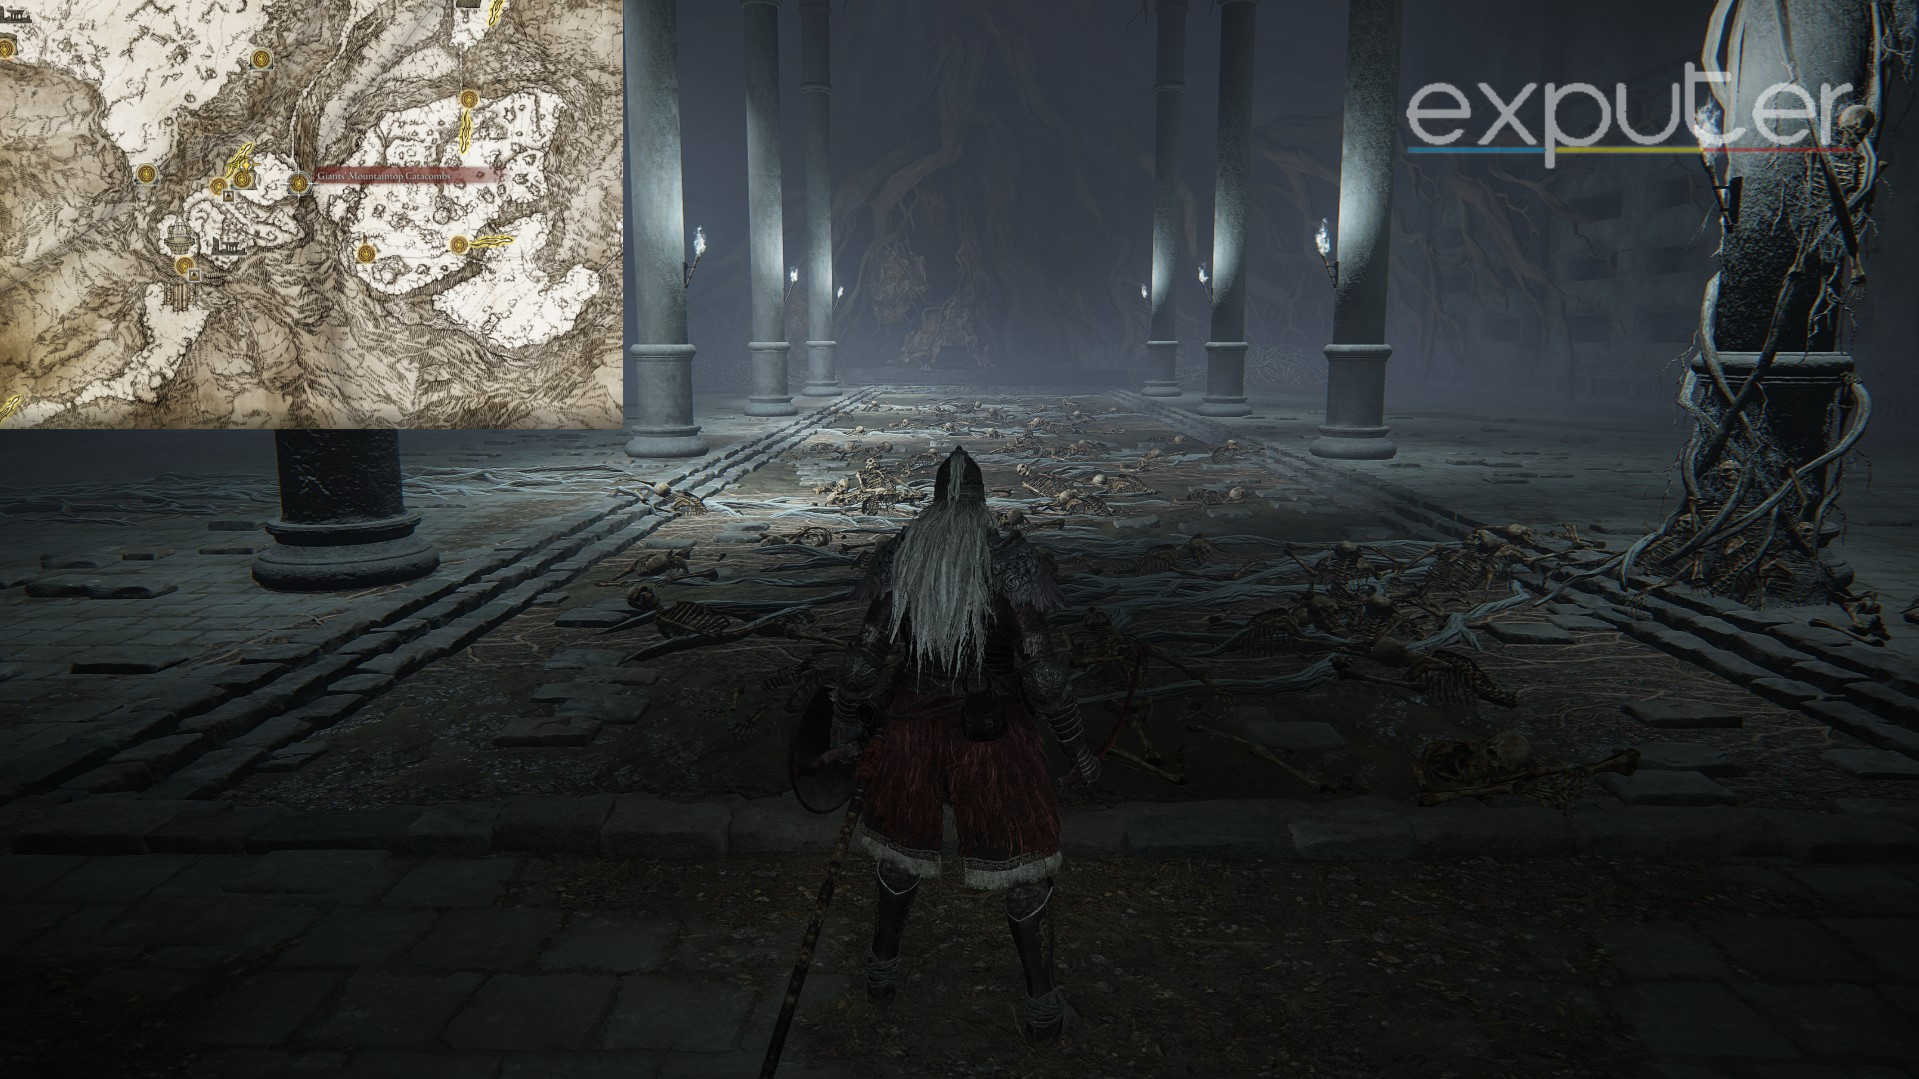
After defeating the Ulcerated Tree Spirit boss, you get the Glovewort Picker’s Bell-Bearing [2] to buy Grave Gloveworts [4], [5], and [6] from the Twin Maiden Husks.
To obtain the final Grave Glovewort Bell-Bearing, head to Crumbling Farum Azula’s church northwest of the Crumbling Beast Grave Depths Site of Grace. Take the outside elevator, avoid wormfaces, and reach a shrine by the pond’s edge, where you’ll find the Glovewort Picker’s Bell-Bearing [3]. This allows you to purchase Grave Gloveworts [7], [8], and [9] from the Twin Maiden Husks.

Ghost Glovewort Bell-Bearings
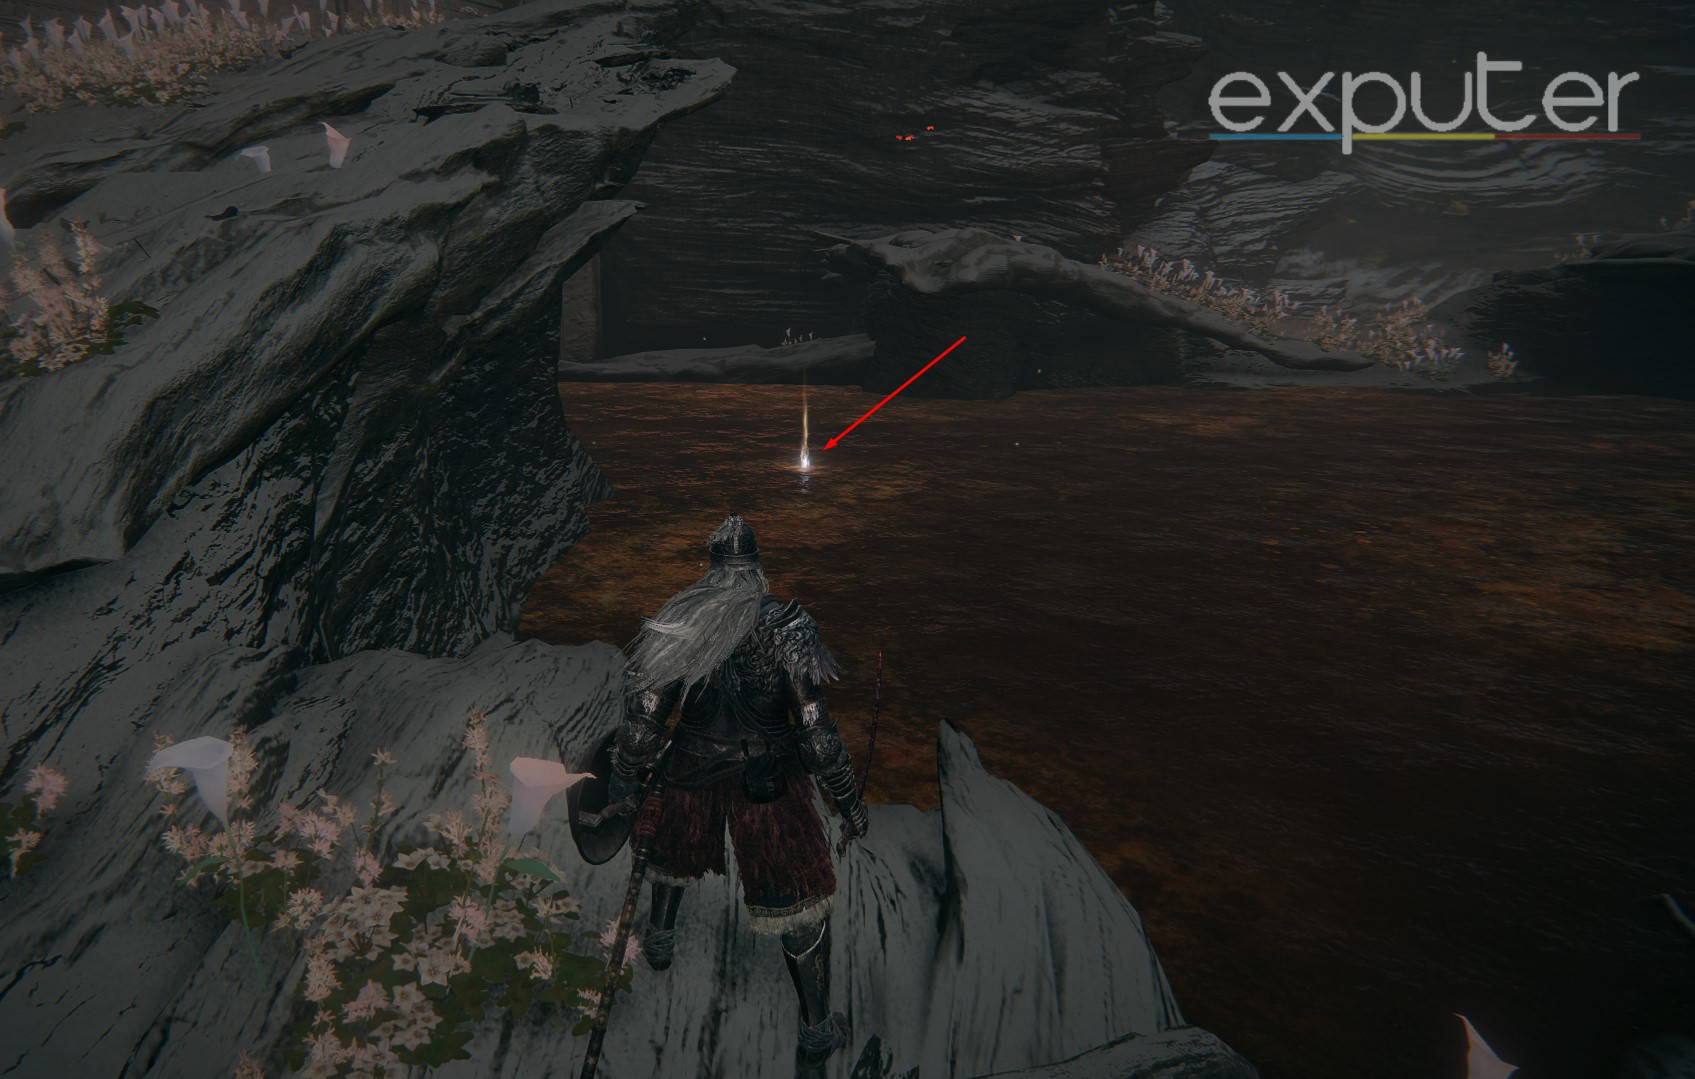
To get the first Ghost Glovewort Bell-Bearing, you must travel to the first Site of Grace in Nokron, The Eternal City. From there, head slightly north, and you’ll find a corpse that has the Ghost Glovewort Picker’s Bell-Bearing [1]. This will let you purchase the Ghost Gloveworts [1], [2], and [3] once offered to the Twin Maiden Husks.
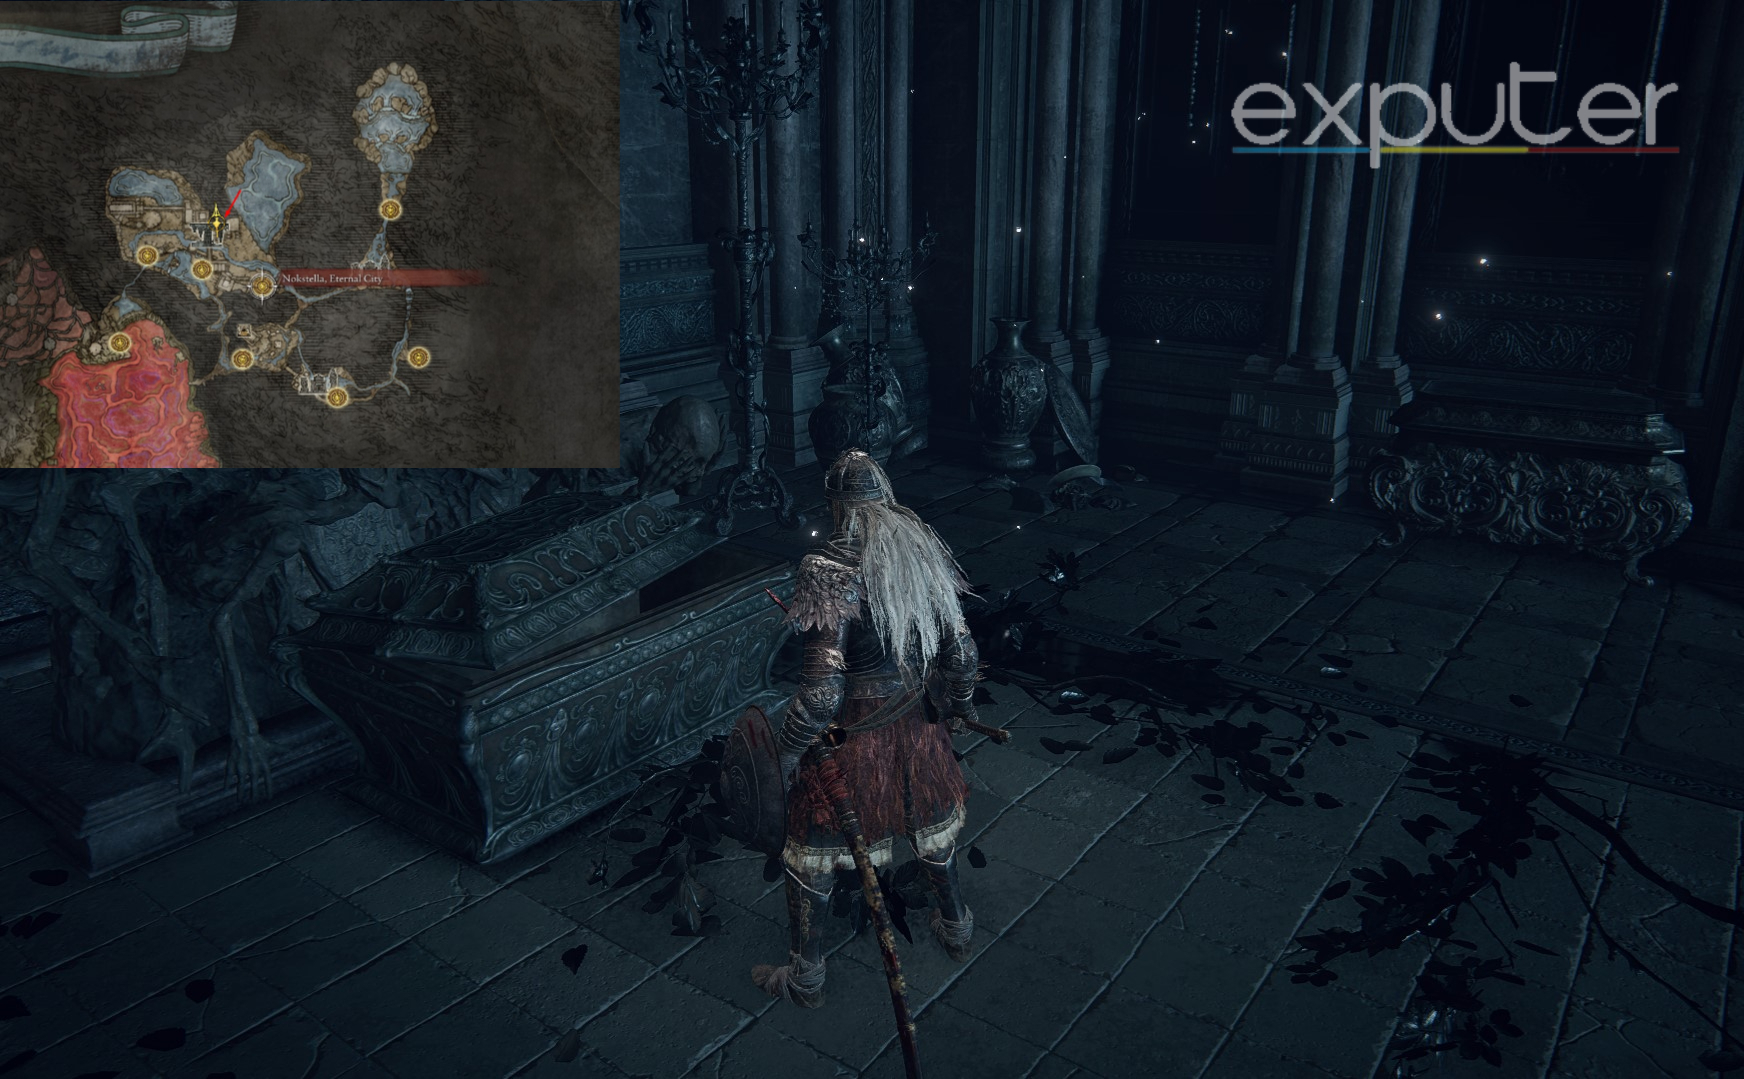
The next Ghost Glovewort Bell-Bearing requires you to go to Elden Ring’s other underground city, Nokstella. From the area’s starting Site of Grace, move straight ahead and climb the first set of stairs in front of you. Now take a sharp left and enter a room, and you’ll come across a black chest at the corner inside, which contains the Ghost Glovewort Picker’s Bell-Bearing [2].
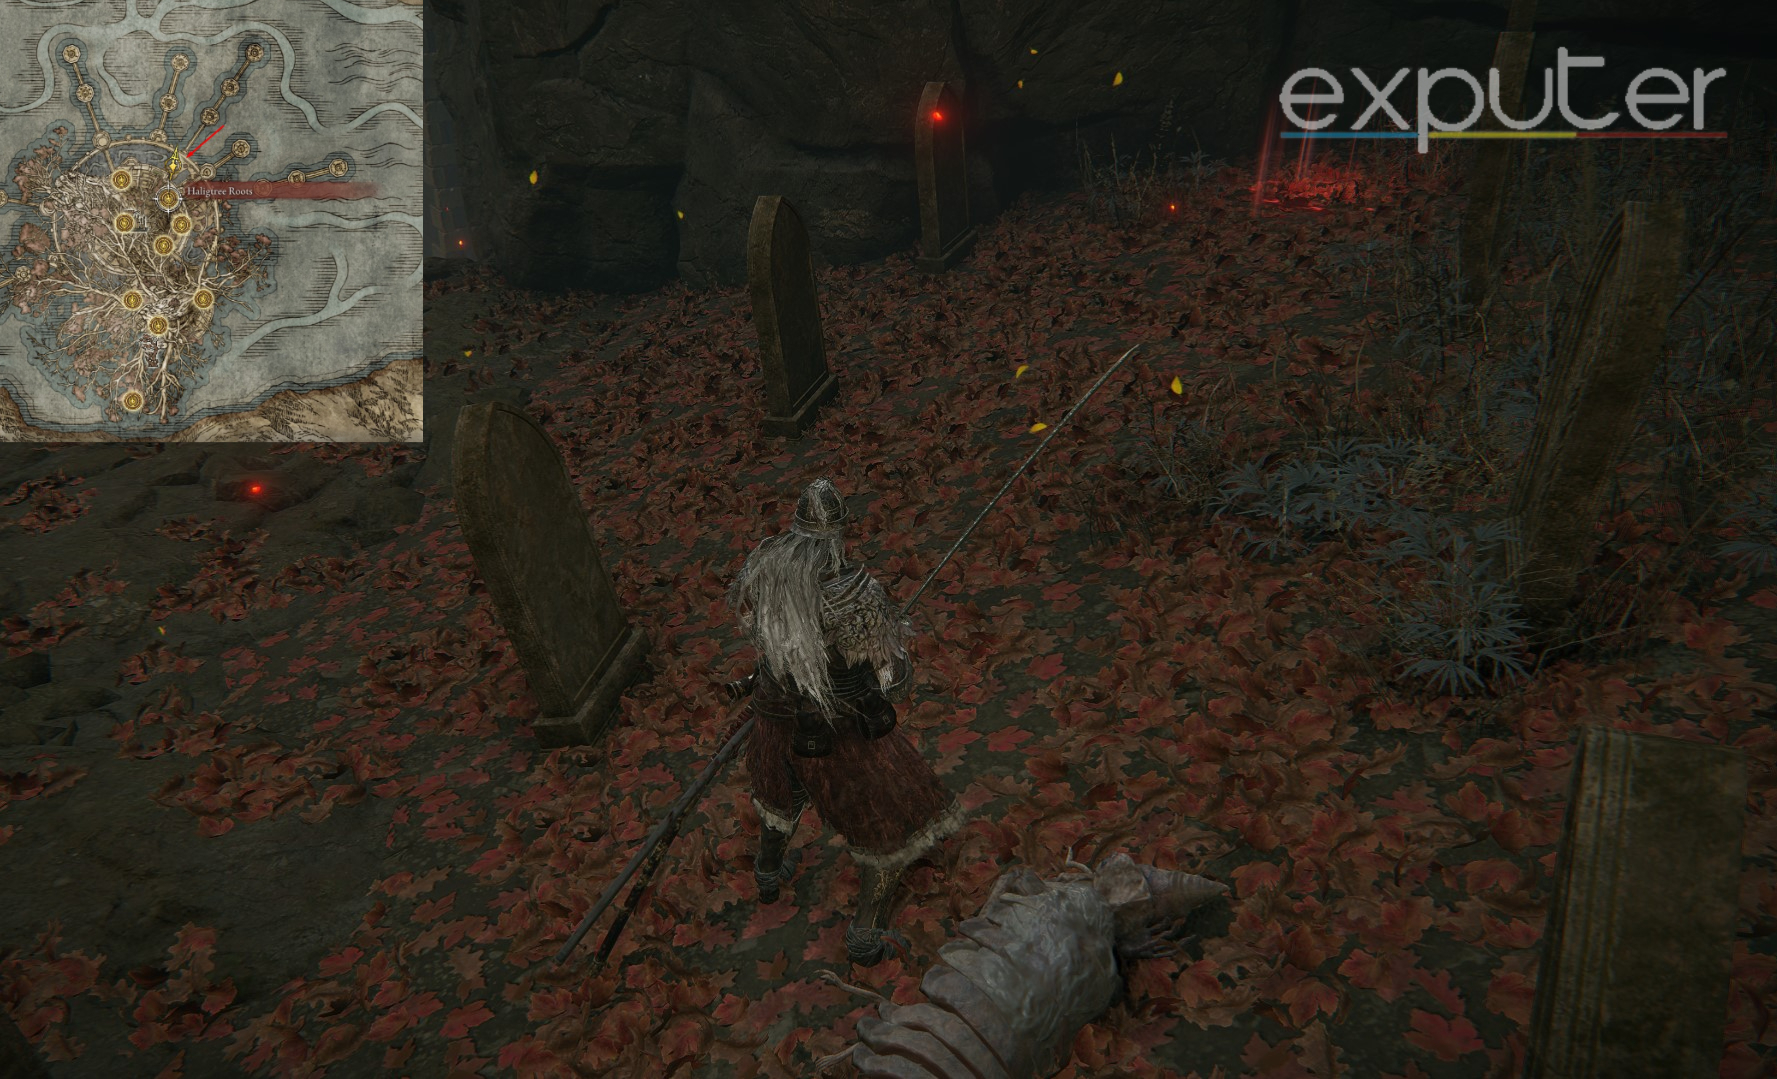
The Ghost Glovewort Picker’s Bell-Bearing [3] can be found in the Haligtree. Start from the Haligtree Roots Site of Grace outside Malenia‘s arena and take the elevator behind you. After that, climb the staircase in front and head outside the building into the open.
Now turn left and go straight down the path, sticking close to the leftmost edge of it. Eventually, you’ll see a few gravestones close to each other at the bottom where the final Ghost Glovewort Bell-Bearing resides which lets you purchase the Ghost Gloveworts [7], [8], and [9].
Great Grave Glovewort Locations
As I mentioned, Great Grave Gloveworts are needed to upgrade your common Ashes to +10. There are 6 of these Gloveworts scattered throughout Elden Ring’s world and mainly found in the game’s later half, including the Haligree, Farum Azula, and the Mountaintops of the Giants.
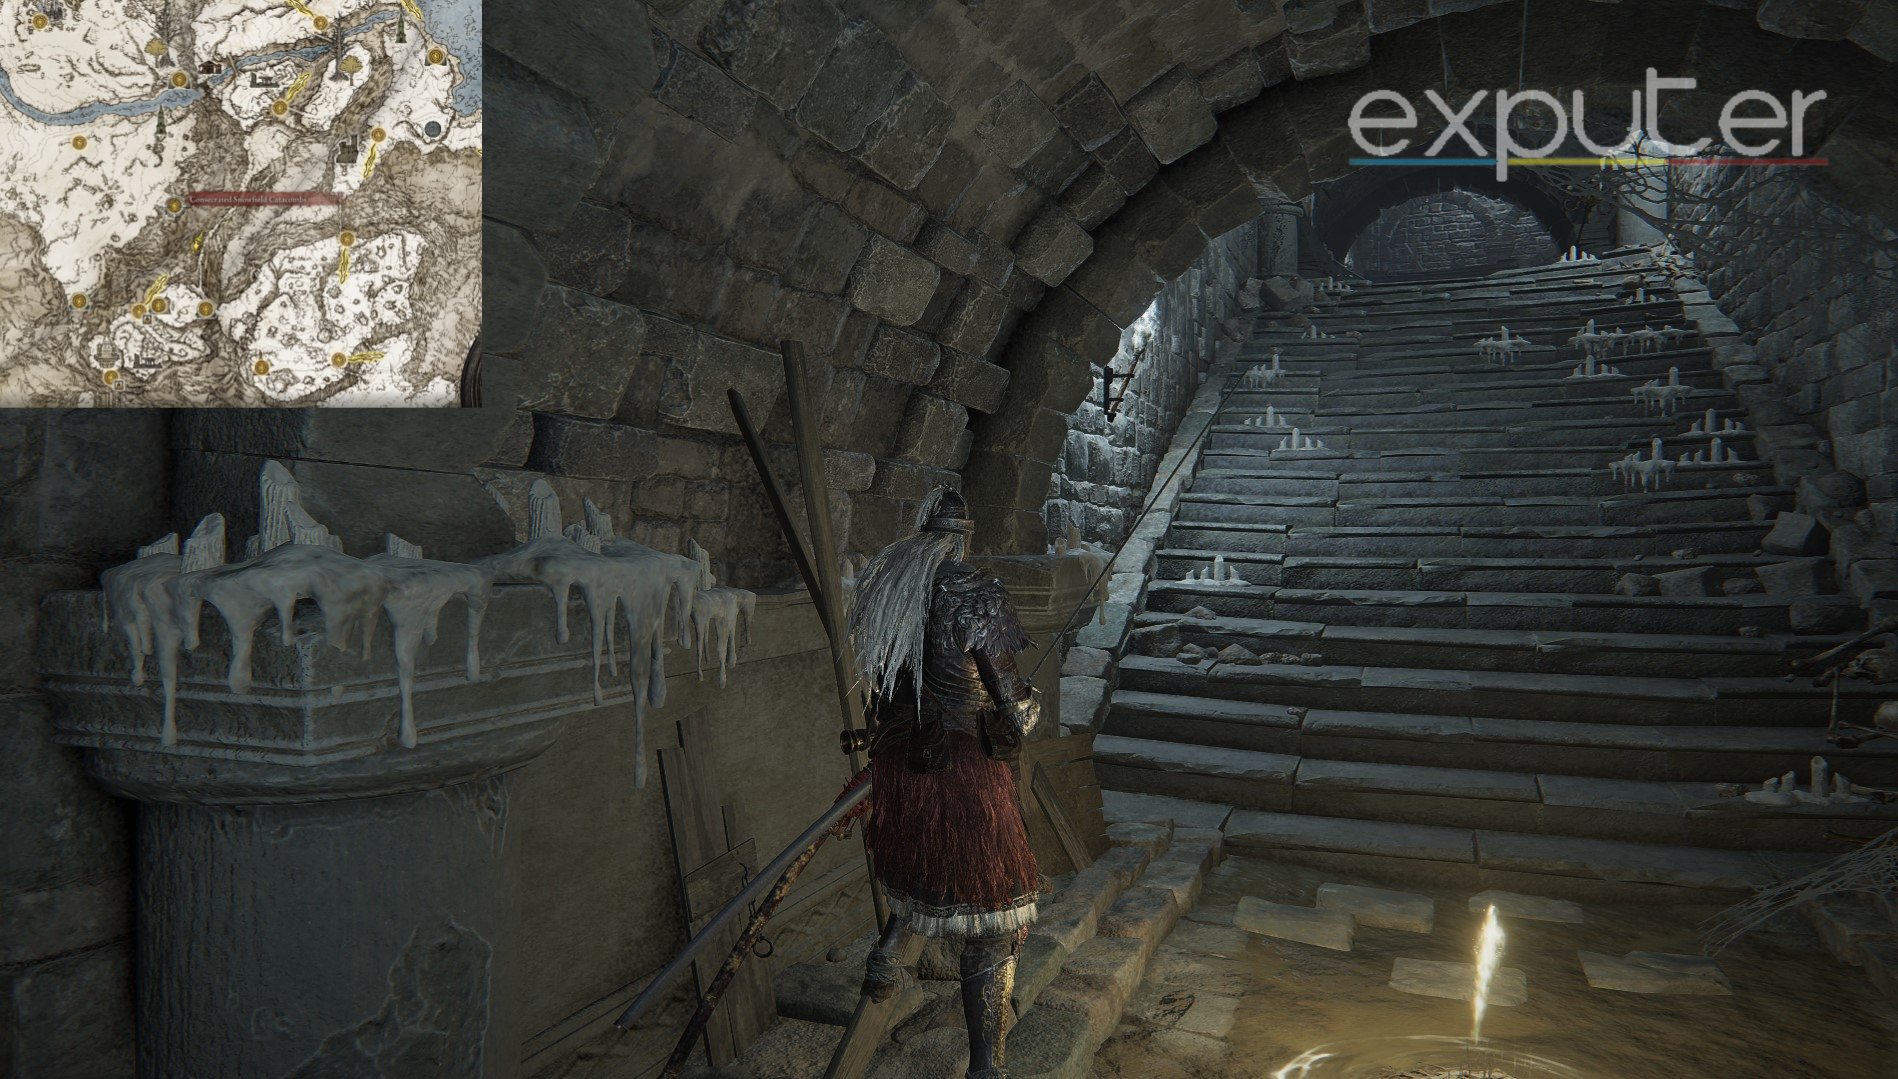
Consecrated Snowfield Catacombs – Mountaintops Of The Giants
The Consecrated Snowfields is the only location in Elden Ring that has 2 Great Grave Gloveworts instead of 1, so this is the first place I think you should go. The major part here is getting through the catacombs to the boss room where the Gloveworts are stored.
Next, follow the steps I’ve listed below:
- From the starting Site of Grace, go up the stairs and turn left to reach the Stake of Marika.
- Follow the train right to a room with an ice-breathing Stone Golem Pillar.
- Hit the pillar on the right side to stop its ice breath.
- In the next room, take the left secret path after defeating the Cleanrot Knight.
- Follow the stairs to the second floor.
- The same pillar will block your path with an ice beam.
- Wait for it to stop, attack it, and ride it up to the third floor. There, you’ll find the lever to open the boss room.
The Great Grave Gloveworts are dropped by the boss in these catacombs, the Putrid Grave Warden Duelist. You’ll likely be very overpowered by this boss already, and its simple moveset means it’ll be an easy encounter.
Giant Conquering Hero’s Grave – Mountaintops Of The Giants
In the Hero’s Grave area, no boss fight is required to obtain the Great Grave Glovewort. Descend the staircases until you encounter an Erdtree Burial Watchdog shrouded in shadow. To defeat it, I found out that you can guide the Watchdog into the light circle behind it, dispelling the shadow barrier, and then attack it.
- After that, move upwards and take the first left into the narrow hallway.
- At the end of the hallway, you’ll see a room with a rotating, fire-breathing pillar.
- Take a left after entering this room and maneuver your way through the pillar to avoid getting burnt.
- Now, it’s a straight run to the elevator that takes you down to the second last floor of the grave.
- Once you’ve completely descended, step on the pressure plate again to send it back up, but get off immediately once you trigger it.
- This is because you’ll find another secret elevator just below the original one that takes you further down.
Next, pull the lever to your right and immediately get on the secret elevator to descend to the lowest floor of the grave. From there, run through the pathway, take the ladder to reach a small room, and you’ll find the Glovewort illuminated at the corner of the room behind the Fire Prelate guarding it.
Drainage Channel – Haligree
This is perhaps the most challenging route to get a Great Grave Glovewort since an Ulcerated Tree Spirit guards it. From the Drainage Channel Site of Grace, head back and climb the ladder up at the end of the hallway. Now, go outside and continue to move upwards until you see a long tree branch on your left.
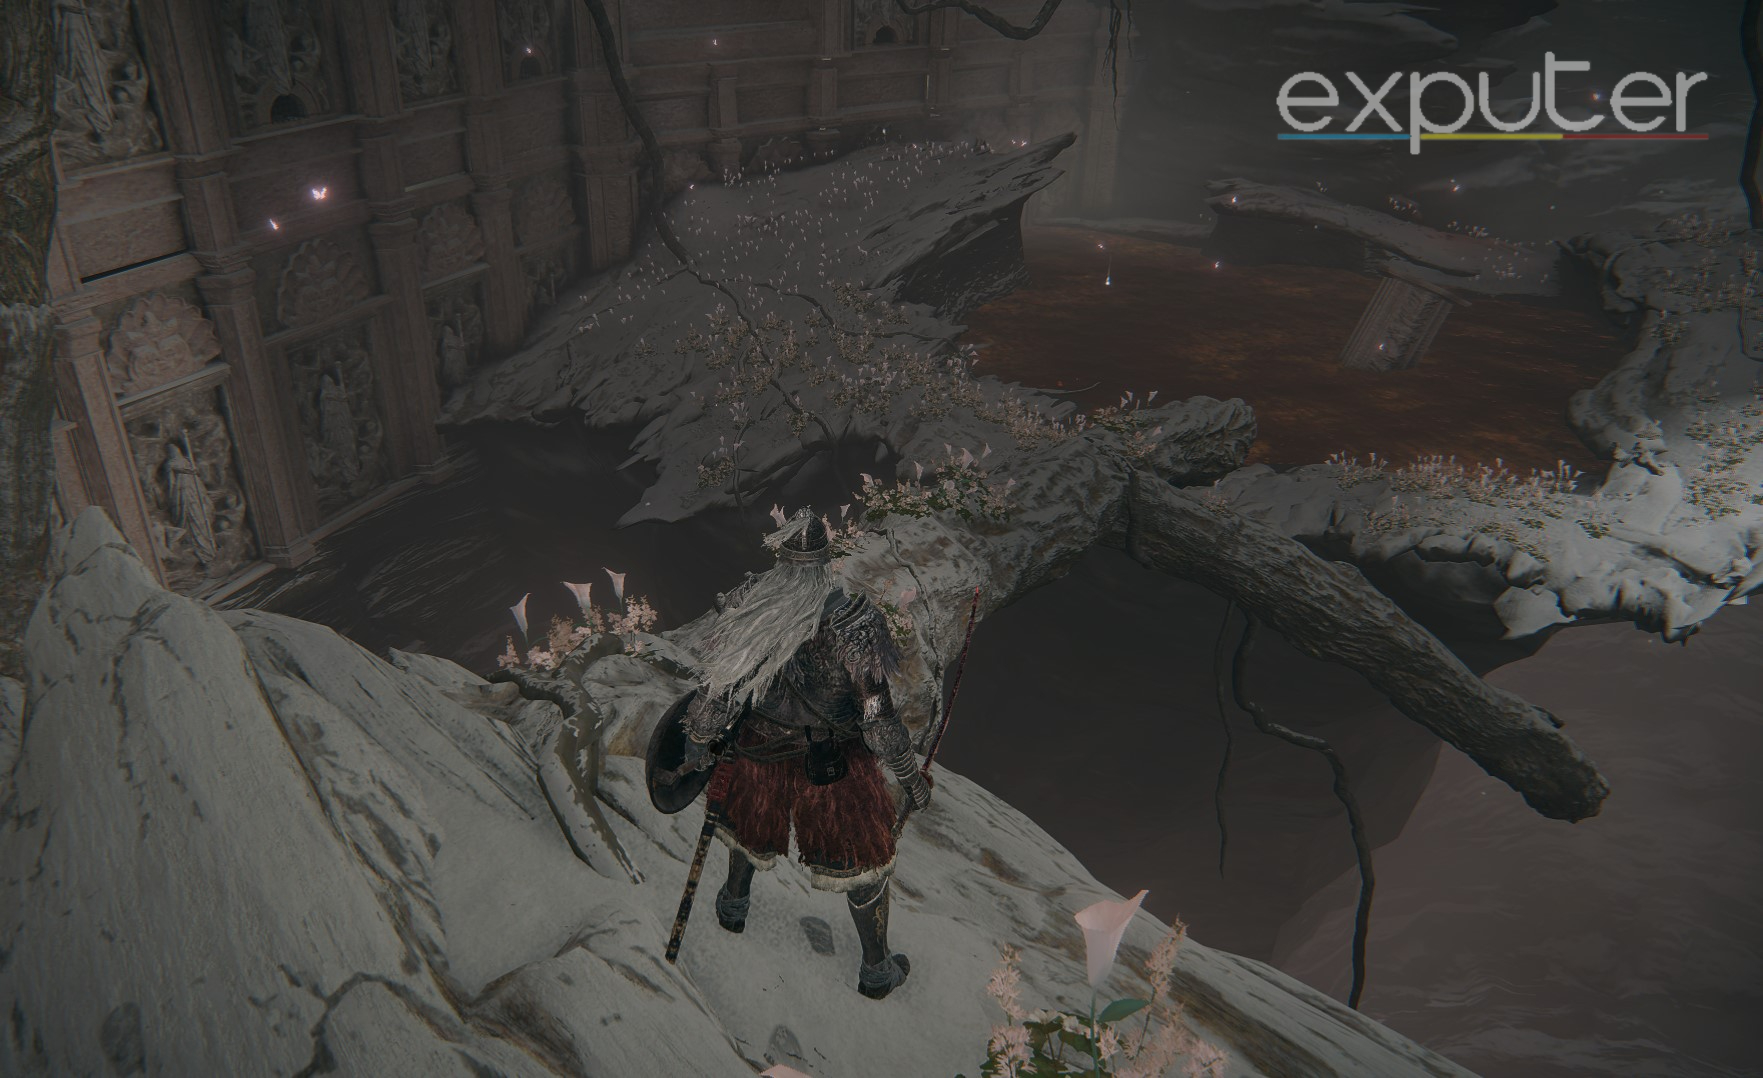
You can climb onto this branch and proceed straight ahead to the Rot swamp that has the Great Grave Glovewort. The best approach I would advise here is to rush to the Glovewort and run back as soon as you pick it up because fighting an Ulcerated Tree Spirit while being inflicted with Scarlet Rot is going to be extremely tough.
Crumbling Beast Grave Depths – Farum Azula
Out of the 2 locations in Crumbling Farum Azula to get the Great Grave Glovewort, this is the easier route. From this Site of Grace, Make your way outside the room by running left to the windows and then jump onto the roof to your right.

Now move to the roof’s peak and, from there, jump to the room slightly above you. Finally, sprint to the extreme back end of the room, and you’ll get the Great Grave Glovewort.
Dragon Temple – Farum Azula
For the last Great Grave Glovewort, you’ll start from the Dragon Temple Site of Grace and jump down from the edge of the platform onto the ascending staircase. After that, head straight and take the second right. Now follow the hallway to the end, and from there, jump to the floating debris on your left.

Continue following the debris and climb the ladder at the end. At the top, it’s just a straight sprint to the Glovewort, which will be at the end of the room you see in front of you.

Great Ghost Glovewort Locations
There are a total of 4 Great Ghost Gloveworts in Elden Ring, which are only found in underground locations. And since these Gloveworts needed to upgrade your rarer Spirit Ashes to their maximum level, they’re also primarily unlocked in the late-game phase.
Nokstella, The Eternal City – Ainsel River
The first Great Ghost Glovewort is found relatively close to the Ghost Glovewort Picker’s Bell-Bearing [2]. From Nokstella’s starting Site of Grace, head straight and the castle at the top by climbing all the stairs. You will encounter a few enemies as you go up, but you can simply run past them.
Once you’re in the castle, continue running straight to the outside and then take the first right. Now, keep sprinting and take a sharp right again so you can avoid the giant Mimic ball approaching from the front. Finally, you can open the door on your left and loot the chest inside to get your first Great Ghost Glovewort.
Night’s Sacred Grounds – Nokron, The Eternal City
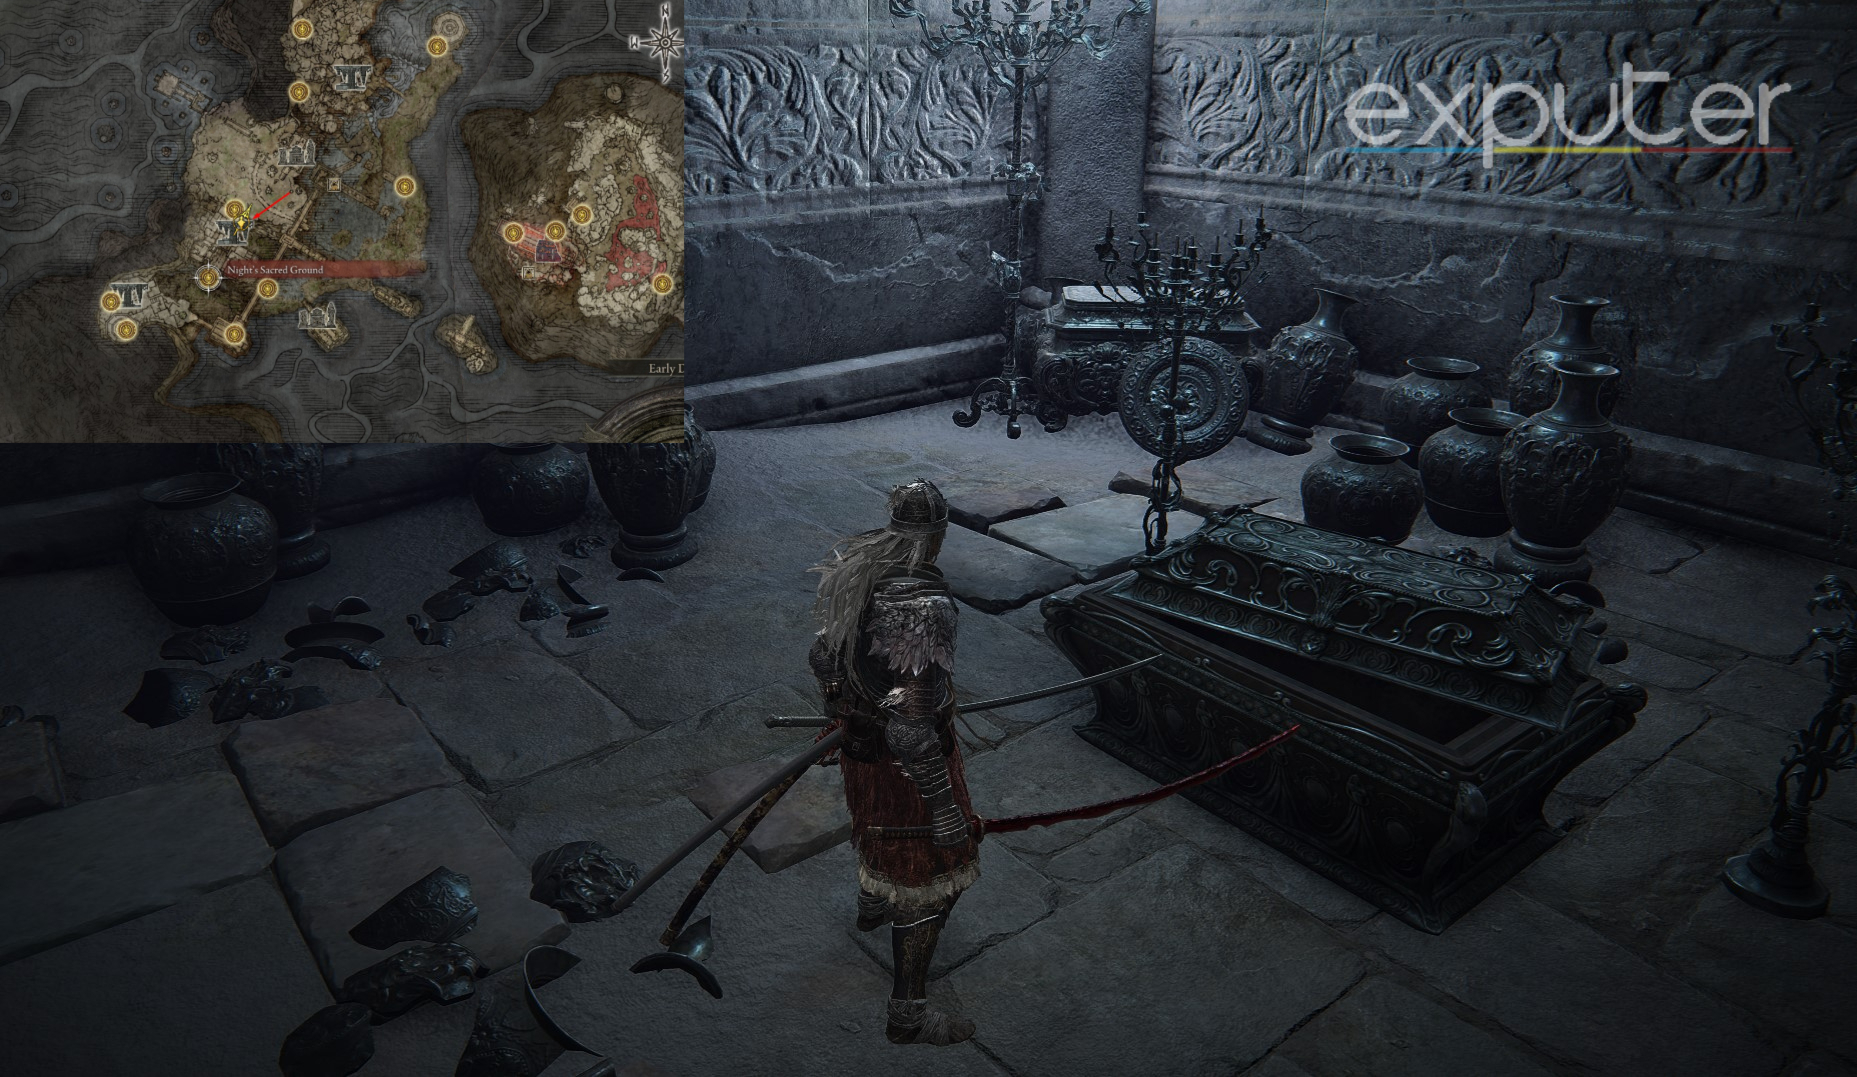
You can find the next Great Ghost Glovewort in Nokron’s lowest plane, the Night’s Sacred Grounds. After taking this Site of Grace, all you have to do is head straight down the road and climb the stairs at the end. From there, enter the small room in front, and the black chest inside will have the Glovewort. In addition to this Glovewort, you’ll also get the Fingerslayer Blade, a crucial item needed to progress through Ranni The Witch’s questline.
Dynasty Mausoleum Midpoint – Mohgwyn
The quickest way to get the third Great Ghost Glovewort is from the Mausoleum Midpoint Site of Grace at Mohgwyn‘s west. From here, head inside the dark tomb and fall to the lower platform on your left. In my experience, the Glovewort will stand out due to its bright illumination, so grab it as quickly as you can and head back outside.

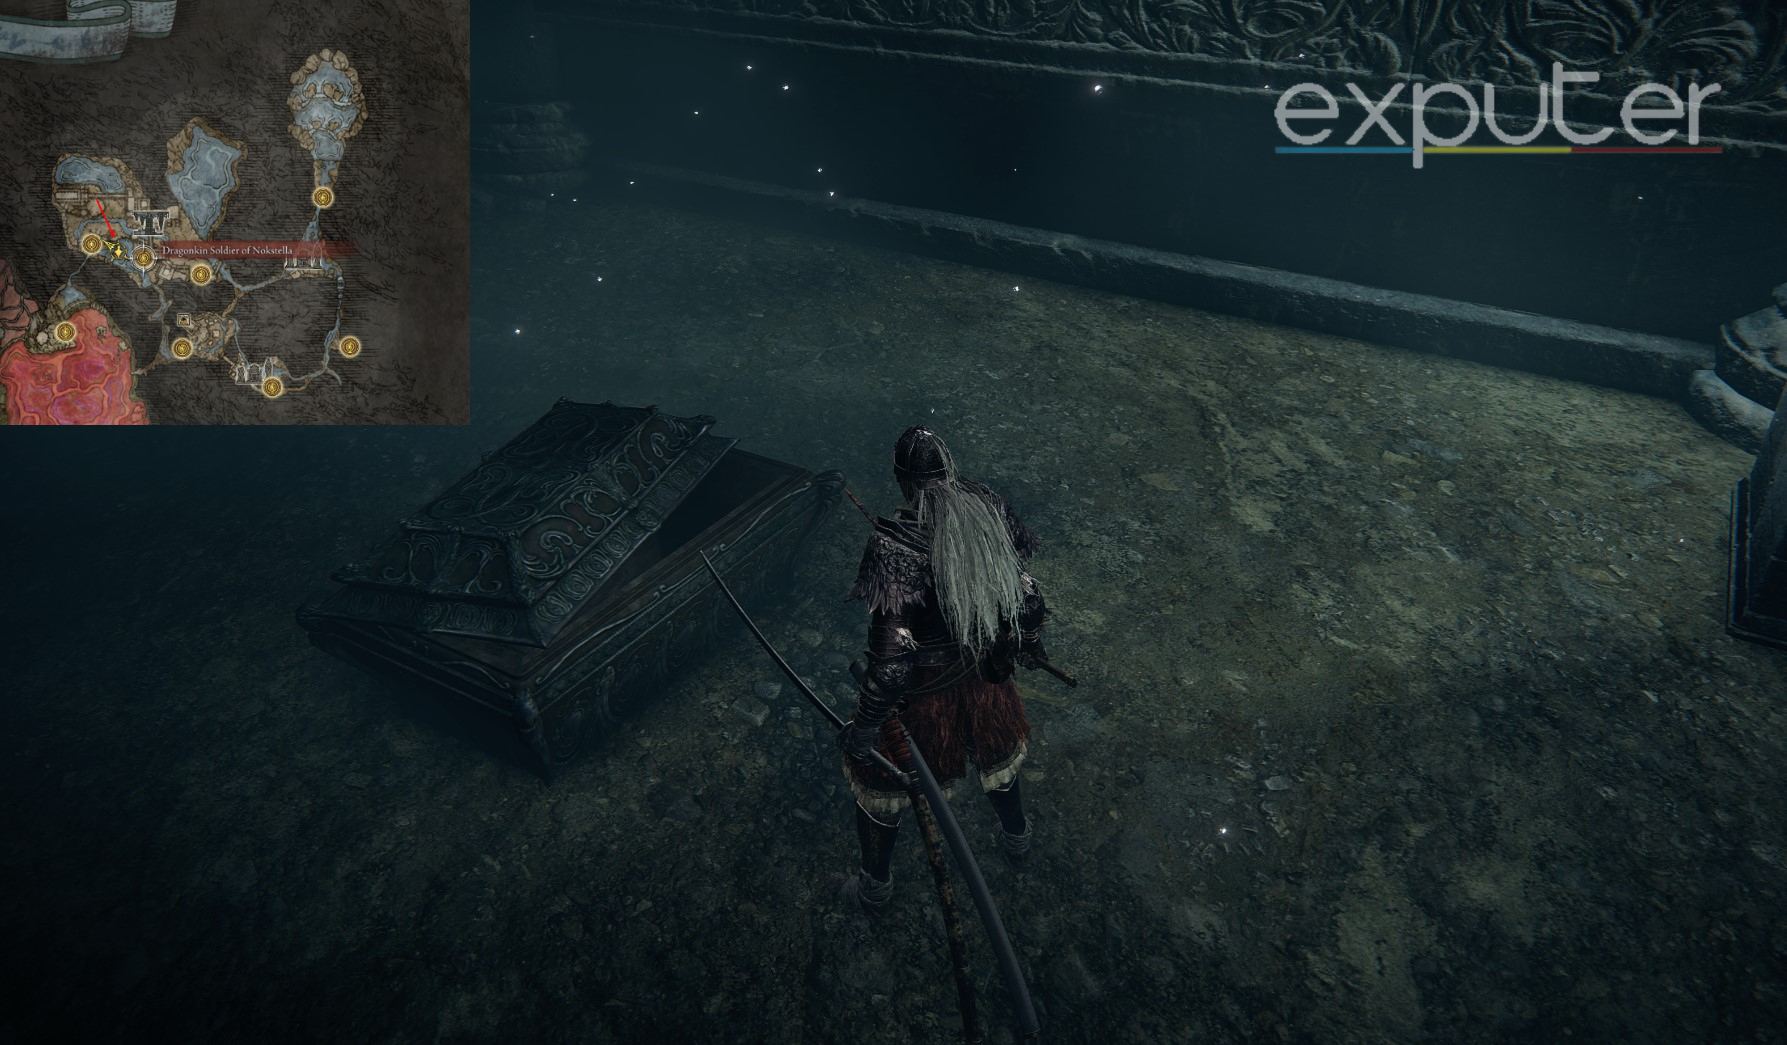
Dragonkin Soldier – Ainsel River
As the only Great Ghost Glovewort guarded by a boss, this one can be found in the arena of the Dragonkin Soldier near Ainsel’s upper half to the west. From the boss’s Site of Grace, all you have to do is go to the tomb underneath the giant corpse in the arena, and you’ll find the final Great Ghost Glavewort inside.
My Experience After Upgrading Spirit Ashes
When I first started Elden Ring, I didn’t give spirit ashes much thought and moved on to fighting bosses with just the normal ones I had. After like around 15 hours of playing, I found Mimic Tear, one of the best Spirit Ashes in Elden Ring. But it still wasn’t that useful at level one, so I upgraded it to level 9, and it became a beast.

While the bosses in Elden Ring are pretty hard, with proper build and setup, you can easily dominate them. Spirit Ashes plays an important role in doing so. I used Mimic Tear and Black Knife Tiche the most, as these are two of the best ones in Elden Ring. While Dung Eater Spirit Summon is also pretty good, I prefer the aforementioned ones. So, with my experience, I would definitely recommend leveling up your Spirit Summons.
Thanks! Do share your feedback with us. ⚡
How can we make this post better? Your help would be appreciated. ✍