Twin Maiden Husks are merchants that you can find in-game. Speaking of merchants, here is my guide on finding all Elden Ring Merchant Locations. The Twin Maiden Husks offer unique and amazing items that can help you quickly progress in the game. Additionally, the shop offers other unique upgrades, making it one of the most important merchant locations.
For instance, you can upgrade weapons and Ashen Remains, as well as unlock items that are sold in other shops as well. All of this makes it essential for all new and old players to seek out the Elden Ring Twin Maiden Husks Location.
- Twin Maiden Husks are merchants offering unique and valuable items crucial for game progression, including exclusive upgrades.
- Found in Roundtable Hold, an area accessible only after completing various missions and quests to receive an invitation.
- Two methods are detailed in this guide to reach the Roundtable Hold.
- Upgrades necessitate Bell Bearings and specific items.
- Locations of various Bell Bearings (Smithing Stone, Somberstone Miner, Gloverwort Picker, Ghost Gloverwort Picker, Bell Bearing Hunter, Gravity stones, Bone Peddlers, Meat Peddlers, and Medicine Peddlers) are elaborated on in this guide.
- NPC Bell Bearings obtained from the corpses of other merchants scattered across the map.
Where To Find the Twin Maiden Husks?
To find the Twin Maiden Husks, you must go to the Roundtable Hold. It is important to note that you cannot jump or simply travel to this area of the game. You must do some quests and missions to get invited to this area of the game. It may require hours of in-game missions, quests, and Site of Grace visits to ultimately get Melina’s invitation.
However, I have developed a perfect strategy and a set of prerequisites you need to complete to get to the Roundtable Hold.
The Shortest Ways to Reach Roundtable Hold
To get invited to the Roundtable Hold, you must visit one of these two sites of grace.
First Method
The first one is the Stormveil Castle Gate site of grace. To access this site of grace, you will have to defeat Margit the Fell Omen.
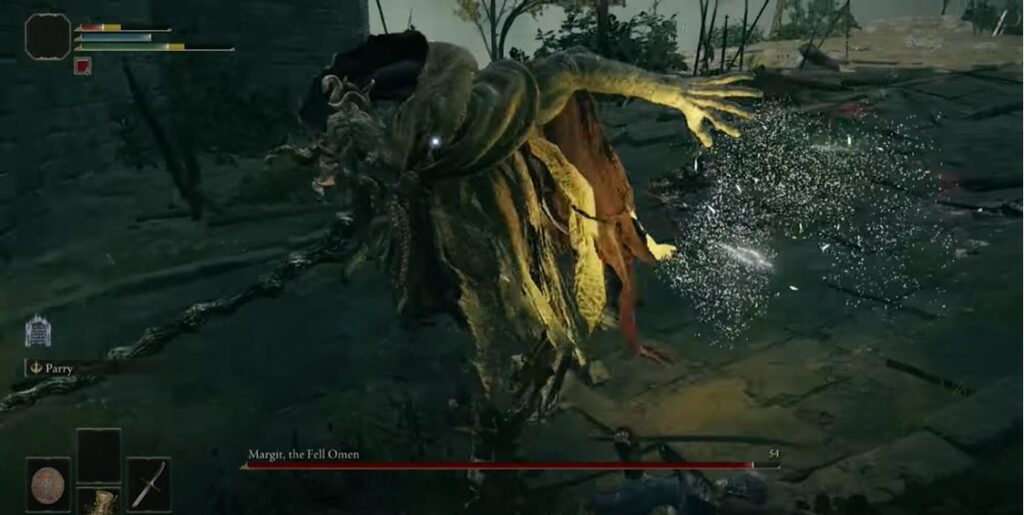
This method of getting the Roundtable Hold can be extremely difficult as Margit is hard to defeat and can take hours.
Second Method
The second method is much simpler and requires less combat than the first one. For this method to work, you must make your way to the Gatefront site of Grace.
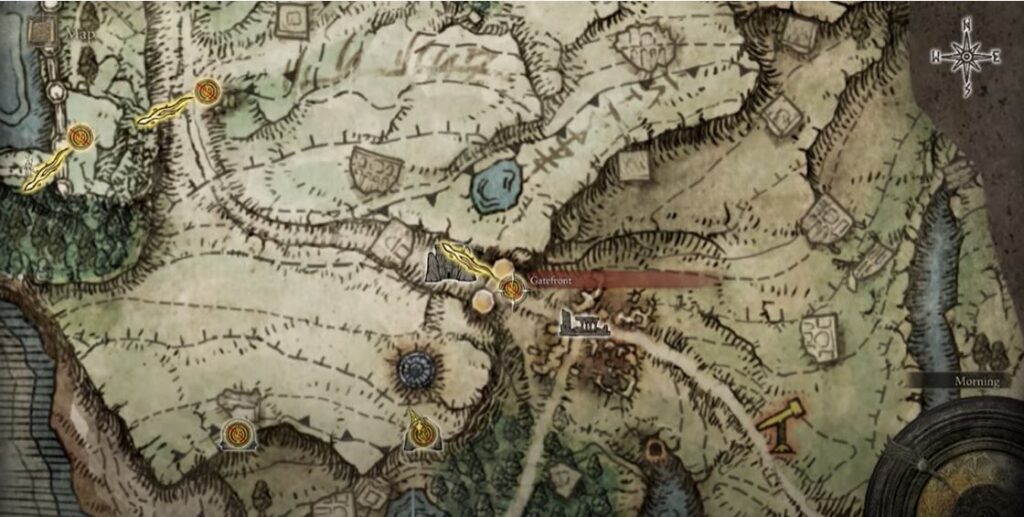
As you rest here, Melina will arrive and give you the Spectral Steed Whistle.
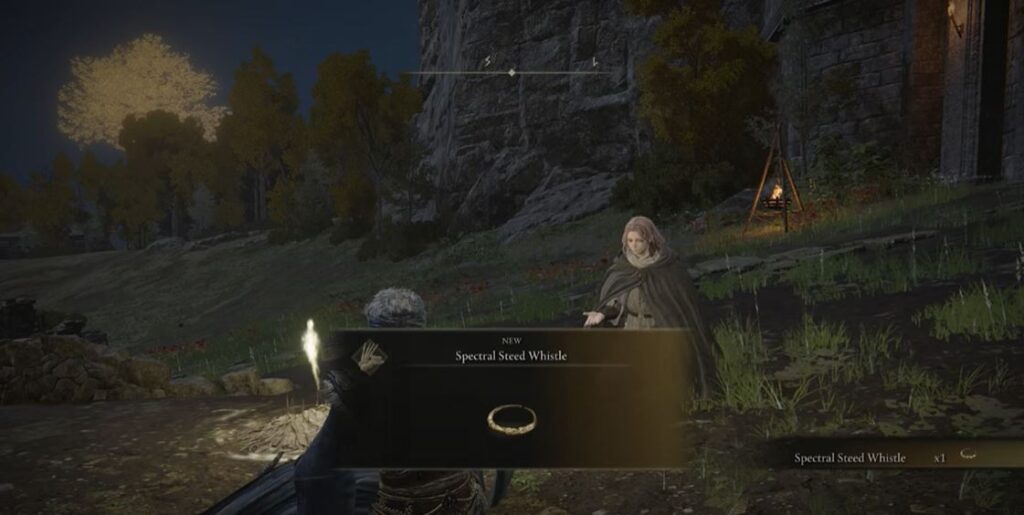
This whistle also allows you to summon Torrent. Once you have your Spirit Steed, you will go to the Stormveil Castle. However, instead of going to the front entrance of the castle, you will make your way to the broken bridge.
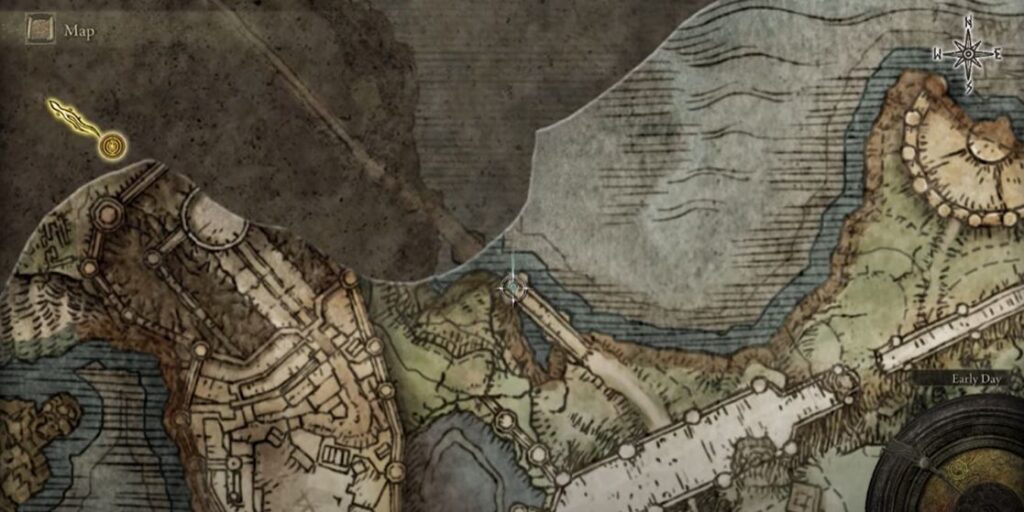
Once you reach the bridge’s end, you will find a Nomadic Warrior’s Cookbook. From here, make your way down this bridge and travel straight until you get to the Liurnia of the Lakes.

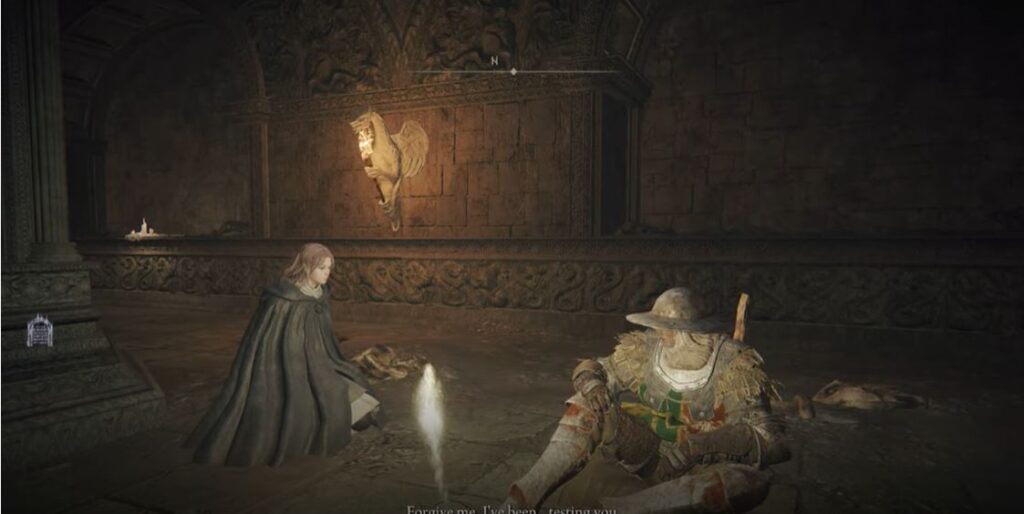
In this area, you will see a site of grace. Interacting with it will summon Melina.
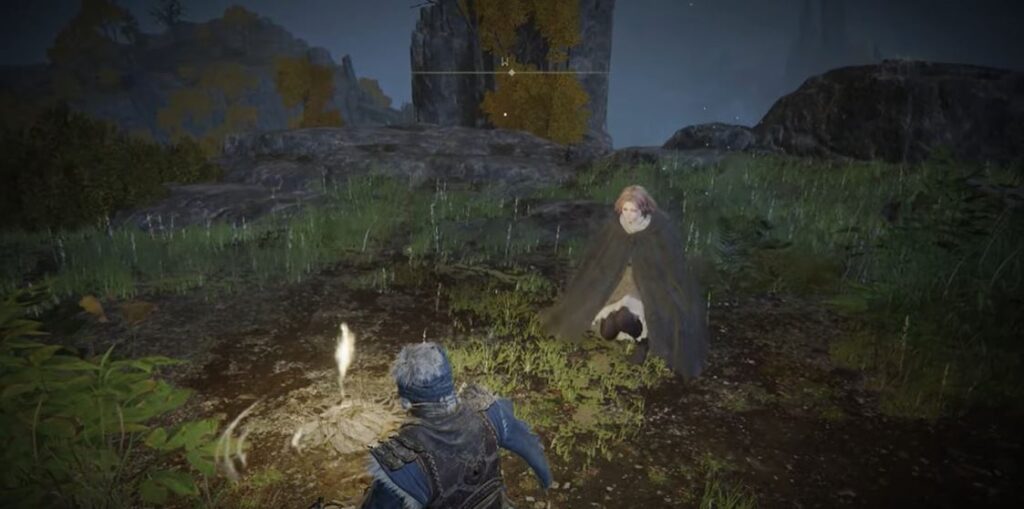
She will invite you to the Roundtable hold, where you will find the Elden Ring Twin Maiden Husks Location.
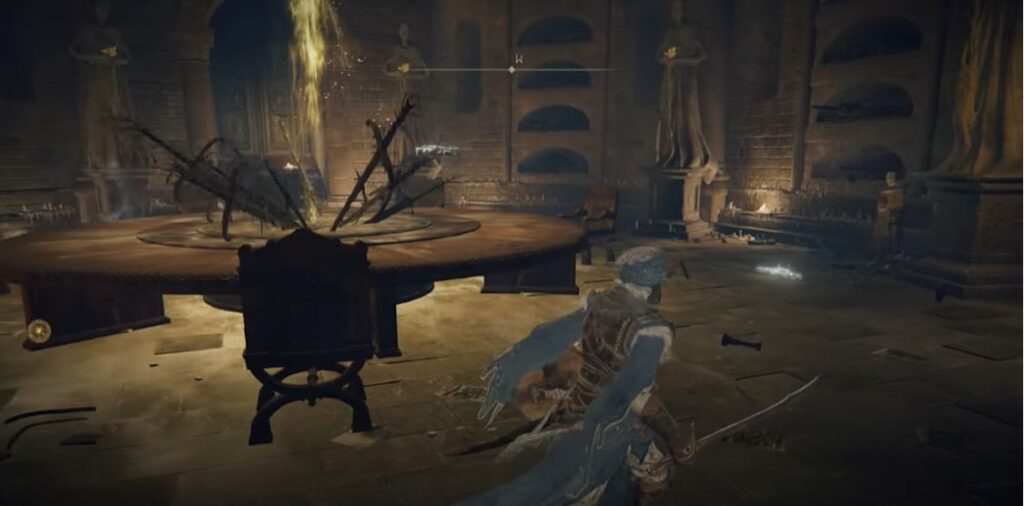
The Twin Maiden Husks will be able to upgrade your weapons and spirit ashes but they require a special currency in return.
Twin Maiden Husks Items Shop
The weapon upgrades at this shop require specific items known as Bell Bearing. Once you bring these Bell Bearings to this shop, you can purchase Smithing Stones and other unique weapons, items, and spells that can be used to upgrade your weapons, shields, and spirit ashes.
Six different Bell Bearings can be used to upgrade and unlock specific items. Once you collect these Bell Bearings, you can take them to the Twin Maiden Husks Location and use them to buy Smithing Stones.
Smithing-Stone Miner’s Bell Bearings
Locating these Bell Bearings and taking them to the Twin Maiden Husks will allow you to unlock the basic Smithing Stones. These stones can be used to reinforce your armaments and make quick work of your enemies. There are four different Miner’s Bell Bearings that you can find on the map and all of them add different attribute points to your weapons.
Smithing-Stone Miner’s Bell Bearing 1 Location
To find the Smithing-Stone Miner’s Bell Bearing 1 you will need to make your way to the Church of Vows.
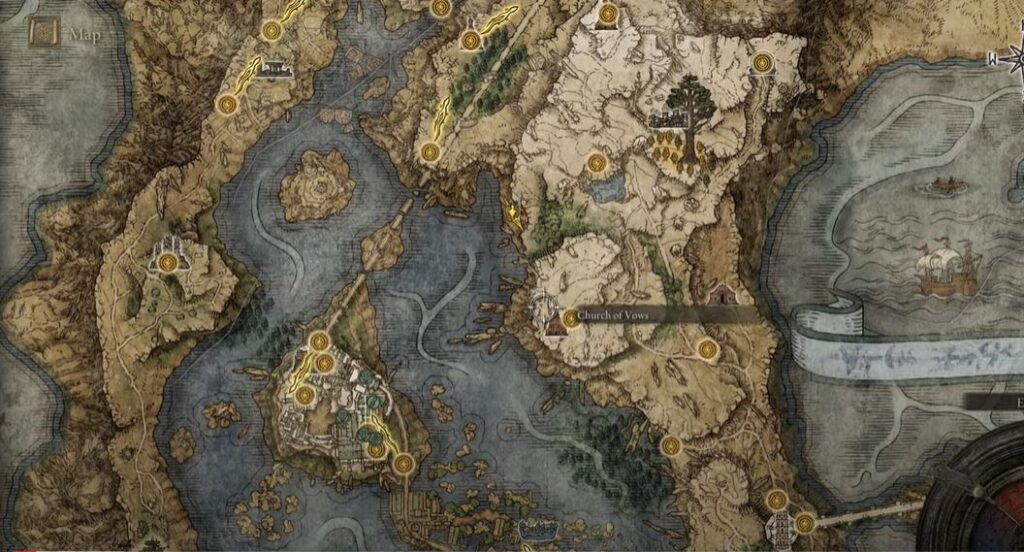
Once you are there, you will make your way east until you reach a mineshaft.

After going in, you will use a lift to go to the bottom level of the mineshaft.

From there, head straight till you make your way to the Raya Lucaria Crystal Tunnel.
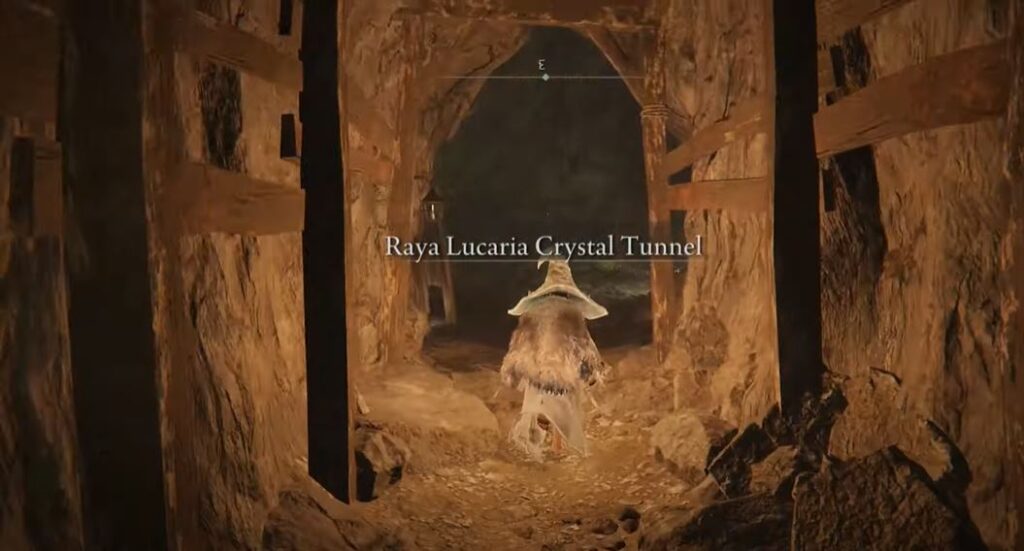
Keep following this path and you will get to a narrow cave. Head inside the narrow cave and keep traveling on this path. This will be a significantly long path and you will encounter enemies along the way but they can be avoided. At the end of this cave, you will see another wooden lift.
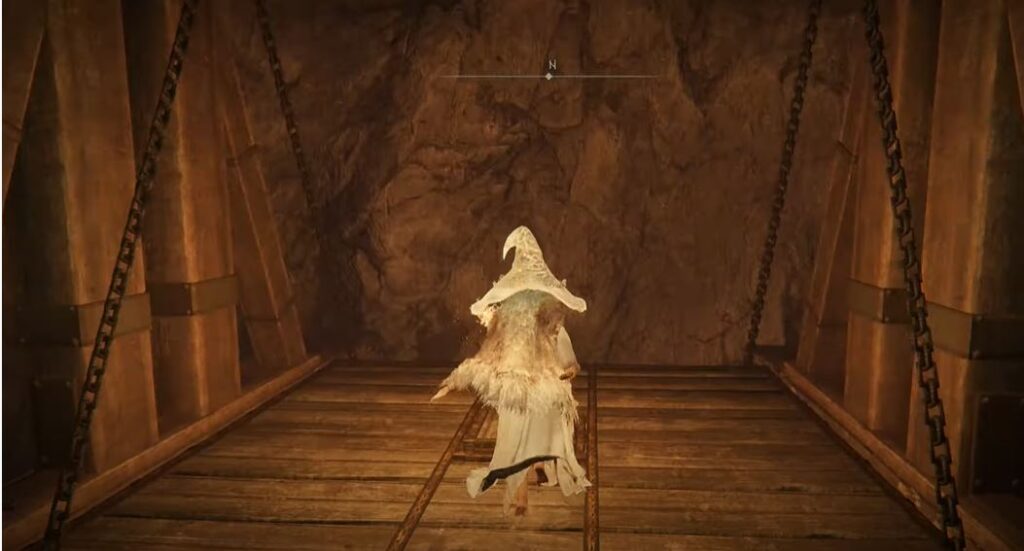
You will use this lift to go down one more level. Once you reach that area, you will keep going along this narrow passageway while dodging enemies. At the end of this passageway, you will see a third wooden lift that will take you to the lowest level of the mineshaft. After getting off the lift, you will head straight until you reach a door that is covered by mist.

Once you go through this door, you will have to fight and defeat the Crystalian boss. You can learn more about him in our Elden Ring Bosses Tier List.
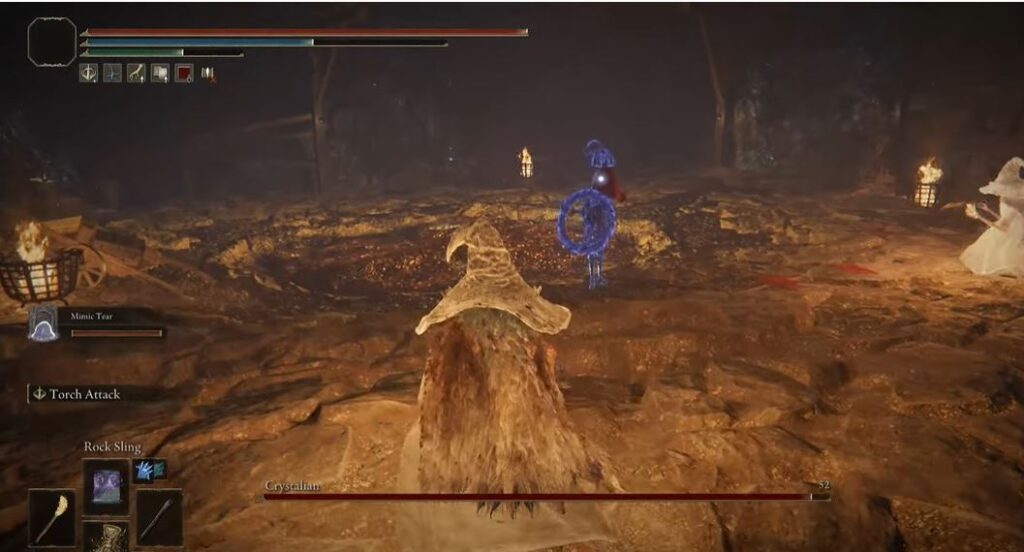
After you have taken care of him, you will get the Smithing-Stone Miner’s Bell Bearing 1 as a reward.
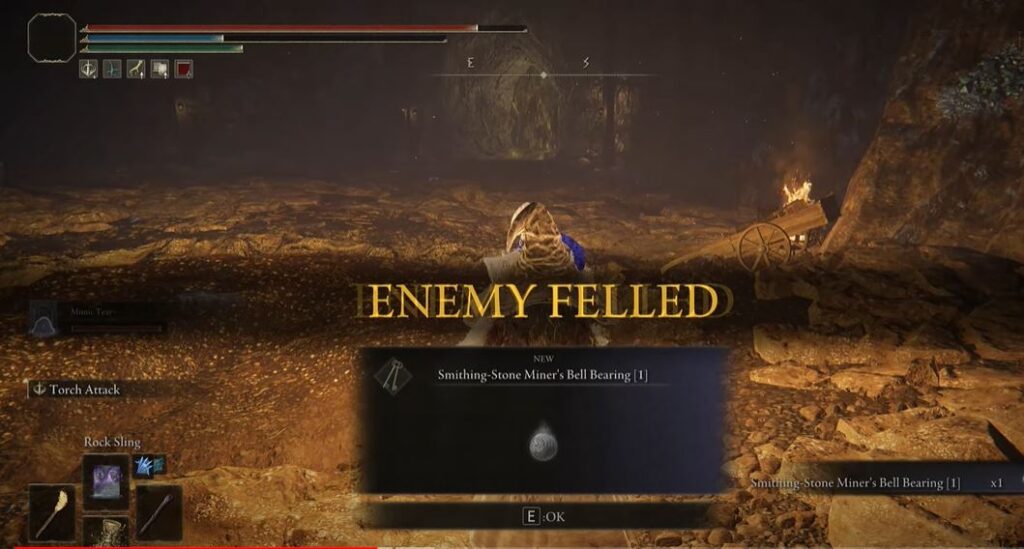
You can take this Bell Bearing to the Twin Maiden Husks Location. You will be able to unlock Smithing Stone 1 and 2 using this Bell Bearing. The Smithing Stone 1 gives +3 while the Stone 2 gives +6 Reinforcement to your weapons.
Smithing-Stone Miner’s Bell Bearing 2 Location
To locate this Bell Bearing, you will have to first travel to the Outer Wall Phantom Tree.
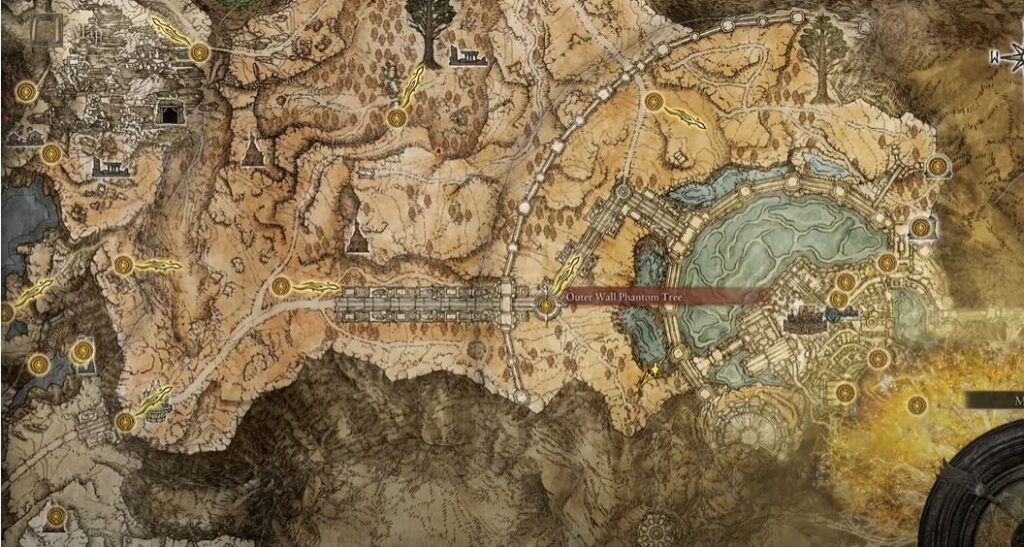
From there, you will have to travel to a specific area of the map known as the Sealed Tunnel.
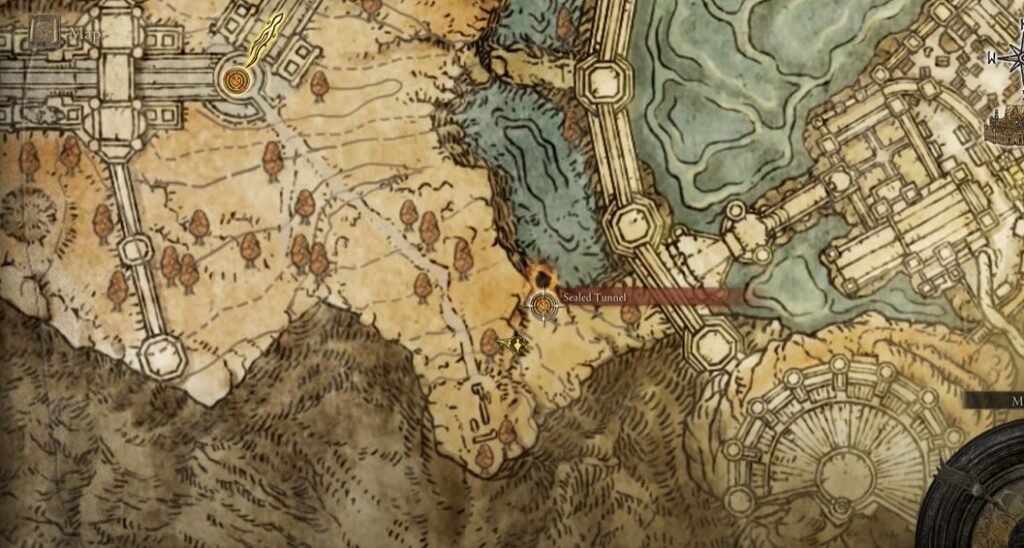
Going inside the tunnel will take you to a cave where you can find an illusory wall. Also, read our Elden Ring 50 Hit Wall Location guide.
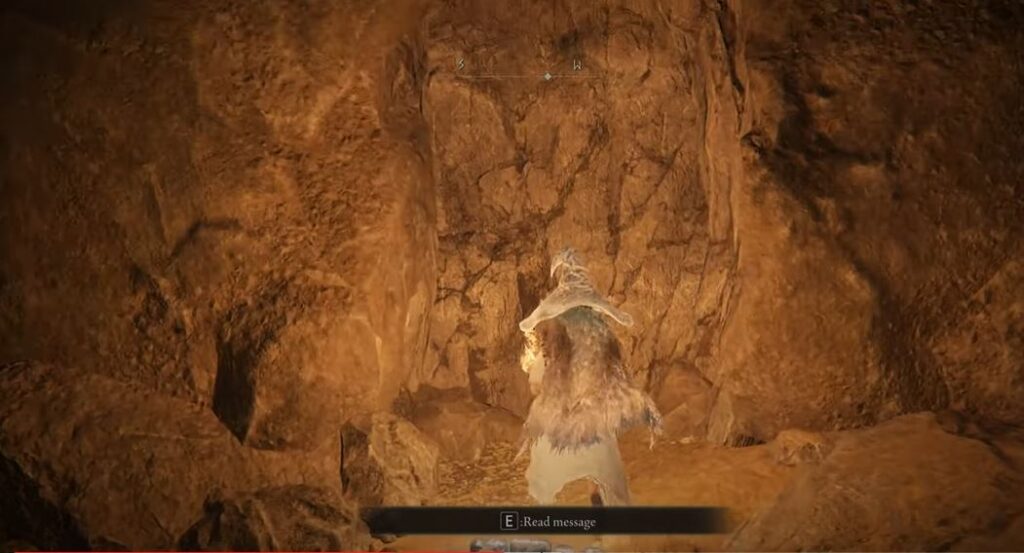
Hitting this wall will take you deep into the Sealed tunnel where you will find the chest containing the Smithing-Stone Miner’s Bell Bearing 2.
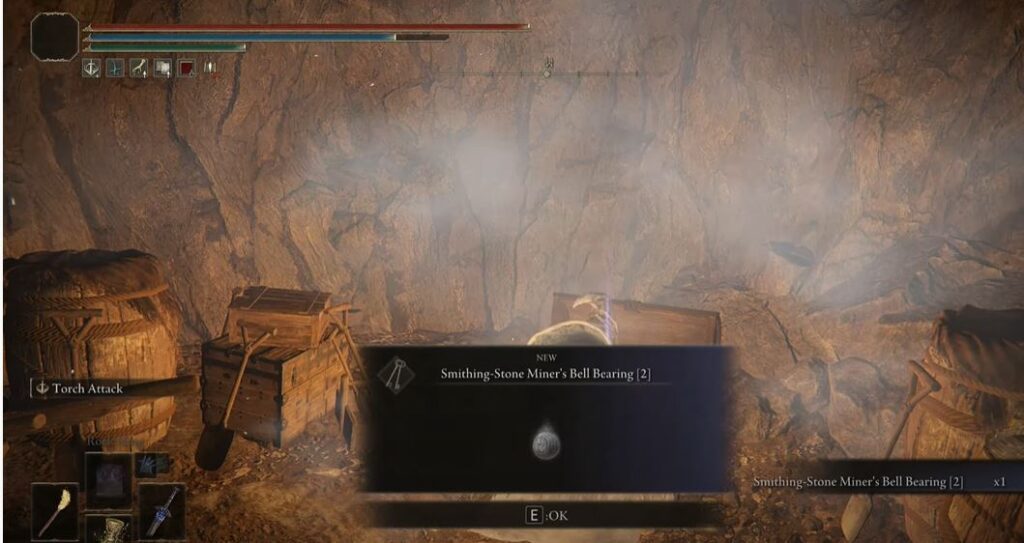
You can take this Bell Bearing to the Twin Maiden Husk to get Smithing Stone 3 and 4. They give you +9 and +12 weapon reinforcement respectively.
Smithing-Stone Miner’s Bell Bearing 3 Location
To find the Bell Bearing 3, you will need to go to the Zamor Ruins at the Mountaintop of the Giants.
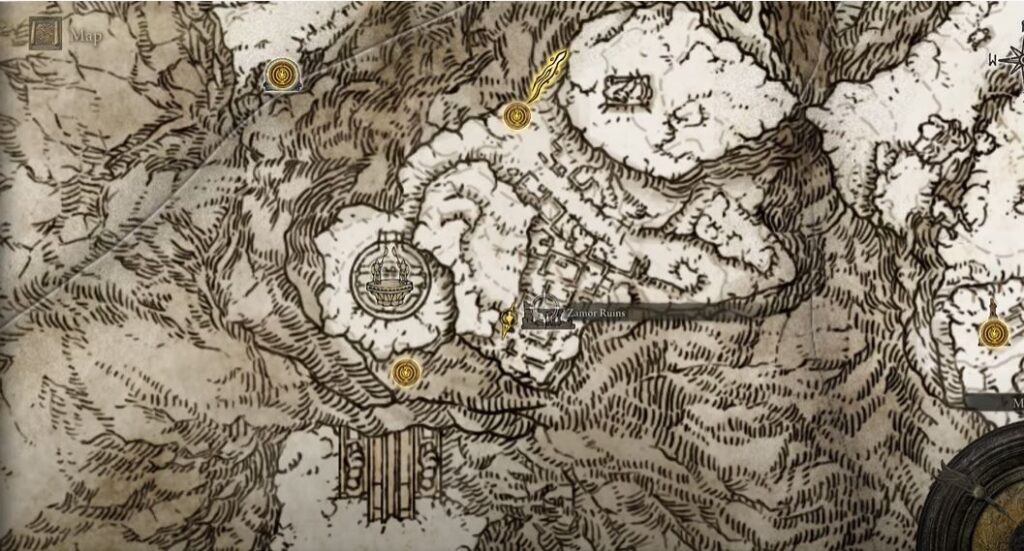
After getting there, you will head to the basement where you will find the chest containing the Smithing-Stone Miner’s Bell Bearing 3.
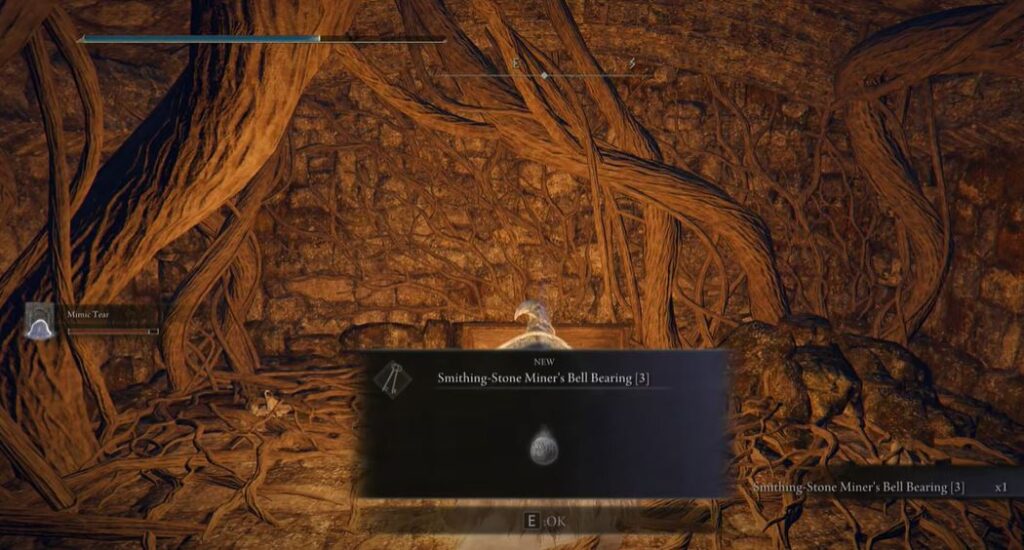
You can take this Bell Bearing to the Twin Maiden Husks Location to get the Smithing Stone 7 and 8. These Stones give you +15 and +18 weapon reinforcement.
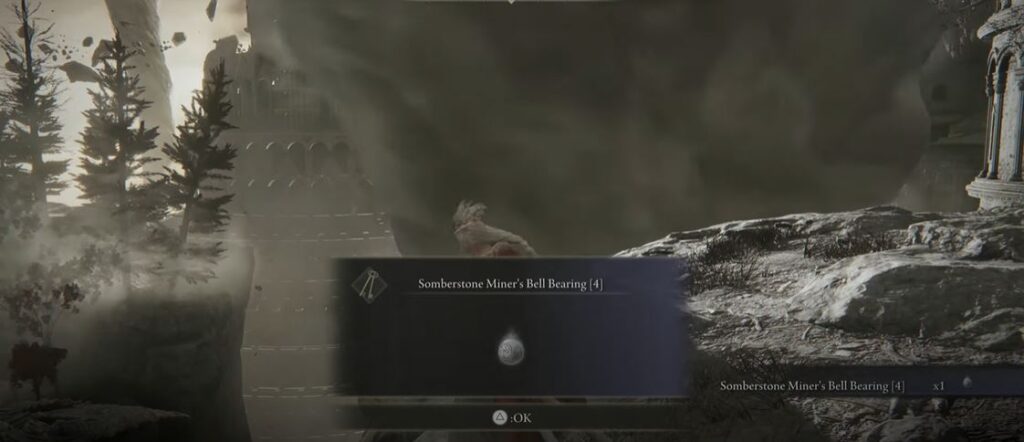
Smithing-Stone Miner’s Bell Bearing 4 Location
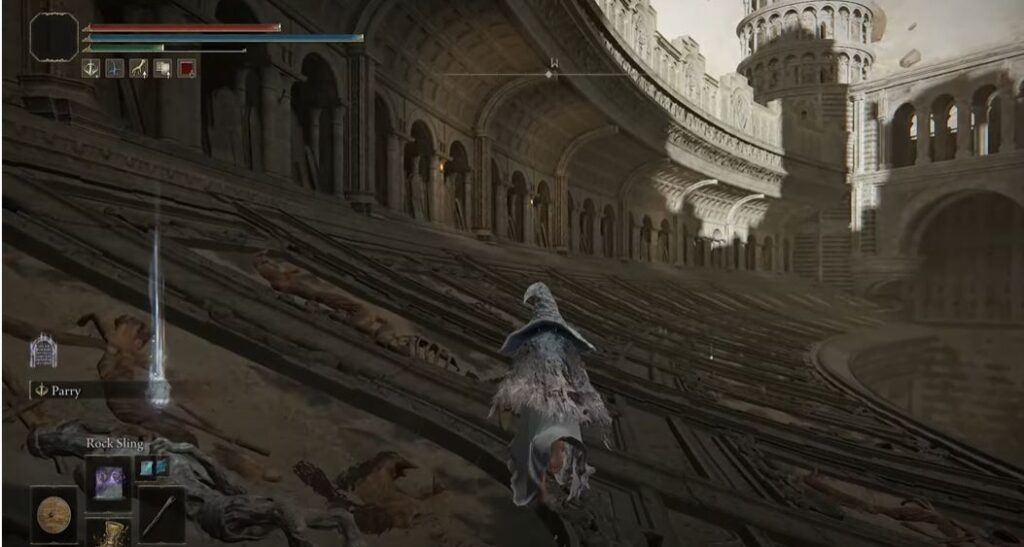
For the last Miner’s Bell Bearing, you need have to go to the Crumbling Farum Azula.
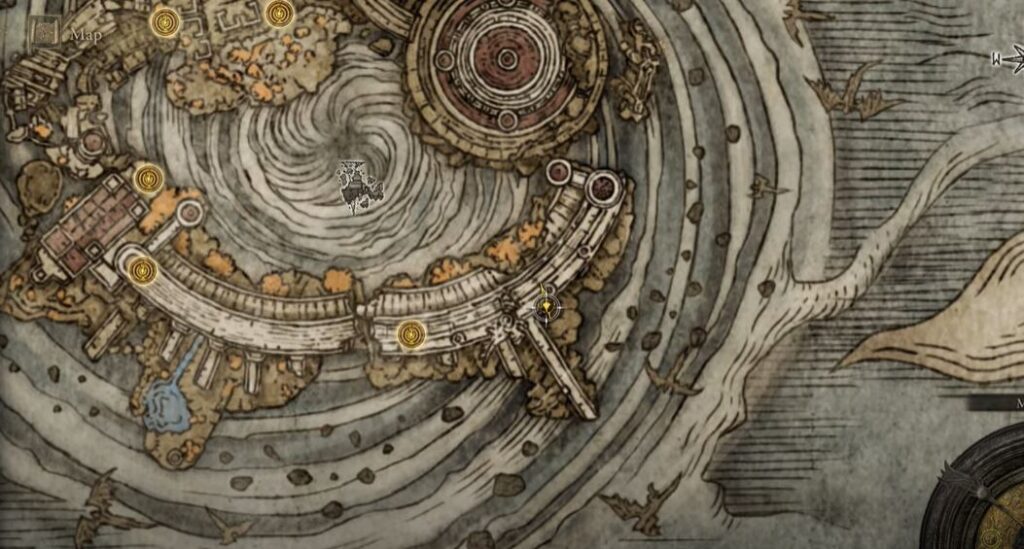
Once you are there, you will have to make your way deep inside the castle. Keep traveling on this path until you get to the outer edge of the temple.
You will make your way to the end of this edge and go inside the room with the skeletal remains.
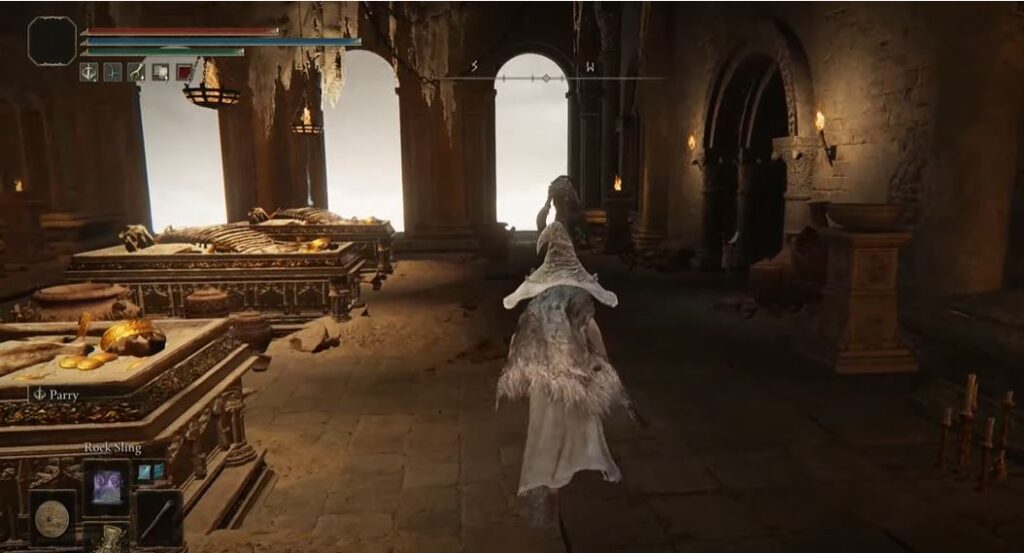
From here, you will keep making your way down and forward while avoiding or fighting a barrage of enemies. By doing this, you will get to the Dragon Temple. At the center of the Dragon Temple, you will have to fight and defeat the Godskin Duo.
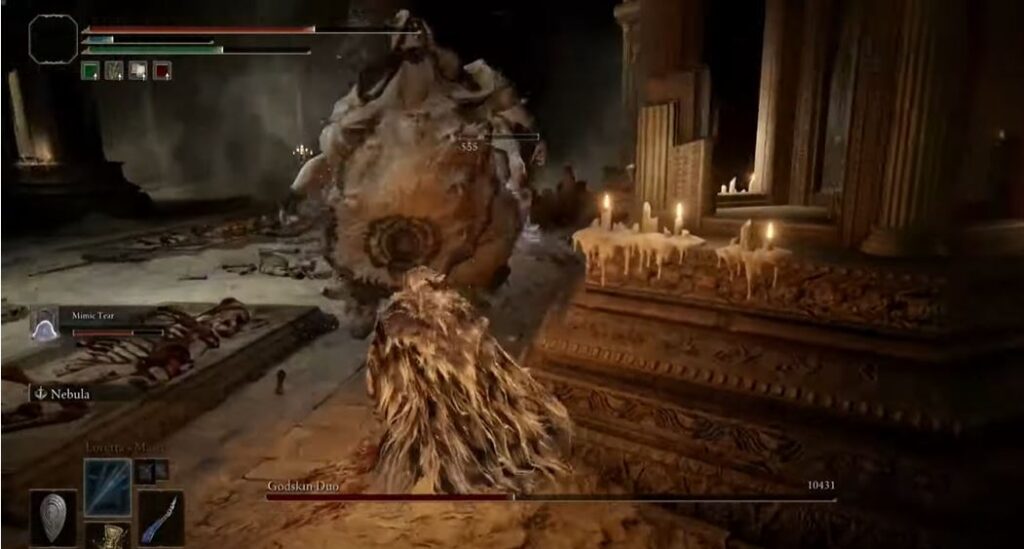
If you facing difficulties fighting this boss, you can view our guide on how you can Beat the Godskin Duo. After you have taken care of this boss, you will receive the Smithing-Stone Miner’s Bell Bearing 4 as a reward.
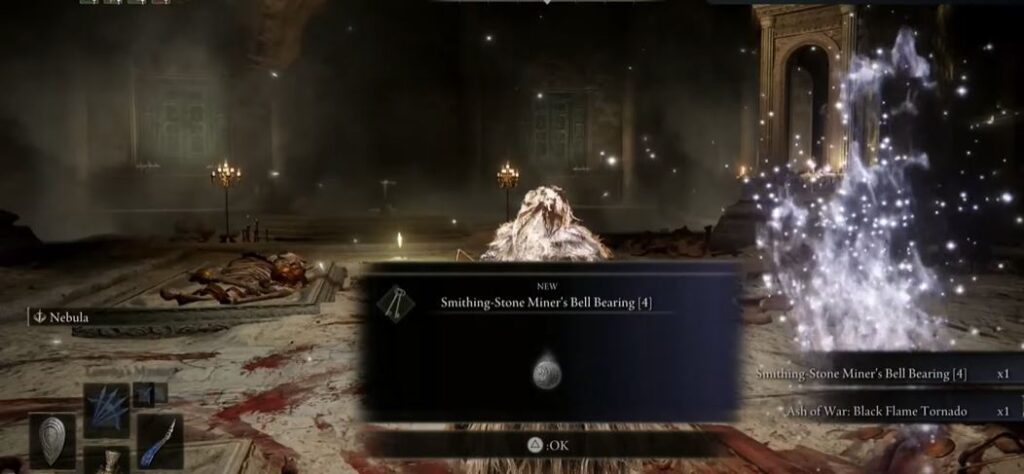
You can take this Bell Bearing to the Twin Maiden Husks Location and get the Smithing Stone 7 and 8. These Stones give you +21 and +24 armament reinforcement.
Somberstone Miner’s Bell Bearing
Next up on my list is the Somberstone Miner’s Bell Bearing. These bell bearings can be exchanged to unlock Somber Smithing Stones. These Stones can be used as bolstering materials that can upgrade your unique weapons. The weapons that are dropped by bosses are often impossible to upgrade, however, you can easily boost their stats using these Smithing Stones.
Somberstone Miner’s Bell Bearing 1 Location
To locate the First Somberstone Bell Bearing, you will have to travel to the Sellia Crystal Tunnel. You can follow our guide on how you can find the Elden Ring Sellia Crytal Tunnel Location.
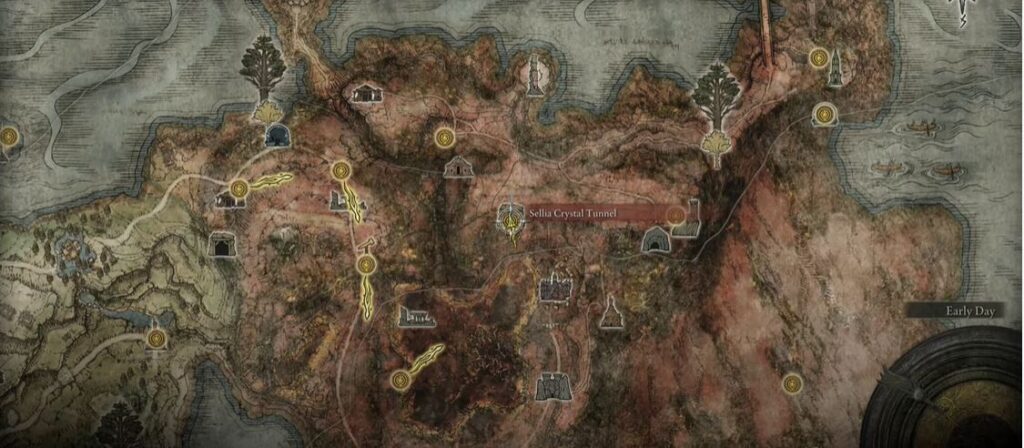
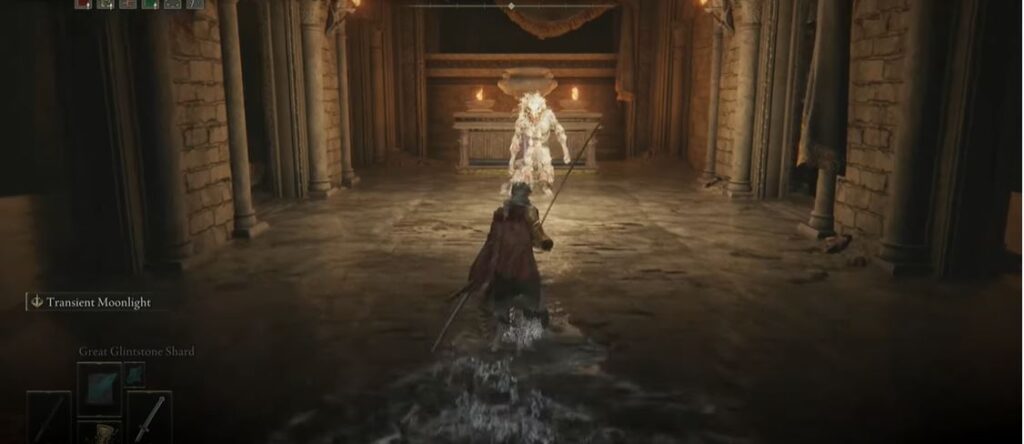
Once you are in the tunnel, you will have to make your way to the end. There, you will encounter the Fallingstar Beast.
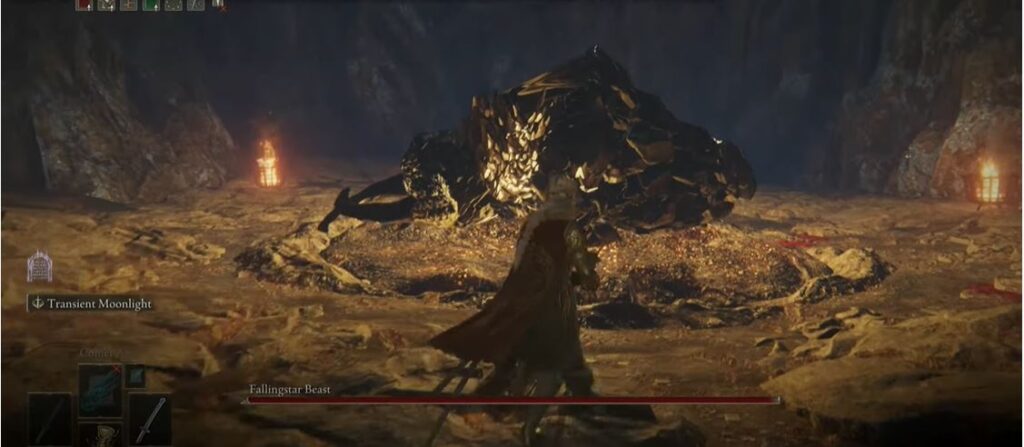
You will receive the Somberstone Miner’s Bell Bearing 1 as a reward after defeating the Fallingstar Beast.
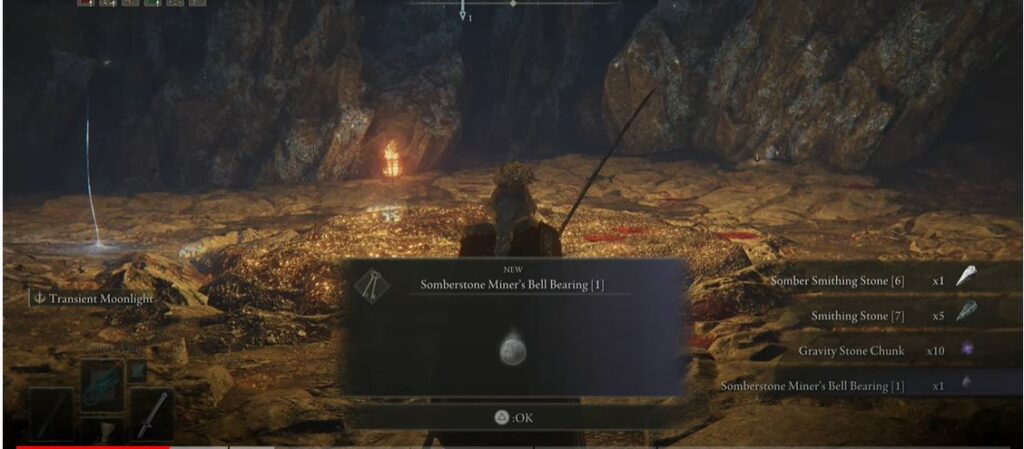
You can take this Bell Bearing to the Twin Maiden Husks where you can use it to unlock the Somber Smithing Stone 1 and 2. These stones give +1 and +2 special weapon reinforcement respectively.
Somberstone Miner’s Bell Bearing 2 Location
To find the second Bell Bearing, you need to make your way to the Altus Tunnel.
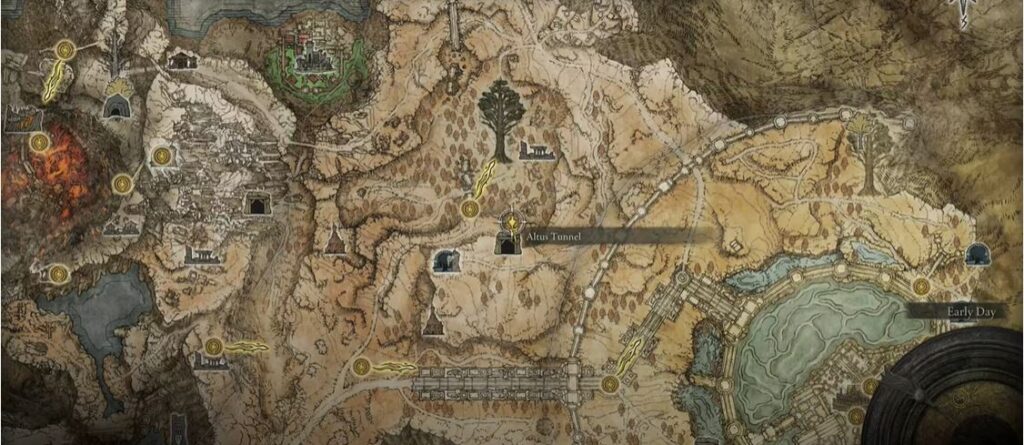
After reaching the tunnel, you will make your way inside and travel down to the lower level. Here, you will encounter the Spear and Ringblade Crystalian Bosses.
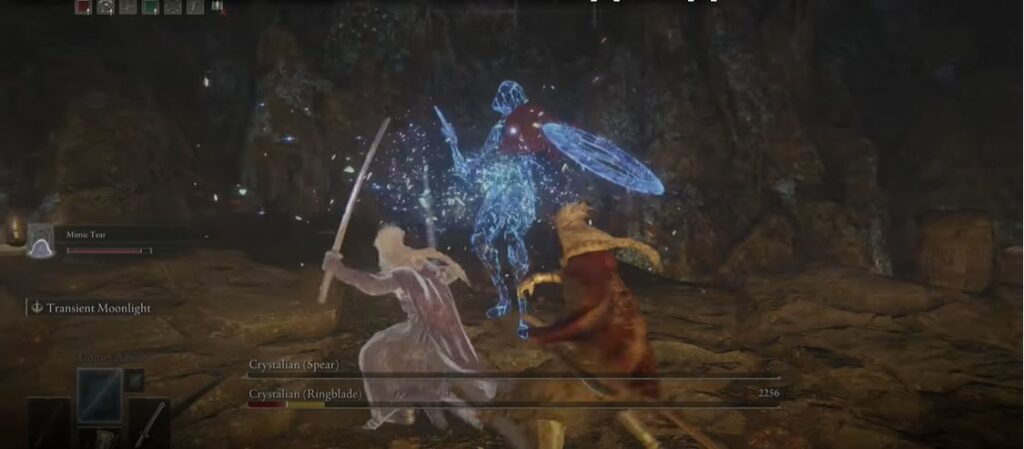
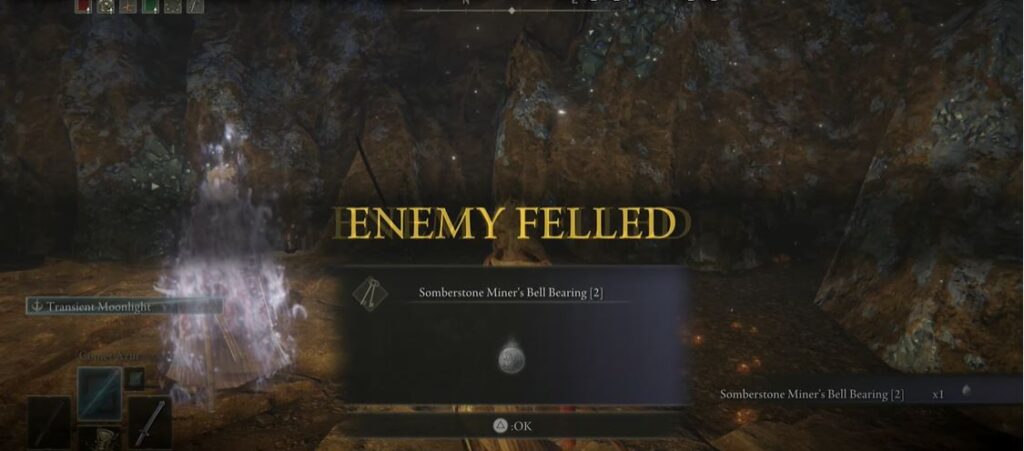
You will get the Bell Bearing 2 as a reward after defeating the Crystalian Bosses.
Taking this Bell Bearing to the Twin Maiden Husks Location will unlock the Somber Smithing Stone 3 and 4. Both these Stones give +3 and +4 special armament reinforcement respectively.
Somberstone Miner’s Bell Bearing 3 Location
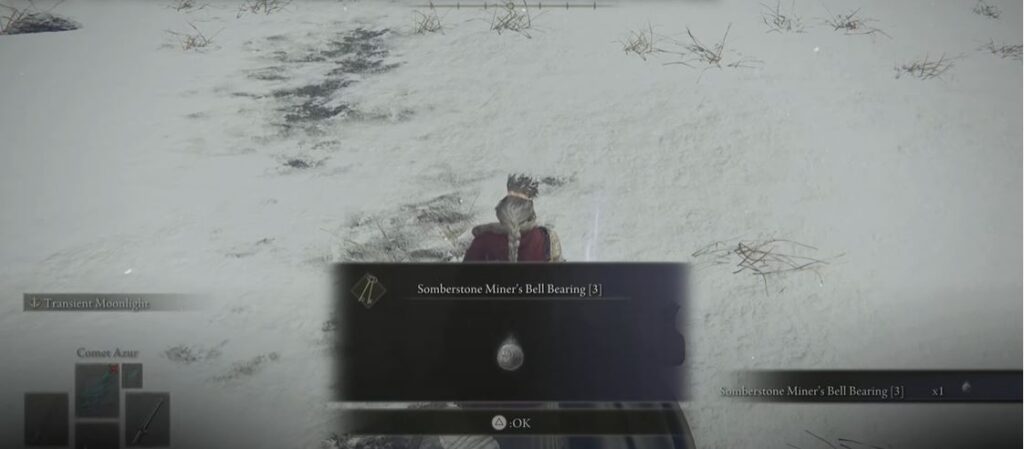
To start your search for the Bell Bearing 3, you will have to travel to the First Church of Marika.
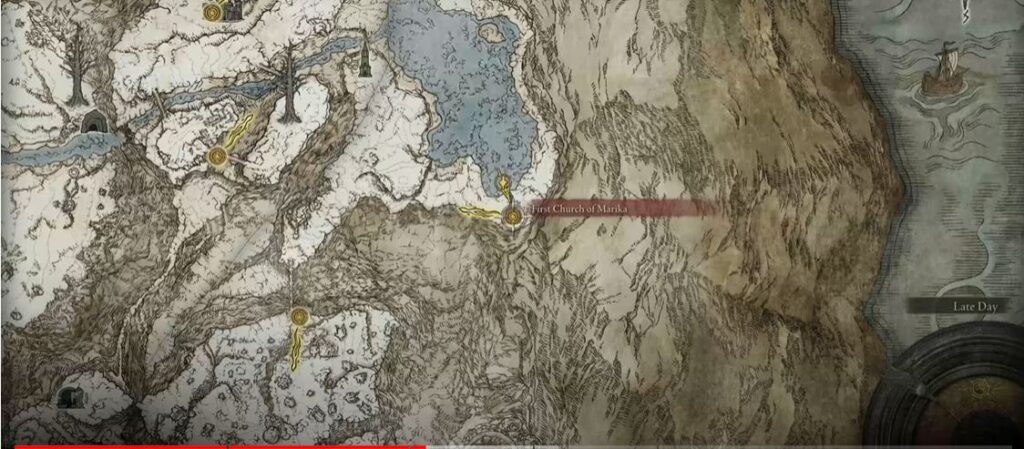
You can collect the Somberstone Miner’s Bell Bearing 3 from a dead body outside the church.
This Bell Bearing can be taken back to the Twin Maiden Husks and can unlock the Somber Stone 5 and 6. These Stones give +5 and +6 special weapon attributes.
Somberstone Miner’s Bell Bearing 4 Location
To locate the 4th Bell Bearing, you will go to the Tempest-Facing Balcony.
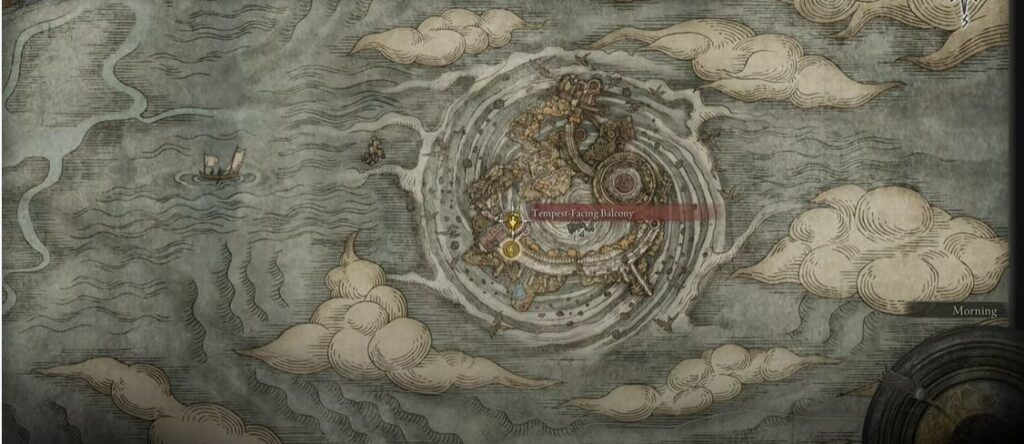
Here you will be able to find it on a dead body on the ledge of the balcony.
You can take this Bearing to the Twin Maiden Husks where you will get the Somber Smithing Stone 7 and 8 as a reward. You can use these stones to get +7 and +8 special armament reinforcement.
Somberstone Miner’s Bell Bearing 5 Location
The fifth and final Somberstone Bell Bearing can be found at the Dragon Temple Rooftop.
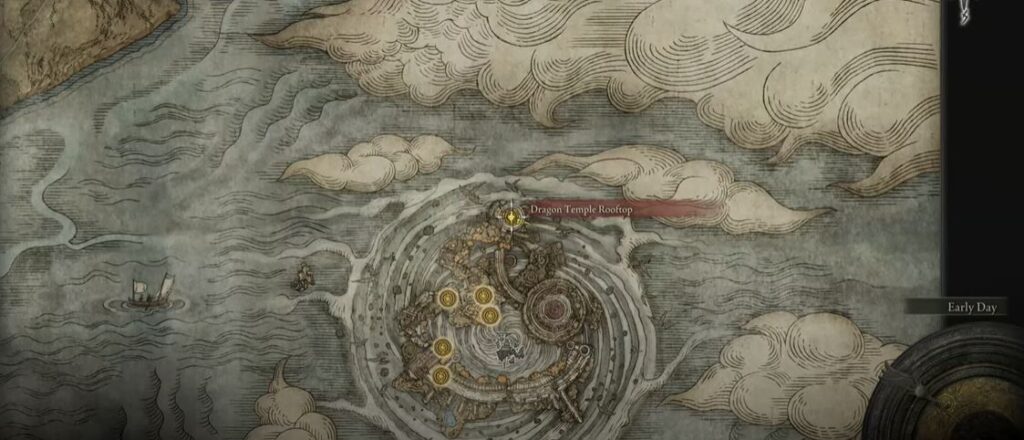
Once you are there, you will make your way down through the temple rooftops.
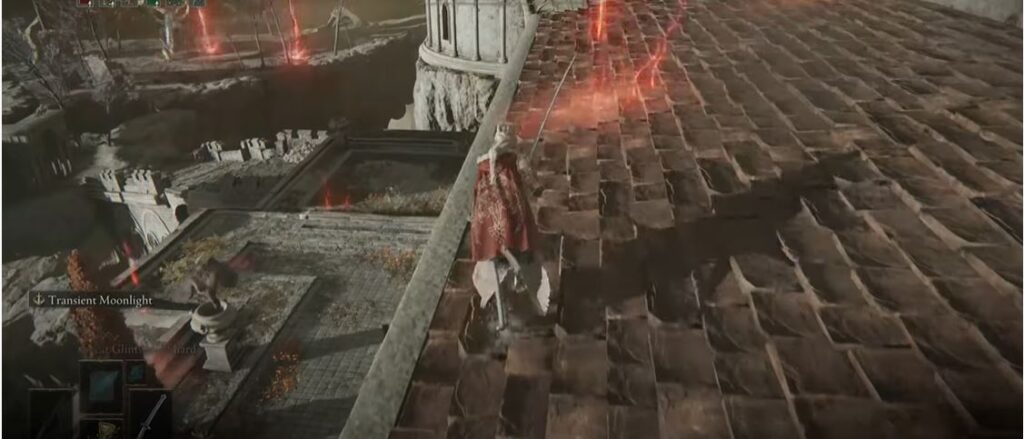
Keep making your way downwards using adjacent ledges until you are at the bottom-most level. Here, you will see an entranceway to the temple. After making your way inside, you will see a dead body that is being guarded by an enemy.
You will be able to pick up the 5th Bell Bearing after killing this enemy.
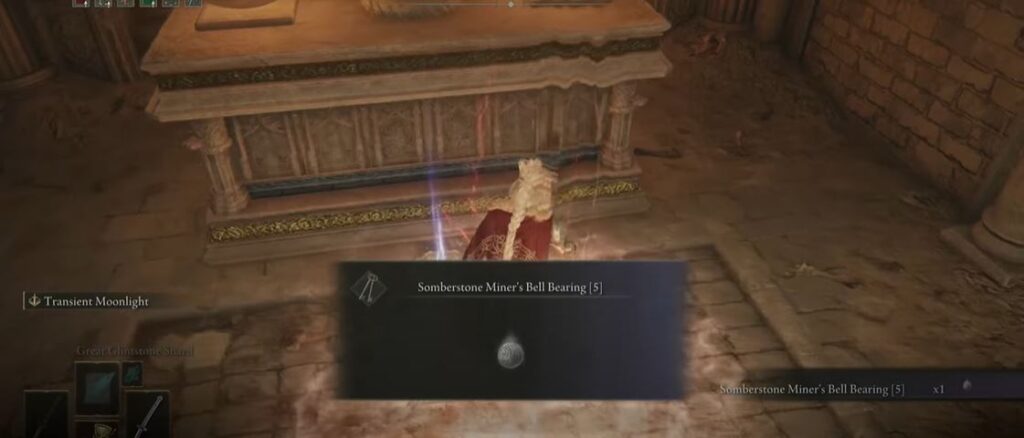
Return this Bell Bearing to the Elden Ring Twin Maiden Husks Location to unlock Somber Smithing stone 9. This stone will be able to give your special weapons a +9 attribute bonus and can be purchased for 25000 afterward.
Glovewort Picker’s Bell Bearings
These particular Bell Bearings allow you to unlock the Grave Gloveworts. These Gloveworts are important as they allow you to upgrade your spirit ashes. There are there Picker’s Bell Bearings that can be found in different parts of the Lands Between.
Glovewort Picker’s Bell Bearing 1 Location
To locate the first Bell Bearing, you will have to go to the Wyndham Catacombs.
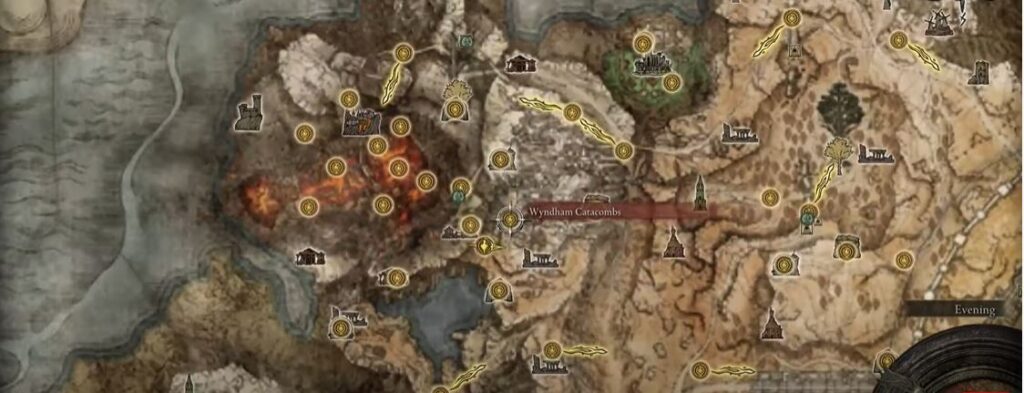
Once you are there, you will have to go to the basement where you will encounter the Erdtree Burial Watchdog.
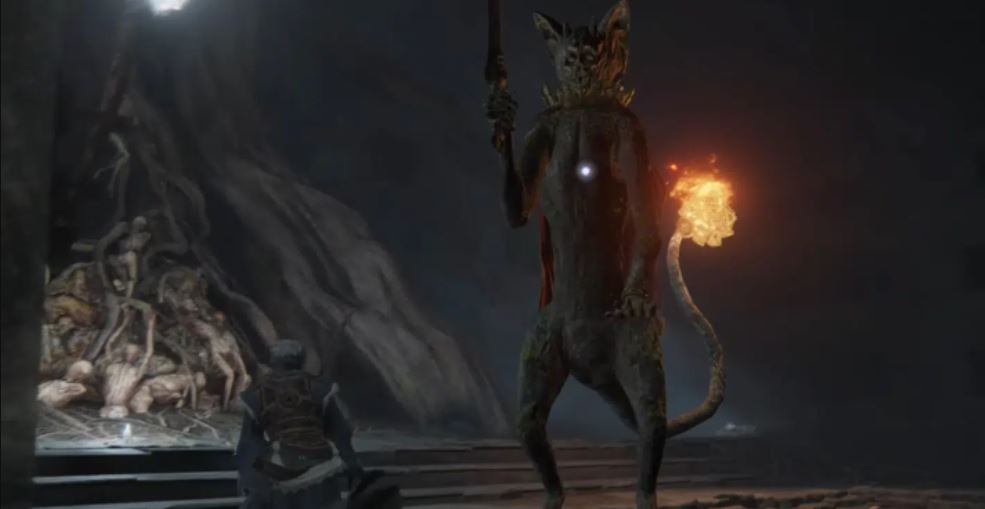
You will get the Glovewort Picker’s Bell Bearing 1 as a reward for defeating this boss.
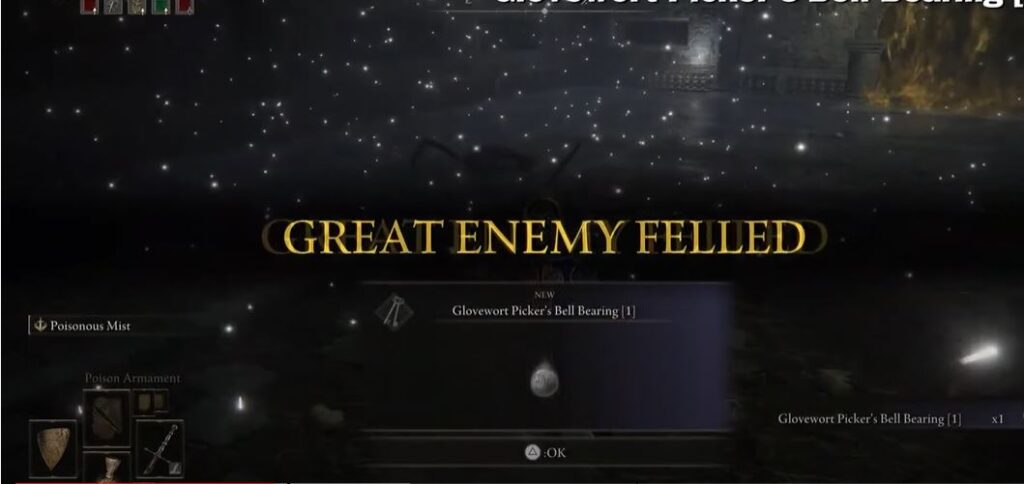
Taking this Bell Bearing to the Twin Maiden Husks will unlock the Grave Glovewort 1, 2, and 3. These items add +1, +2, and +3 strength to your spirit ashes.
Glovewort Picker’s Bell Bearing 2 Location
The second Glovewort Bell Bearing can be found at the Giants’ Mountaintop Catacombs.
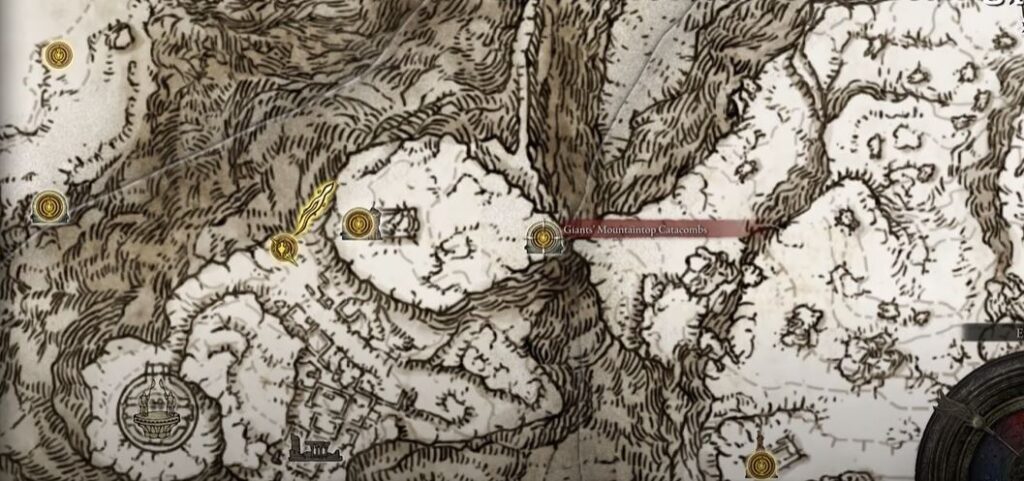
If you are having difficulties reaching the mountaintop, you can view our guide on how you can find the Elden Ring Mountaintops of the Giants’ Location. Once you are there, you will have to fight and defeat the Ulcerated Tree Spirit.
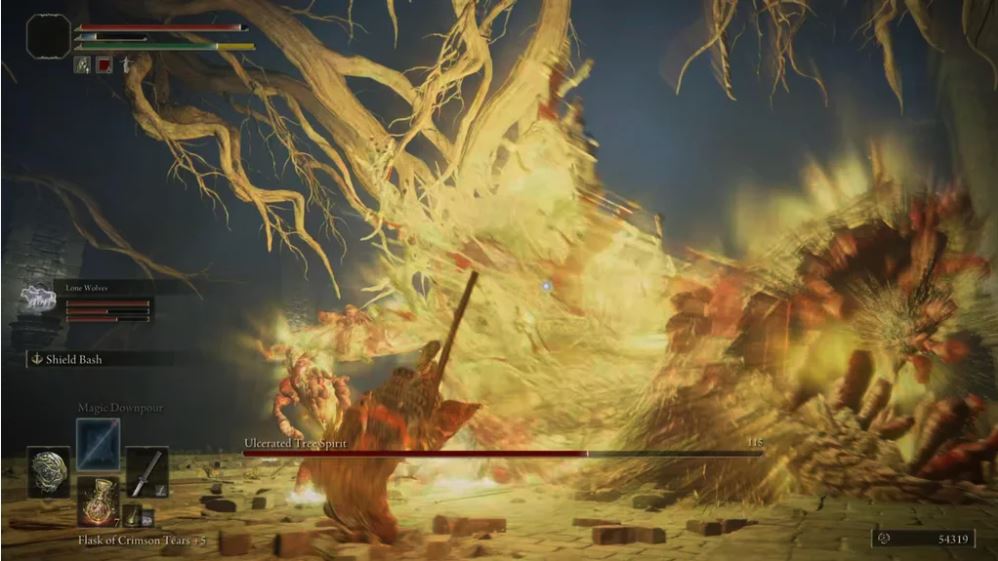
You will receive the 2nd Bell Bearing as a reward upon killing the Tree Spirit.
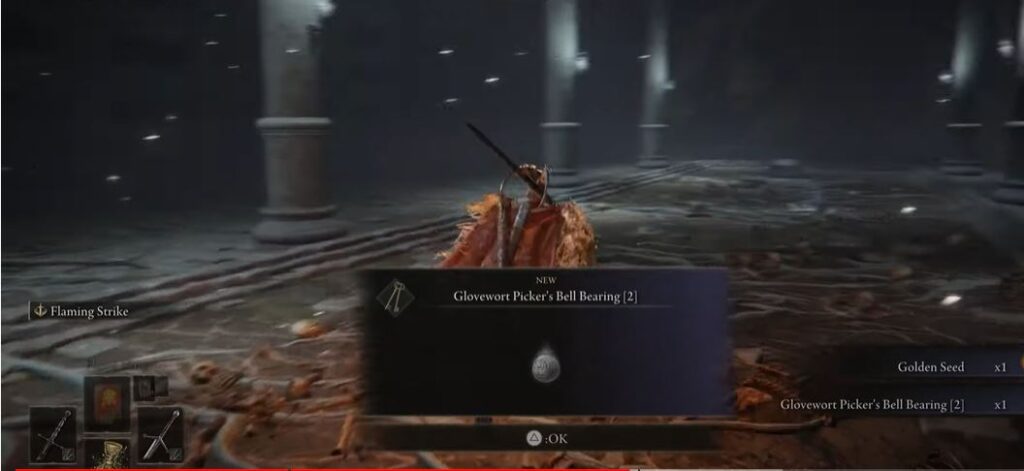
This Bell Bearing can be taken to the Twin Maiden Husks Location to unlock the Grave Glovewort 4,5, and 6. These items grant +4, +5, and +6 strength to your spirit ashes.
Glovewort Picker’s Bell Bearing 3 Location
The last Bell Bearing is located at the Crumbling Beast Grave Depths.
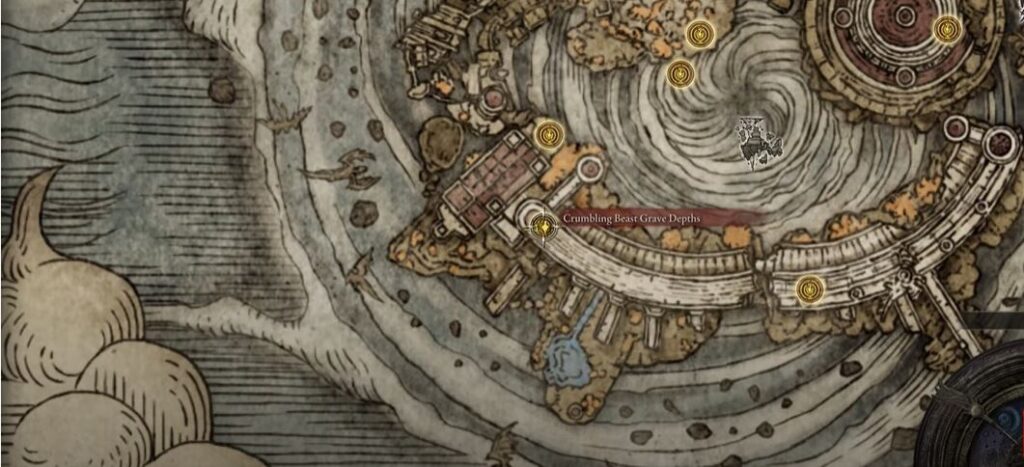
Once you get there, you will make your way down to the central area of the Temple. Here, you will use the stone lift to go down to the lower level of the Dragon Temple.
When you get there you will make your way down this path. Here you will see a structure. Inside the structure, you will find the 3rd Bell Bearing.
This Bell Bearing can be used to unlock the Grave Glovewort 7, 8, and 9 at the Twin Maiden Husks shop. These items will give you +7, +8, and +9 spirit ash strength.
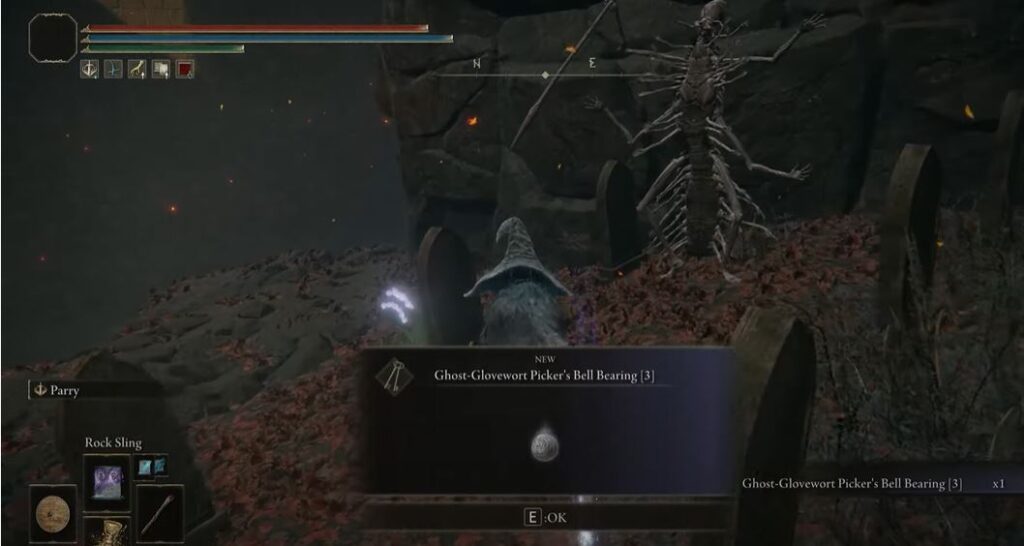
Ghost-Glovewort Picker’s Bell Bearings
This is the advanced form of the Glovewort Ball Bearings. These Bearings can be used to unlock and purchase Glove Gloveworts that can be used to strengthen up renowned ashes. These ashes normally include spirits like the Banished Knight Oleg and Lhutel the Headless.
Ghost-Glovewort Picker’s Bell Bearing 1 Location
The first Bell Bearing can be located in the Nokron, Eternal City.
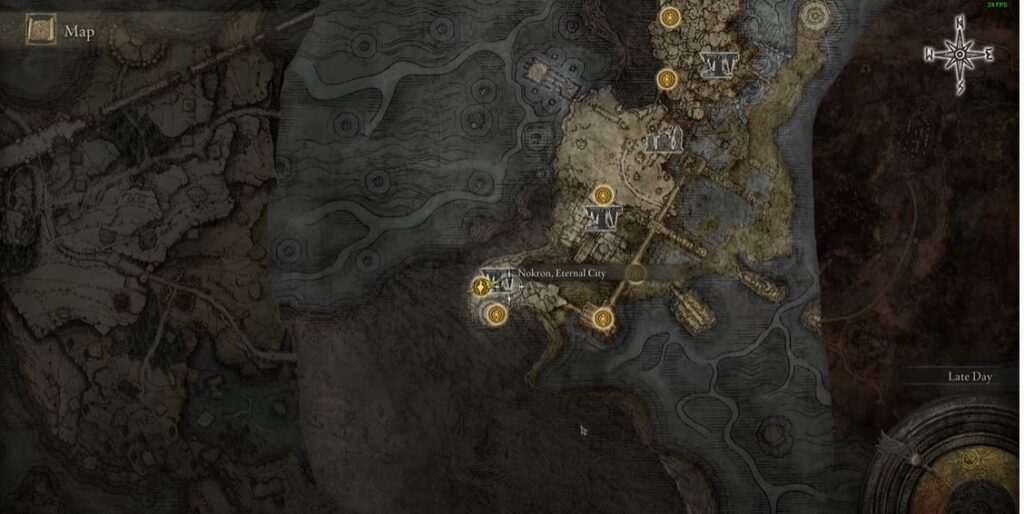
Once you are there, make your way to the gazebo area. Here you will be able to find the Bell Bearing on a dead body.
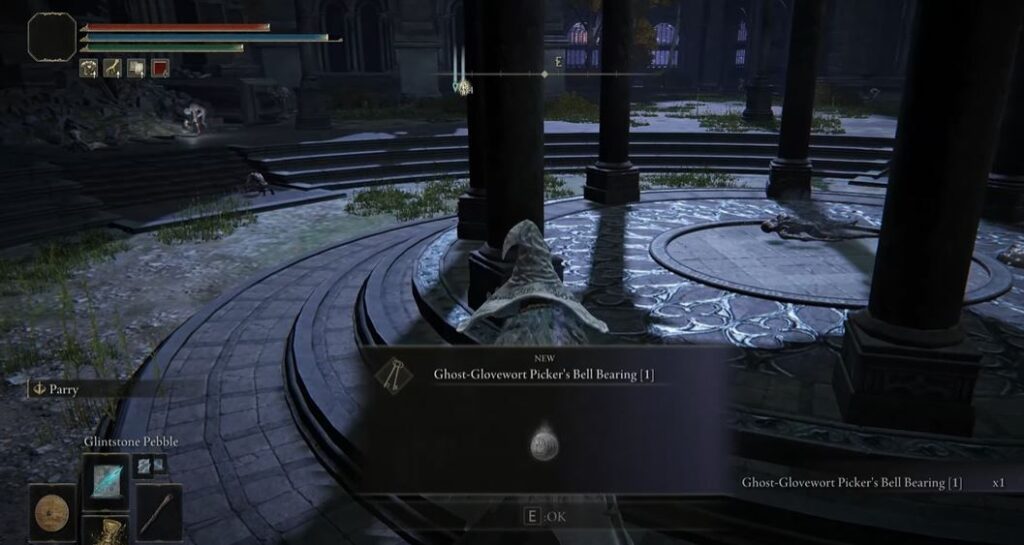
Take this Bell Bearing back to the Twin Maiden Husks Location to unlock Ghost Glovewort 1,2 and 3. These items will give +1, +2, and +3 strength to the renowned spirit ashes.
Ghost-Glovewort Picker’s Bell Bearing 2 Location
This Bell Bearing can also be found in Nokron, Eternal City in the Nokstella area.
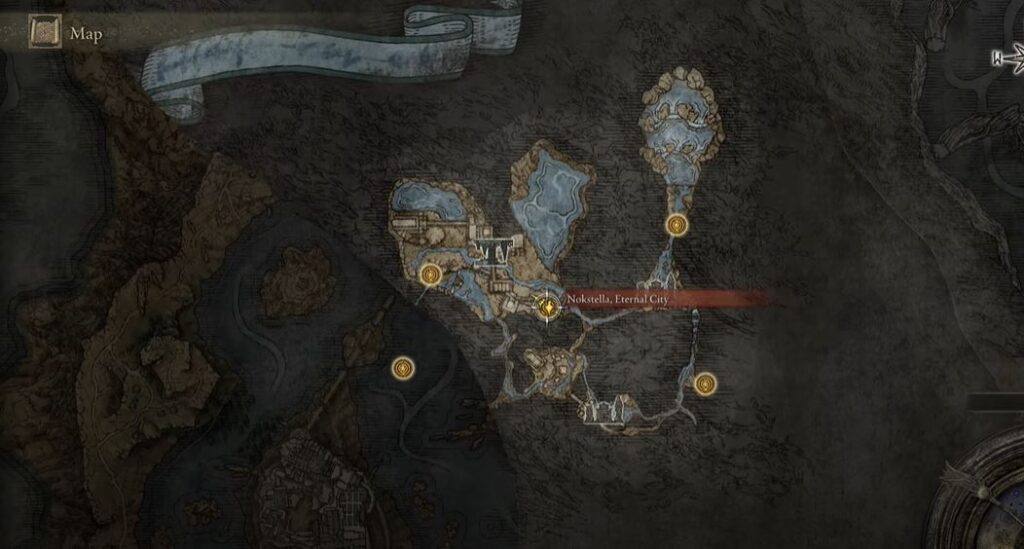
After getting there, you will make your way up a large flight of stairs. Keep in mind that this entire area will be swarming with different enemy types so it is best to come prepared. After you have dispatched all the enemies, you will find a chest that will have the 2nd Bell Bearing in it.
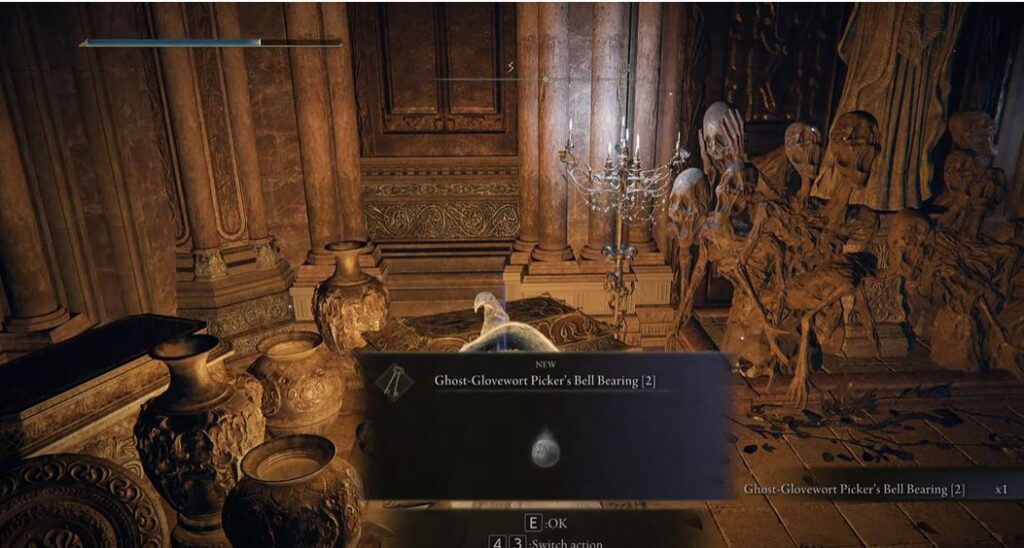
You can take this item to the Twin Maiden Husks Location to unlock the Ghost Glovewort 4, 5, and 6. You can use these items to add +4, +5, and +6 strength to your spirit ashes.
Ghost-Glovewort Picker’s Bell Bearing 3 Location
To find the 3rd and final Bell Bearing, you will start your journey at the Drainage Channel.

From there, you will make your way outside and travel down the Haligtree Roots. After reaching the lowest level using these roots, you will come to a graveyard.
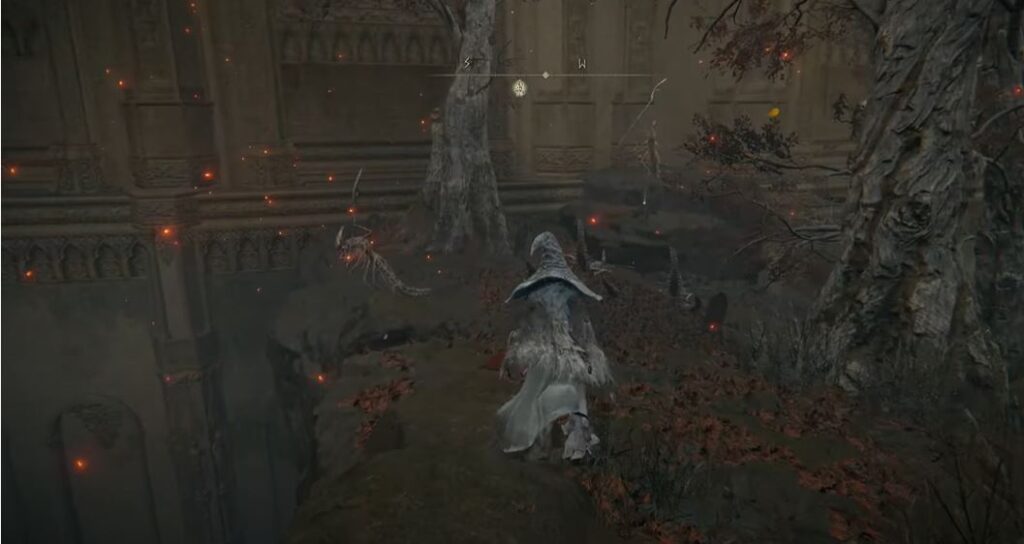
Going down this particular graveyard, you will come to another graveyard with the Bell Bearing hidden near a tombstone.
This Bell Bearing can be used to unlock Ghost Glovewort 7, 8, and 9. These can help give +7, +8, and +9 strength to your renowned spirit ashes.
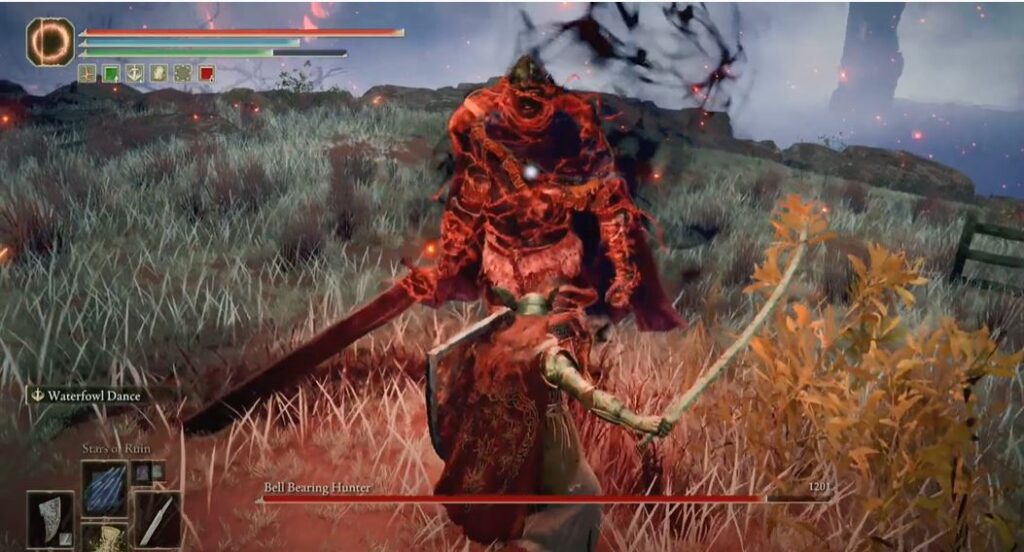
Bell Bearing Hunter’s Bell Bearings
Contrary to the other Bell Bearings, these Bell Bearings can be used to unlock weapons, armor sets, and shields instead of upgrading them. All of these Bell Bearings require you to defeat the Bell Bearing Hunter. This Elden Ring Boss can be found at different locations and can be defeated to unlock different Bell Bearings.
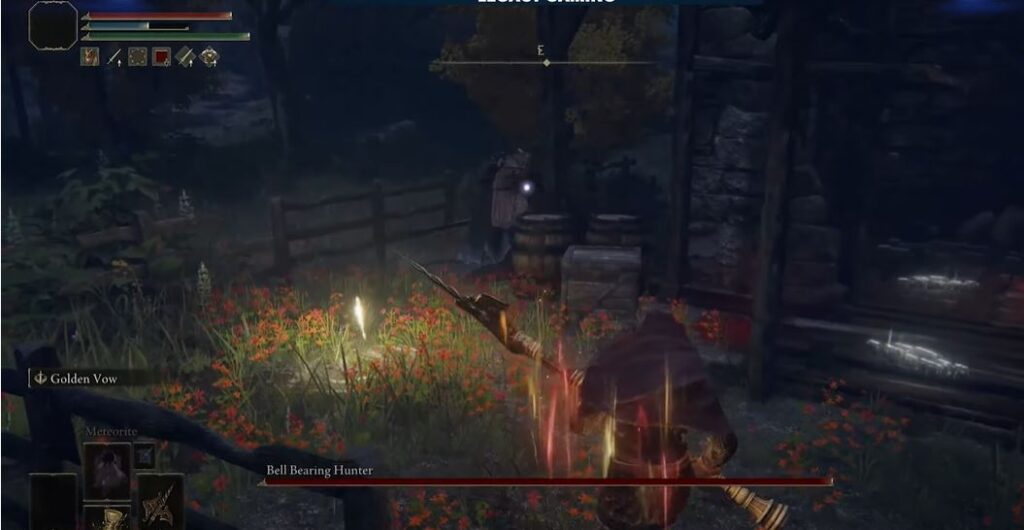
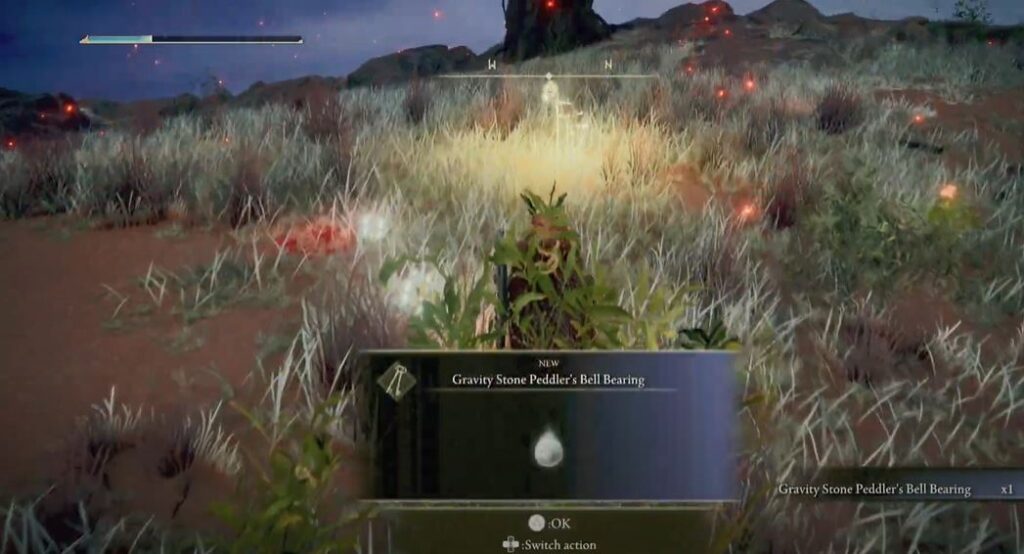
Gravity Stone’s Bell Bearing Location
To locate this Bell Bearing you will have to travel to the Isolated Merchant’s Shack.

As soon as you get there, you will come face-to-face with the Bell Bearing Hunter in this area.
Once you have defeated him, you will get the Gravity Stone’s Bell Bearing as a reward. You can this to the EMaiden Husks to unlock the Gravity Stone Fan and the Gravity Stone Chunk.
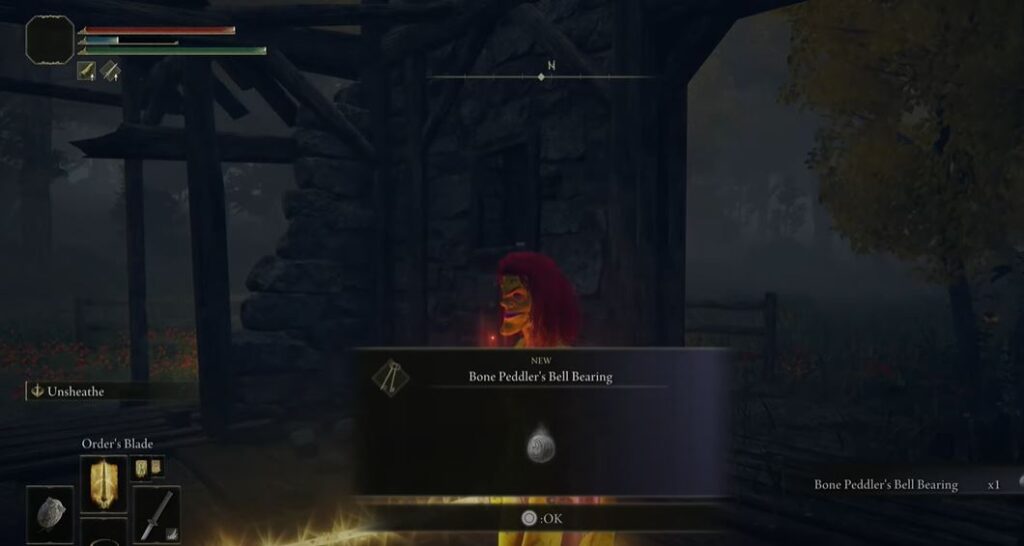
Bone Peddler’s Bell Bearing Location
You will have to travel to the Warmaster’s Shack to acquire this Bell Bearing.
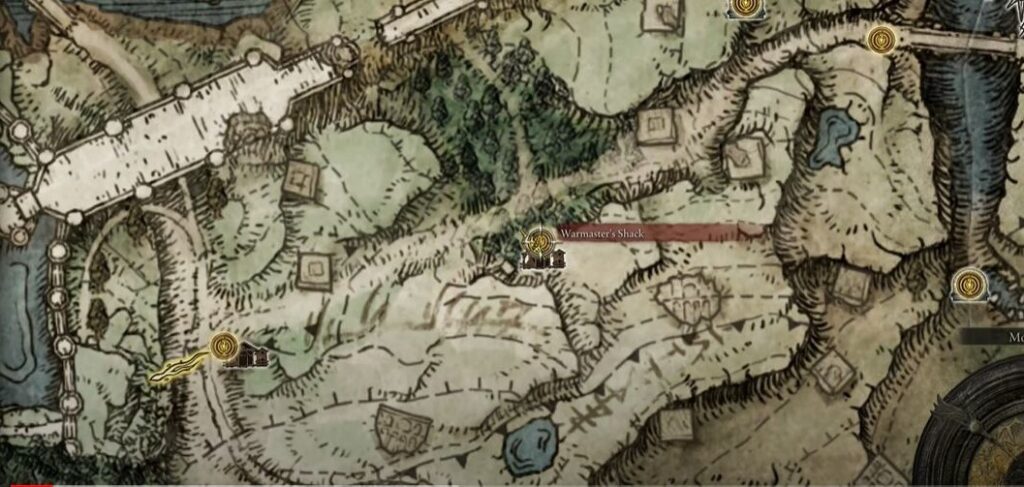
You will then have to talk to Knight Bernahl and rest at the site of grace to start the boss fight.
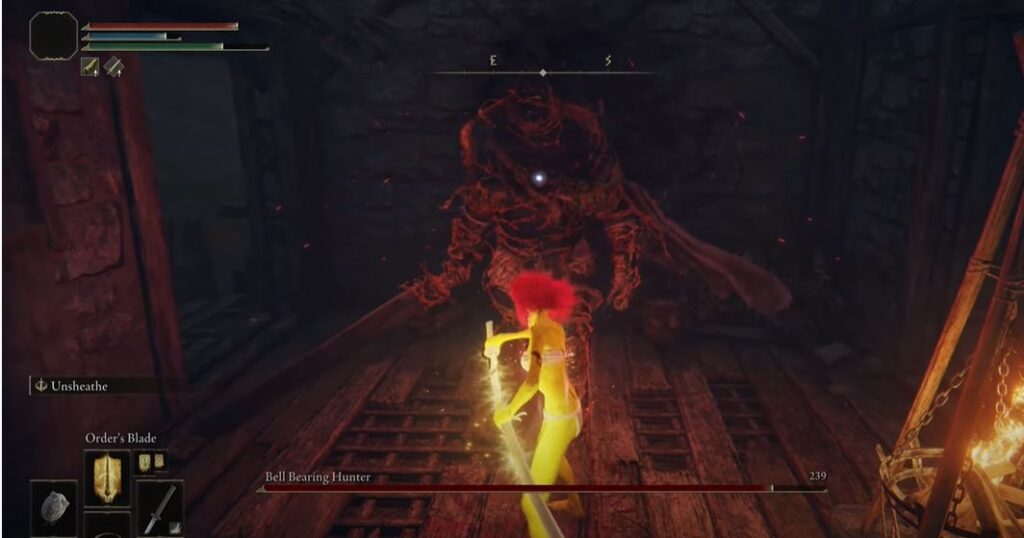
After taking care of the Bell Bearing Hunter, you will get the Bone Peddler’s Bell Bearing as a reward. This item can be taken to the shop to unlock the Thin Animal Bones and Hefty Beast Bones.
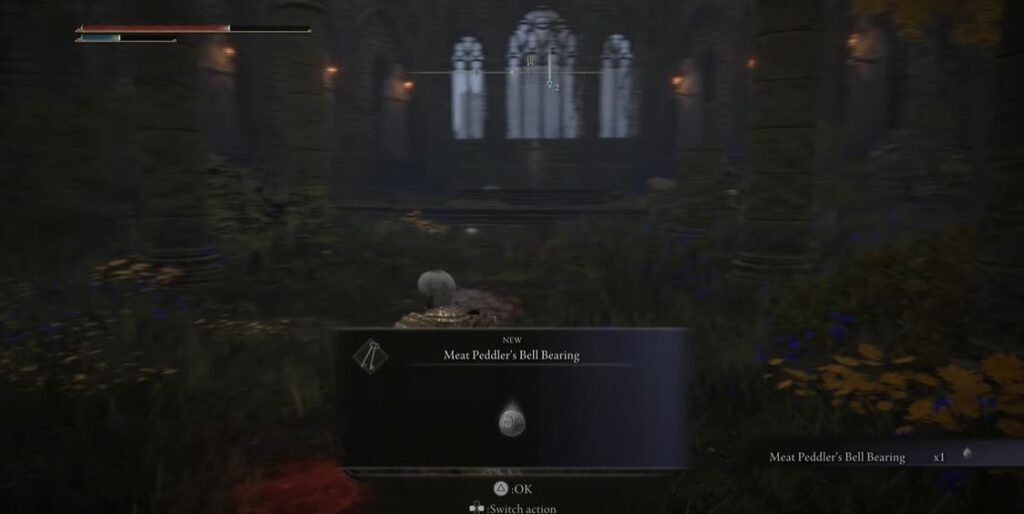
Meat Peddler’s Bell Bearing Location
Travel to the Church of Vows where you will have to encounter the Bell Bearing Hunter.

Once you have fought and defeated him you will get the Meat Peddler’s Bell Bearing as a reward. This item can to taken to the win Maiden Husks to unlock Sliver of Meat, Lump of Flesh, and Turtle Neck Meat for purchase.
Medicine Peddler’s Bell Bearing Location
You will have to make your way to Hermit Merchant’s Shack to find the last Bell Bearing.
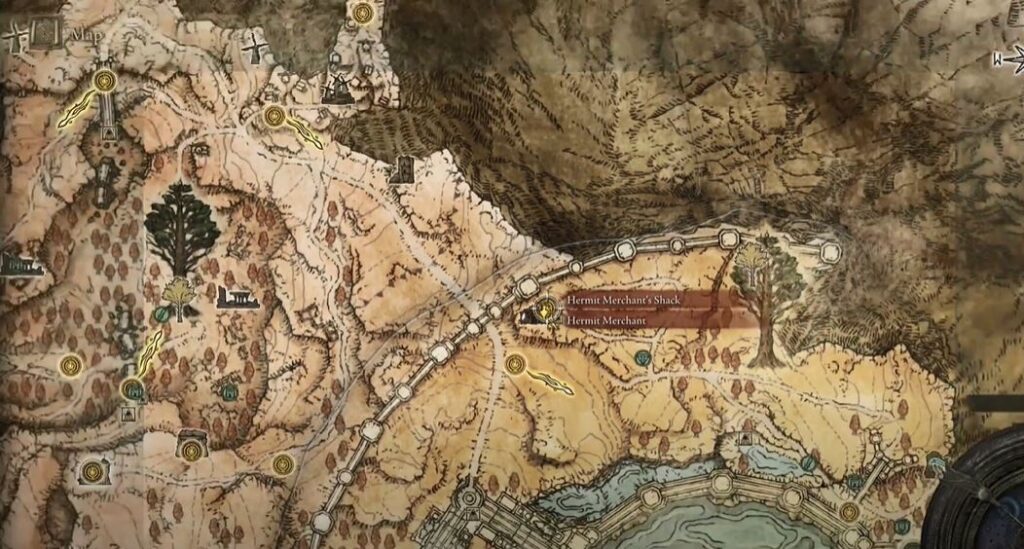
After getting there you will have to fight and defeat the Bell Bearing Hunter. Once you have taken care of him, you will receive the Medicine Peddler’s Bell Bearing as a reward.
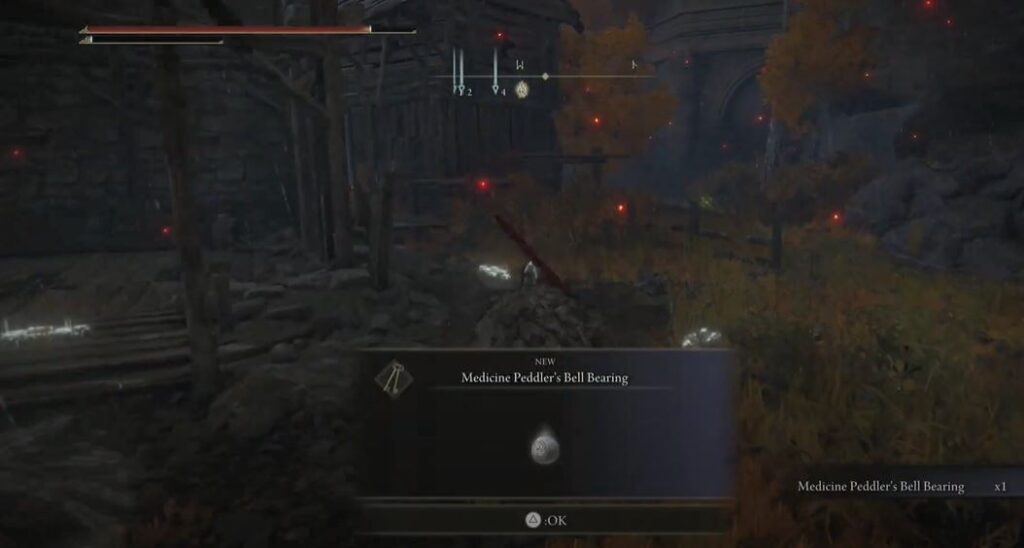
This item can be taken to the Twin Maiden Husks shop to unlock the Neutralizing, Stanching, Thawfrost, and Stimulating Boluses.
Other NPC Bell Bearings
These Bell Bearings can be picked up from the corpses of other merchants across the map. If the merchants die during their allotted quest, you can pick up their Bell Bearings and take them to the Twin Maiden Husks. This will make all the items the Merchants were selling appear in this shop. You can then purchase these items directly from the Twin Maiden Husks Location.
How to Acquire NPC Bell Bearings?
Some of these NPC Bell Bearings include;
- Kale’s Bell Bearing can be found on his corpse after you kill him at the Church of Elleh.
- Thops’s Bell Bearing can be found at the Academy of Raya Lucaria on his dead body.
- Rogier’s Bell Bearing can be found at the Roundtable Hold right after he dies in his questline.
- Iji’s Bell Bearing requires you to complete Blaidd’s and Ranni’s questlines. You can consult our guide on how to complete Ranni’s Questline if you need any help. After completing these quests, you can find Iji’s Bell Bearing on his corpse.
- Seluvis’s Bell Bearing can be found on his corpse after Ranni’s questline.
- D’s Bell Bearing requires you to complete Fia’s questline. After completing the quest, you can find this Bell Bearing on his corpse.
- Pidia’s Bell Bearing can be located on their corpse after they are killed in Ranni’s questline.
- Bernahl’s Bell Bearing can be found on his corpse at the Warmaster’s Shack.
- Corhyn’s Bell Bearing can be picked up after he disappears at the Mountaintop of the Giants.
- Gostoc’s Bell Bearing can be found on his at the Stormveil Castle.
- Blackguard’s Bell Bearing can be picked up if he dies at the end of his questline.
- Sellen’s Bell Bearing can be found on her corpse if you decide to side with Jerren. You can learn more about the Jerren Quest by going through our guide.
My Tips On Properly Utilizing The Twin Maiden Husks

While it is fun to find certain merchants in your first playthrough of Elden Ring, it becomes less exciting, especially when you’re like me with over 1200+ hours of playtime (Steam ID: WaterJuice). The Twin Maiden Husks in the Roundtable Hold serve as an umbrella merchant to satisfy all of your in-game needs.
If you’re fine with being slightly brutal, I recommend hunting down all the merchants in-game to receive their bell bearings and offer them to the Twin Maidens. There is no loss, it becomes far easier to collectively buy all items in a single go or not to traverse an entire kilometer to purchase a couple of arrows. I find it more than optimal just to be able to return to a single spot to buy anything and everything I desire.
This concludes my guide on finding the Twin Maiden Husks Location. If you liked this walkthrough, you can also read about finding the Homing Instinct Painting Location. Let me know what you thought about this guide in the comments below!
Thanks! Do share your feedback with us. ⚡
How can we make this post better? Your help would be appreciated. ✍