One of the most peculiar puzzles in Remnant 2 is the Cathedral of Omens Puzzle. At first sight, it can be quite intimidating to solve, but with some guidance, players will see that it is not that difficult.
- Remnant 2 Cathedral of Omens puzzle in Yaesha has 3 sections: Calamity, Blood Moon, Hope.
- Solve each section by manipulating three levers; find the right patterns.
- Journal in nearby room provides puzzle hints.
- For Calamity: Select Ravager, Death, and Doe symbols on the ground.
- For Blood Moon: Choose Moon, Ravager, and Sun symbols on the ground.
- For Hope: Pick Doe, Life, Sun, and Ravager symbols on the ground.
- Completing each section rewards players with items, including the Sagittarius Long Gun.
Cathedral Of Omens Puzzle In Remnant 2
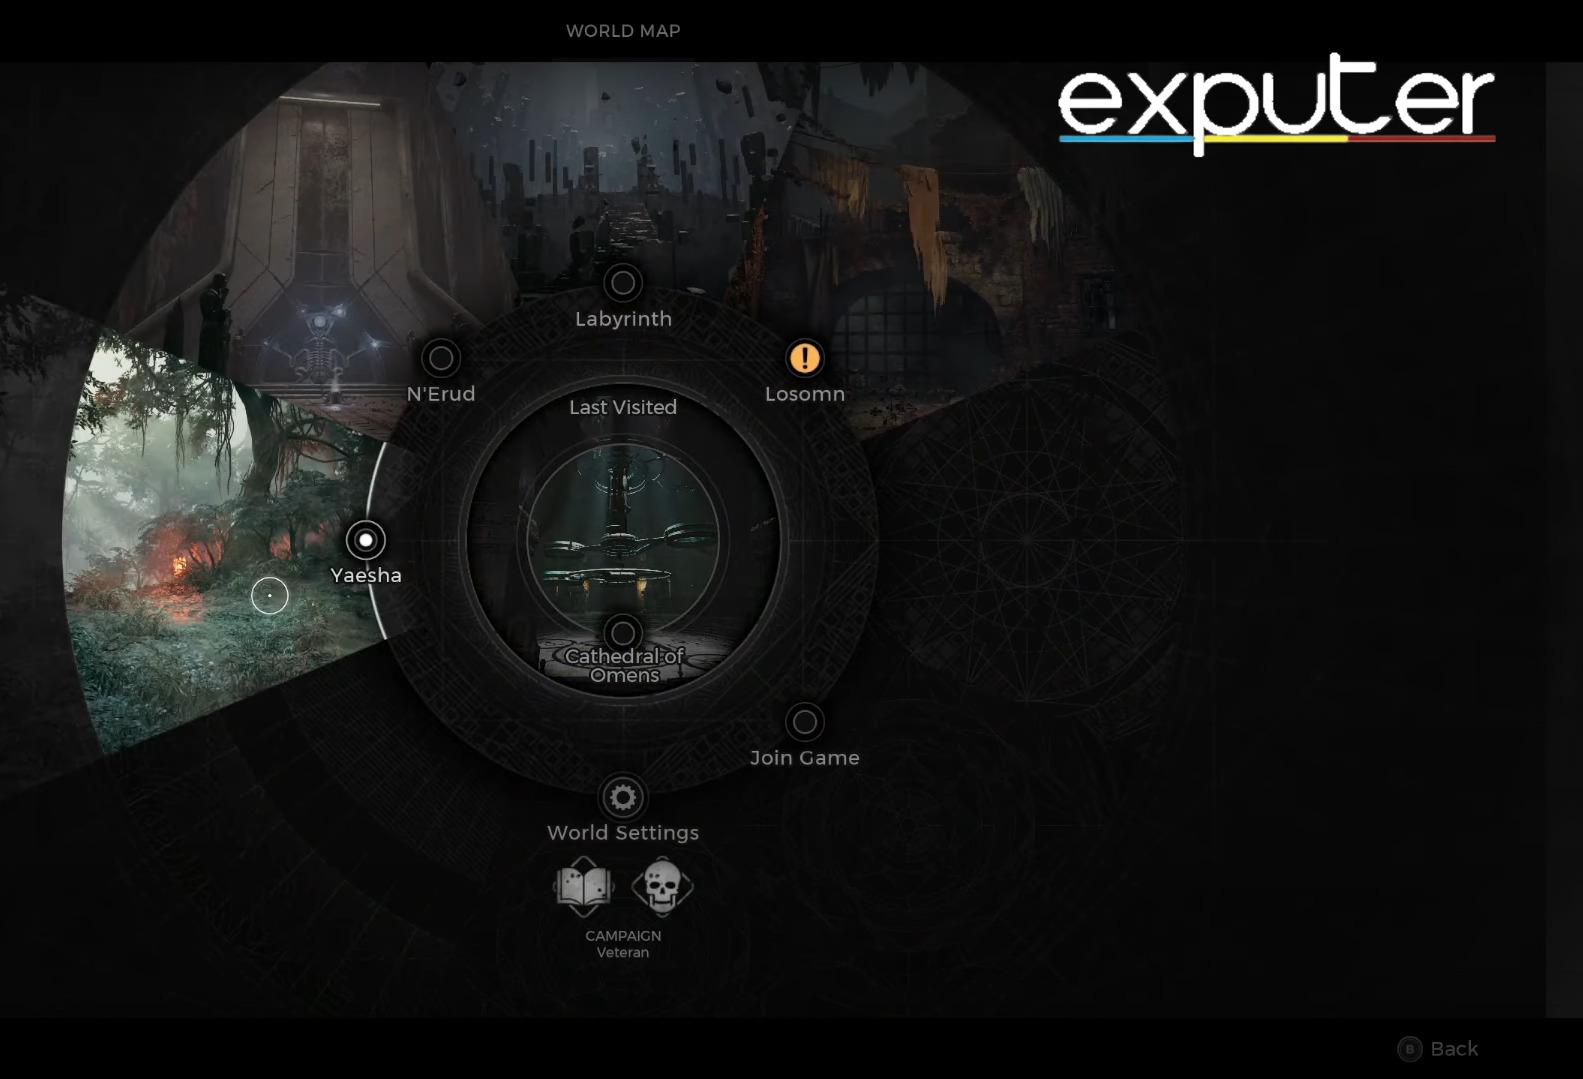
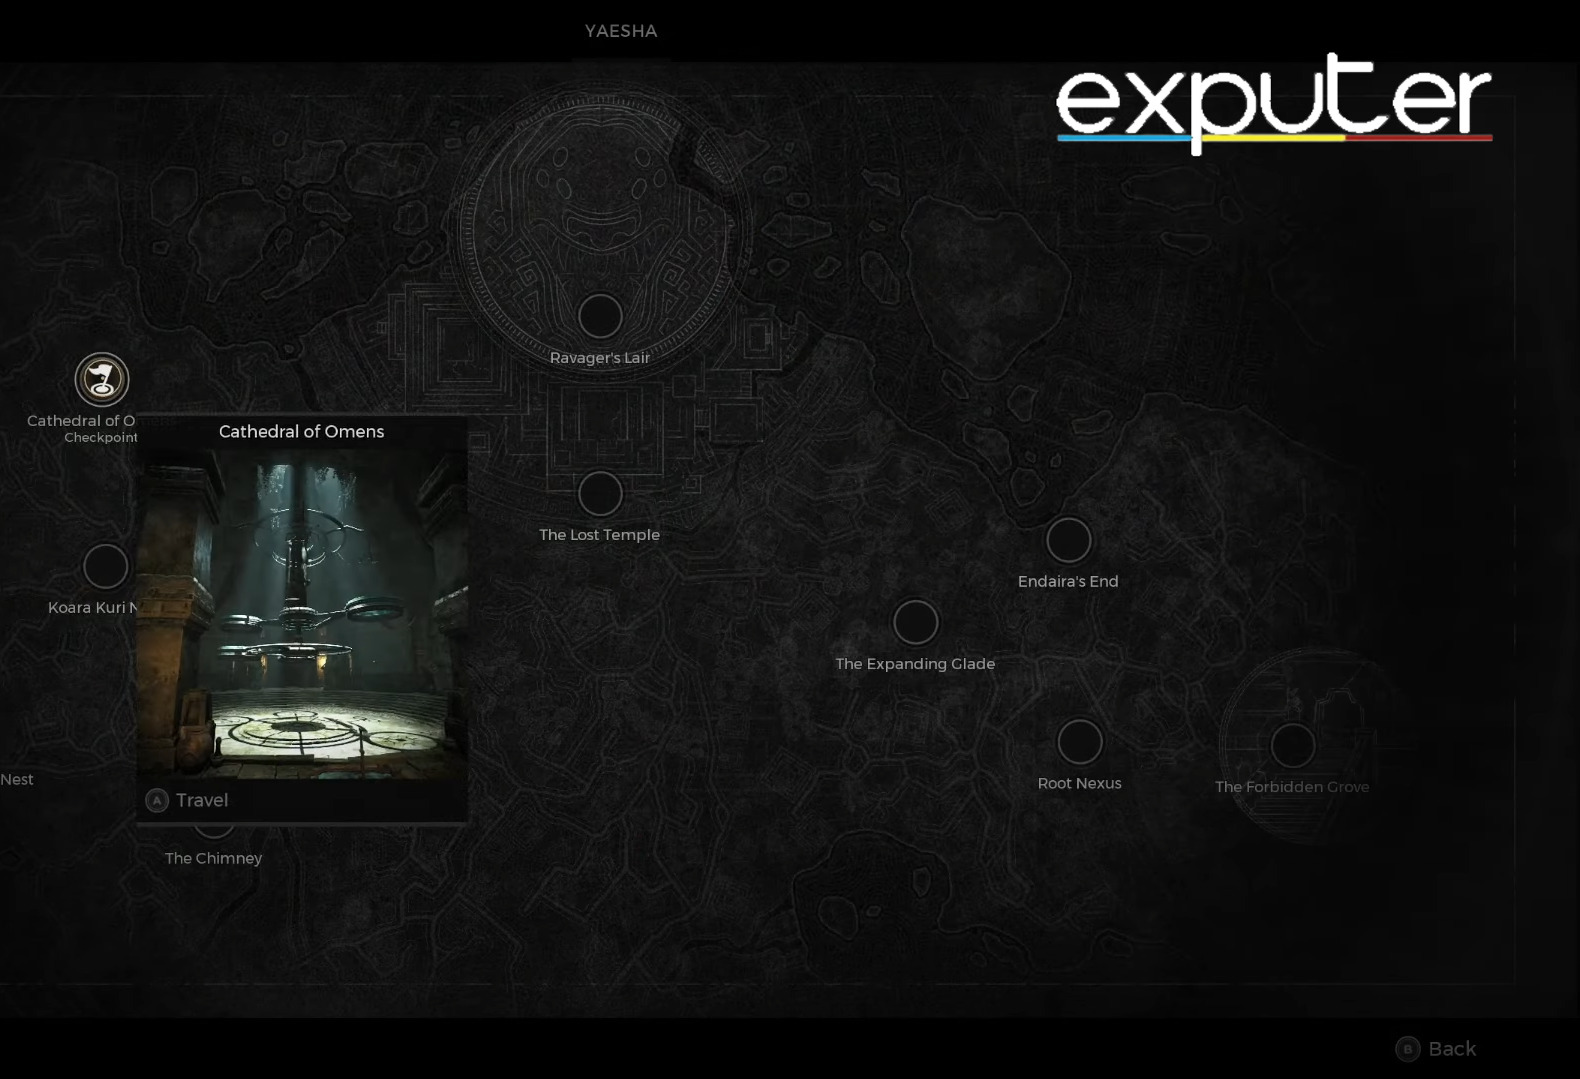
You will encounter this puzzle in Yaesha, one of the regions in Remnant 2. Within this region, there is an area named the Cathedral of Omens. The puzzle consists of 3 main parts in which you are trying to control a mechanism with the help of levers in an attempt to match the symbols on the ground.
The three parts of the Cathedral of Omens Puzzle are as follows:
- The Calamity Section
- The Blood Moon Section
- The Hope Section
Before proceeding with solving the puzzles, it is important to understand how the underlying mechanics of this puzzle work.
So, I would recommend keeping the following things in mind:
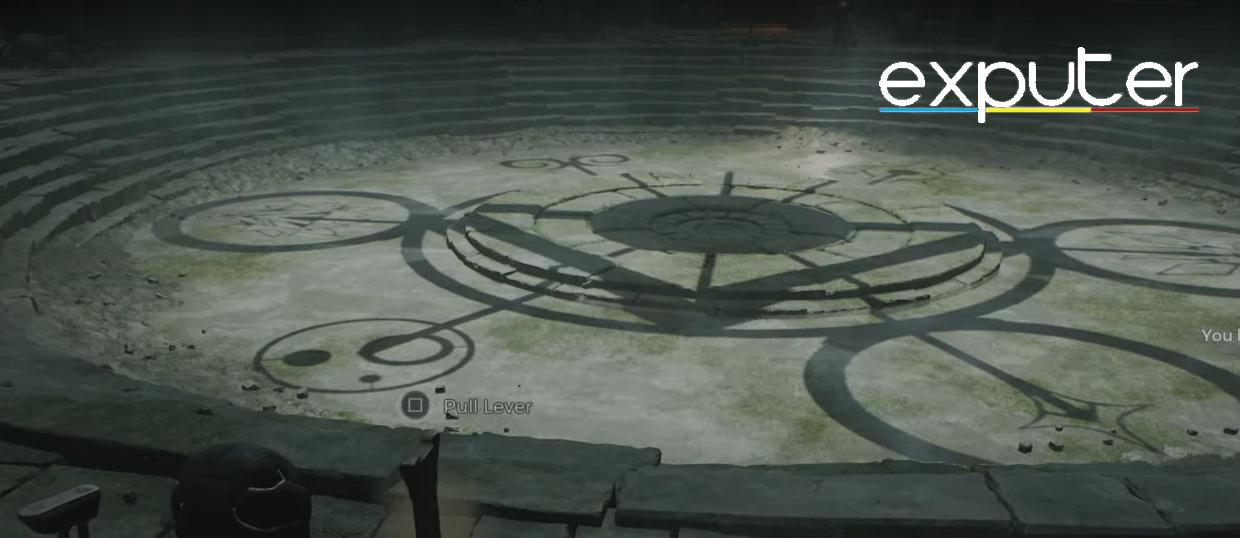
The Mechanism Of The Puzzle
Upon entering the Cathedral of Omens, you’ll immediately notice three levers in the room, each controlling different parts of the mechanism. Matching symbols for various sections is crucial. There are three doors inside on the left. One is open, and the other two are closed.
Follow my instructions below, to understand the levers:
- Near the entrance, the First Lever controls opposite symbols at the triangle’s edge formed by the shadow.
- The Second Lever, located by the open door on the left, controls adjacent circles on another selector dial.
- The Third Lever, opposite the second lever on the right, controls ground symbols.
Finding The Journal
Based on my gameplay experience, here is everything you need to know before solving each section of the Cathedral of Omens puzzle:
- Navigate to the right side of the room and go up the stairs.
- You will find yourself in a room that has clues regarding the puzzle.
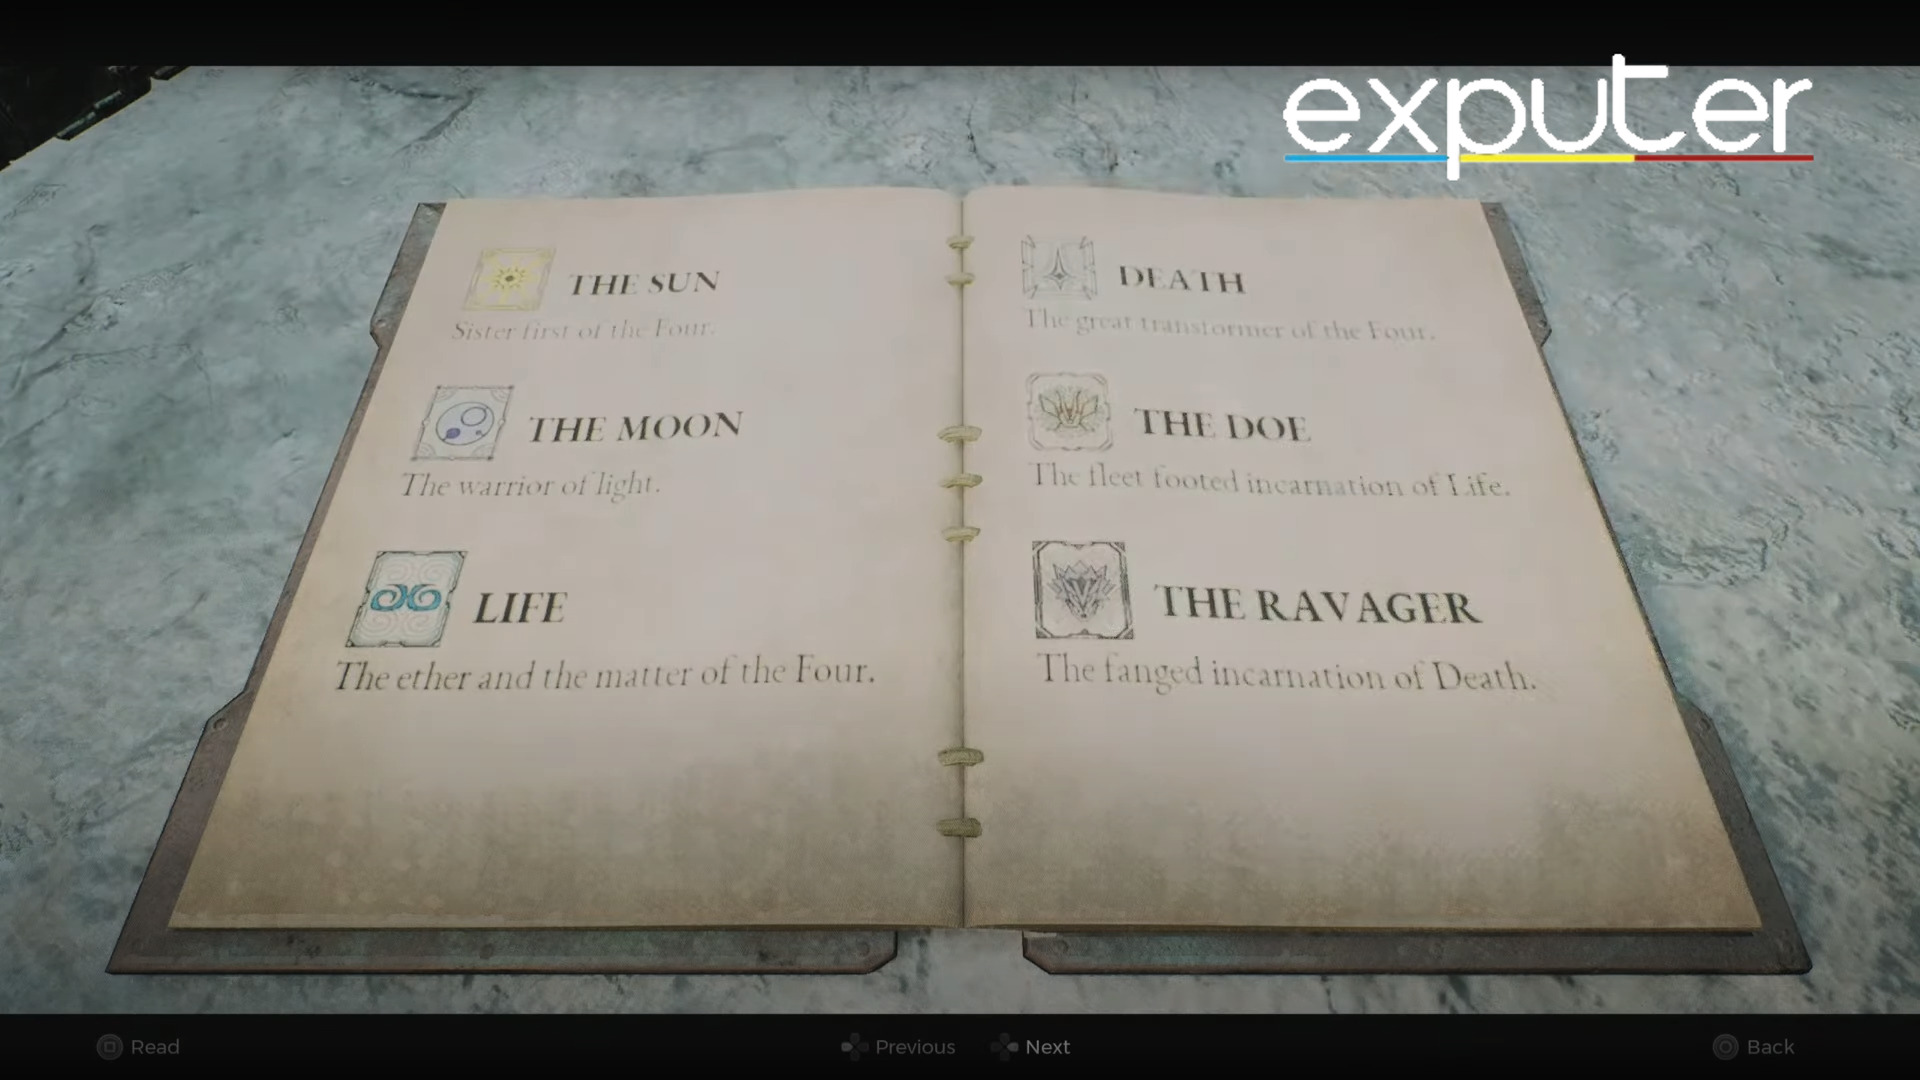
- In the room, you will find a journal that entails what all the symbols mean and how you can solve the puzzle, so keep this in mind as a reference while you are solving the puzzle.
- If you are stuck at any point while solving the puzzle, refer to the journal in the room to find a breakthrough in the puzzle.
How To Solve The Calamity Section
When you read the journal, you will notice that it is divided into three sections, indicating the three parts of the puzzle.
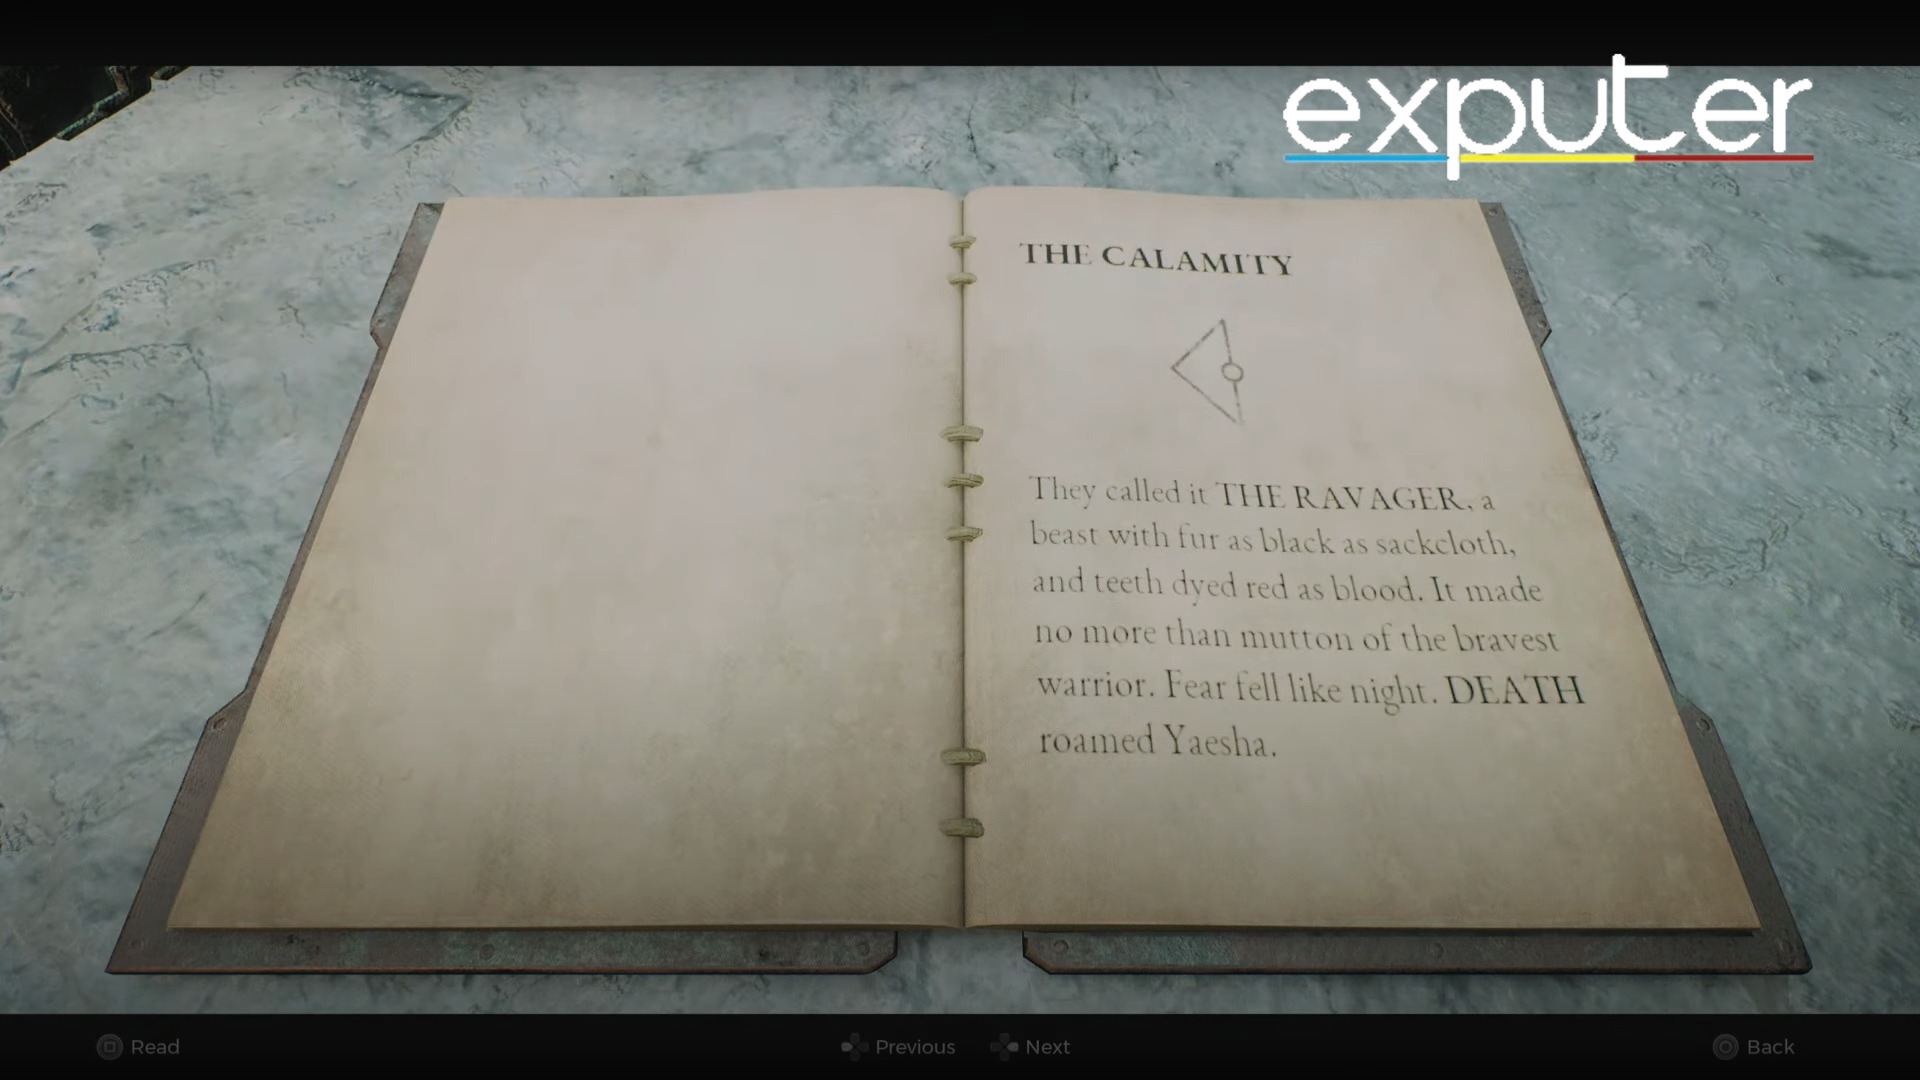
For the Calamity Section, the following words are highlighted in the text:
- The Ravager
- Death
- The Doe
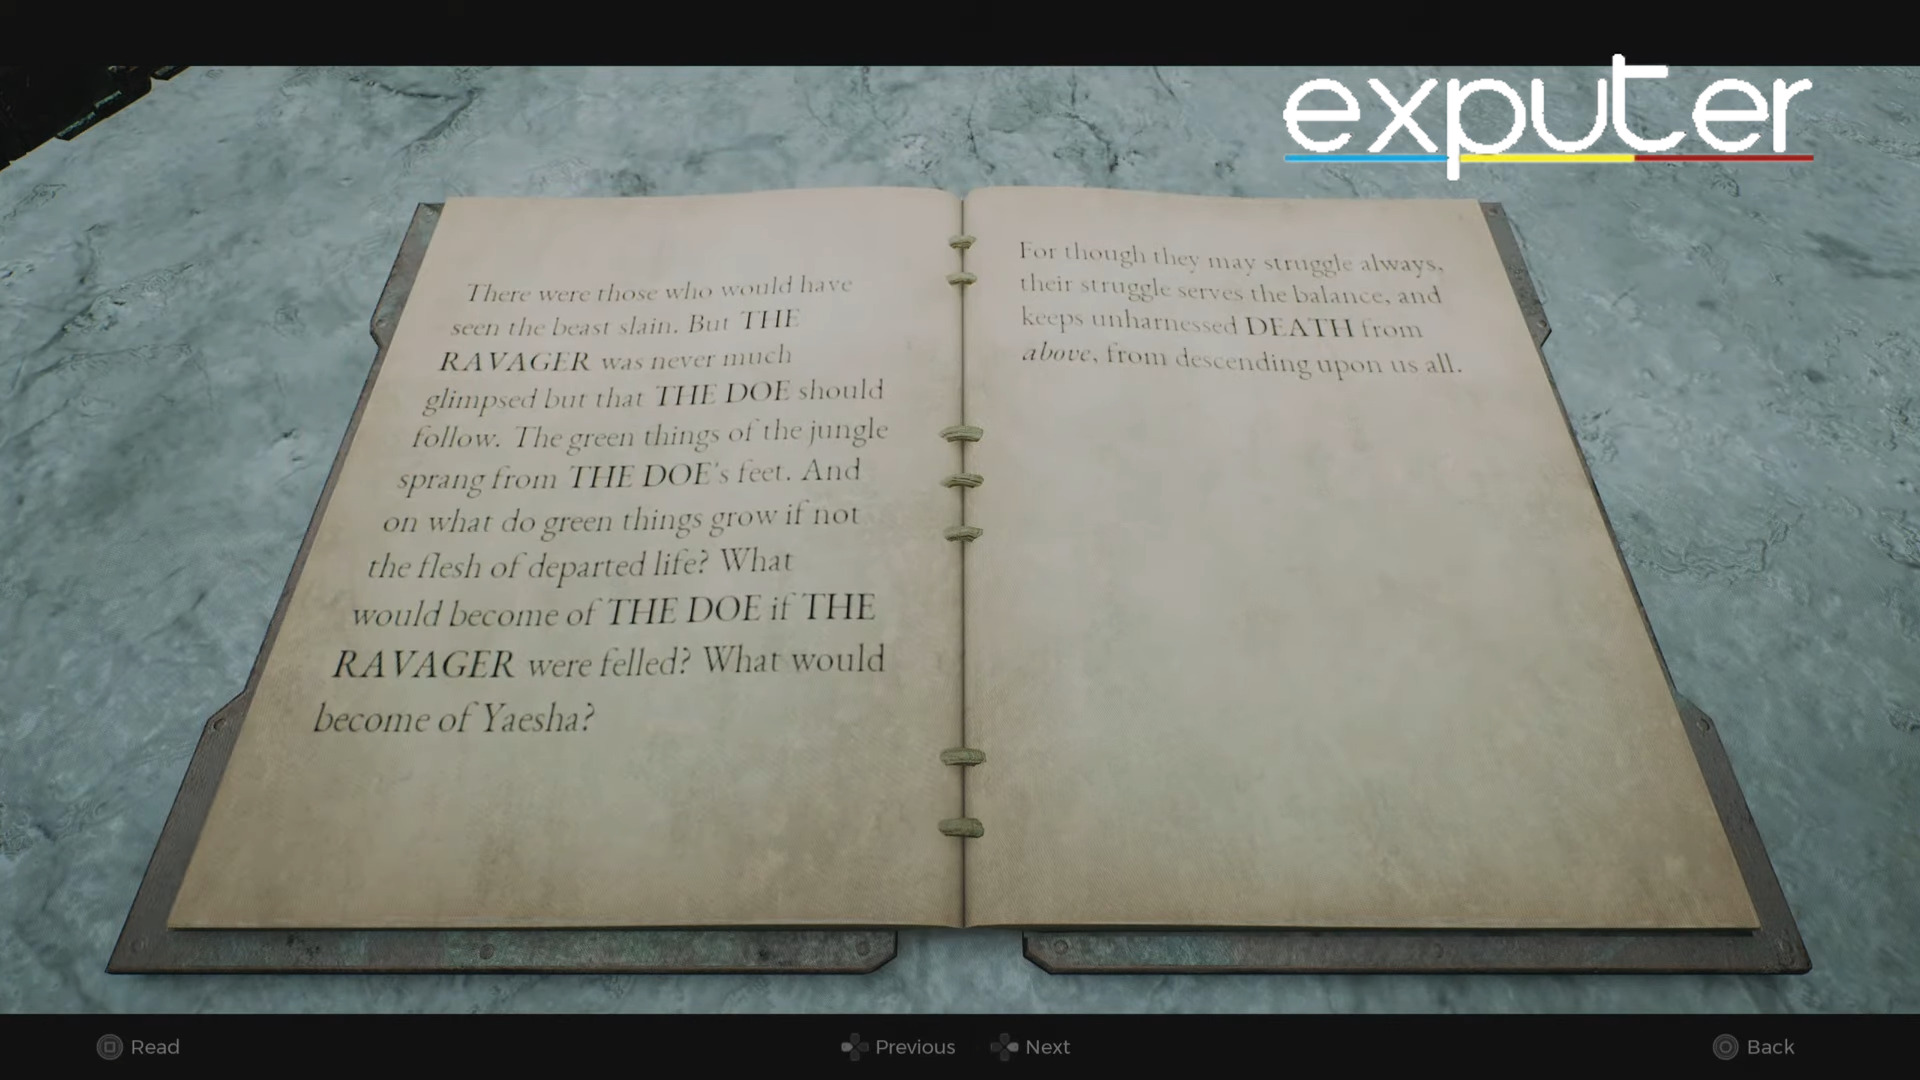
To complete the first section of this puzzle, the shadow cast by the triangle needs to be the same as the triangle above the locked door across the entrance.
An explanation of how I solved the first section of the puzzle is listed below:
- First, use the first lever to move the triangle until it matches the orientation on top of the door in the middle.
- The triangle shadow will now face left.
- Now, use the third lever to move the symbol of The Doe towards the side of the first lever.
- After you have done this, the symbol for The Ravager and The Doe will be directly across each other, while Death will be above the triangle.
- Next, you must use the second lever to bring a circle around the Death symbol.
- Now that you have selected the three required symbols, the Calamity door will open, and you can go in to collect your prize.
The reward for this section is a Faith Seed. It is an item that can be used for crafting.
How To Solve The Blood Moon Section
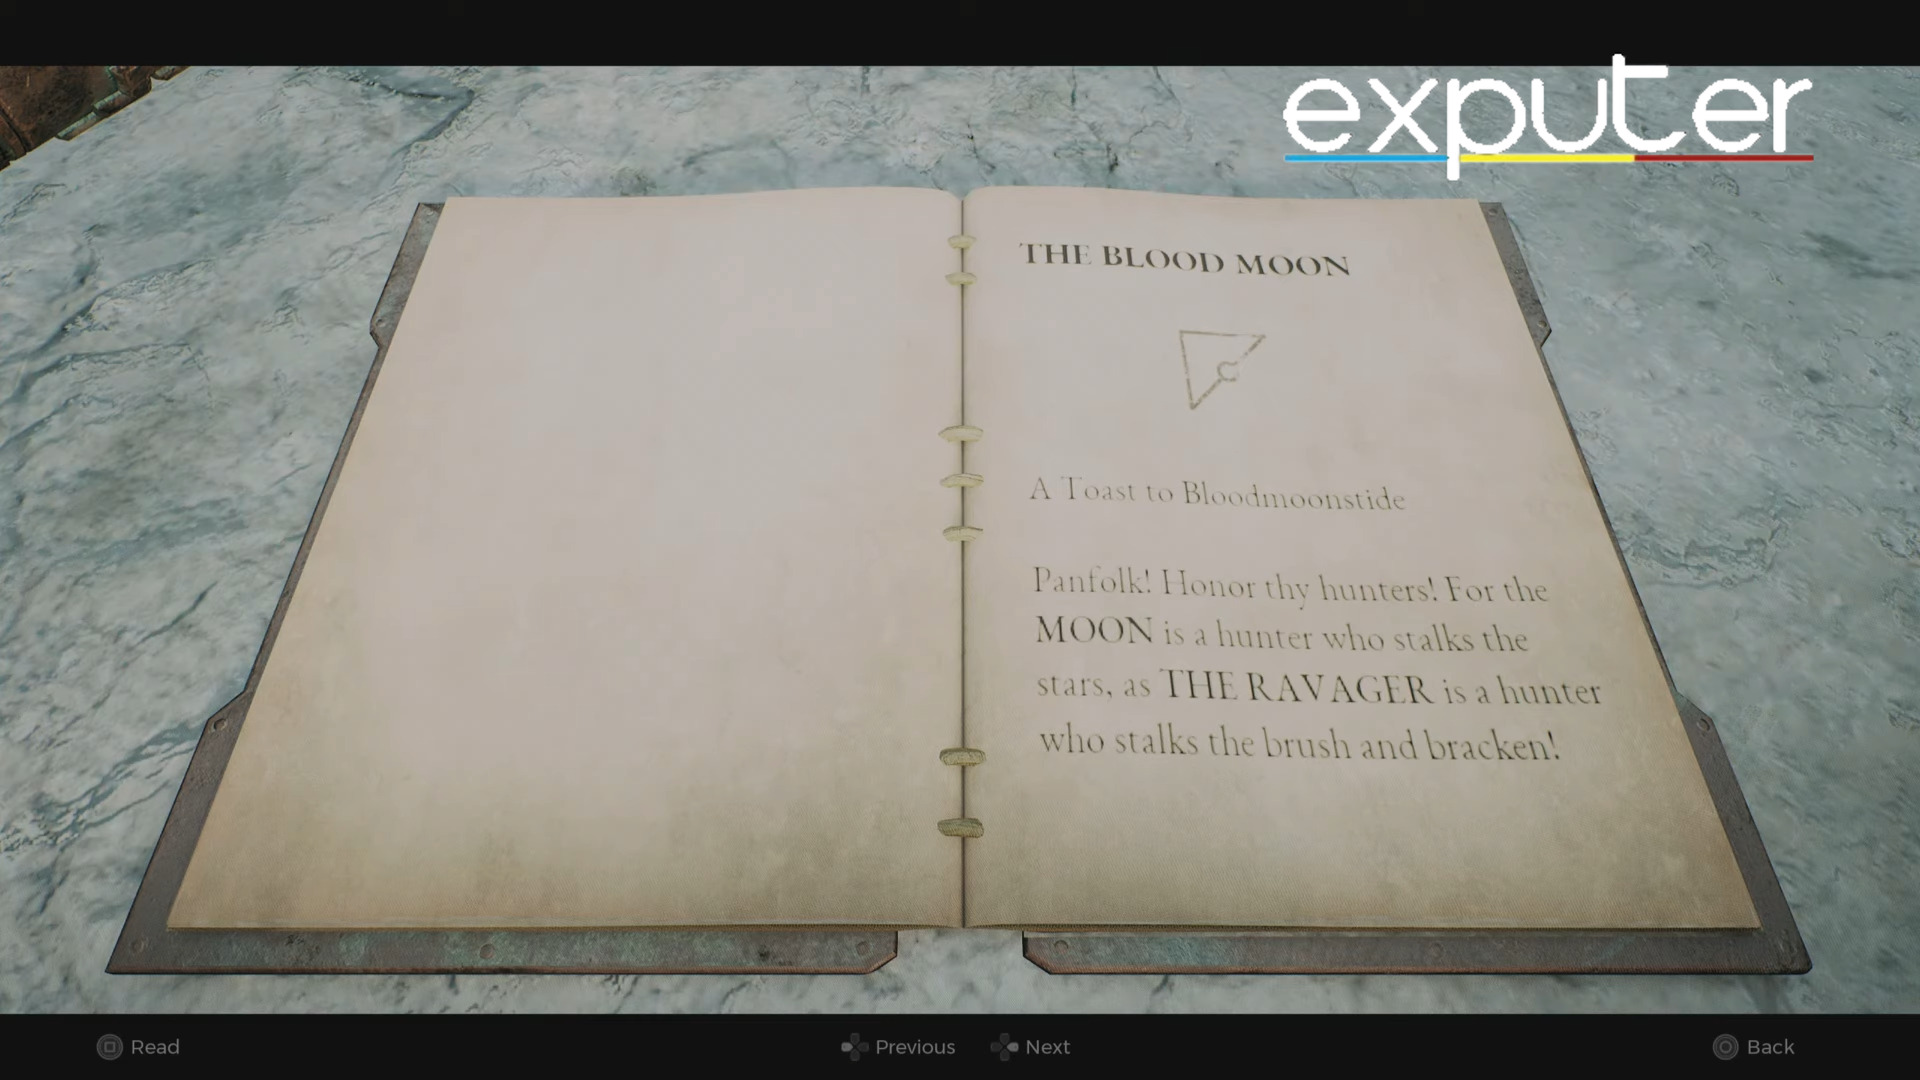
For the Blood Moon section of the puzzle, the following words are highlighted in the journal:
- Moon
- The Ravager
- Sun
Follow my instructions provided below to complete the Blood Moon section of the puzzle:
- Firstly, use the first lever to move the triangle until it matches the orientation that is on top of the door on the right.
- Now, use the third lever to move the symbol of the Sun and Moon on opposite sides of the triangle.
- The Moon will be directly in front of the locked door, while the Sun will be on the other side of it.
- After you have done this, the orientation will make it so that The Ravager is below the triangle.
- Next, you need to use the second lever to bring a circle around the three required symbols.
- Now that you have selected the three required symbols, the Blood Moon door will open and you can go in to collect your prize.
- The reward for this section is two chests that are filled with treasure, including a new Relic Fragment.
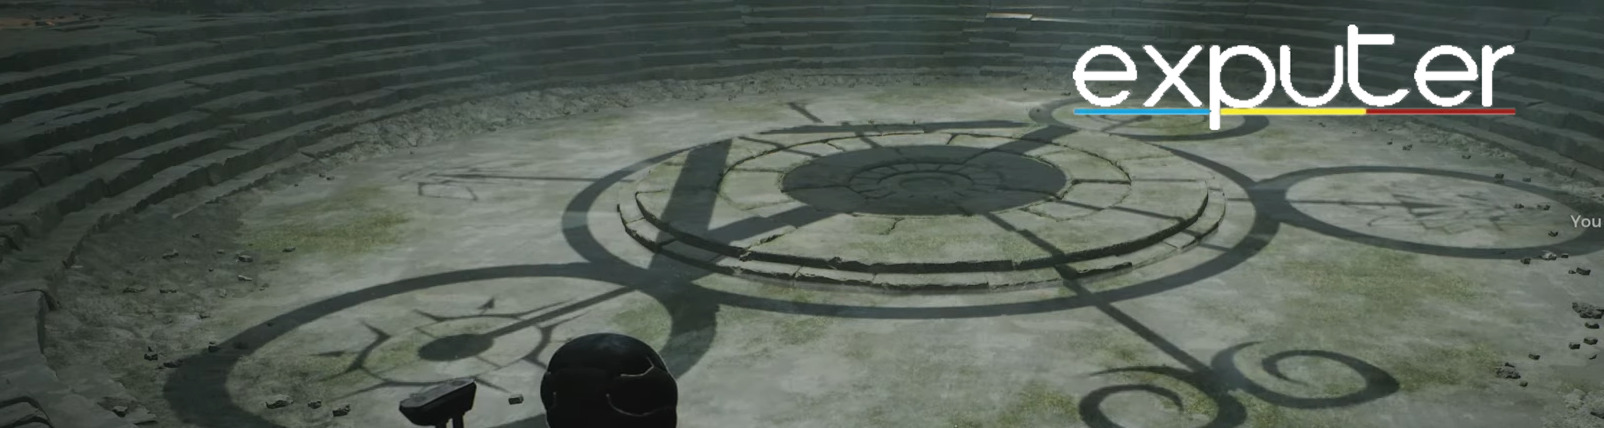
How To Solve The Hope Section
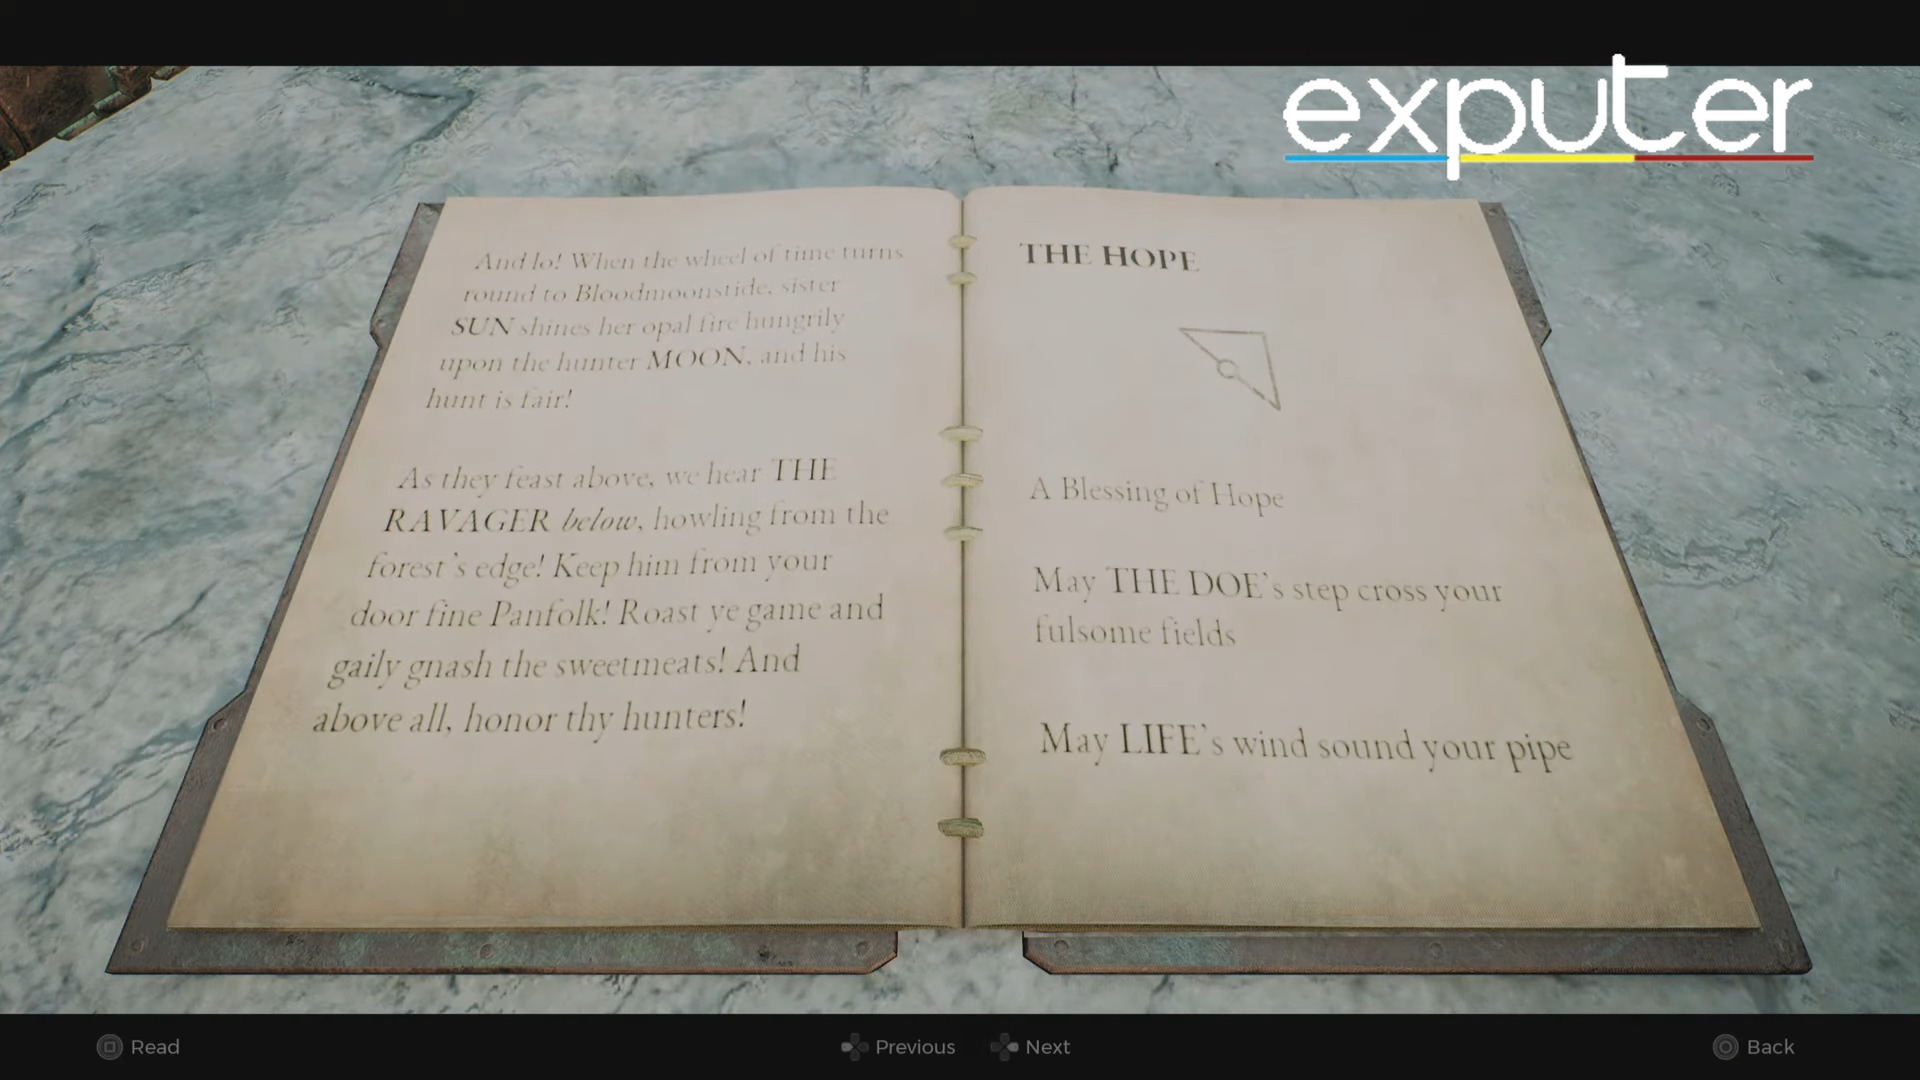
In the journal’s “Hope” section, the following words are highlighted:
- The Doe
- Life
- Sun
- The Ravager
Ensure that the shadow cast by the triangle matches the one above the entrance door with the following steps, listed from my in-game experience:
- Use the first lever to align the triangle with the orientation on top of the entrance door.
- Utilize the third lever to position The Doe and The Ravager symbols on opposite sides of the triangle.
- This alignment will place Life and the Sun below the triangle.
- Use the second lever to encircle the four required symbols.
- With the four symbols selected, a pedestal will appear in the room’s center, allowing you to collect your reward.
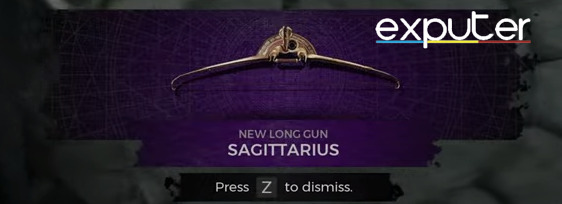
This section’s reward is the Sagittarius Long Gun, one of Remnant 2’s best weapons.
And that sums up my guide on how to solve Remnant 2’s Cathedral of Omens puzzle. With that, you know everything you need to know about solving the puzzle. Considering that this puzzle can be a bit cryptic to solve, completing it can be quite challenging. But by following my instructions, you can finish the puzzle in no time and claim your rightful rewards.
If you found this guide helpful, be sure to check out some other guides, such as Remnant 2 Morrow Parish Safe and Remnant 2 Best Medic Build.
Up Next:
- Remnant 2: Council Tribunal
- Remnant 2: Severed Hand
- The BEST Solo Classes In Remnant 2
- Remnant 2: Preload & Unlock Time
- How To Unlock Adventure Mode In Remnant 2
- Remnant 2: Vault Of The Formless
Thanks! Do share your feedback with us. ⚡
How can we make this post better? Your help would be appreciated. ✍