The Starfield Burden Of Proof is a sort of faction questline for the United Colonies Vanguard. You have to infiltrate the Crimson Fleet and gather pieces of evidence against them. It is here where you decide whether you want to betray the Crimson Fleet pirates or stay with them. You will have to wait and do multiple missions in order to get the various spread-out pieces of evidence.
Key Takeaways
The Burden Of Proof is also about infiltrating the Crimson Fleet for the UC Vanguard faction.
You need about 20 pieces of evidence in order to complete the Starfield Burden Of Proof.
You must take the pieces of evidence back to Lt. Toft to complete the mission in Starfield.
For each piece of evidence, Lt. Toft will reward you with about 1000 credits.
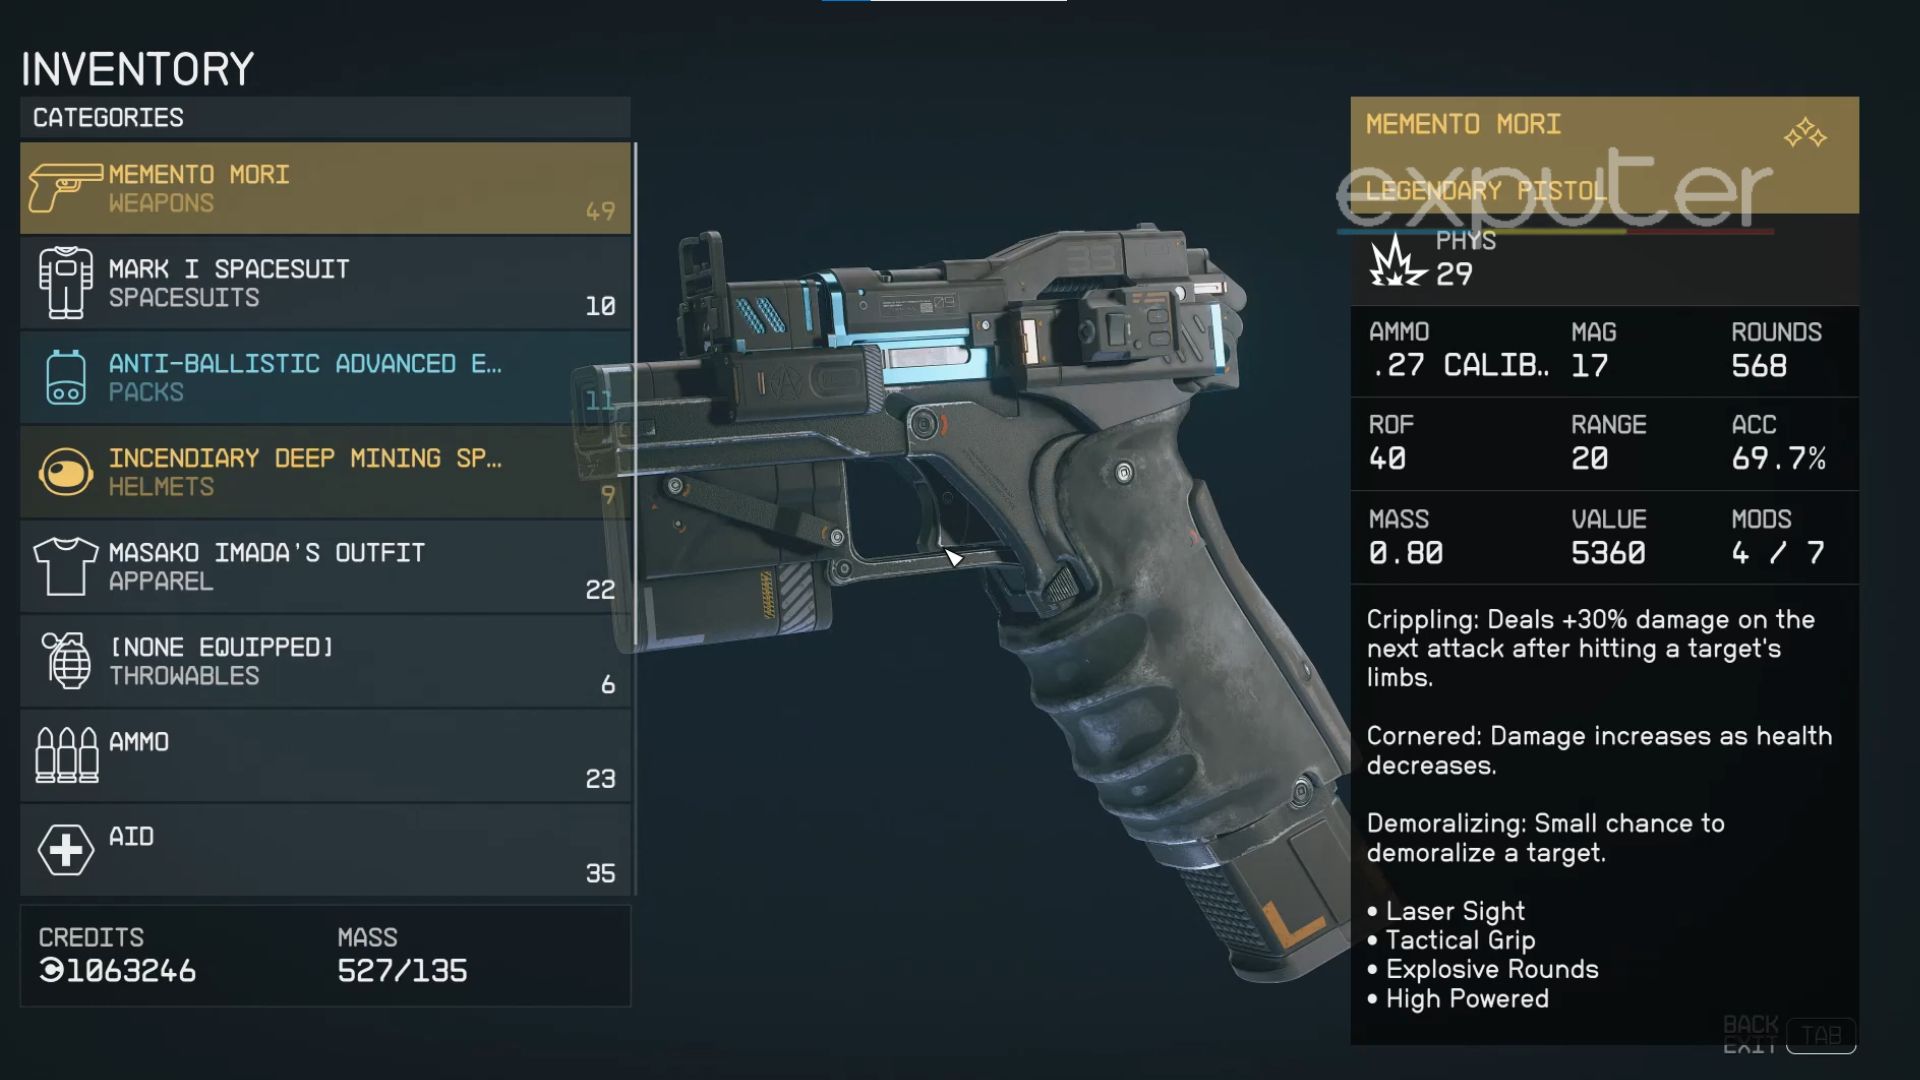
After you complete the Burden Of Proof mission, you can get a legendary Memento Mori pistol from Lt. Toft.
Before You Start: The mission is interlinked with the Echoes Of The Past, meaning it will not be completed until you progress in the Echoes Of The Past mission.
How Do You Get Burden Of Proof Mission In Starfield?
In order to get the Burden Of Proof mission, you will have to infiltrate the Crimson Fleet as per the demand of UC Vanguard.
Burden of Proof is one of the missions that you will have to do for the UC Vanguard Faction. The UC Vanguard faction opposes the Crimson Fleet in Starfield. You can join the Crimson Fleet easily by completing several quests, which will be given by The Crimson Fleet themselves.
To get the Starfield Burden Of Proof, you will have to commit multiple crimes against UC Vanguard so that they can arrest you.
After you get arrested, you will be given the choice to either stay in prison or you could get out and help Vanguard infiltrate the Crimson Fleet.
Once you start infiltrating the Crimson Fleet, you will get your Burden Of Proof mission in Starfield.
How Do You Complete Burden Of Proof?
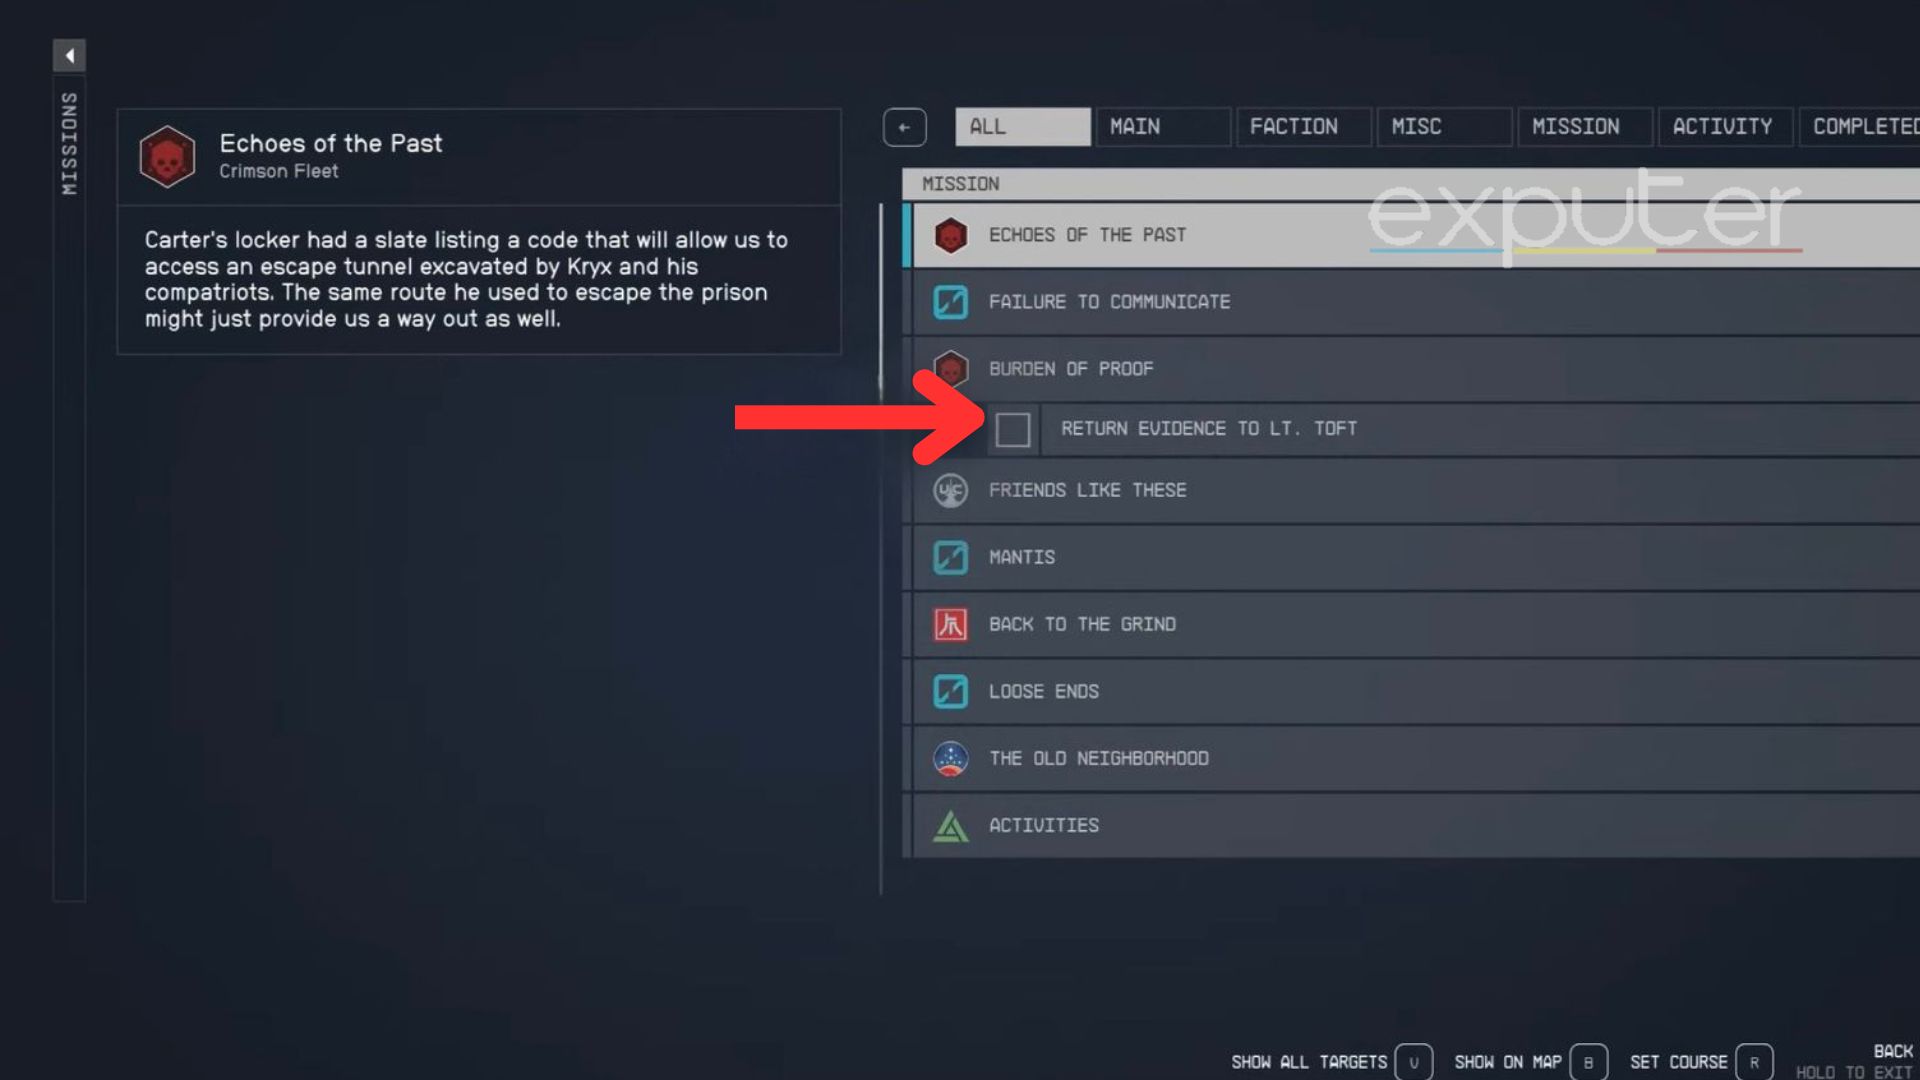
Return To LT. Toft – [Screenshot Grab: eXputer]You have to gather 20 pieces of evidence and submit them back to Lt. Toft to complete the Burden of Proof.
Important: Try to find each piece of evidence while doing their respective missions because as you go ahead, you may not be able to complete some.
All 20 Evidence Locations For Burden Of Proof
Here are all the 20 Evidence Locations that you need in order to complete the Starfield Burden Of Proof:
Evidence Name
Location
Mission/Quest
Naeva Meetup
Cynodia on Mars, Broken Spear bar
Deep Cover mission
Carter's Gig
The Lock, D-block section of the showers
Echoes Of The Past mission
Warden's Log
UC Prison, The Lock, Intercom room
Echoes Of The Past mission
Request Denied
Siren Of Stars ship, Captain's Quarters
Breaking The Bank mission
Dumbrosky’s Embezzlement Scheme
SY-920 ship, Gabriel Vogal's lab
Breaking The Bank mission
Huan's Talk
New Atlantis, Well District
All The Best There quest
Eubanks And Woods
SY-920 ship, Gabriel Vogal's lab (missable)
All The Best There quest
Request A17
The Key Space Station, Reckoner's Core
Rook Meets King quest
Mira's Demise
The Key Space Station, Bunk room
Rook Meets King quest
Voss's Parts
The Key Space Station, Control Room
Rook Meets King quest
Gennady Ayton
The Key Space Station, Clinic Spacestation
Doctor's Orders side quest
Message For Bog
Planet Kumasi IX-A, Ecliptic Garrison
Retrieving The Past side quest
Chunk's Heist Evidence
Porimma III, Red Mile building
N/A
Chiropetra
Planet Gagarin, Lizzie's Bar
N/A
Hopetown Raid
Planet Volvo, Hopetown
N/A
Kreet Offer
Wolf System, Chthonia
N/A
The Big Score
Neon City, Madame Sauvage’s Place
Absolute Power mission
Meeting With Bayu
Neon City, Generdyne Industries Office
Absolute Power mission
Ayumi's Offer
Neon City, Member's Lounge
Absolute Power mission
Mortem Obire
Jasper Kryx's body
Eye Of The Storm mission
1. Naeva Meetup
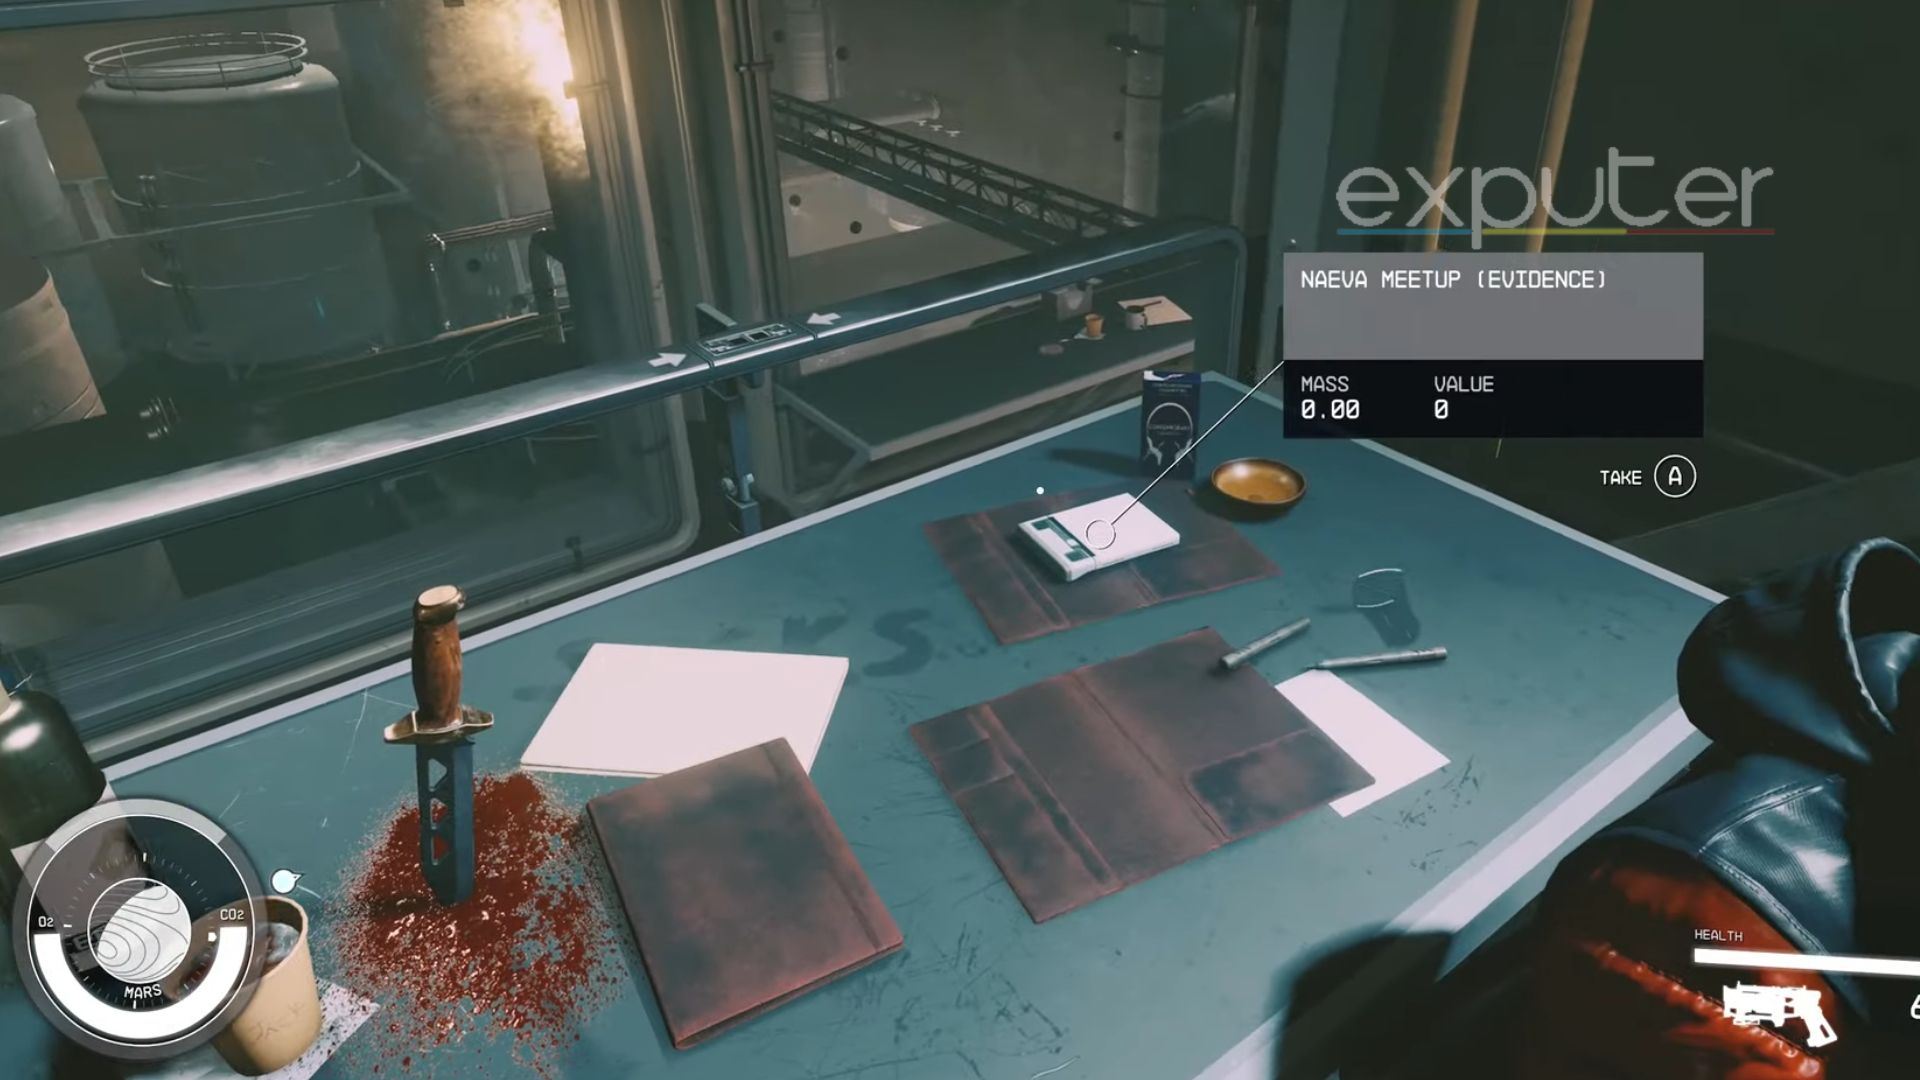
Naeva Meetup – [Image by eXputer]The first piece of evidence you will find is the Naeva Meetup. It is definitely a pretty easy one to catch, as it cannot be missed like most evidence slates can. Naeve Meetup will be found at the beginning of a mission called “Deep Cover.” The piece of evidence will resemble a sort of mini pad, but it won’t be that hard to miss because its location will be guided to beginners.
Show Full Text
Go to the Cynodia on Mars inside the Solar System.
It is where you will likely meet Adler Kemp inside the Broken Spear bar.
The evidence labeled as Naeva Meetup will be found at the table behind where Adler Kemp is sitting.
2. Carter’s Gig
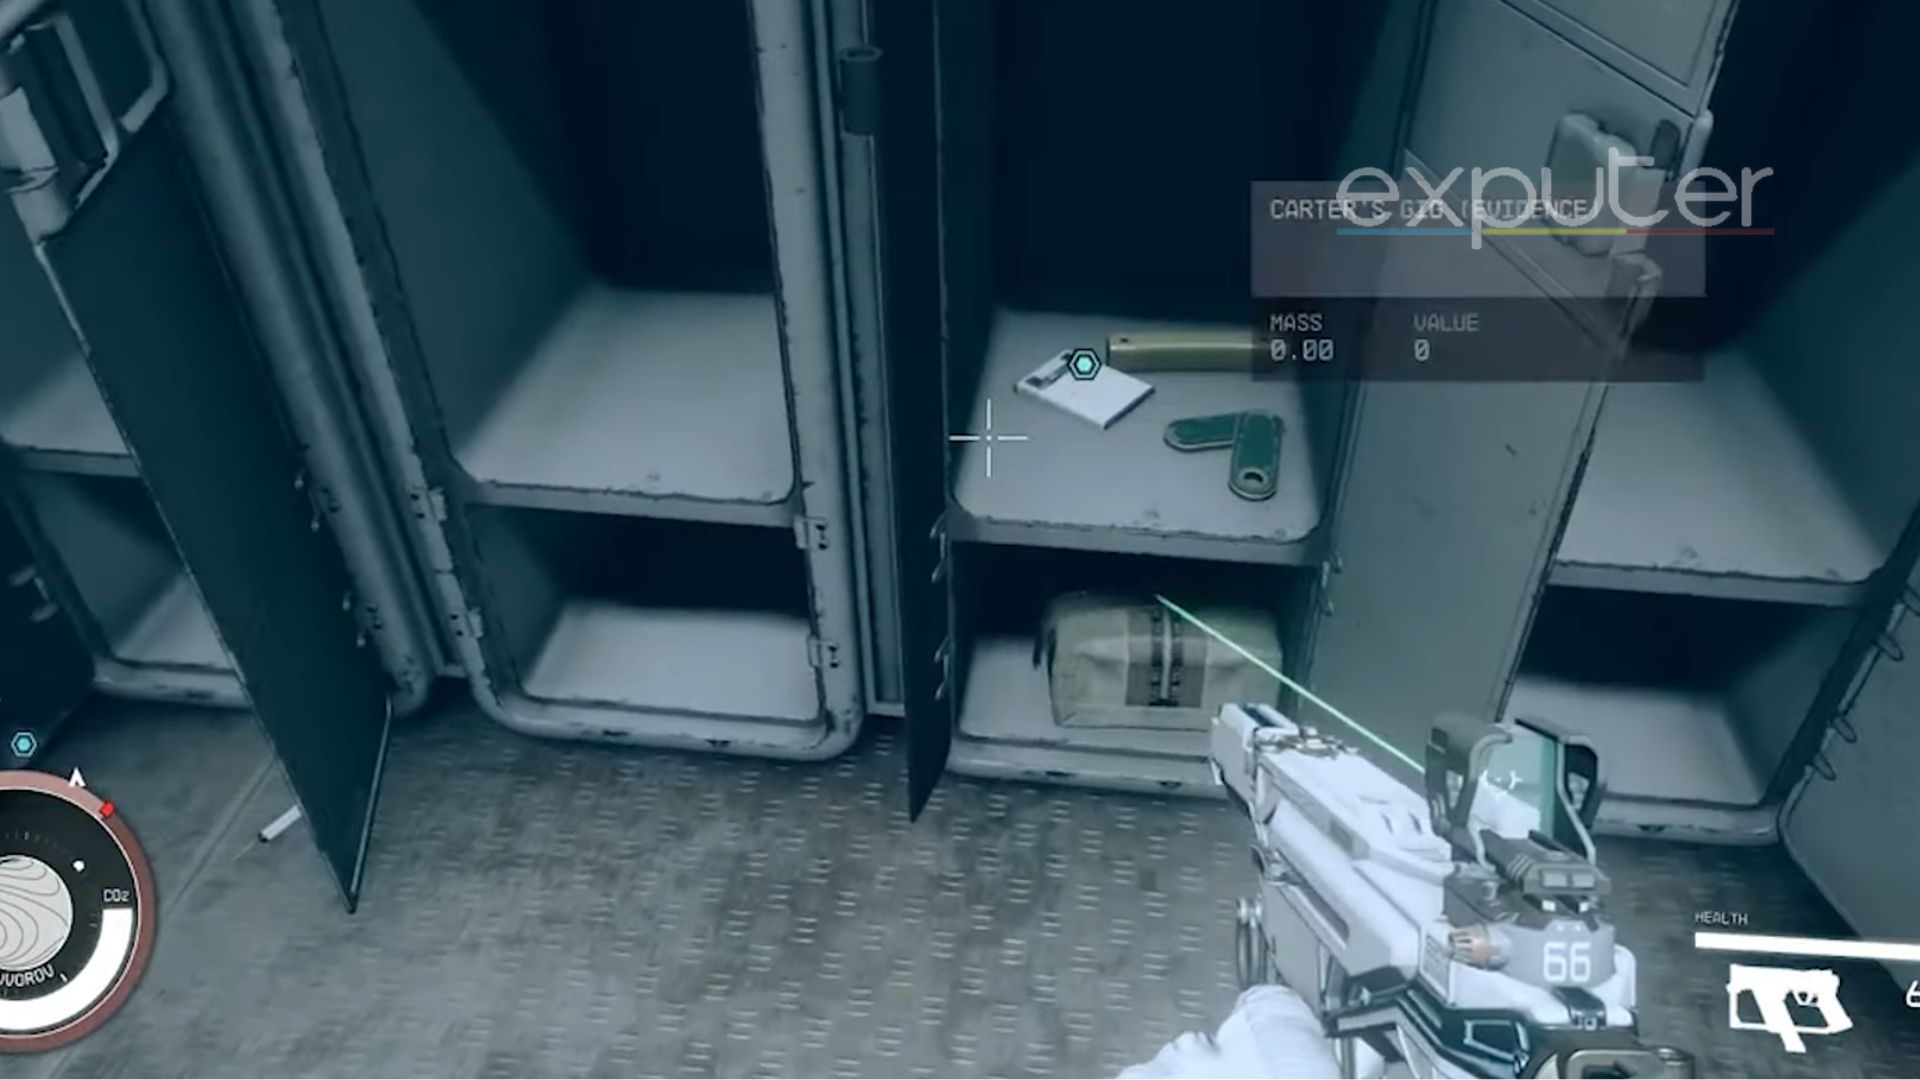
Carter’s Gig – [Image by eXputer]You will have to find Carter’s Locker when you are on the mission of “Echoes Of The Past.” It will be on an abandoned UC prison known as The Lock.
Show Full Text
After moving on to Search Carter’s locker, you must follow these simple steps to reach the locker:
Exit the Kryx’s Cell and start moving towards your right-hand side.
Now, head left from there along the passage and go down the stairs.
You will see a white-colored door in front of you, the Carters Locker.
Enter the locker, and you will see four lockers in front of you.
Open the locker, and you will find a slate with a recording inside the locker.
Listen to Carter’s Slate.
3. Warden’s Log
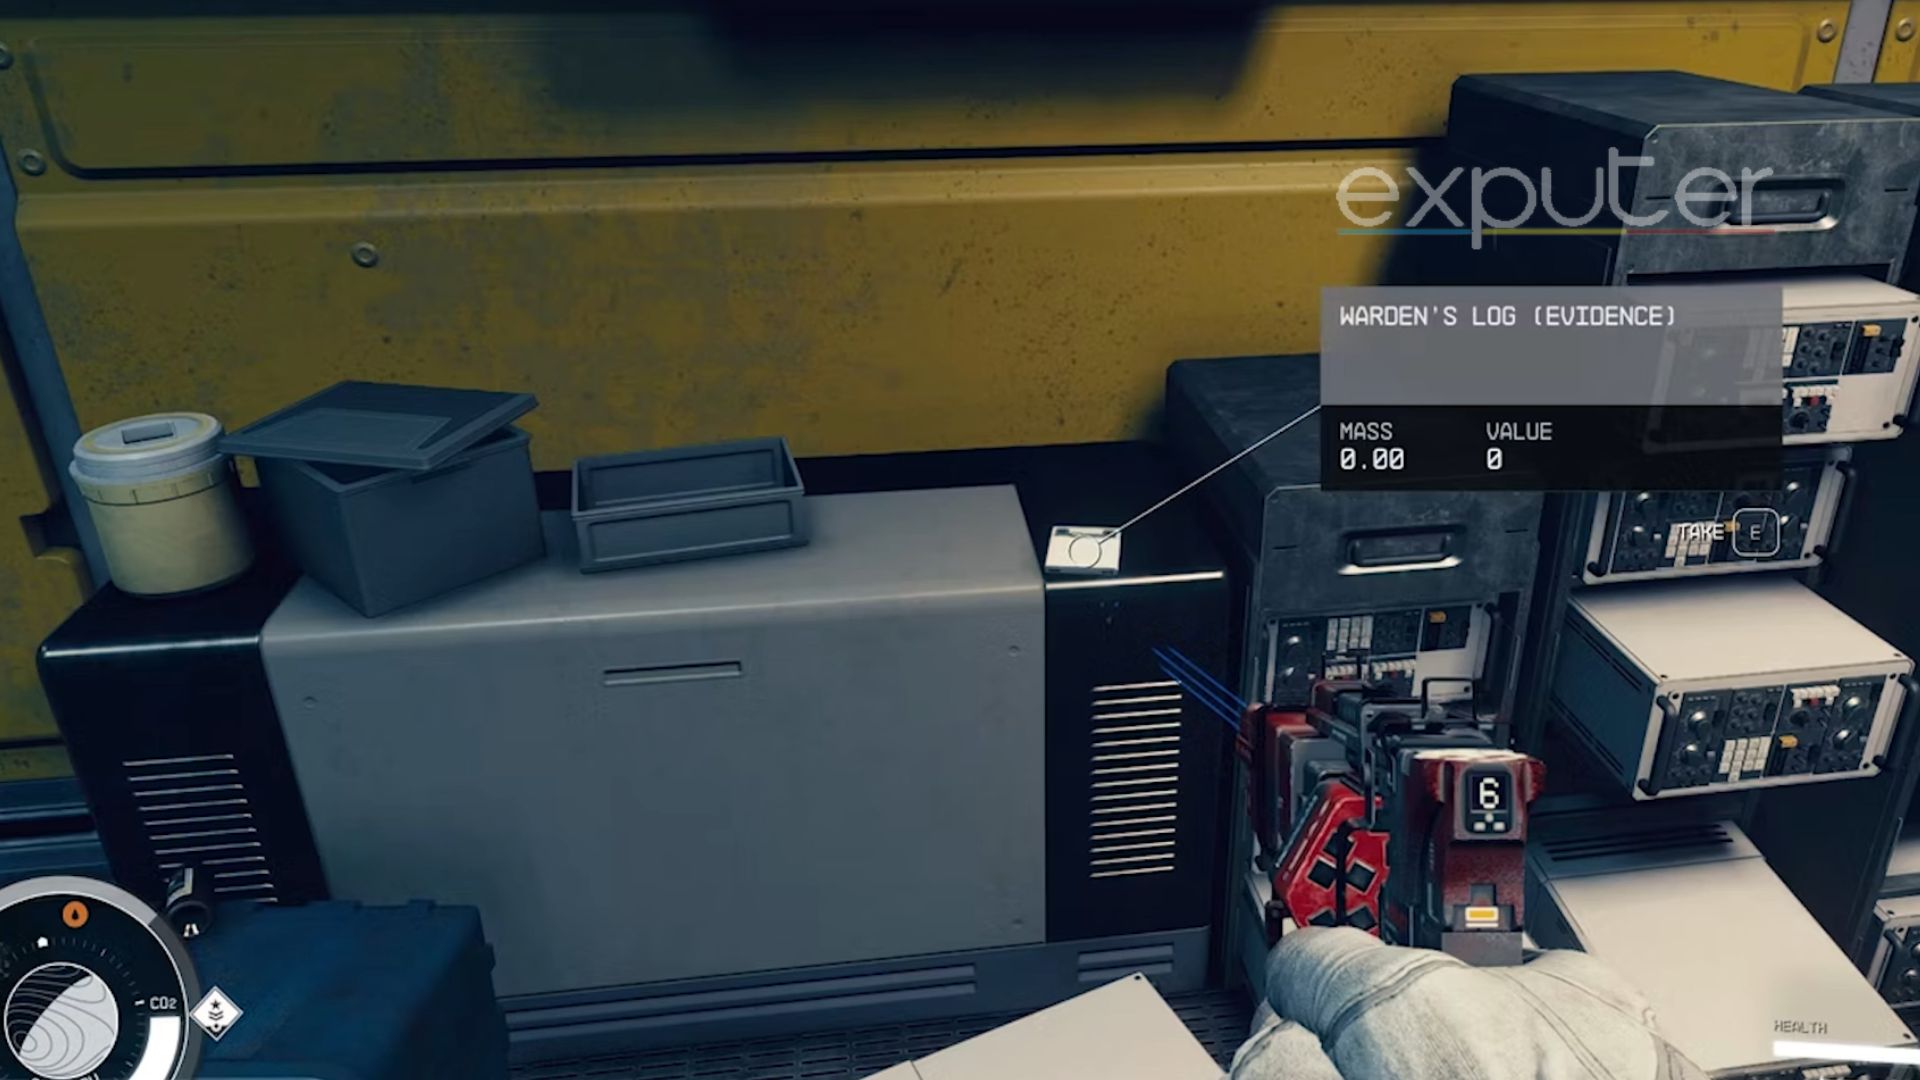
Warden’s Log – [Image Captured by eXputer]The Warden’s Log Evidence will also be found whilst doing the Echoes Of The Past mission or quest. It comes much later on after Carter’s Gig evidence mission, which is why it is mentioned after it. Similar to Carter’s Slate, the Warden’s Log will be found while exploring the UC Prison, The Lock.
Show Full Text
You will be tasked to go to the Intercom room while doing the mission because you need it to progress.
There, you will find the Warden’s Office, and inside, there will be a Shelf and a couple of drawers.
On the right of the Intercom will be a shelf, and on it, you will see the Warden’s Log labeled evidence.
4. Request Denied
Request Denied – [Image Captured by eXputer]During the Breaking The Bank mission, you will have the option to get the Request Denied evidence. You will have to start your search for the evidence when you are on the SirenOf Starsship. It will be found inside the Captain’s Quarter or the Captain’s room.
Move ahead toward the two doors and turn right and then left after the way ends.
The major indicator that you will see will be a vending soda machine with the words “Boom Pop” written on it.
The room that is right to the vending machine is the Captain’s Room.
It is where you will be searching for the Request Denied Evidence Slate.
The Evidence will be found sitting on a 4-level shelf next to the Captain’s Bed.
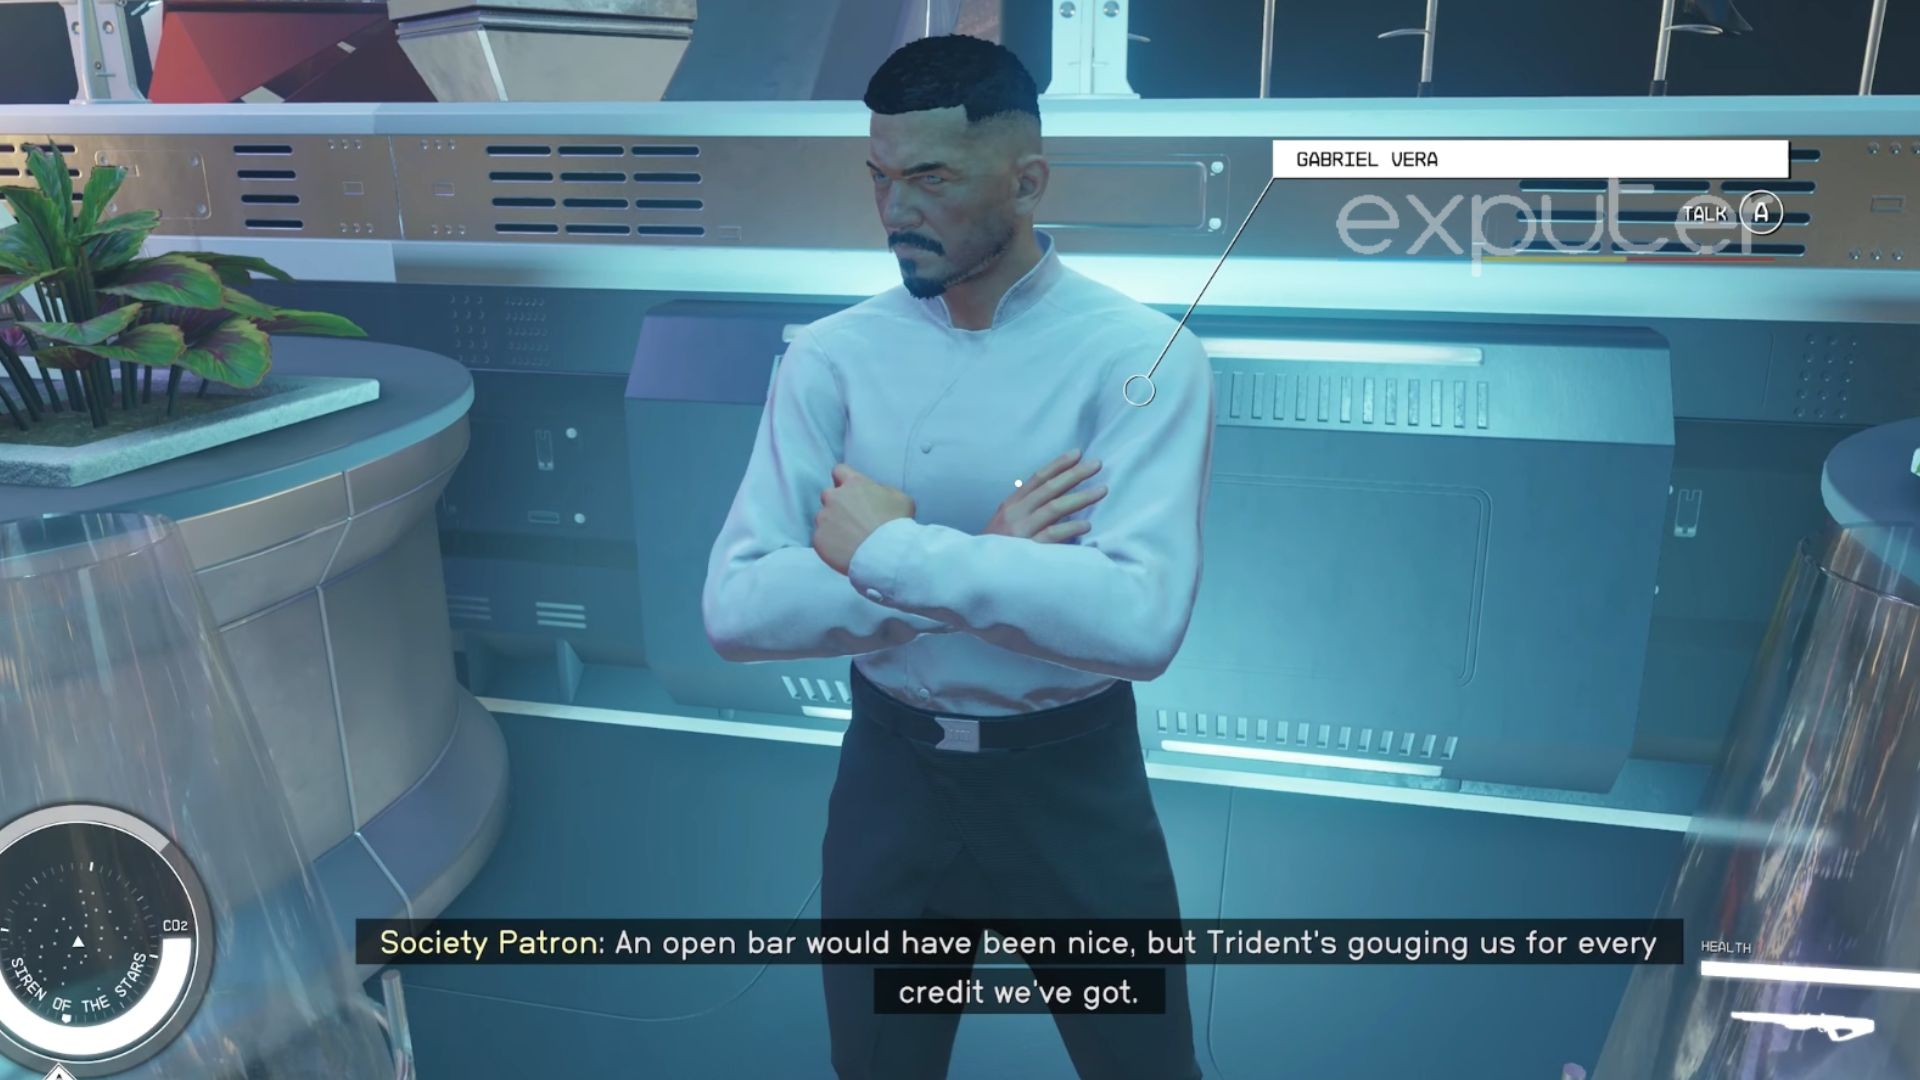
5. Dumbrosky’s Embezzlement Scheme
Dumbrosky’s Embezzlement Scheme – [Screenshot Captured by eXputer]The evidence, in particular, is a pretty straightforward and linear sort of evidence quest. It can be found while doing the Breaking The Bank mission, just like the Request Denied Evidence.
Show Full Text
Gabriel Vera is the NPC from whom you will get the Dumbrosky’s Embezzlement Scheme.
There are three ways through which you can get the gossip out of him
The first and the easiest is to just bribe him with 2500 Credits, which will be costly, though.
The third is to just kill him and loot his body to get the evidence.
Important: Keep reporting back to Lt Toft with the evidence as soon as you get it so that it won’t take much time afterward.
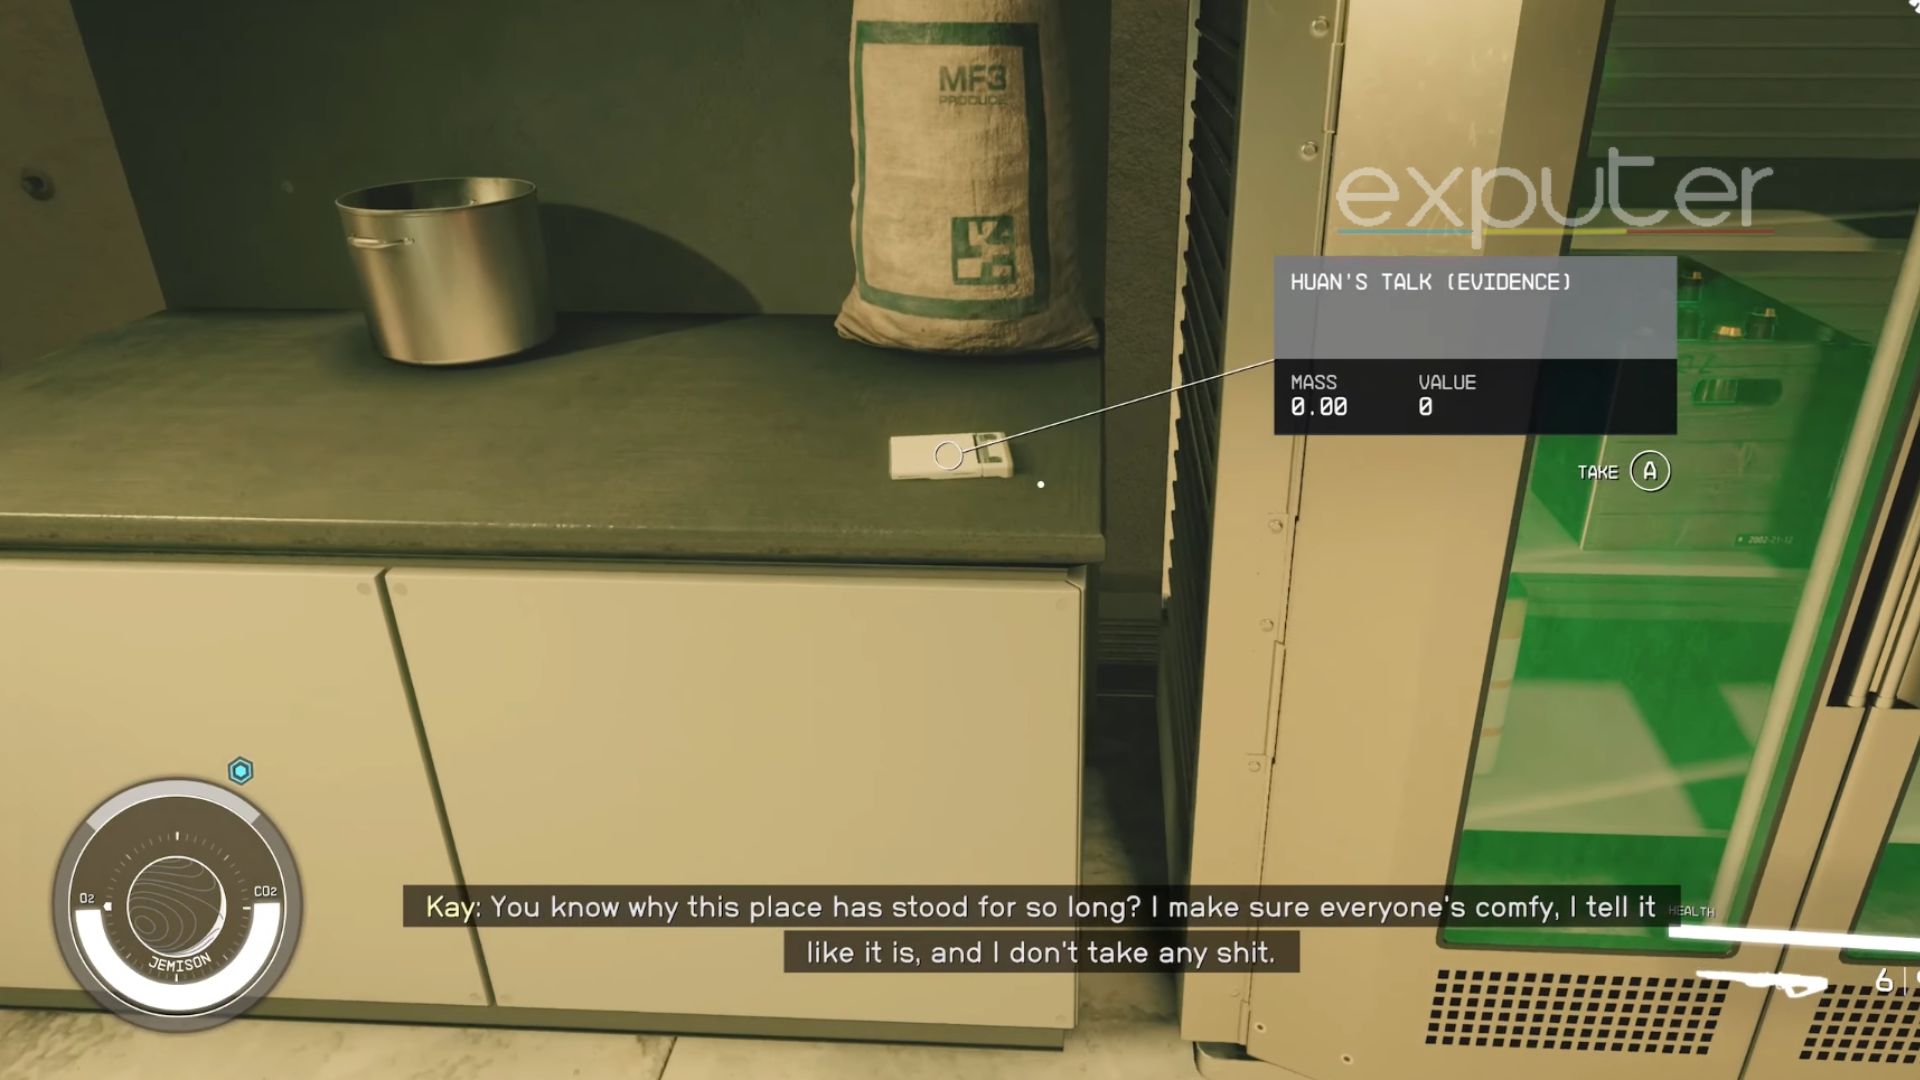
6. Huan’s Talk
Huan’s Talk – [Screenshot Captured by eXputer]You will be able to get Huan’s Talk evidence during the “The Best There Is” main quest, which will come after a while. The Huan’s Talk will be located in the Well District of the New Atlantis City.
Show Full Text
You will start by trying to reach “The Well.”
When you get to The Well, you must move forward until you see the Med Bay.
Get to Kay’s House.
Get inside and turn left by the plastic-covered door, and beside the fridge will be a counter.
You will see the Huan’s Talk sitting idle on the counter.
7. Eubanks And Woods
Eubanks And Woods – [Screenshot Captured by eXputer]Eubanks And Woods evidence will also be found from the same mission as Huan’s Talk, which is The Best There Is. You will have to sneak into the SY-920 ship and then enter Gabriel Vogal’s lab.
Show Full Text
Once you are in Gabriel Vogal’s lab, you will have to move toward the back of the room.
There will be a bunch of tech consoles, and you will find the evidence just lying on a small cart.
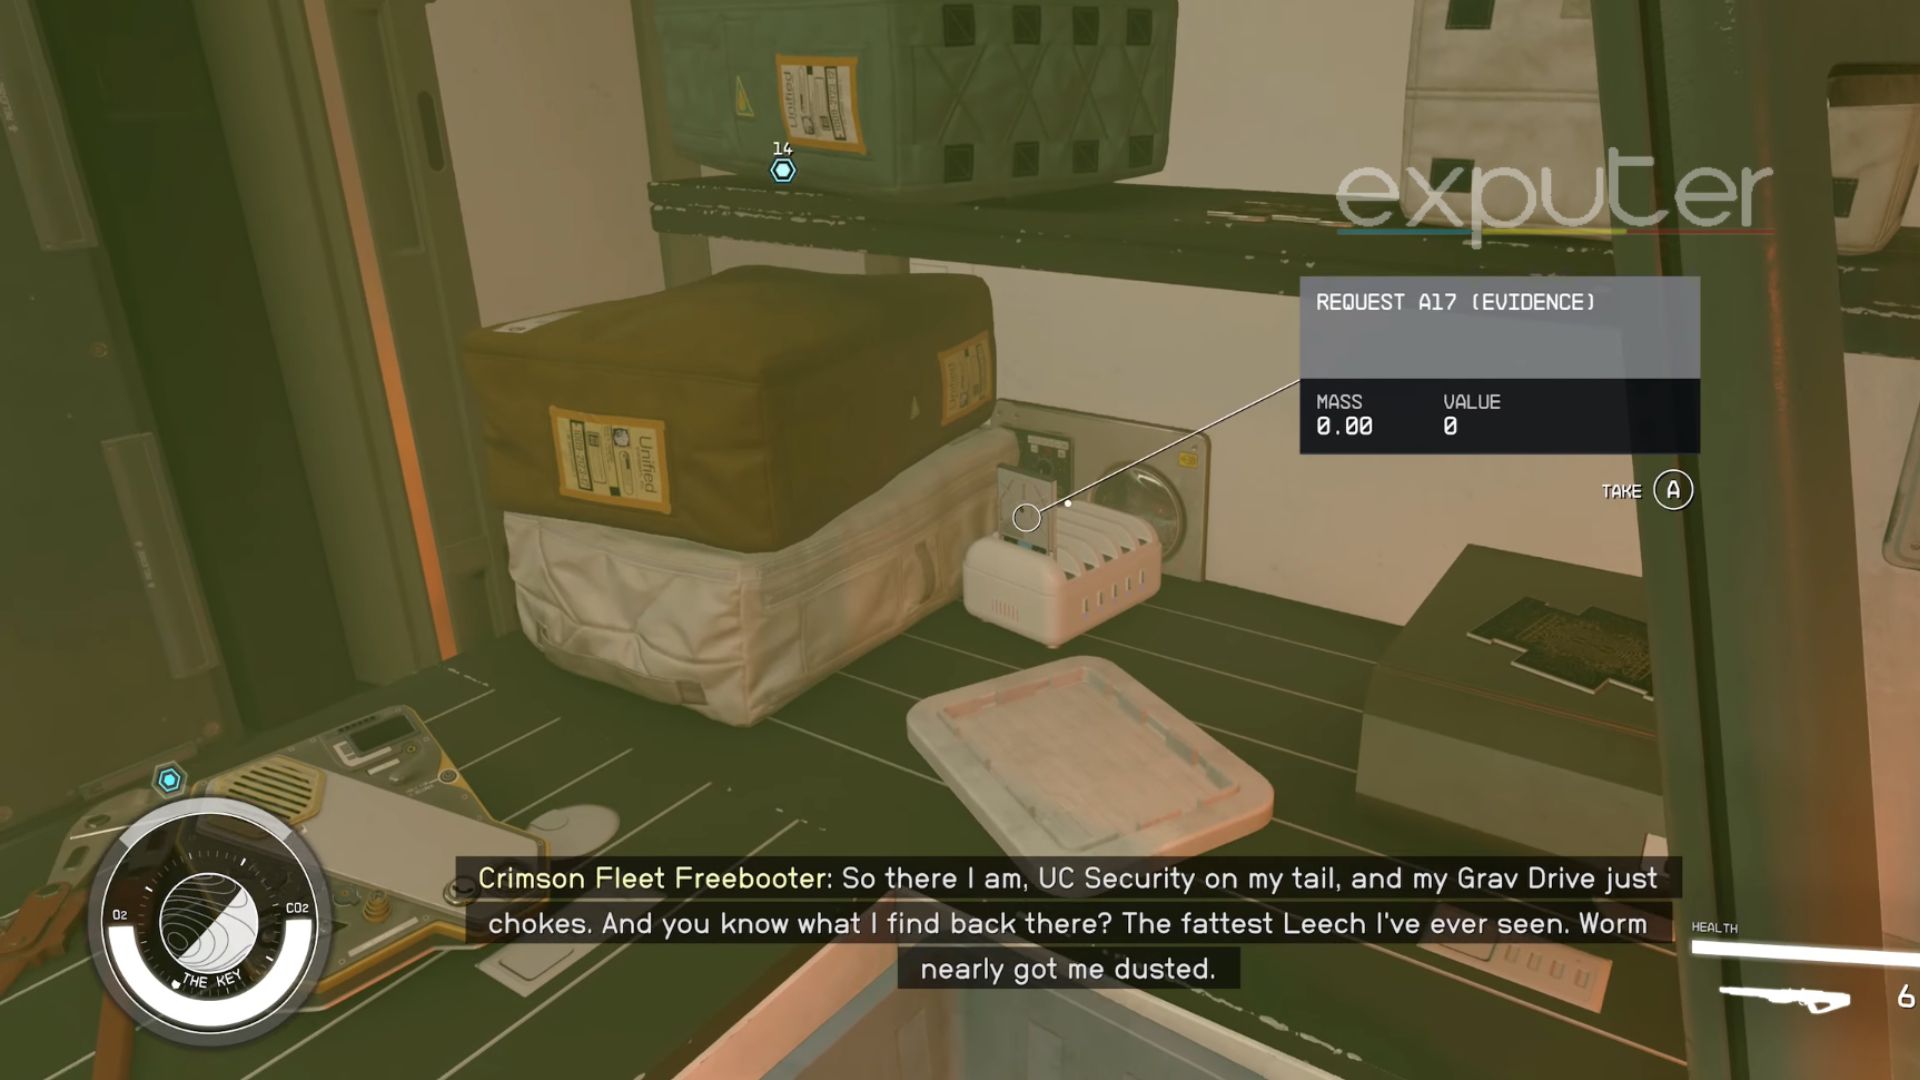
8. Request A17
Request A17 – [Image Captured by us]Now come the pieces of evidence that can be found on a space station known as The Key.
Prerequisite To The Evidence: In order to avail the Request A17 and other evidence on The Key, you must first complete the “Rook Meets King” quest.
Show Full Text
In order to find the Request A17 evidence, you must board The Key and move to the Reckoner’s Core.
Move toward the left Of Reckoner’s Core into a hidden room
The room will be named Jazz’sShip Service.
Request A17 will be fixed on an organizer box on top of an L-shaped green desk.
Search for it well because it is kind of easy to miss on the table.
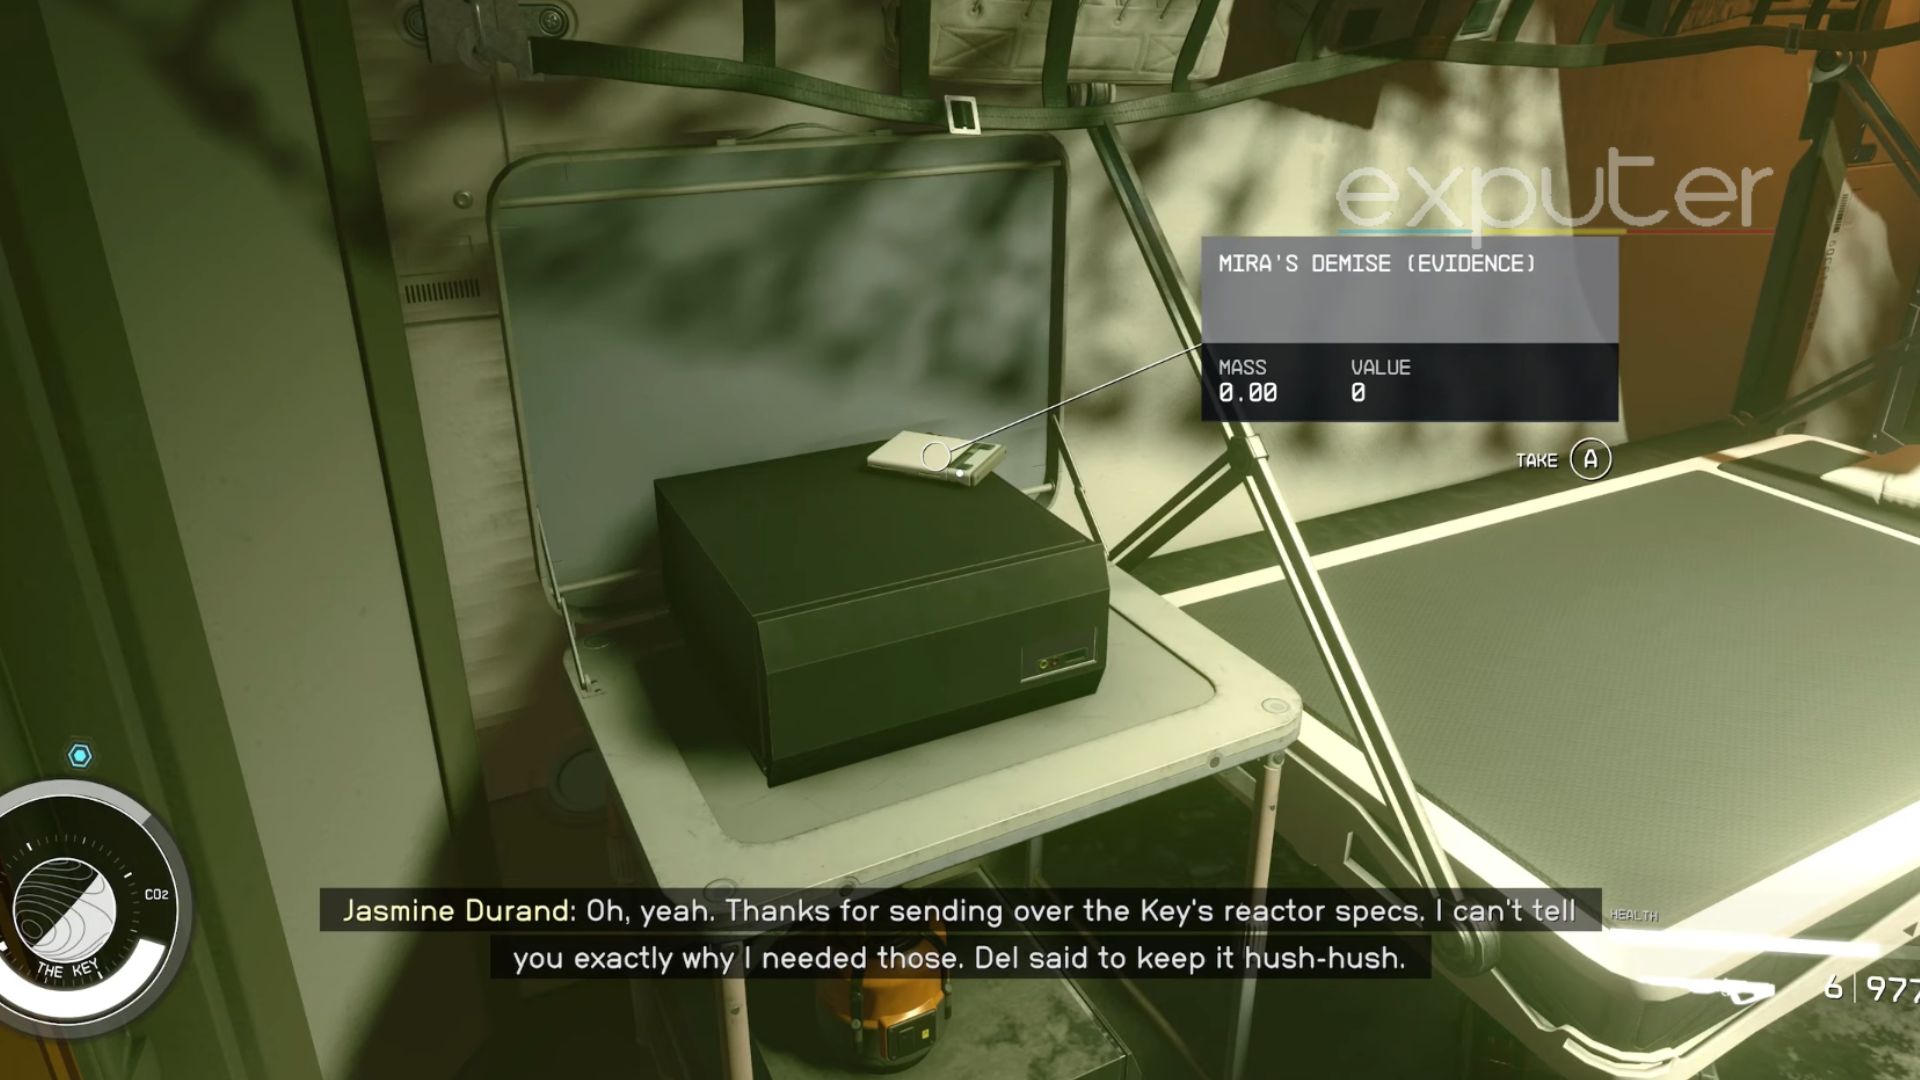
9. Mira’s Demise
Mira’s Demise – [Image Captured by us]You can also find Mira’s Demise on The Key Space Station, but it is a bit hard to find because there are no such coordinates to it.
Show Full Text
You first need to go into the Reckoner’s Core section on The Key.
From there on, head until you see a pool table where you will turn left by the Chair Room.
You need to be headed to the first-floor room Bunk, where even a sign of the word “Bunks” is on display.
You will find a small room on the left where a barbell with some weights is on the floor.
There, on the table, you will find Mira’s Demise evidence.
The Mira’s Evidence is necessary to complete the Starfield Burden Of Proof mission.
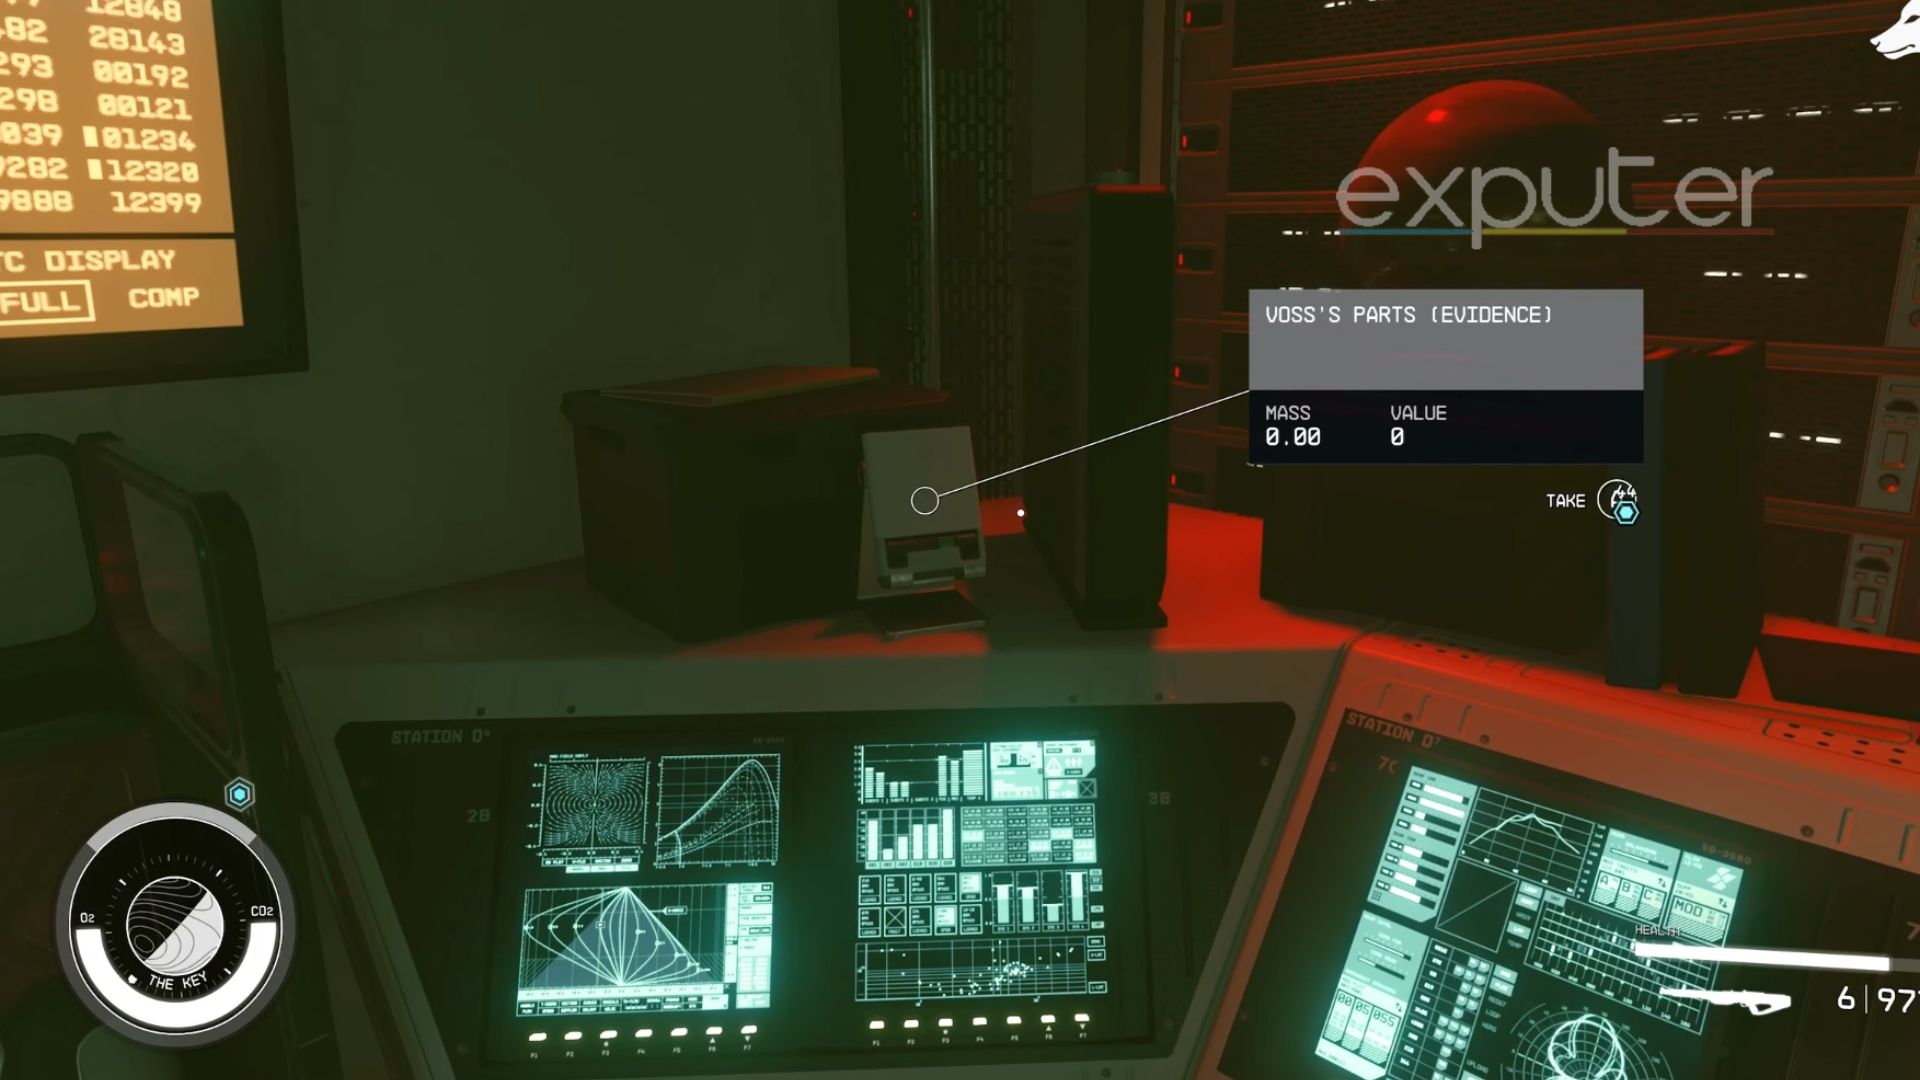
10. Voss’s Parts
Voss’s Parts – [Image by eXputer]During the “The Best There Is” mission, you can find the Voss’s Parts evidence. It is the last piece that you can find on The Key Space Station. As soon as you get Mira’s Demise evidence, you can go and look for Voss’s Parts.
Show Full Text
As soon as you get out of the small room to the sharp right, you can find a hallway and, at the end, a staircase.
Use the staircase to go up onto the second floor.
Another staircase can be found upon turning left and into a sort of Control Room.
You must go toward the Captain’s Quarters, where it leads to the Command Room.
Take the stairs on your right and take a right again, which takes you into a small room.
You will see a computer console in the left corner of the room with Voss’s Parts on top of it.
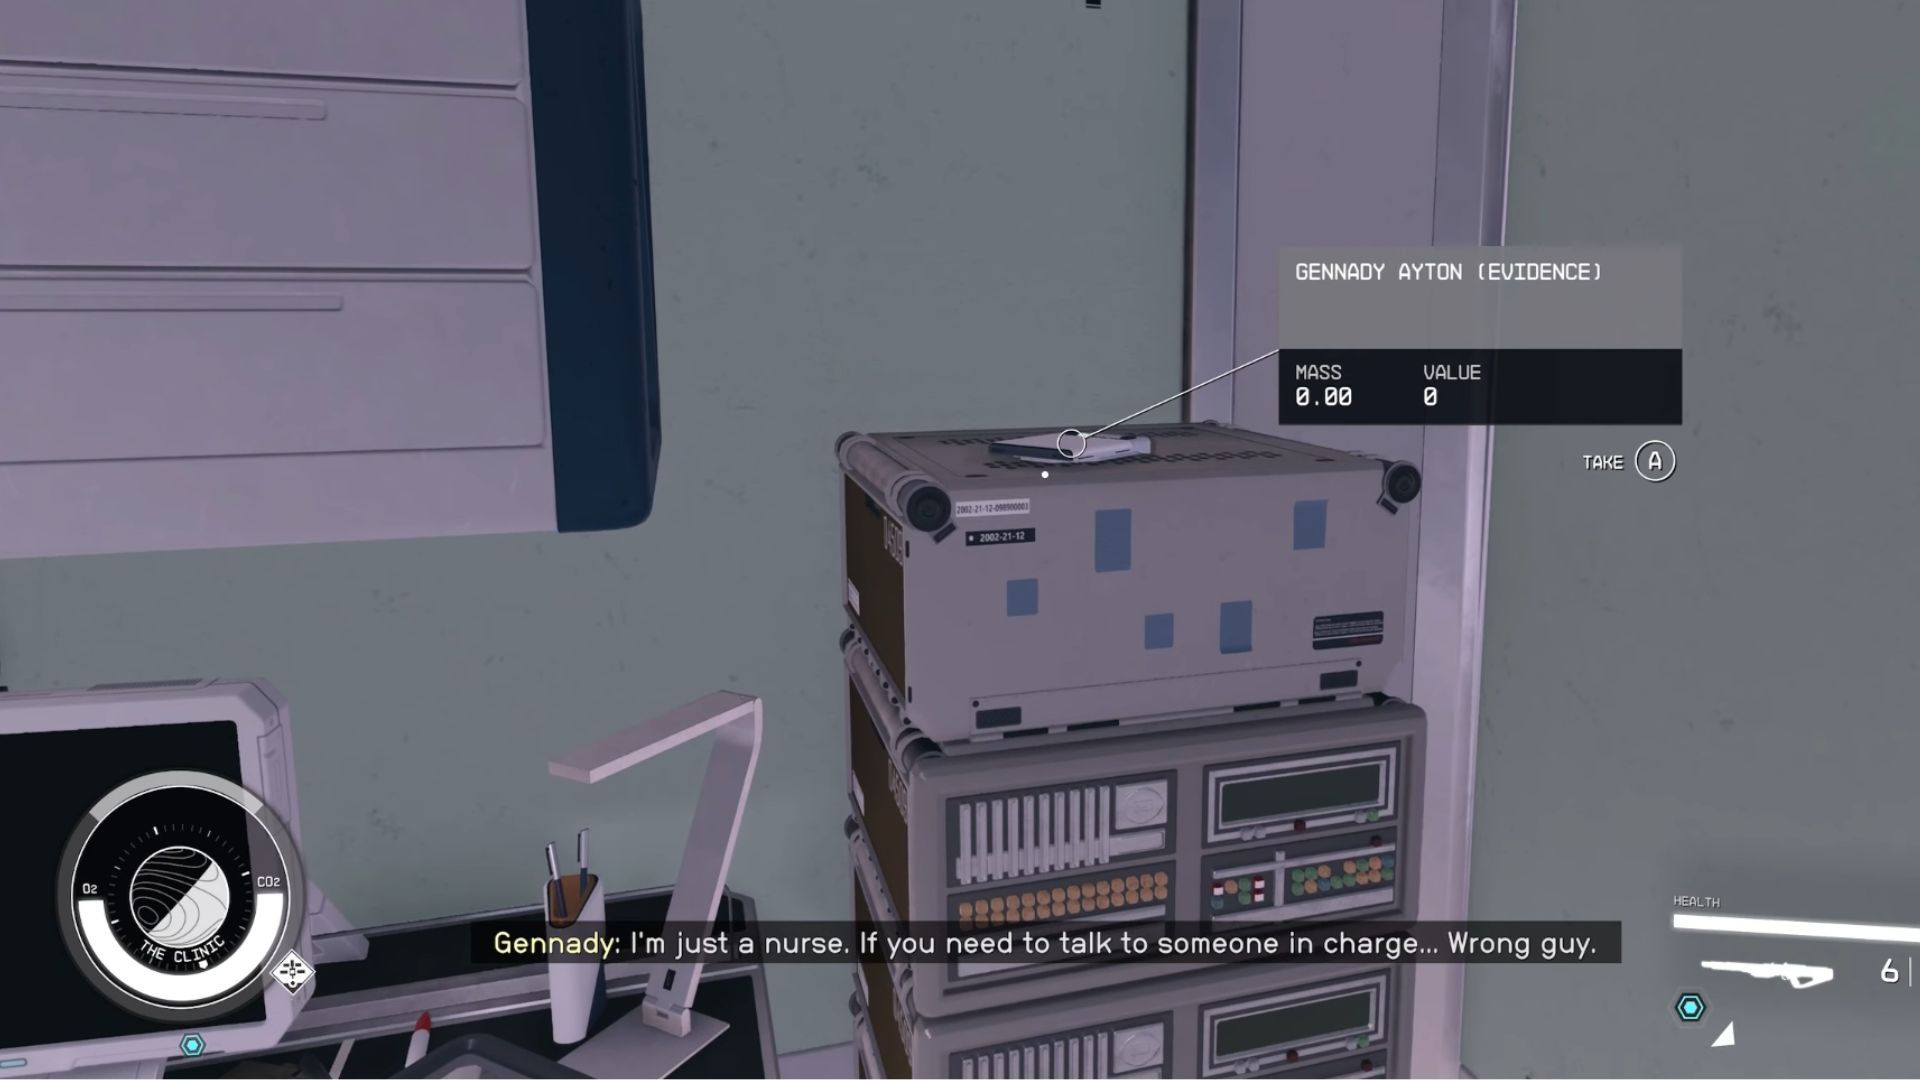
11. Gennady Ayton
Gennady Ayton – [Image by eXputer]You will have to start a side mission for the Crimson Fleet, which can only trigger when you talk to Samina at The Key’s Clinic. The sidequest is called “Doctor’s Orders.”
Show Full Text
Go to The Key’s clinic and talk to Samina Mizrah.
Tell her that you want to help, and she will send you to get her some supplies.
Follow the mission tracker until you meet with Doctor Gennady, the assistant at the Clinic Spacestation,
Right behind Gennady, there will be some computer parts, and on top of them, you will find the Gennady Ayton evidence.
12. Message For Bog
Message For Bog – [Screenshot Captured by eXputer]When you are on The Key Space station, you must go and talk to Bog. He will be found in the Lost Nova Bar, and he will assign you a side quest. You can easily find him since he is the bartender of the bar. The side quest will be called “Retrieving ThePast.”
Show Full Text
Even the outpost of the quest is selected at random, which means you could be fighting higher-level opponents.
You must fast-travel to Planet Kumasi IX-A, from where you will retrieve the evidence and the ring.
The Questline will help you get to Ecliptic Garrison, which would be deserted.
Here, you will find some “Ecliptics” who will be ready to fight you.
The ring and the evidence will be in a sort of military bunker crate, so you won’t definitely be able to miss it.
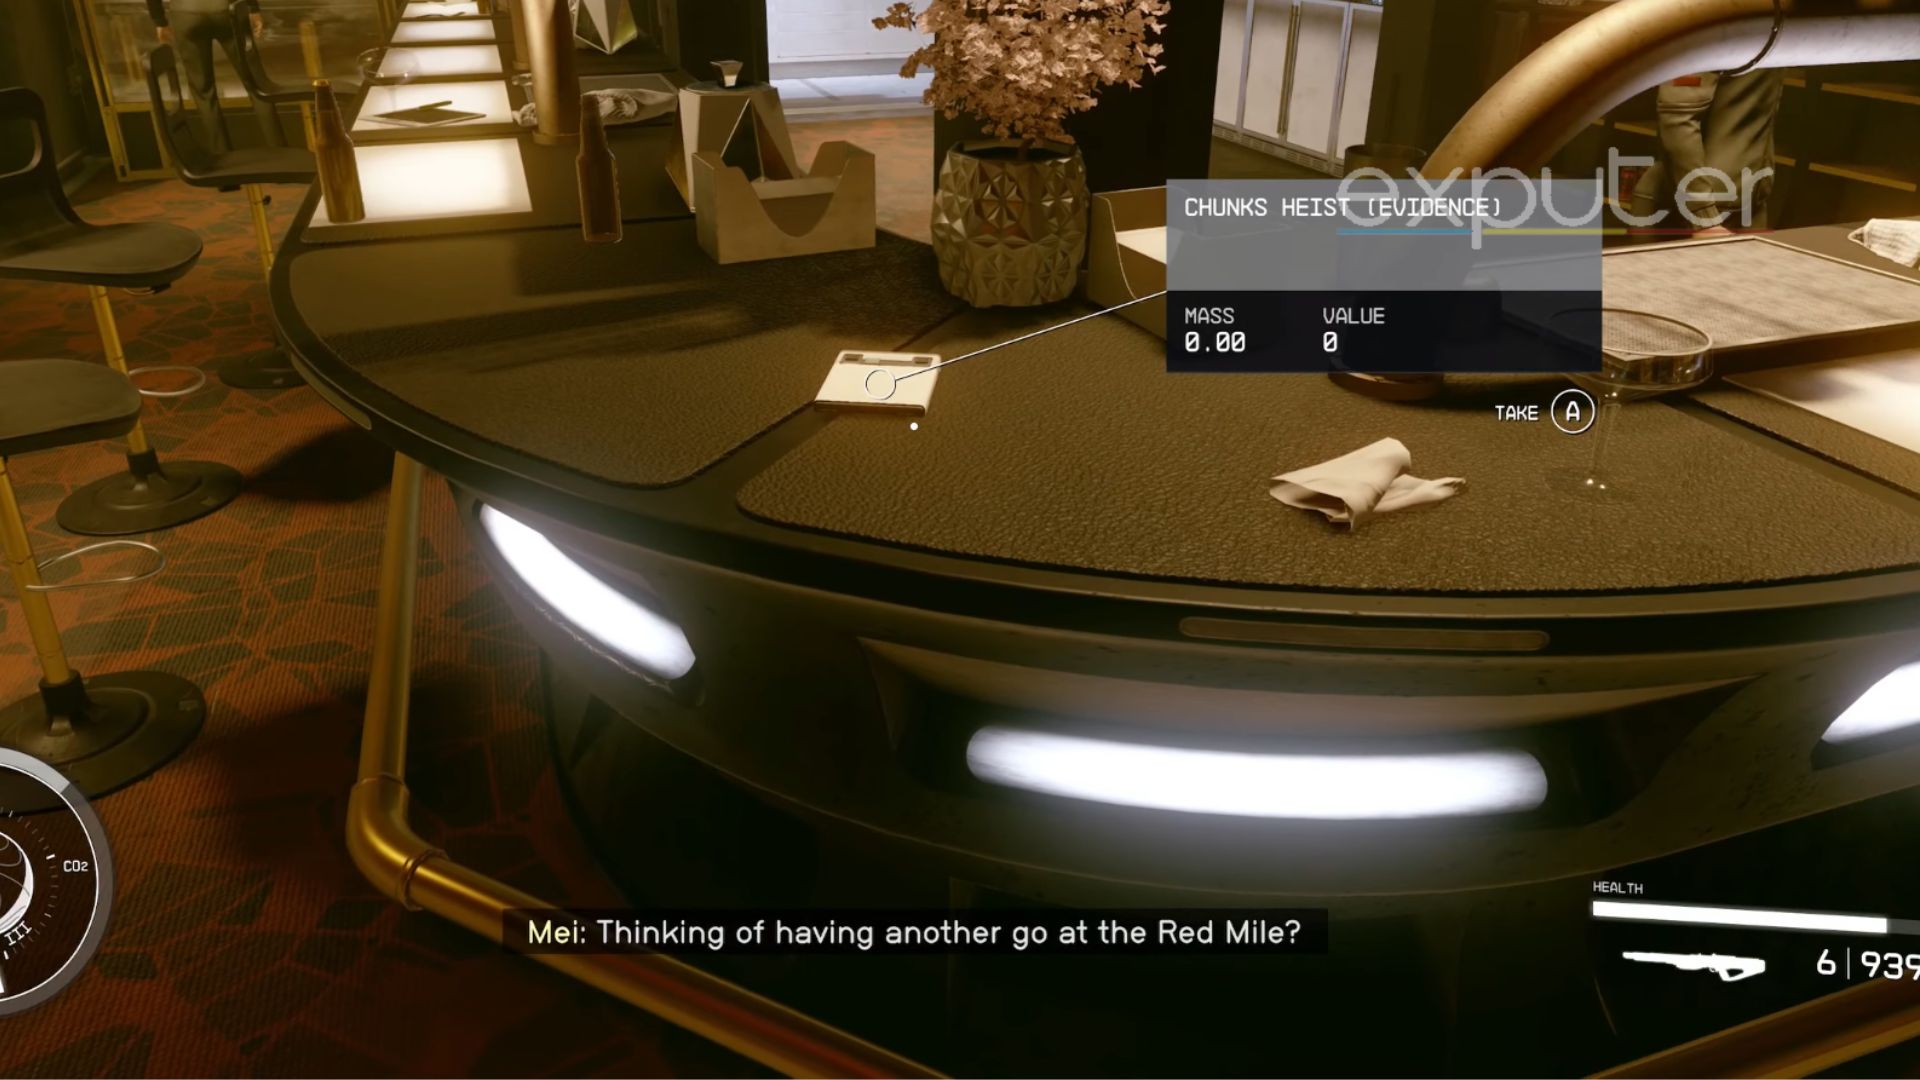
13. Chunk’s Heist Evidence
Chunk’s Heist Evidence – [Image Captured by us]It is an easy-to-find sort of evidence with no quests attached to it, but it is missable if you don’t know where to look for it.
Show Full Text
All you have to do is head to the planet Porimma III.
The planet is part of the Porimma system as well.
There is an infamous building there known as the Red Mile.
Enter the bar, and on the left side of the bar table, you will find Chunk’s Heist evidence.
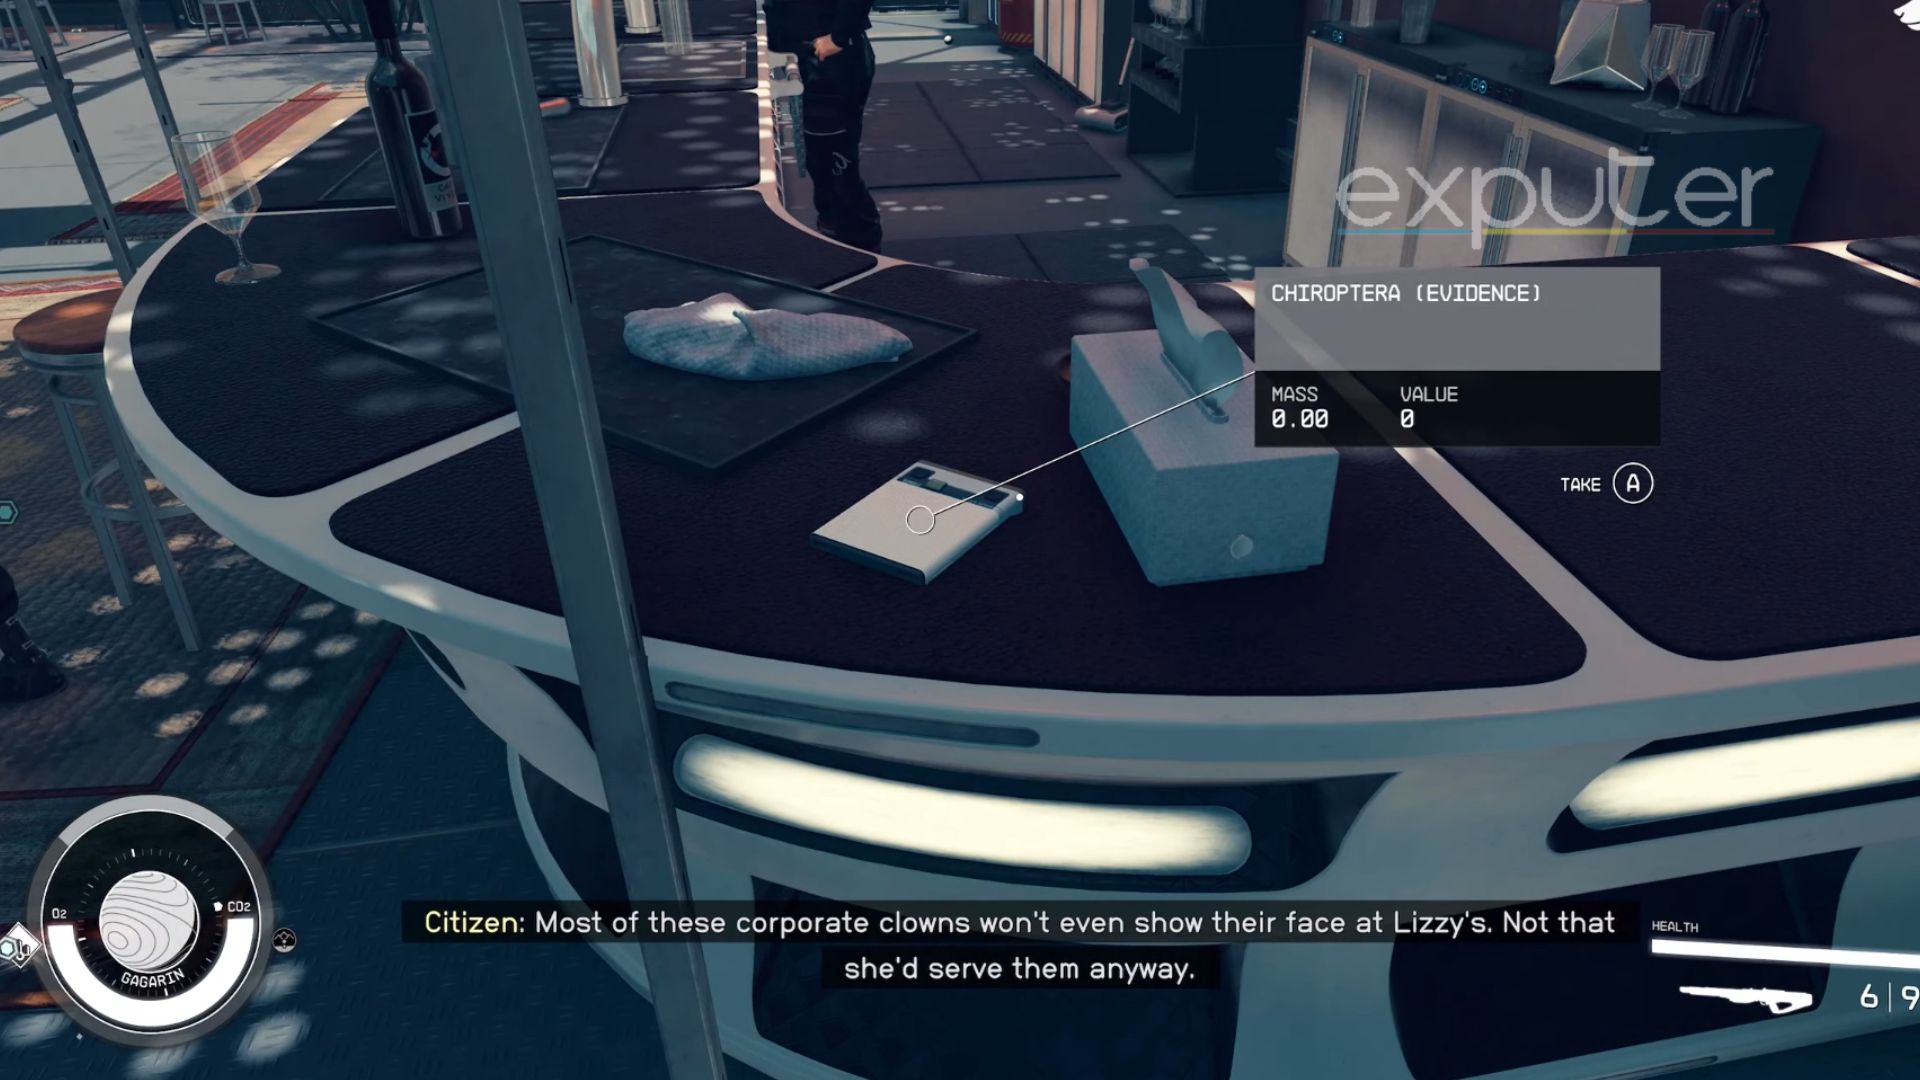
14. Chiropetra
Chiropetra – [Image Captured by us]Now, you would have to reach the Alpha Centauri system on a planet called Gagarin.
Show Full Text
Once you land on the planet, head toward the main landmark of the city, which is its big statue at Gagarian’s Landing.
On the left side, you will see an open bar known as Lizzie’s Bar.
Head toward the bar, and on the bar table, you will find the Chiropetra evidence lying on top.
15. Hopetown Raid
Hopetown Raid – [Image Captured by us]This time around, you can find yourself reaching the Planet Volvo. The planet is from the Valo System and can be found whilst roaming and exploring various systems.
Show Full Text
Once you reach planet Volvo, you must head toward Hopetown.
Pit Stop is a bar that is situated in Hometown, and it is found just outside of the Hope Building.
Hopetown Raid evidence will be sitting right on top of the bar counter.
16. Kreet Offer
Kreet Offer – [Image Captured by us]Yet another easy-to-find location is for the Kreet Offer evidence. You need to the Wolf System now and on the planet Chthonia.
Show Full Text
Enter TheDen Space Station.
Move straight ahead and across the “Open” neon sign floor.
You need to reach for a small table close to the rail.
The Kreet Offer evidence will be sitting on top of Rail.
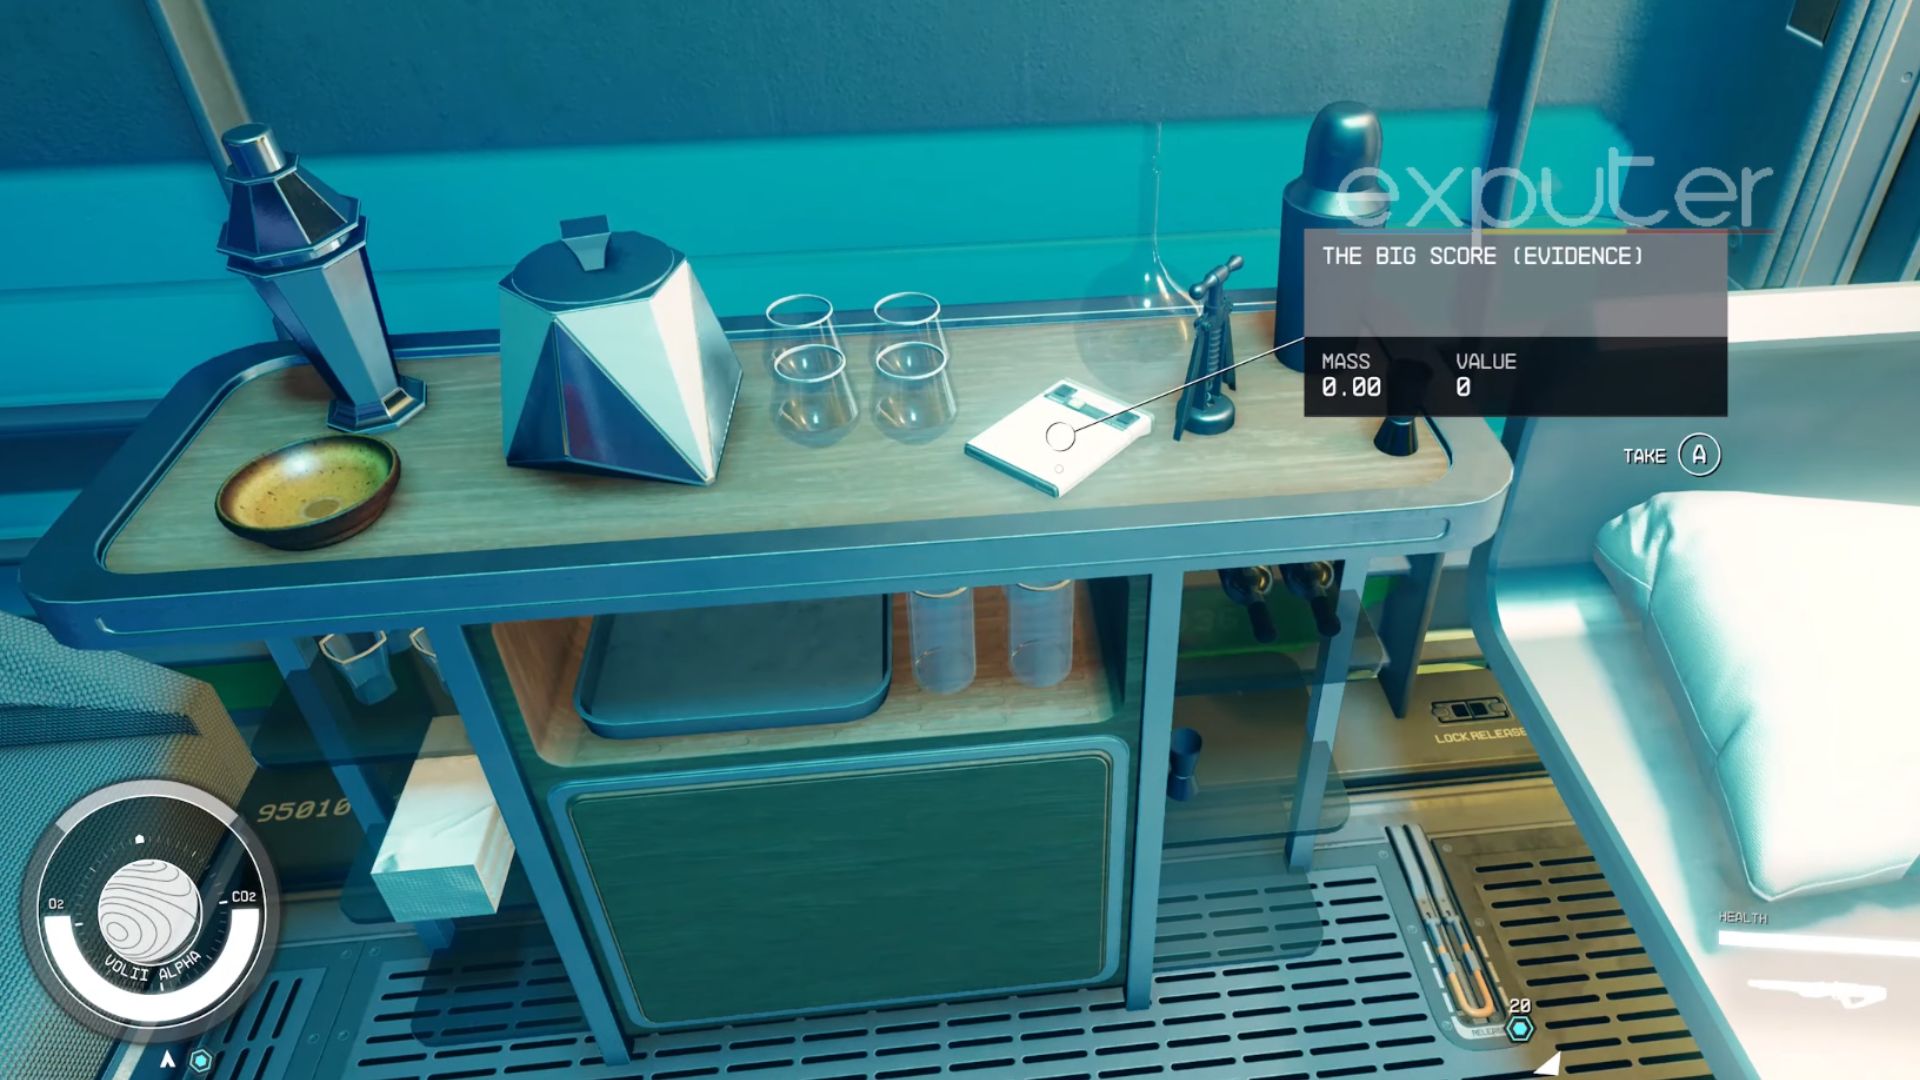
17. The Big Score
The Big Score – [Image Captured by us]In order to get The Big Score evidence, you must go to Neon City. You will have to pick up the Absolute Powermission, which will take you to Neon City for the Crimson Fleet. During the mission, you will eventually meet Estelle Vincent. She will be in Madame Sauvage’s Place, which is a bit hard to locate since it is not that visible via the map.
Show Full Text
In order to reach Madame Sauvage’s Place, you must first go between the alley of the Spaceport Terminal elevator and the Mining League store.
The alley will lead you to an Ebbside Door.
When you cross the door, you will find yourself at Madame Sauvage’s Place.
Once you enter, you will see a bar counter.
Beside the counter on the left side is a door which leads to a hidden backroom.
Once there, you will find The Big Score evidence on the table beside the bed.
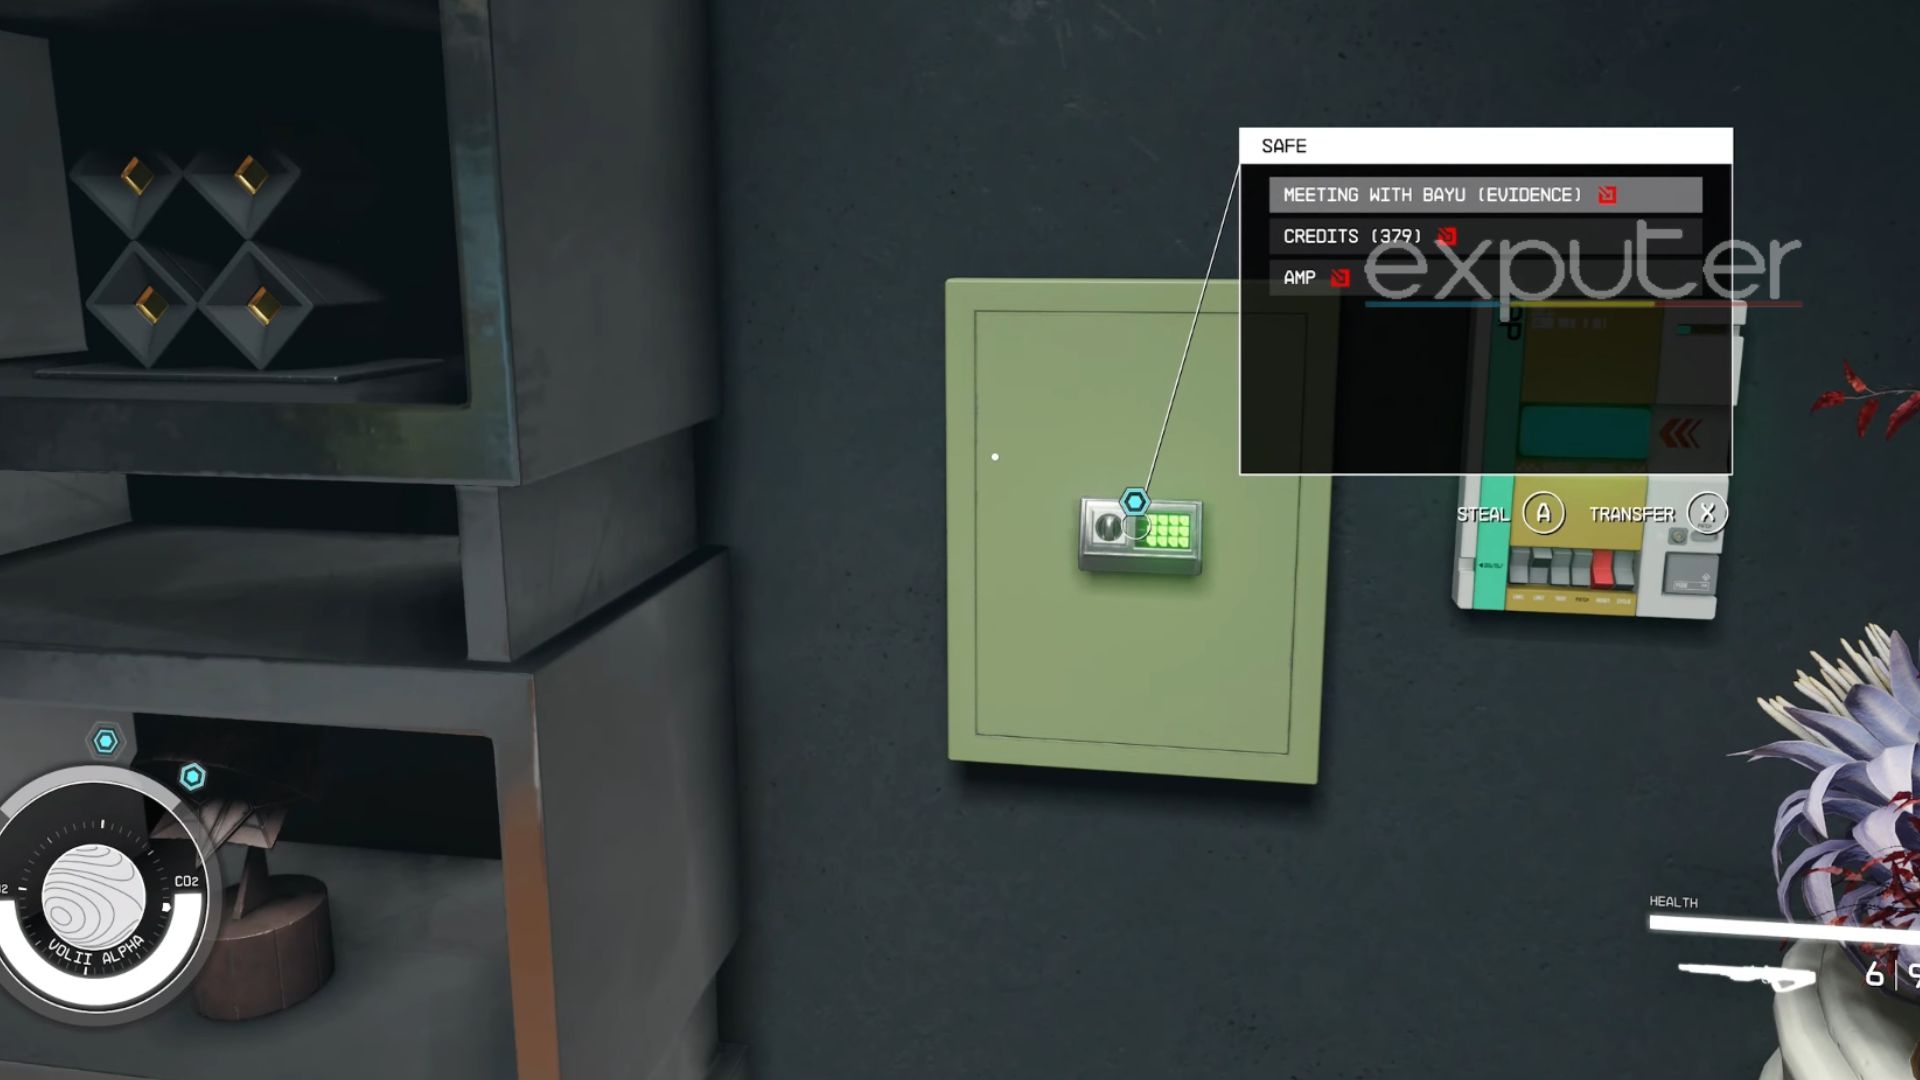
18. Meeting With Bayu
Meeting With Bayu – [Screenshot Captured by eXputer]It is the second piece of evidence that you will find in Neon City during the Absolute Power mission. There are three in total that can be found here. Meeting With Bayu can be picked up while looking for evidence, especially against Komiko.
Show Full Text
Go to the Trade Towers in the Neon City and head straight up to the Generdyne Industries Office via the elevator.
Once there, you will need to persuade a fellow named Ji Nashida, as he will be found in the Astral Lounge.
The Meeting With Bayu is hidden in a safe, so you need to persuade Ji Nashida to get the key.
Make a sudden move through the spinning door and into the office.
You will find a safe embedded in the wall and, in it, the Meeting With Bayu evidence.
Important: Make sure to save before speaking to Ji Nashida in case you aren’t able to persuade him and want to try again.
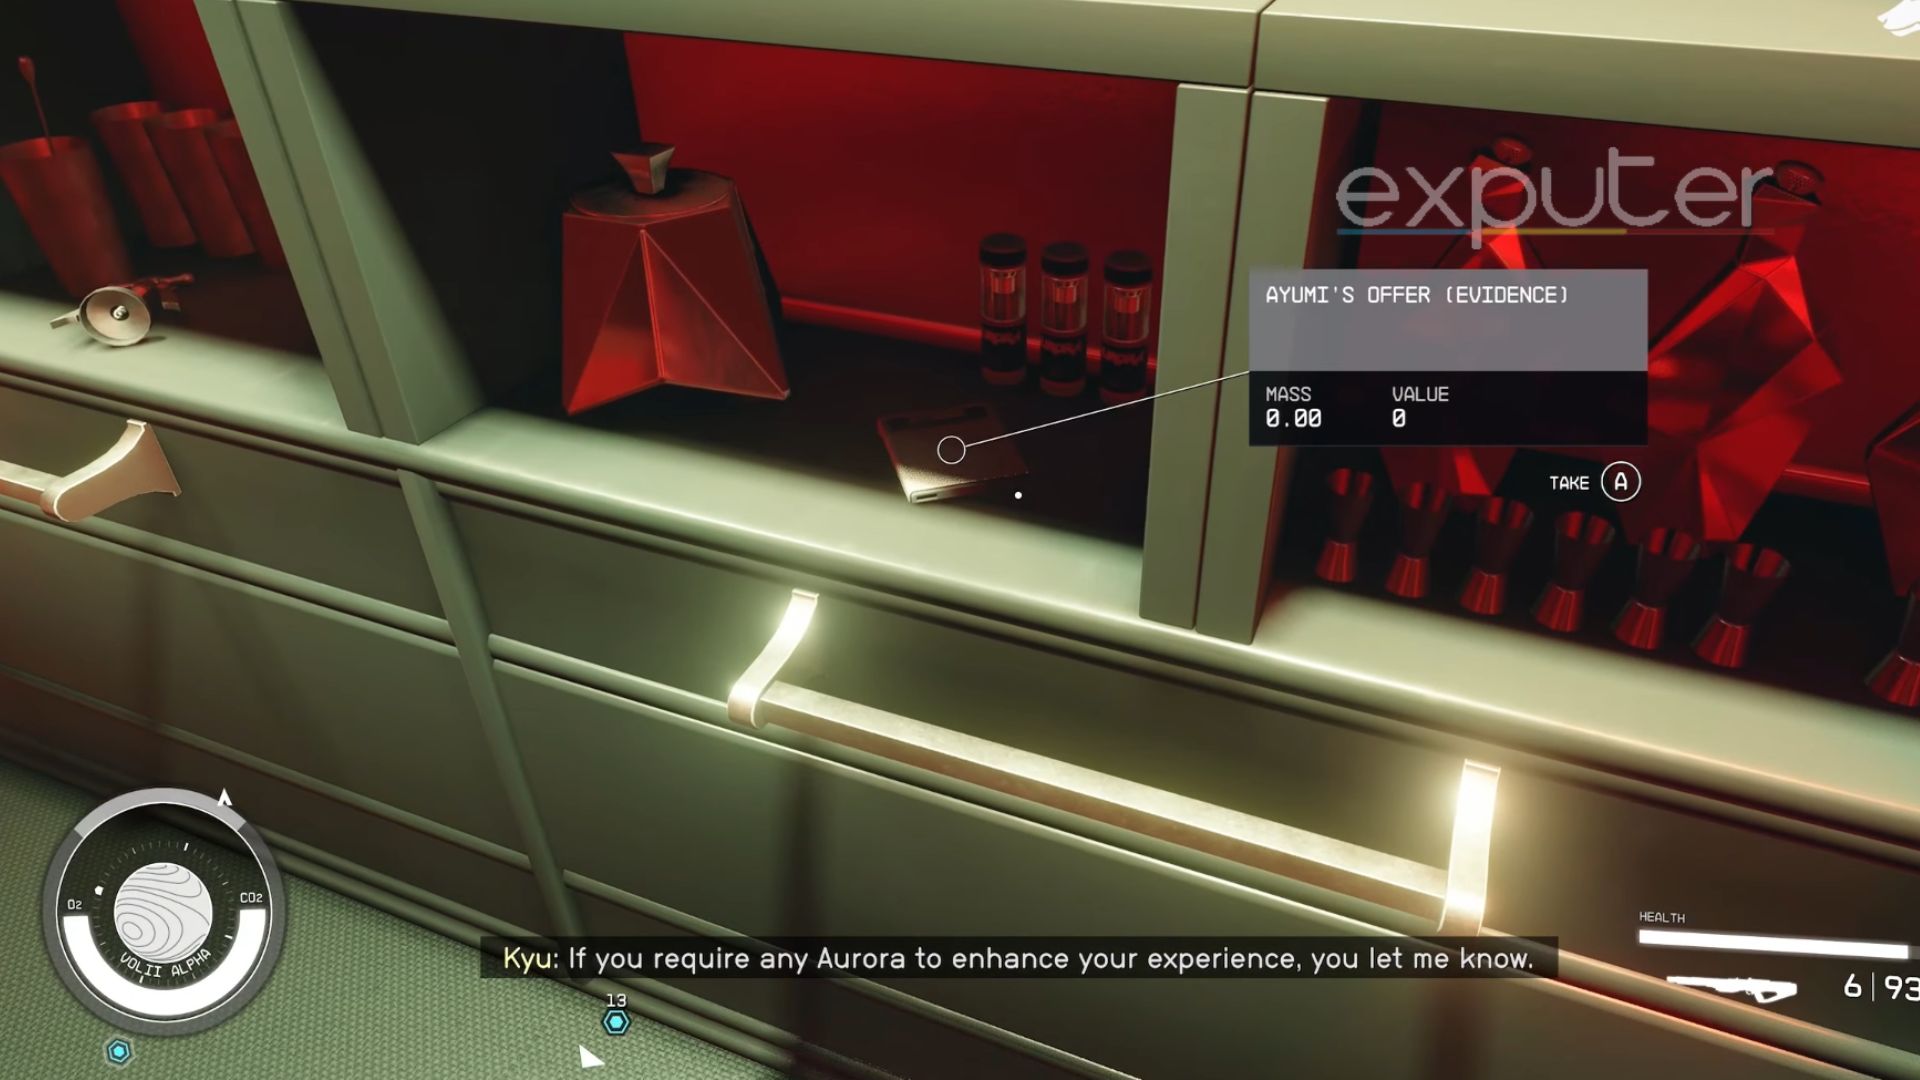
19. Ayumi’s Offer
Ayumi’s Offer – [Image Credit Copyright: eXputer]You find yourself again in the Neon City, where your mission must again be the Absolute Power.
Show Full Text
In order to get the Ayumi’s Offer evidence, you need 5000 extra credits beforehand.
The Absolute Power quest will lead you to Euphorika, where you need to talk to Myka.
Myka will ask for a credit transfer of 5000 to let you into the Member’s Lounge.
Once you get inside the Lounge, you will see a bar on your right.
Hop behind the bar, and you will see that the Ayumi’s Offer evidence will be there on the lowest shelf.
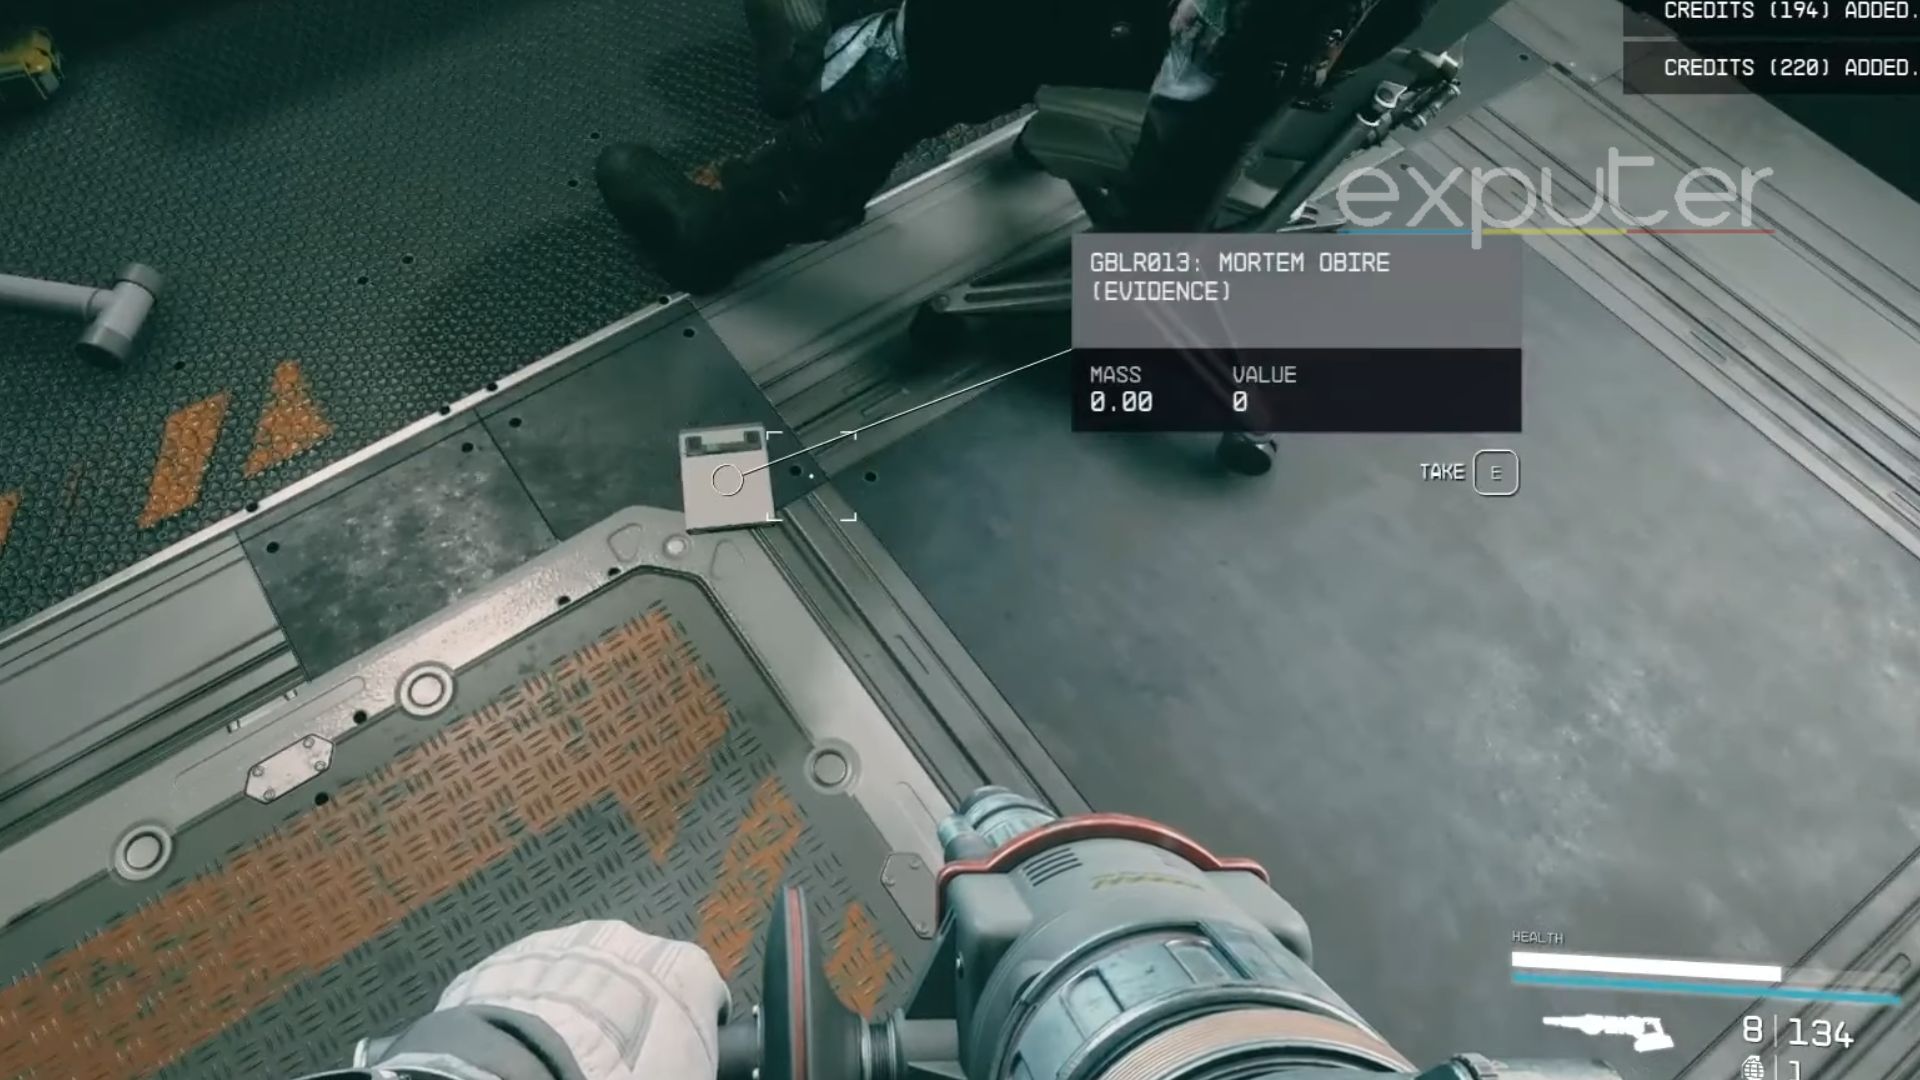
20. Mortem Obire
Mortem Obire – [Image Credit Copyright: eXputer]The final evidence, Mortem Obire, can only be attained once you complete the quest Eye Of The Storm. It is the final quest to the faction questline of the Crimson Fleet. It is here where you will decide whether you want to side with Crimson Fleet or the UC SysDef. Get fully equipped with weapons so that you can reach the end of Eye Of The Storm easily.
Show Full Text
In the mission, you must get to the body of Jasper Kryx with the help of the quest line.
Once you find the body of Jasper Kryx, you will be able to find the Mortem Obire evidence lying down on the floor.
What Do You Get At The End Of Burden Of Proof?
Memento Mori – [Image Credit Copyright: eXputer]After you are done collecting all 20 pieces of evidence, you must head straight to the UC Vigilance ship. There, you have to meet Lt. Toft and submit all pieces of evidence one by one. It can take some time, so it is better to submit the slates as soon as you retrieve them from time to time.
For each piece of evidence, you will get 1000 credits, totaling up to 20000 credits!
You will also get bonus credits for submitting all of them.
When you are done submitting, you will receive some appreciation from Lt. Toft for the work you have done. She will start to open up more about her life; you just need to keep communicating with her. After a long talk about her life, she will finally give you the legendary Memento Mori Pistol.
By completing more of these missions, the player could become a full-fledged member of the Crimson Fleet. It is a really simple yet very confusing mission for the players. Check out eXputer’s articles about finding and unlocking the Almagest Jackpot and how to Romance Sarah in Starfield.
How can we make this post better? Your help would be appreciated. ✍
Summary
The Starfield Burden Of Proof is a sort of faction questline for the United Colonies Vanguard. You have to infiltrate the Crimson Fleet and gather pieces of evidence against them. It is here where you decide whether you want to betray the Crimson Fleet pirates or stay with them. You will have to wait and do…
Saqib is a Senior Guides writer at eXputer with multiple years of writing experience. His love for RPGs, Roblox, and mobile games knows no bounds. In his free time, Saqib is on yet another adventure with Roblox or free roaming in RPG. Saqib has completed a Journalism degree and worked for notable gaming sites including DualShockers and Gamepur. You can follow Saqib's gaming activity on his Steamprofile.
Experience: 3+ Years || Education: Bachelor's in Accounting || Previously Worked for DualShockers & Gamepur || Published 200+ Guides
Enjoyed this article? Discuss the latest gaming news, get expert help with guides and errors, and chat about all things gaming on eXputer Forums and Discord Server. Connect with fellow gamers who share your passion by becoming a part of eXputer's community.