In Overwatch 2, choosing the appropriate DPS is essential to get a victory in every game. Your team relies on you to accumulate kill streaks after you select the “Damage” position. We will thus assist you in locating the DPS character you should try to use as your primary today. Here is our Overwatch 2 DPS Tier List of the top damage or DPS characters to choose from right now.
Similar Overwatch 2 Tier Lists:
- Out of the total of 37 characters spread across DPS, Tank, and Support roles, Overwatch 2 offers 17 dedicated DPS units to its players.
- Since DPS category characters have a rather offense+defense oriented role in Overwatch 2, their ranking is done after carefully considering each unit’s attack versatility and shielding ability.
- Overwatch 2 DPS characters that perform exceptionally well in competitive battles are Soldier: 76, Genji, Sojourn, and Tracer. They will quickly eliminate opponents at the right time.
- Overwatch 2 DPS characters who aren’t as reliable as the top units of the tier list include Symmetra and Bastion.
- With lower-ranked heroes, you will, though, be able to sweep a couple of knockouts, the possibility is pretty nonrecurring, and you should rely on the powerhouses only.
Before we begin let’s have a quick look at the comparison between the DPS Heroes in Overwatch 2:
Characters | Weapons | Abilities | Ultimate Ability |
---|---|---|---|
Soldier: 76 | Heavy Pulse Rifle | Sprint, Biotic Field, Helix Rockets | Tactical Visor |
Genji | Shuriken | Deflect, Swift Strike | Dragonblade |
Sojourn | Railgun | Power Slide, Disruptor Shot | Overclock |
Tracer | Pulse Pistol | Blink, Recall | Pulse Bomb |
Cassidy | Peacekeeper | Combat Roll, magnetic Grenade | Deadeye |
Sombra | Machine Pistol | Translocator, Stealth, Hack | EMP |
Mei | Endothermic Blaster | Cryo-freeze, Ice Wall | Blizzard |
Reaper | Hellfire Shotgun | Shadow Step, Wraith Form | Death Blossom |
Echo | Tri-Shot | Sticky Bombs, Flight, Focusing Beam | Duplicate |
Ashe | The Viper | Coach Gun, Dynamite | B.O.B |
Junkrat | Frag Launcher | Concussion Mine, Steel Trap | Rip-Trap |
Torbjörn | Rivet Gun, Forge Hammer | Deploy Turret, Overload | Molten Core |
Pharah | Rocket Launcher | Jump Jet, Concussive Blast | Barrage |
Hanzo | Storm Bow | Storm Arrows, Sonic Arrow, Lunge | Dragonstrike |
Widowmaker | Widow's Kiss | Grappling Hook, Venom Mine | Infra-Sight |
Symmetra | Photon Projector | Sentry Turret, Teleporter | Photon Barrier |
Bastion | Configuration: Assault, Configuration: Recon | A-36 Tactical Grenade, Reconfigure | Configuration-Artillery |
While damage and elimination stats for tanks and supports might be quite high, DPS characters, when played correctly, will decimate opponent teams. It includes the most characters in it and is the most well-liked position in Overwatch.
Everyone may discover a Damage character here that suits them because there is a wide selection available. Depending on how you play and how well you understand a character’s abilities, you can think some heroes are better than others. We anticipate that several heroes will move up in the DPS Tier List quite soon as a result of buffs and nerfs.
But even so, we consider Genji & Tracer to be the top two DPS characters in Overwatch 2. With that out of the way, here is our tier list of all the DPS heroes in the game.
Overwatch 2 DPS Tier List Ranking Table | |
Tiers | DPS Heroes |
S-Tier | Soldier: 76, Genji, Sojourn, Tracer |
A-Tier | Cassidy, Sombra, Mei, Reaper, Echo, Ashe |
B-Tier | Junkrat, Torbjörn, Pharah, Hanzo, Widowmaker, Symmetra |
C-Tier | Bastion |
S-Tier
The Overwatch 2 DPS characters of the S-Tier List are quite powerful. Any of the following DPS Characters may be used by an experienced player to eliminate opponents one at a time and intimidate the opposing side.
Tracer
A close-quarters skirmishing hero with a focus on speed and single-target damage, Tracer. Because of her agility and potent single-target damage, she excels at targeting important targets with little risk. She is at the top of the S-Tier of our DPS Tier List since she excels at dishing out damage.
Role | Damage |
Weapons | Pulse Pistol |
Abilities | Blink, Recall |
Ultimate Ability | Pulse Bomb: Throw a powerful sticky explosives on enemies |
With the help of Blink, Tracer can move fast across a battlefield and outflank her opponents, inflict damage on them, and then flee before they can react.
Pulse Pistols
Type | Weapon |
Effect Type | HItscan |
Damage |
|
Falloff Range | 13 – 20 meters |
Spread Angle | 3.6 degrees max |
No. Of Pellets | 2 bullets/shot |
Rate Of Fire (ROF) | 20 shots/sec |
Ammo | 40 |
Ammo Usage |
|
Reload Speed | 1 sec |
Tracer’s hallmark firearms are the Pulse Pistols. She shoots these close-quarters guns at a clip of 20 bullets per second while holding one in each hand. These pistols have a maximum damage output of 5 at close range, which drops to 1.8 at extended ranges.
Blink
Type | Ability |
Effect Type | Movement |
Max Range | 7.5 meters |
Ammo | Charges: 3 |
Duration | Recovery For Reuse: 0.1 secs |
Cooldown | Per Charge: 3 secs |
Blink, Tracer’s primary mobility ability, enables her to cover ground quickly. A maximum of three charges may be stored in Blink, which can then be utilized all at once if necessary. Charges are continually replenishing in combat and have a 3-second recharge for each one.
Recall
Type | Ability |
Effect Type | Movement |
Healing | Highest Value HP Returned In 3 secs |
Duration |
|
Cooldown | 12 secs |
The tracer may travel back in time for up to three seconds when she uses Recall. The recall will return Tracer to her previous location and bring her HP back to her greatest level from the previous three seconds.
Pulse Bomb
Type | Ultimate Ability |
Effect Type |
|
Damage |
|
Projectile Speed | 15 m/s |
Area Of Effect | Explosion Radius: 5 meter |
Casting Time |
|
Duration | 1 sec |
Ultimate Cost | 1,260 points |
Pulse Bomb is Tracer’s Ultimate Ability. When used, She will launch a huge bomb that can cling to any object or foe. The bomb will detonate after a short wait of 1 second, dealing up to 350 damage to an adversary who is directly trapped.
Sojourn
Sojourn may be a challenging character to control since her railgun has a highly skilled ceiling and a lot of force concentrated in its secondary fire. The more precisely the player can aim, the more powerful they will be with it.
Role | Damage |
Weapons | Railgun |
Abilities | Power Slide, Disruptor Shot |
Ultimate Ability | Overclock: Railgun energy auto-charge for a short duration |
Railgun
Primary Fire
Type | Weapon – Primary Fire |
Effect Type | Projectile |
Damage | 9 dmg/shot |
Projectile Speed | 160 m/s |
Rate Of Fire (ROF) | 14 rounds/sec |
Ammo | 45 |
Ammo Usage | 1 |
Reload Speed | 1.2 secs |
Secondary Fire
Type | Weapon – Secondary Fire |
Effect Type | Hitscan |
Damage | 30 – 130 dmg |
Falloff Range | 40 – 60 meters |
Area Of Effect | 0.1 meters (Scales With Energy) |
Casting Time | Recovery: 0.6 secs |
Cooldown | None |
The Railgun, which Sojourn uses as her main weapon, has a 14-projectile rapid-fire rate. Each of these bullets will strike the enemy and do 9 damage while also producing energy. The energy produced by the Railgun can be used by Sojourn in the Second Firing Mode. The Railgun can fire 45 rounds and reloads in 1.2 seconds.
Power Slide
Type | Ability |
Effect Type | Movement |
Move Speed |
|
Max Range | 16 meters |
Cooldown | 7 secs |
Power Slide is a strong movement skill that enables Sojourn to transition into a slide that can be stopped in its tracks by leaping. She will be sent into the air at a great height by the Power Slide’s leap, which will provide her the opportunity to move about and launch strikes from unexpected angles.
Disruptor Shot
Type | Ability |
Effect Type |
|
Damage |
|
Projectile Speed | 30 m/s |
Max Range | 30 meters |
Area Of Effect | 5 meters |
Duration | 4 secs |
Cooldown | 15 secs |
Sojourn’s Disruptor Shot gives her the ability to both harm and ensnares her enemies. When used, Sojourn launches the Disruptor Shot that has a 4-second duration, deals up to 210 damage in an AoE attack, slows targets inside the radius, and deals a maximum of 210 damage.
Overclock
Type | Ultimate Ability |
Rate Of Fire | Full Charge: 1 sec |
Casting Time | Recovery: 0.75 secs |
Duration | 8 secs |
Ultimate Cost | 2,100 points |
Overclock is Sojourn’s Ultimate Ability. When utilized, Overclock overclocks Sojourn’s Railgun, enabling it to create energy independence for nine seconds. Every 1.2 seconds, Overclock may fully recharge the Railgun’s energy meter, making it simple and quick to employ her Second Firing Mode.
Genji
Genji is one of the most mobile and adaptable flankers among all the heroes, with some of the greatest movement possibilities. He may be quite effective at the range but is best at mid-range where he can employ his speed and Shurikens.
Role | Damage |
Weapons | Shuriken |
Abilities | Deflect, Swift Strike |
Ultimate Ability | Dragonblade: Unsheathe a deadly melee weapon |
Genji’s Cyber-Agility gives him a tough target and makes it simple for him to move across the area. He can effectively attack, flee from, or travel between targets thanks to Swift Strike.
Cyber Agility
Type | Passive Ability |
Effect Type | Movement |
Move Speed | Vertical: 7.8 m/s |
Duration | 1 sec |
Genji is a cyber ninja, and as such, he is incredibly agile. He gains Cyber Agility as a result, enabling him to double leap and scale walls. Extreme mobility can be utilized to travel between targets, avoid being shot at, or simply startle adversaries by approaching from unexpected angles.
Shuriken
Primary Fire
Type | Weapon – Primary Fire |
Effect Type | Projectile |
Damage |
|
Spread Angle | Pinpoint |
Projectile Speed | 60 m/s |
Area Of Effect | Shuriken Radius: 0.1 meters |
Rate Of Fire (ROF) | 3 shurikens/0.88 secs |
Ammo | 30 |
Reload Time | 1.5 secs |
Secondary Fire
Type | Weapon – Secondary Fire |
Effect Type | Projectile |
Damage |
|
Spread Angle | 9 degrees |
Projectile Speed | 60 m/s |
Area Of Effect | Shuriken Radius: 0.1 meters |
Rate Of Fire | 3 shurikens/0.68 secs |
Ammo | 24 |
Ammo Usage | 3 |
Reload Time | 1.5 secs |
Genji has several Shurikens at his disposal because he is a ninja. Genji will hurl a Shuriken at his adversaries in the main fire mode. It functions as a projectile as a thrown weapon. He can store up to 30 shurikens at once, but when his supply runs out, he must manually or automatically refill for 1.5 seconds.
Swift Strike
Type | Ability |
Effect Type |
|
Damage | 50 dmg |
Move Speed | 50 m/s |
Duration | 0.3 secs |
Cooldown | 8 secs |
Genji will rush forward and attack his adversaries with his katana for 50 damage when utilizing the Swift Strike ability. He can use this power again right away if he uses it to defeat an adversary. He may be able to dispatch several adversaries with little health as a result swiftly.
Deflect
Type | Ability |
Area Of Effect | Radius: 1 meter |
Duration |
|
Cooldown | 8 secs |
Deflect is a defensive skill that Genji may use to great effect against his adversaries. Any shots that hit him from the front are going to be reflected at the adversary while this ability is used.
Dragonblade
Type | Ultimate Ability |
Effect Type | Melee |
Damage | 110 dmg |
Move Speed | +30% |
Max Range | 5 meters |
Rate Of Fire (ROF) | 1 swing/0.9 secs |
Casting Time | 1 sec |
Duration |
|
Ultimate Cost | 1,932 points |
Genji may use Dragonblade, his Ultimate Ability, to unleash a gigantic blade known as the Dragonblade. It is his katana, and with each swipe, it is capable of inflicting a catastrophic 110 damage.
Soldier: 76
Soldier 76 is a DPS character with a lot of versatility. He can move swiftly across the battlefield, do both steady and burst damage at every range, and use his Icon-ability to boost both himself and his squad.
Role | Damage |
Weapons | Heavy Pulse Rifle |
Abilities | Sprint, Biotic Field, Helix Rockets |
Ultimate Ability | Tactical Visor: Aim your weapon at target in view |
Heavy Pulse Rifle
Type | Weapon |
Effect Type | Hitscan |
Damage | 5.7 – 19 dmg |
Falloff Range | 30 – 50 meters |
Rate Of Fire |
|
Ammo | 30 |
Reload Time | 1.5 secs |
The Heavy Pulse Rifle, which serves as Soldier: 76’s emblematic weapon, is a precise and dependable hitscan weapon. This eliminates the need for players to consider projectiles, making it incredibly reliable to attack quick or flying targets like Pharah and Mercy.
Helix Rockets
The Helix Rockets, the Heavy Pulse Rifle’s secondary firing mode, can deal tremendous damage to opponents inside their field of impact. When activated, Soldier: 76 will launch the rockets in a burst, causing 120 damage on contact and up to 80 damage within a 3-meter radius.
Sprint
Soldier: 76 now has access to Sprint, a simple way to move more quickly. Soldier: 76’s mobility speed is increased by 50% when Sprint is activated. The period continues as long as he advances without making any more movements.
Biotic Field
Soldier: 76 deploys a biotic emitter when he uses Biotic Field, which heals 35 HP to him and any allies within a 4.5-meter radius. He can sustain himself more than most other DPS heroes thanks to this ability, and he may even use it to aid his team’s support.
Tactical Visor
Tactical Visor is Soldier: 76’s Ultimate Ability. When employed, it enables him to latch on to his adversaries successfully. Soldier: 76 will be capable of hitting those nearest to his sights with precise accuracy. If any targets escape his sight, he can easily find the next one nearest to him and take care of them.
A-Tier
The A-Tier DPS Characters from our Tier List should be your first choice because they are also incredible at damaging and have effective attacks and flanking properties.
Echo
Echo is a versatile hero that can blend into various settings and situations, as implied by her profession. She is at the Top of the A-Tier of our Overwatch 2 DPS Tier List because is an all-rounder. She may burst through opposing shields to clear the way for her squad to see, ambush the backline, pelt opponents from above, or dive alongside her tanks.
Role | Damage |
Weapons | Tri-Shot |
Abilities | Sticky Bombs, Flight, Focusing Beam |
Ultimate Ability | Duplicate: Becoming a duplicate of the targeted enemy hero |
Glide
Holding the jump button enables Echo’s passive ability to glide while falling. It will delay her descent and give her more time to orient herself before engaging in combat.
Tri-Shot
The Tri-Shot is Echo’s go-to firearm. The weapon shoots three bullets simultaneously in a triangle pattern, just as it would sound, and may provide significant damage at a medium range. Since it fires many projectiles, it’s crucial to land them all on the target to harm it as much as possible.
Sticky Bombs
When utilizing Sticky Explosives, Echo launches a barrage of bombs that attach to targets and explode after a brief delay. These explosives may be extremely lethal, dealing 25 damage on each explosion and 5 damage upon hit.
Flight
Echo not only can glide when holding a jump, but she also has a little amount of flying. When this is employed, she briefly launches forward before the player has full control over her.
Focusing Beam
An extremely potent ability that may swiftly dispatch foes is Focusing Beam. It’s because Focusing Beam deals significantly more damage when players have less than 50% health, even if it deals 50 damage per second over 2 seconds.
Duplicate
The Duplicate Ability is Echo’s Ultimate Ability and the source of her name. This skill has undergone some adjustments in Overwatch 2. Echo is used to duplicate an opponent hero’s whole life when casting Duplicate on them.
Reaper
Reaper is a quick flanker and among the game’s most lethal characters up close. His Hellfire Shotguns can even melt Tanks like Roadhog. One of the best invulnerability techniques in the game is Wraith Form, which Reaper may utilize to flee or pursue his adversaries owing to his accelerated speed and quick reload.
Role | Damage |
Weapons | Hellfire Shotgun |
Abilities | Shadow Step, Wraith Form |
Ultimate Ability | Death Blossom: Firing Hellfire Shotgun by spinning in a circle, destroying all nearby enemies |
The Reaping
Reaper recovers 35% of the damage he deals to his foes as health, whether it comes from shotguns, combat, or even environmental impacts. It is a result of his kit’s passive The Reaping.
Hellfire Shotguns
The Hellfire Shotguns, Reaper’s main weapon of choice, have a lethal punch when used up close. Reaper uses these devastating weapons in his trademark dual-wielding technique, causing 5.4 damage for every pellet that strikes an opponent and ejecting 20 pellets per shot.
Wraith Form
It might be dangerous to be in close quarters, but Reaper possesses Wraith Form to assist him to get away. He has 50% faster movement speed and becomes invulnerable when he enters Wraith Form.
Shadow Step
One of Reaper’s skills is getting close to opponents. With Shadow Step, he can complete this task even more quickly. Reaper has an effective range and may teleport immediately to any location when activated.
Death Blossom
Death Blossom, Reaper’s Ultimate Ability, turns him into a swirling whirlwind of death. Reaper will swiftly spin in a circle while shooting his Hellfire Shotguns in all directions when in use.
Mei
Mei is an adept one-on-one combatant. In most confrontations, the Endothermic Blaster’s slowing effect will give her the upper hand. When utilized properly, Icicle causes significant damage, making them dangerous from close and far away.
Role | Damage |
Weapons | Endothermic Blaster |
Abilities | Cryo-freeze, Ice Wall |
Ultimate Ability | Blizzard: Launches weather control droze to freeze enemies in a wide area |
Due to its ability to obstruct an adversary’s view or divide some of the foes from others, Ice Wall may be utilized to trap or deceive an enemy.
Endothermic Blaster
The Endothermic Blaster, Mei’s primary weapon of assault, has undergone several modifications for Overwatch 2. The weapon is mostly used to create stacks that eventually force the adversary to become fully frozen. This weapon no longer can freeze foes in Overwatch 2.
Instead, its primary firing mechanism fires a quick burst of cold in the direction of targets, damaging them and slowing them by 50%. Before, the slow would increase to 50% before actually freezing, and now it’ll always be 50% upon contact.
Cryo-Freeze
Mei has a skill called Cryo-Freeze that can let her stay alive for a long time. When activated, it will instantaneously surround her in ice, rendering her immune to damage. Additionally, it reverses all adverse effects and recovers 50 HP per second.
Ice Wall
Ice Wall may be used to create an ice wall up to 20 yards in front of the user. In Overwatch 2, this skill’s range was decreased to 20 from 35 meters, while the wall’s HP was decreased from 400 to 250.
Blizzard
Blizzard, Mei’s ultimate strike, does damage to all-around targets while also slowing or freezing them. When activated, she launches a drone that modifies the weather for 4.25 seconds in a certain region.
Sombra
Sombra is an effective infiltrator thanks to her stealth and crippling assaults. Her EMP gives her the advantage against several attackers at once, and her hacking may destabilize her enemies, making them simpler to eliminate. Sombra is difficult to find because of her ability to dislocate and disguise herself.
Role | Damage |
Weapons | Machine Pistol |
Abilities | Translocator, Stealth, Hack |
Ultimate Ability | EMP: deals 40% of damage of all nearby enemies’ health, hacking them and destroying barriers around you |
Opportunist
For Overwatch 2, Sombra’s passive talent, Opportunist, was altered. Previously, she could see past barriers to critically wounded foes with this skill. She was able to accomplish the task by moving swiftly across to enemies with low HP as a result.
Machine Pistol
The Machine Pistol is Sombra’s go-to weapon, a compact SMG with a hitscan that can inflict damage swiftly at close ranges. Even while the weapon’s lethality does decrease between 15 and 35 meters, at close range it can do 7 damage every round at a startling 20 shots per second.
Hack
Sombra’s trademark ability, Hack, has the power to alter any battle significantly. For 1.75 seconds after Sombra hacks a player, they are unable to utilize their skills.
Stealth
Stealth, a pillar of Sombra’s skills, enables her to conceal herself from opponent sight. Sombra will become cloaked after casting stealth, which requires a lengthy channeling phase.
Translocator
With this power, Sombra may launch a Translocator missile that would fall in the location she chooses. She will immediately transport back to the spot where the Translocator was installed if she utilizes this power once more.
EMP
Sombra’s Ultimate Ability, the EMP, can be quite problematic for the opposing team when unleashed. All opponents within a 15-meter range of an EMP used by Sombra will be compromised. They will sustain greater damage from Sombra and her friends as a result.
Ashe
A strong mechanical understanding is necessary to play Ashe well. When the player employs her ADS (aim-down-sight) alternative fire, the Viper, her long-range weapon, is incredibly potent.
The hazardous and adaptable ability of dynamite may be used to threaten areas (such as constricting passageways and chokepoints) and cause respectable damage within its radius while also applying a damage-over-time debuff.
The Viper
In Overwatch 2, Ashe’s go-to weapon is the Viper. This repeater uses a lever action and, in the proper hands, can cause significant damage helping Ashe with her ranking in the DPS Tier List. There are two firing modes on the cannon. The weapon shoots significantly more quickly but does less damage in hip-firing mode.
Dynamite
Ashe uses a load of explosives to deliver a punch in the traditional cowgirl style. When activated, Ashe will toss the explosives with the fuse ignited. The dynamite will detonate after a predetermined amount of time, damaging any targets it hits.
Coach Gun
Players may rapidly blast adversaries with the Coach Gun, which is essentially simply a shotgun Ashe has with her at all times. Similar to Lucio‘s Soundwave, players will blow their target backward with each shot of the Coach Gun.
B.O.B.
B.O.B. is the name of Ashe’s Ultimate Ability, which calls her sidekick B.O.B. to go do her business and support her in battle. When activated, B.O.B. will leap into Ashe’s path, run in that way, and then jump back up again.
Cassidy
Cassidy is among the greatest duelists in the game, as befits a gunslinger. He can stun practically everyone he comes in contact with a Flashbang and then uses his Peacekeeper to dispatch them quickly.
Role | Damage |
Weapons | Peacekeeper |
Abilities | Combat Roll, magnetic Grenade |
Ultimate Ability | Deadeye: Face off against your enemies |
His primary weapon’s precise hitscan feature also qualifies him for medium-range combat against moving opponents like Genji and Pharah.
Peacekeeper
The Peacekeeper is Cassidy’s trademark revolver. This weapon only has a small magazine (6 bullets), but it has a lot of punch.
Combat Roll
His famous Combat Roll skill in Overwatch 2 may have seen Cassidy’s greatest progress. He can dive in the direction he is traveling when a player performs Combat Roll.
Magnetic Grenade
Flashbang will be replaced by Magnetic Grenade for Cassidy in Overwatch 2. It lacks Flashbang’s stopping capability, but it compensates for this with burst damage.
Deadeye
In Overwatch 2, Deadeye, Cassidy’s ultimate ability, has also experienced some modifications. Cassidy is known for standing motionless and taking his time to line shots up while employing this iconic skill.
B-Tier
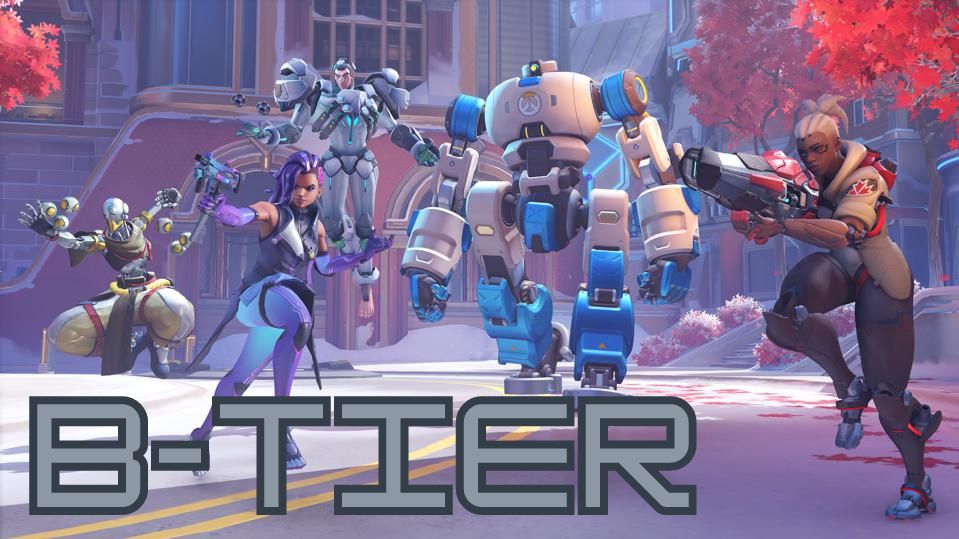
The B-Tier DPS Characters in our Overwatch 2 DPS Tier List are rather good even if they are extremely basic, and they may benefit you and your squad.
Widowmaker
Widowmaker‘s main danger is frequently another, stronger Widowmaker on the other side because she is rather poor in close-quarters combat and immobile when scoped.
Role | Damage |
Weapons | Widow’s Kiss |
Abilities | Grappling Hook, Venom Mine |
Ultimate Ability | Infra-Sight: Gives your team a view of the enemy’s location that pierces through walls and different obstacles on the map |
Since her sole true mobility is Grappling Hook, which may have a long throwing time and leaves her very susceptible to another attack, she is frequently forced to play far from the target where she is safer.
Widow’s Kiss
Widowmaker attacks her enemies from a distance with her go-to sniper weapon, the Widow’s Kiss. The weapon has two distinct firing modes and can easily swap between them.
Grappling Hook
Widowmaker can use her Grappling Hook to increase her mobility. When used, Widowmaker launches a grappling hook toward a surface and starts to drag herself there.
Venom Mine
The effectiveness of Widowmaker depends heavily on her ability to keep herself safe when perched up high on the sniper’s perch. The Venom Mine is one of her tools for making sure of this. When Widowmaker is employed, a Venom Mine is laid down and then armed on almost any surface.
Infra-Sight
Infrasight, Widowmaker’s Ultimate Power, enables her to detect the thermal radiation of her adversaries. Widowmaker can see her adversaries through walls when she uses infra-sight. Not only does she know where they are, but she also knows how much Health they still have.
Hanzo
Hanzo is a proficient area denial and team utility sniper with a medium range. He is a more covert sniper than Widowmaker because of the relatively quiet and difficult-to-see quality of his arrows, allowing him to kill and then flee before his adversaries see him.
Role | Damage |
Weapons | Storm Bow |
Abilities | Storm Arrows, Sonic Arrow, Lunge |
Ultimate Ability | Dragonstrike: Launch Dragon Spirit that devastates enemies it passes through |
Wall Climb
Since he can scale walls to have a superior viewpoint, Hanzo is a particularly effective sniper. Hanzo may climb on walls by leaping at them when he activates this passive ability.
Lunge/Double Jump
Hanzo can double leap in addition to being able to climb walls. The player may click the jump button once more to lunge while in mid-jump. This enables Hanzo to jump higher and further than other heroes, as well as change direction mid-jump, which is useful for dodging enemy fire.
Storm Bow
The Storm Bow is the main weapon used by Hanzo. The longer the player keeps the bow charged, the more potent it becomes. Although it has endless ammunition, it must be reloaded and recharged after each shot.
Sonic Arrow
The Sonic Arrow when shot will explode after impacting a surface or enemy. When this occurs, it will discharge a sonar-like gadget that will show targets in an area around the arrow’s landing spot that is 9 meters in diameter.
Storm Arrows
The only aspect of Hanzo that was altered in Overwatch 2 was his use of Storm Arrows. Damage from this ability has decreased from 70 to 65. Hanzo can shoot his next five arrows immediately after using Storm Arrows.
Dragonstrike
The name of Hanzo’s Ultimate Power is Dragonstrike. When activated, Hanzo will unleash a powerful arrow that can smash through walls or other barriers. The arrow will be surrounded by a pair of dragons that will circle it and cause tremendous damage to any enemies nearby the dragon’s core.
Pharah
Pharah is a DPS character with amazing aerial mobility, but she has significant limitations while she stays on the ground. Her rocket launcher does splash damage immediately upon impact and does not experience damage falloff, therefore it may provide exceptional damage.
Role | Damage |
Weapons | Rocket Launcher |
Abilities | Jump Jet, Concussive Blast |
Ultimate Ability | Barrage: Launch continuous volley of mini-rockets |
Pharah is launched into the air at a great height by the Jump Jet, allowing her to position herself for attacks at an angle or flee from peril.
Hover Jets
Having the ability to fly in the air is one of the key appeals of playing a hero like Pharah. Pharah can hover air while pressing the jump button thanks to the hover jets. Pharah’s ability to go a certain height is, however, limited by the quantity of gasoline she has left in the tank, which she must monitor.
Rocket Launcher
The Rocket Launcher, Pharah’s preferred weapon, fires exploding missiles at her enemies that do damage in a surrounding area. Depending on how near the blast was to the target, these rockets may inflict up to 80 splash damage in addition to 120 damage on a hit.
Jump Jet
Jump Jets may swiftly launch players 11.55 meters into the air if they desire to go high. In addition to giving Pharah a greater view of the fight, it also allows her to gain the upper hand or just flee if she wants to leave right away.
Concussive Blast
Concussive Blast gives Pharah a backup in case an adversary does come too near. This ability’s damage just received a modification, causing 30 damage additional to throwing the target back.
Barrage
Barrage is Pharah’s Ultimate Ability. When activated, Pharah will launch an enormous barrage of little rockets against her enemies. It has a 2.5-second duration and can launch 31 missiles per second.
Torbjörn
The tool-tip damage dealer with the most zone-protecting skills is Torbjörn. Due to its enormous damage output, The Rivet Gun is an extremely deadly weapon, but its primary flaw is that it arcs at mid- to long-range.
Role | Damage |
Weapons | Rivet Gun, Forge Hammer |
Abilities | Deploy Turret, Overload |
Ultimate Ability | Molten Core: Create pools of molten slag to damage enemies in range. Also deals additional arrow damage |
Rivet Gun
Torbjorn likes to use the Rivet Gun. The Rivet Gun’s long-range projectile does 70 damage to an adversary when it hits them in the primary firing mode. The primary fire rate of the Rivet Gun has been somewhat increased for Overwatch 2, resting at.55 seconds between bullets.
Forge Hammer
Torbjorn’s secondary weapon, the Forge Hammer, has two distinct functions. The first is that each time Torbjorn strikes the Forge Hammer against the turret, the damage to the turret is repaired for 50 HP. The Forge Hammer may also be used as a physical weapon, doing 55 damage to any opponents it hits with each swing.
Deploy Turret
Torbjorn will build a self-building turret when Deploy Turret is invoked. The turret can harm foes and requires 3 seconds to build. It also has 250 HP. When shooting, the turret has an effective range of 15 m and does 14 damage every.25 seconds.
Overload
Through overload, Torbjorn certainly gains enhanced stats and can improve himself in battle. When activated, he has 100 armor, 30% movement speed, 43% fire and reloads speed and 30% movement speed.
Molten Core
Torbjorn’s Ultimate Ability, Molten Core, causes him to shoot molten slag out of his claw when used. Torbjorn unleashes 10 shots of molten slag during Molten Core, which can result in pools on the ground that can deal 25 damage upon contact and 160 damage each second an opponent is in the pool.
Junkrat
Junkrat is a hero that specializes in area defense using traps and fire support; he is renowned for his damage output skills. He has good mobility owing to the Concussion Mine, and his Frag Launcher provides significant damage.
Role | Damage |
Weapons | Frag Launcher |
Abilities | Concussion Mine, Steel Trap |
Ultimate Ability | Rip-Trap: Drive and detonate an exploding tire |
Total Mayhem
One of the key components in his toolbox, the passive ability of Junkrat is permitted by Total Mayhem to escape the damage of his bombs. It is a very fantastic skill for a DPS character that solely deals with explosives.
Frag Launcher
Junkrat’s Frag Launcher has been somewhat improved in Overwatch 2. This pistol serves as his main weapon, firing grenades at his adversaries. These grenades can explode quickly upon impact with an adversary or bounce twice before going off
Concussion Mine
The Concussion Mine may be used by Junkrat to move about or to provide more damage and knockback to opponents. The Concussion Mine deploys a remote-controlled mine when activated.
Steel Trap
Junkrat uses the Steel Trap to imprison any heroes who are dumb enough to fall into it. The Steel Trap would then be tossed onto the ground and await an adversary when it is activated. It will close in on them when activated, doing 100 damage and immobilizing them for three seconds.
RIP-Tire
Junkrat possesses the RIP-Tire for his Ultimate Ability. When it’s used, Junkrat will launch a huge explosive-filled tire in the direction of his enemies. Junkrat can remotely manipulate the tire and set it off at any time, or he may just wait for it to do so after 10 seconds.
Symmetra
The benefits Symmetra‘s squad gains from her skills are defensive and positional. She can divide the battlefield in half using her Ultimate, cover chokepoints with the Sentry Turrets, use a Teleporter to give allies high ground or flank the other team, and deploy Sentry Turrets to protect chokepoints.
Role | Damage |
Weapons | Photon Projector |
Abilities | Sentry Turret, Teleporter |
Ultimate Ability | Photon Barrier: Deploy massive energy barriers |
Photon Projector
The Photon Projector, Symmetra’s main weapon, had several changes for Overwatch 2. A short-range beam gun with rising damage over time is the Photon Projector.
Sentry Turret
When Symmetra utilizes the teleporter, she positions the entry at her present location and the exit pad at the destination she is looking for. She can utilize the teleporter to reach a destination with the help of her teammates quickly.
Teleporter
The capability to position Sentry Turrets is one of Symmetra’s kit’s main features. In Overwatch 2, these turrets may be mounted on nearly any hard surface, including walls, ceilings, and floors. They may all be deployed at once, up to three.
Photon Barrier
The ultimate of Symmetra is Photon Barrier. When activated, this power forces Symmetra to launch a huge vertical shield that covers the whole map. With its 4000 HP, this barrier is capable of stopping all incoming ranged strikes.
C-Tier
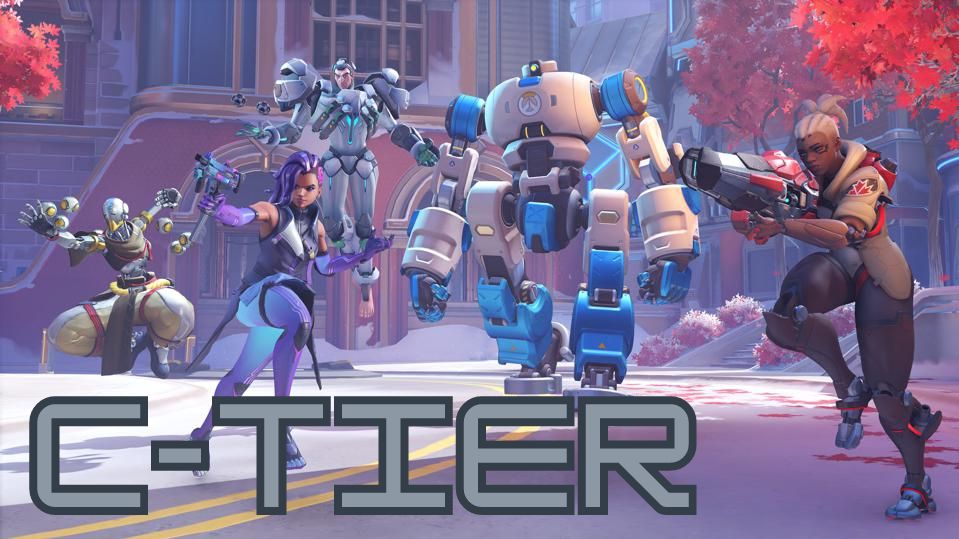
The skills and application of the C-Tier Overwatch 2 DPS Characters aren’t as good as compared to the other DPS. Even so, you might still participate in matches with them and obtain some eliminations. But it’s advisable to stay with figures further up on our Tier List.
Bastion
Bastion, the last character on our Overwatch 2 DPS Tier List is a DPS character who can take on two different forms. The first is a less movable turret form, while the default variant is a movable bipedal form having a sub-machine gun.
Role | Damage |
Weapons | Configuration: Assault, Configuration: Recon |
Abilities | A-36 Tactical Grenade, Reconfigure |
Ultimate Ability | Configuration-Artillery: Become immobile and fire up 3 strong artillery shells |
Although Bastion‘s turret can destroy shields and heroes equally and has some of the best damage output, it is unable to deliver critical hits. Faster heroes may simply sneak up behind Bastion and rapidly dispatch it using this weakness.
Configuration: Recon
Bastion possesses the unique ability to reconfigure himself into several forms. He is capable of moving at various speeds while in these positions, and his weaponry is also altered. Bastion may walk normally and travels at a regular pace in Configuration: Recon.
Reconfigure
Previously, Bastion could utilize the power of Reconfigure to change into a turret or remain that way for a lengthy period. The compromise was that Bastion was immobile. He could, however, heal himself.
It just took a few seconds for him to transform, and he could already start dealing eye-watering harm. Bastion can no longer remain in Turret form indefinitely, even though he can still perform Reconfigure.
Configuration: Sentry
Bastion is a transformational master. As a result, changing into various configurations is an essential part of his gameplay. The player will change into the same sentry turret they previously transformed into when they use Reconfigure to convert into Configuration: Sentry, with the addition that it now has a timer and can move.
It significantly increases Bastion’s capacity for burst damage and can help him find the ideal location for his ambush.
A-36 Tactical Grenade
The A-36 Tactical Grenade is a welcome new Bastion ability that enables the user to shoot a sticky grenade that explodes either after a brief delay or immediately upon impact with a player. The grenade also throws players back when it is deployed.
Configuration: Artillery
Previously, Bastion could drive about and fire at adversaries for a brief period thanks to his tank-like Ultimate Ability. Now, though, it makes Bastion the best mobile artillery system. When activated, Bastion can change into artillery mode and unleash three rounds that cause significant damage to any foes they strike.
Recent Patch Notes
Last Updated: August 10th, 2023.
Here are some nerfs and buffs that the characters went through in recent patches that players should be aware of:
- Bastion:
- A-36 Tactical Grenade explosion damage falloff: 70% -> 50%
- A-36 Tactical Grenade Detonation time: 0.5 seconds -> 0.35 seconds
- A-36 Tactical Grenade Projectile size: 0.2 -> 0.25
- A-36 Tactical Grenade Impact damage: 15 -> 30
- Configuration: Recon Reload time: 1.5 seconds -> 1.2 seconds
- Configuration: Assault Repair armor health: 50
- Configuration: Artillery targeting move speed: 20 m/s -> 25 m/s
- Cassidy:
- Base Health: 200 -> 225
- Peacekeeper damage falloff range: 25-45 meters -> 25-35 meters
- Magnetic Grenade Max travel time: 1.5 seconds
- Magnetic Grenade Slow amount: 30% -> 25%
- Hanzo:
- Storm Bow’s arrow draw progress was not preserved at the time of wall climbing
- Soldier 76:
- Helix Rocket Explosion damage: 90 -> 80
- Tactical Visor Cost increase: 10%
- Sombra:
- EMP overall Cost increase: 15%
- Now, EMP cannot damage lifeweaver’s tree of life
- Torbjörn:
- Weapon swap time: 0.5 seconds -> 0.4 seconds
- Rivet Gun Primary fire recovery time: 0.55 seconds -> 0.48 seconds
- Forge Hammer Swing recovery time: 0.75 seconds -> 0.6 seconds
Summary
Our Overwatch 2 DPS Tier List currently ranks all of the DPS characters in order of potency and playability. If you have any more questions about the game, you should take a look at our other Overwatch 2 Guides.
Related Content:
- Overwatch 2 Support Tier List
- Overwatch 2 Tier List
- Overwatch 2 Doomfist
- Overwatch 2 Tank Tier List
- Best Overwatch 2 Characters
- Overwatch 2 Crashing On PC
- Overwatch 2: Best Controller Settings
Thanks! Do share your feedback with us. ⚡
How could we improve this post? Please Help us. ✍