Elden Ring: All 7 Walking Mausoleum Locations
Our guide covers the locations of all the Walking Mausoleums in Elden Ring; learn how you can kill and use them to duplicate Remembrances.
 Fact Checked By
 Elden Ring’s Walking Mausoleums are an uncommon enemy type that lets you duplicate Remembrances. A Remembrance is a rare item that can be traded for special boss weapons from the Finger Reader Enya at the Roundtable Hold. But out of the 2 weapon options for each Remembrance, you can only get 1 weapon from those options. So if you duplicate a Remembrance with the Mausoleum, you can grab both its weapons from Enya.
There are a total of 7 Walking Mausoleums in Elden Ring but with one distinctive location where players can find two in a single area.
- Players can find all these Mausoleums in the following locations:
- Weeping Peninsula: Near the Tombsward Ruins Site of Grace, located southwest of the biome.
- Bellum Highway: Close to the eastern edge of the cliff at the beginning of the highway.
- Frenzied Flame Village: Located east of the Bellum Highway in the southern region of Liurnia.
- Mountaintops of the Giants: Next to the Castle Sol Site of Grace in the northern region of the area.
- Consecrated Snowfield: Wandering outside the Apostate Derelict at the western edge of the Snowfield.
- Deeproot Depths: In the open area beyond the large branches.
- There are 2 types of Walking Mausoleums in Elden Ring:
- Bell Mausoleums: These variants can duplicate any Remembrance.
- Non-Bell Mausoleums: These can only duplicate Non-Shardbearer Remembrances.
- Breaking the skull-shaped barnacles located either on their legs or on the building atop them will cause the Mausoleums to fall.
- Once they’re down, players can enter the aforementioned building and duplicate their Remembrances inside.
- Why Trust Us: Daniyal has spent more than 750 hours in Elden Ring, making his guides trustworthy!
Walking Mausoleums Locations
| Walking Mausoleum | Region | Location |
|---|---|---|
| First | Weeping Peninsula (Bell) | East of isolated merchants shack. |
| Second | Liurnia of the lakes (Bell) | Northeast of Raya Lucaria Academy, in the waters in front of Raya Lucaria Crystal Tunnel Grace. |
| Third | Liurnia of the lakes (No Bell) | North of the Ruined Labriynth Grace. |
| Fourth | Liurnia of the lakes (No Bell) | Mausoleum Compound Grace. |
| Fifth | Mountaintops of the Giants (Bell) | Outside Castle Sol in the northern area. |
| Sixth | Consecrated Snowfield (Bell) | Northwest of Ordina, Next to the Apostate Derelict Grace. |
| Seventh | Deeproot Depths (Bell) | North of the Nameless Eternal City. |
Elden Ring’s Walking Mausoleums are a rare breed of monsters since you can only find 7 of them in the entire game. And since you can get up to 15 Remembrances in a single playthrough, you’ll have to decide which ones are worth duplicating. Fortunately, most of the Walking Mausoleums are in Elden Ring’s end-game locations, so once you get to them, you’ll have a clearer idea of which boss’ Remembrance Weapons suit you the most.
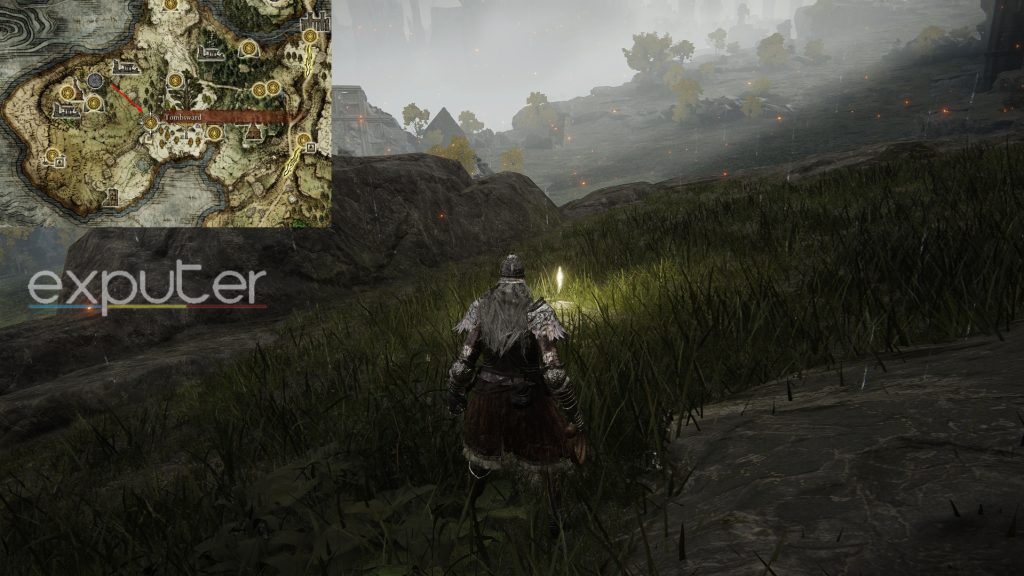
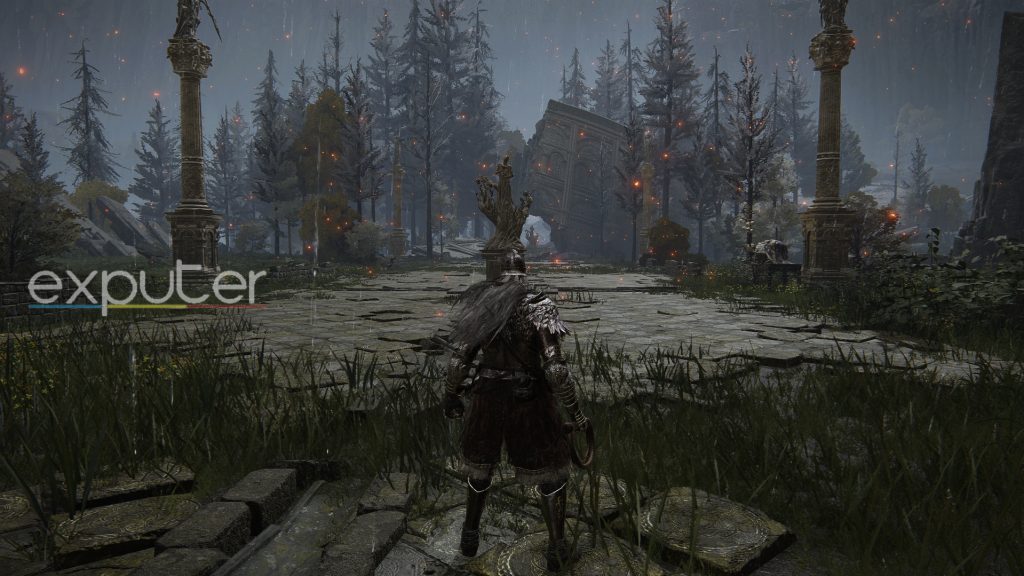
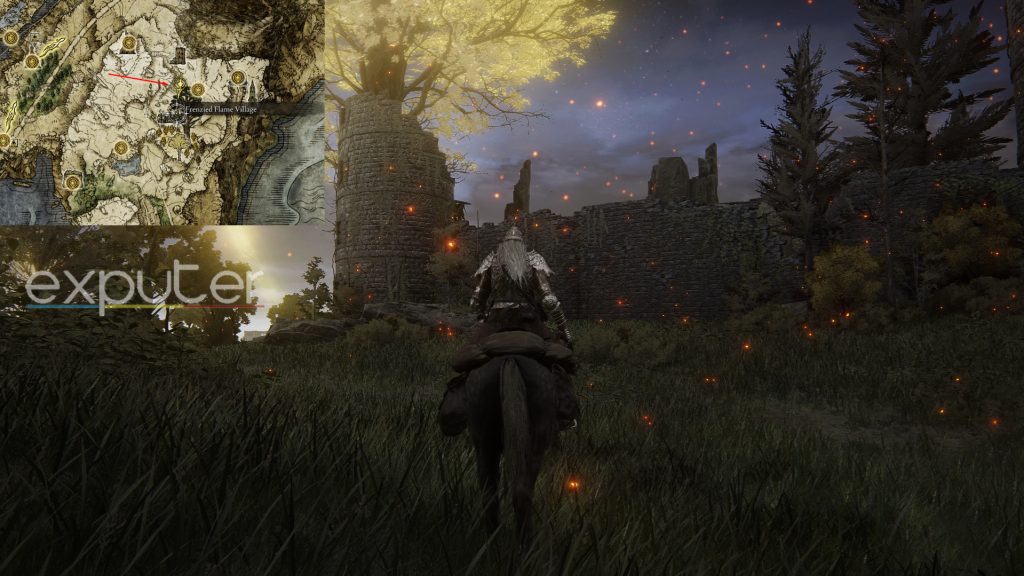
Weeping Peninsula
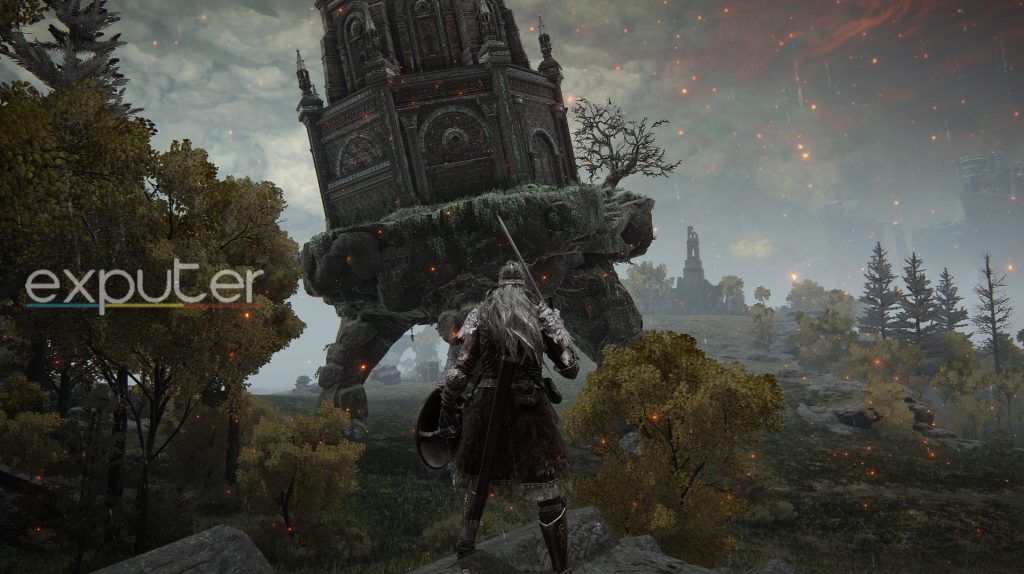
You’ll likely encounter your first Walking Mausoleum in the Weeping Peninsula south of Limgrave. Personally, I found this massive behemoth to be the easiest Mausoleum to kill with its slow mobility and weak damage output overall.
Here’s the optimal route I would recommend following for reaching this Mausoleum:
- Once you’ve reached the Peninsula, you’ll have to make your way to the Tombsward Site of Grace located next to the Minor Erdtree in the southwestern region of the biome.
-
- From here, descend down the hill and make your way to the open field in front and you’ll see the giant Mausoleum slowly wandering the area.
Liurnia Of The Lakes
Fortunately, the next 3 Walking Mausoleums in Elden Ring are located in a single biome, Liurnia, which is likely the second location you’ll visit after defeating Godrick the Grafted in Limgrave. It’s better to reserve the duplicating ability from these Mausoleums for later since you’ll have beaten more bosses and as a result, have more Remembrances and build variety by then.
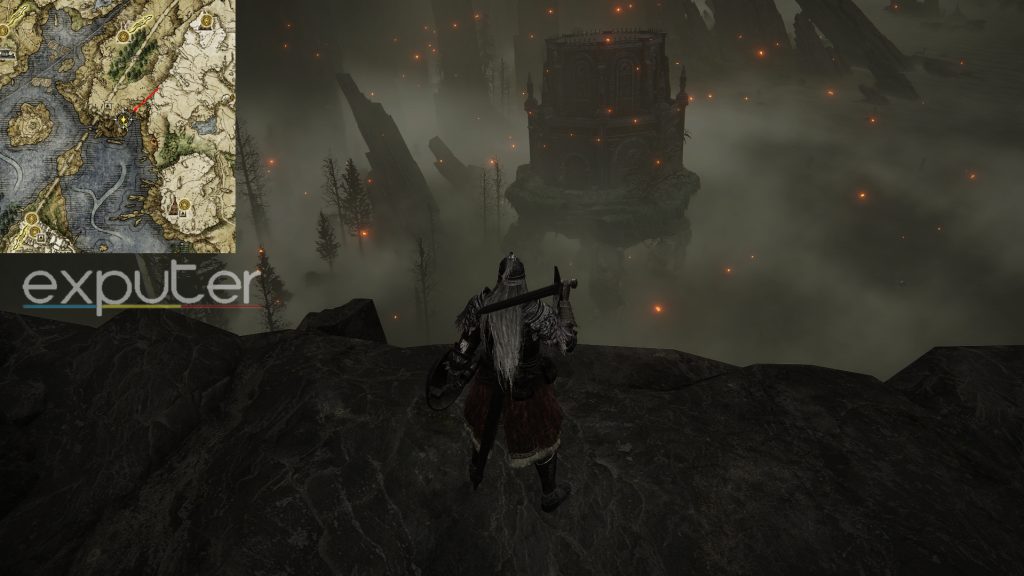
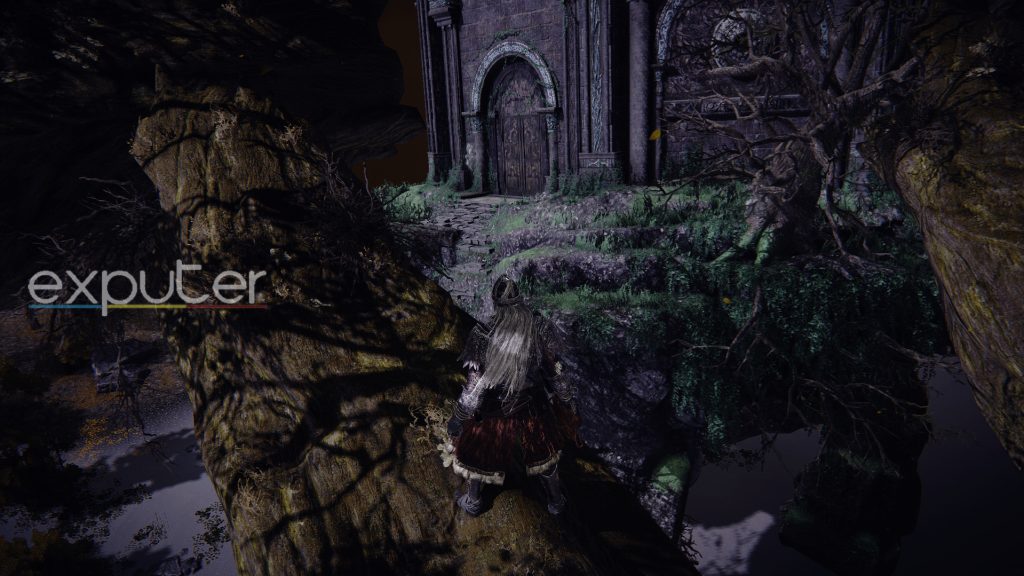
Bellum Highway
- Starting from the Main Academy Gate Site of Grace outside Raya Lucaria at the center of Liurnia, make your way towards the glowing snowflake in front of the narrow bridge.
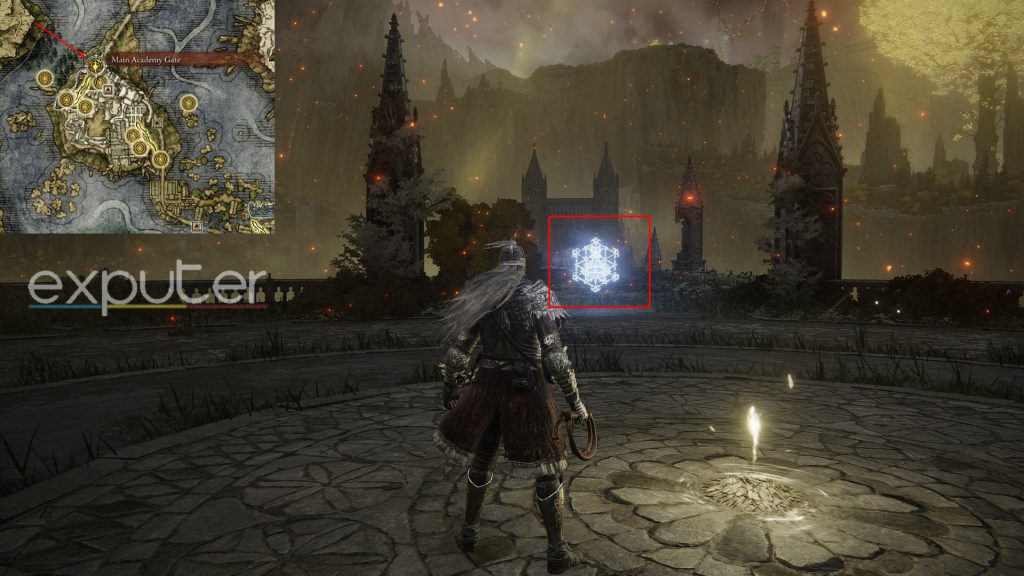
-
- Interacting with this snowflake will teleport you across the bridge all the way to the start of the Bellum Highway.
-
- Touch the East Raya Lucaria Gate Site of Grace and head east until you reach the cliff and see the first Walking Mausoleum wandering the Lake just beyond this point.
-
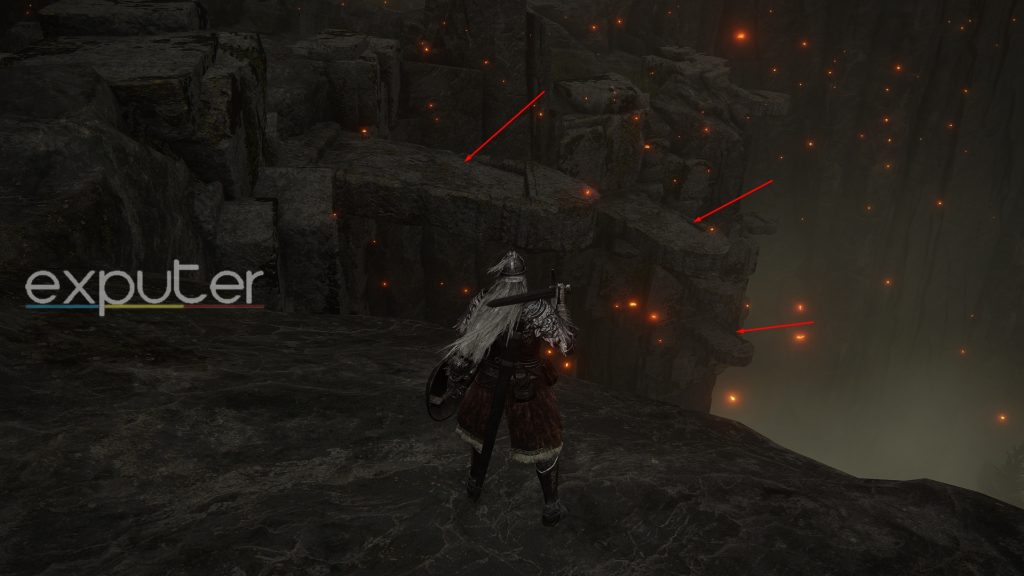
- Now, look to your left and you’ll see a few stone pedestals embedded next to the cliff’s edge.
-
- Use Torrent to jump onto the pedestals close the distance as much as possible and wait roughly 3 minutes for the Mausoleum to walk towards you.
- Once it’s close enough, double-jump onto the behemoth with Torrent and break all the barnacles surrounding the building atop.
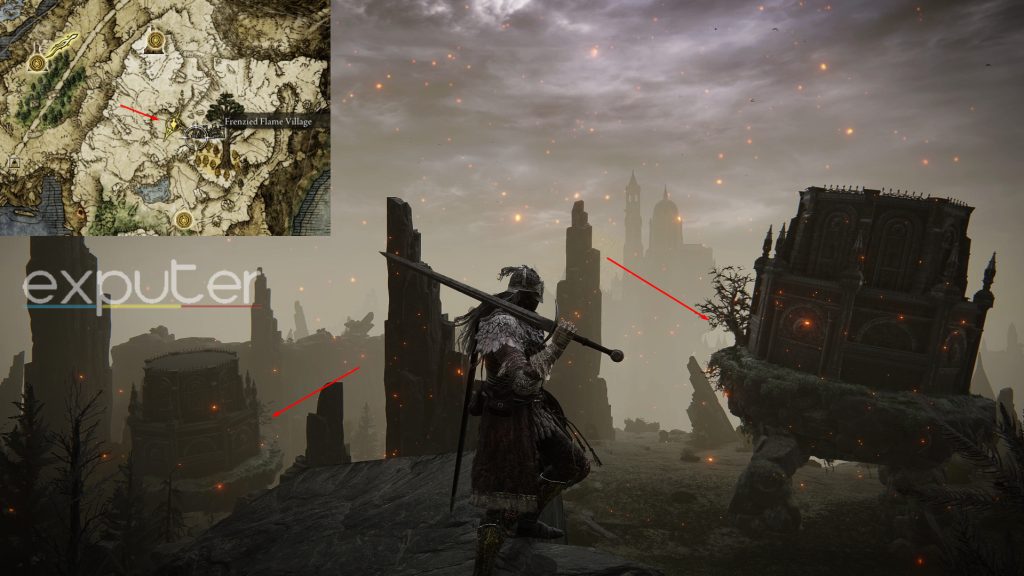
Frenzied Flame Village
The third and fourth Walking Mausoleums are directly next to each other at the Frenzied Flame Village, a small town situated east of the Bellum Highway in the southern region of Liurnia.
I’ve listed the location and strategy to tackle this Mausoleum in the steps below:
- Start from the East Raya Lucaria Gate Site of Grace at the Bellum Highway and head north towards the Bellum Church.
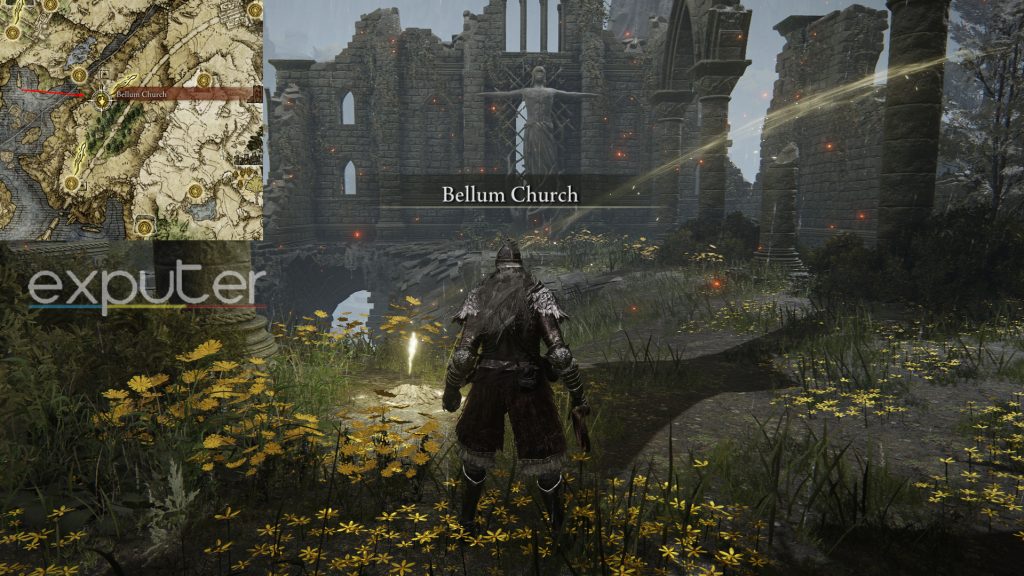
-
- Touch the Site of Grace at this landmark, get back onto the highway, and follow the road to the top of the hill past the enemy’s camp.
- Continue straight ahead and you’ll eventually reach the Frenzied Flame Village atop the cliff near the Minor Erdtree.
-
- Go around the village to its backside and you’ll find the first Walking Mausoleum right in front of you with the other one wandering behind it at the lower half of the cliff.
-
- Unlike the previous Mausoleums you’ve faced, these ones can randomly jump and often catch you off-guard.
- Therefore, I would advise you to always keep your mobility active and jump around with Torrent since their attacks can likely one-shot you at this stage of the game.
- During the encounter, you may have noticed that none of these 2 Mausoleums have their signature giant bell between their legs.
- This is because they can only duplicate the Remembrances of Non-Shardbearers.
- Fortunately, these two are the only non-bell Walking Mausoleums in Elden Ring, so you won’t be as restricted in other locations once you’ve taken down the other behemoths.
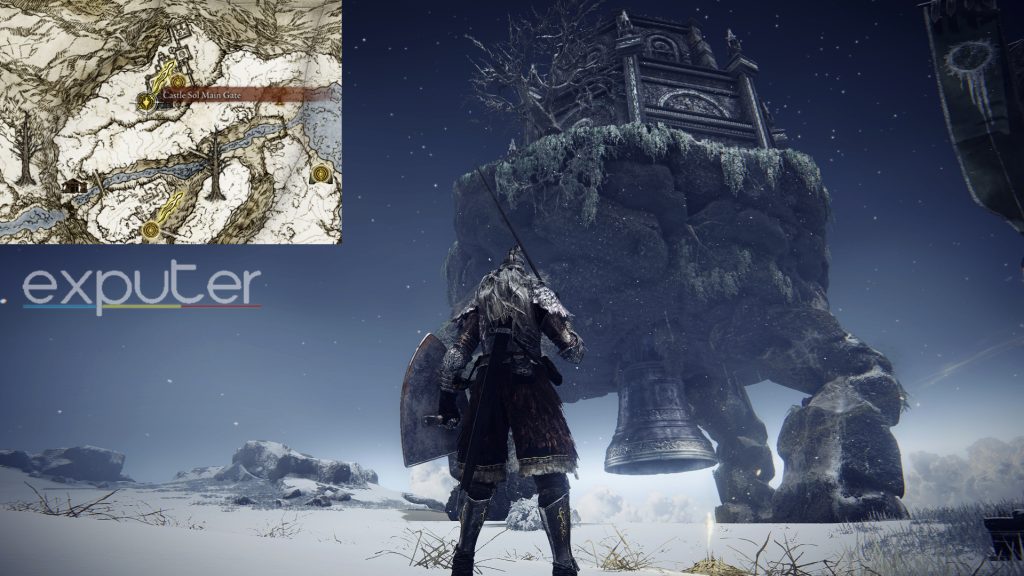
Mountaintops Of The Giants
Once you’re through Liurnia, the next Walking Mausoleum will appear much later in the Mountaintops of the Giants. By this time, you’ll have likely faced off most Remembrance bosses like Morgott, Radahn, and the Regal Ancestor Spirit. As such, I think you’ll have a better understanding of your build and, consequently, the Remembrance weapon duo best for you.
- Starting from the Freezing Lake Site of Grace, head up the hill and stay close to the western cliffside.
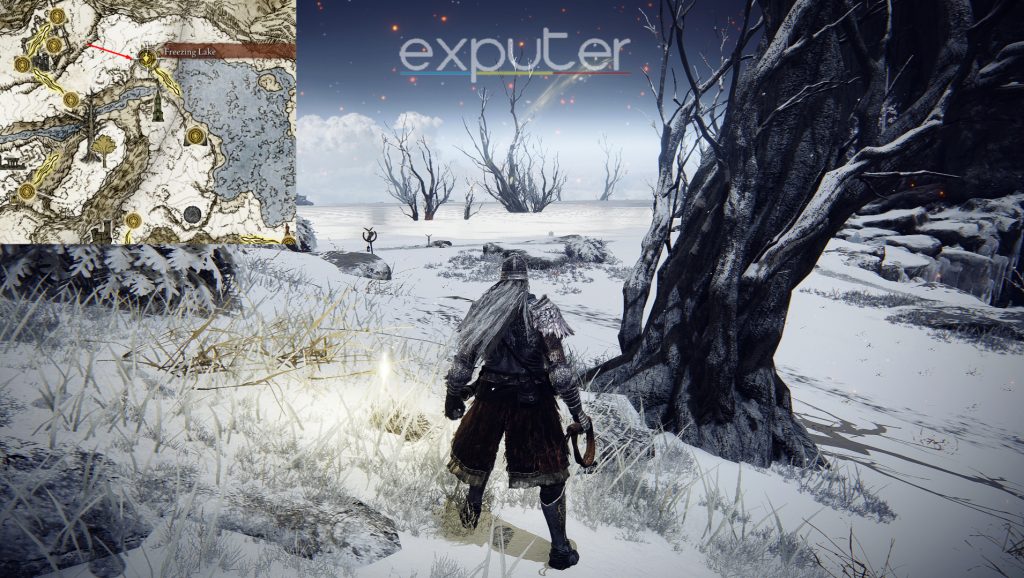
-
- Moving along the path, avoid all the Skeletal mobs and the giant emerging skeletons and make your way down the hill until you’ve reached the bottom.
- Once you’re at the bottom, head north to reach Castle Sol, one of the major dungeons in this biome.
- You’ll find the fifth Walking Mausoleum outside the Castle along with the Castle Sol Site of Grace beside it.
Consecrated Snowfield
The sixth Mausoleum can be found in the Consecrated Snowfield located west of the Mountaintops. It’s better to reserve and visit this Mausoleum after you’ve beaten the game since this is the strongest Mausoleum by far, at least when I faced him since he’s the only Mausoleum that killed me.
- Starting from the Ordina Liturgical Town Site of Grace located in the Snowfield’s northern region, head west towards the edge of the map.
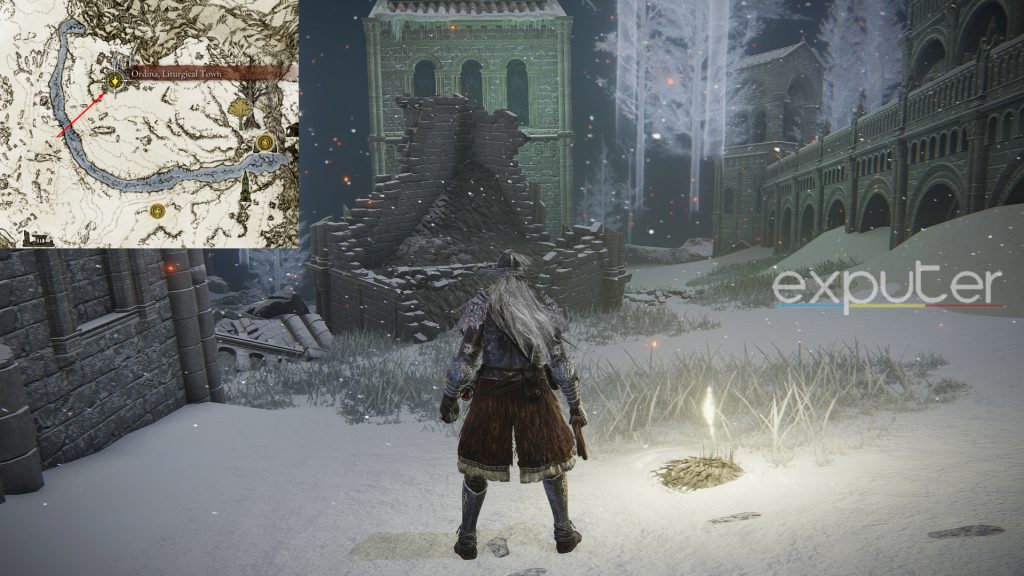
-
- Eventually, towards the far end of the snowfield, you’ll encounter the sixth Walking Mausoleum surrounded by a few lesser enemies.
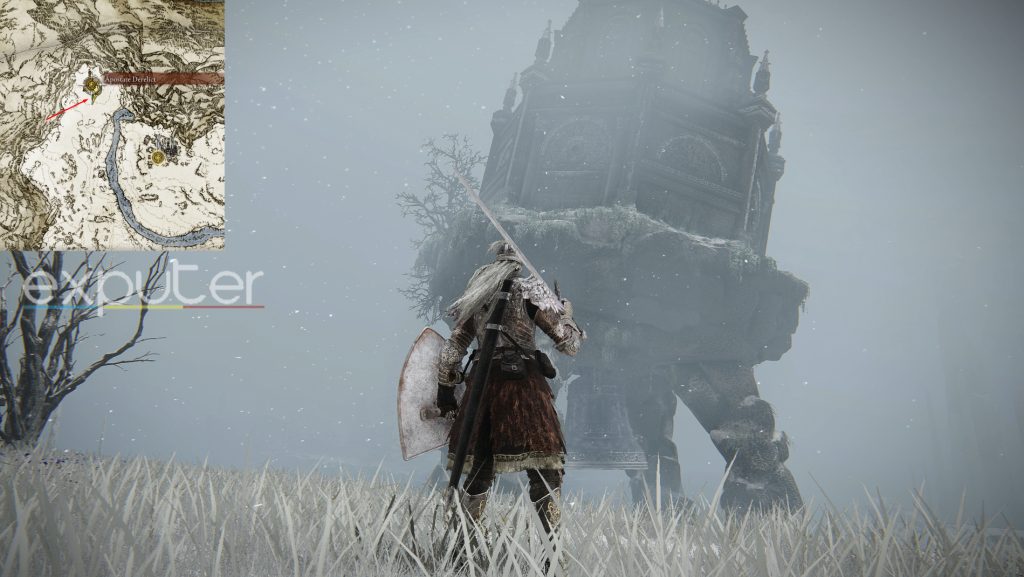
-
- Before combat, I would recommend you touch the Apostate Derelict Site of Grace just behind the creature to avoid the tedious runback.
Deeproot Depths
The last Walking Mausoleum is by far the hardest to find, since getting to him involves you reaching the Deeproot Depths, one of the major underground cities in the game.
- Once you initially make it to the Depths, you’ll see a few large branches that, once you traverse, will lead to the Deeproot Depths Site of Grace beside the Finger Reader Crone.
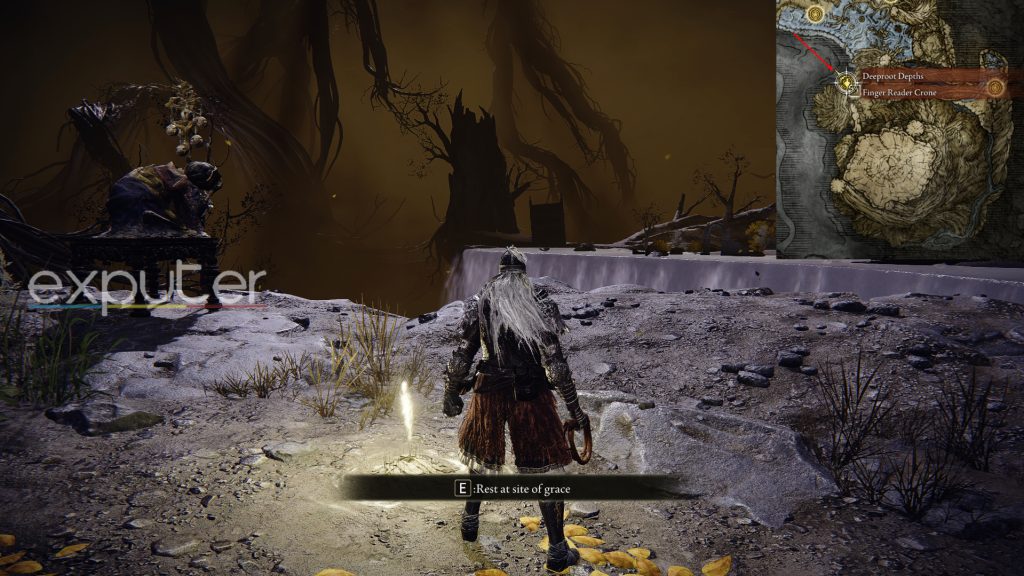
-
- After that, take a right and follow the water body until you reach the Mausoleum past the debris along the way.
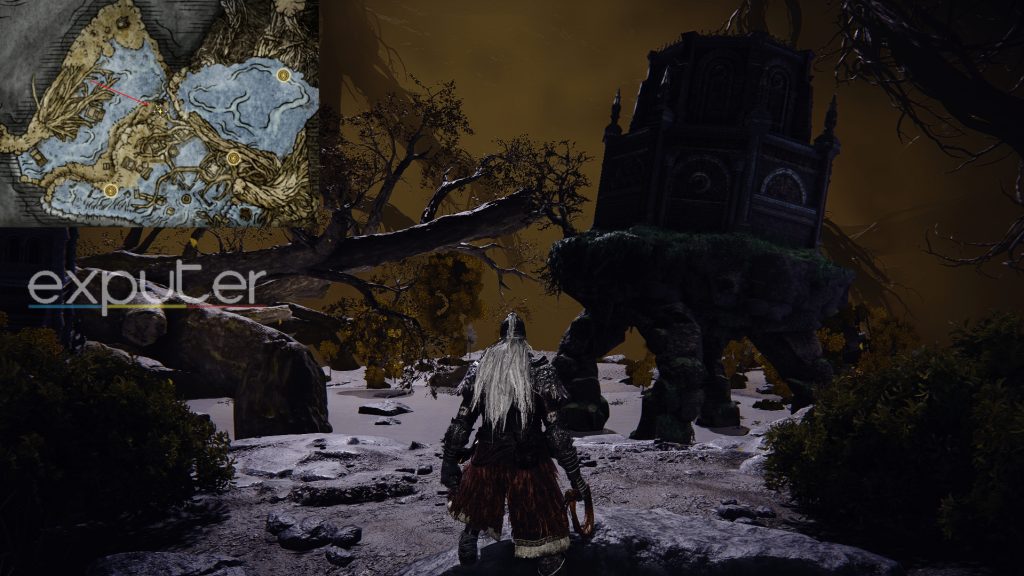
-
- Here, you’ll see a few branches to your left which you’ll need to follow to get on top of the Mausoleum.
- Once you’ve followed these branches and reached their peak, use Torrent to double jump onto the Walking Mausoleum.
My Thoughts On Walking Mausoleums
Replaying through Elden Ring can sometimes get tiring for me if I only want to try out boss weapons with different builds. That’s why the title has Walking Mausoleums, which I believe are a perfect addition because I got to try out multiple amazing weapons without having to replay through Elden Ring. In previous Soulsborne games, you were always limited to one weapon per boss per playthrough. Walking Mausoleums, like a lot of things in Elden Ring, are an added convenience factor that you can use at your own volition.

There is a scarce number of them, but that is only for balancing. 7 was plenty to satisfy my needs without completely removing replay value.
That wraps up my guide on all the locations of Elden Ring’s Walking Mausoleum. As seen, these creatures are extremely rare but give a great challenge and reward. And since most Remembrance items are considered the best weapons in Elden Ring, there’s a ton of incentive for slaying these giant stone monsters. And if you want, you could even explore this Subreddit Post to dive deep into the obscure lore behind the Mausoleums.
For more intriguing narrative bits in the game, here are Interesting Lore Facts you would love to know. If you’re instead searching for more unique interactions and encounters, here’s How you can Invade & Beat Juno Hoslow. And if you want to revamp your arsenal, do so by reading our guide on the Best Buffs in Elden Ring.
Next:
- Elden Ring Best Starting Class
- How To Gesture In Elden Ring
- How To Respec In Elden Ring
- Elden Ring Best Sacred Seals
Thanks! Do share your feedback with us. ⚡
How can we make this post better? Your help would be appreciated. ✍