Elden Ring: Blasphemous Blade Build [Stats, Armor & Spells]
Learn everything there is about the location of the Blasphemous Blade and the best build for this weapon in Elden Ring.
 Fact Checked By
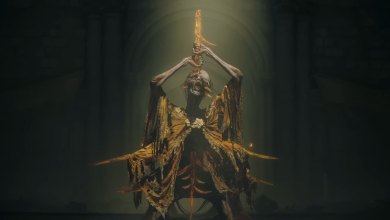
 Elden Ring Blasphemous Blade is easily one of the best weapons acquired upon defeating Praetor Rykard. Its unique Ash of War is called Taker’s Flame, and this ability allows you to restore HP upon damaging your adversaries. In a game like Elden Ring, where HP dilutes fast in battles, a weapon such as Blasphemous Blade can make a difference between life and death.
- Why Trust Us: Hammad Ijaz has spent over 200+ hours in Elden Ring, making his guides trustworthy!
- Blasphemous Blade can be obtained by trading in Rykard’s Remembrance for his weapon via Enia.
- This weapon restores health per enemy killed.
- The best off-hand weapon for this build is Sword of Milos, which restores FP per enemy killed.
- The armor sets that fit the build are the Briar set, Lord of Blood’s Robe, and Omen Killer Mask.
- The Great Rune recommended for this build is Rykard’s Great Rune, which also boosts your HP restoration for every enemy killed.
Here is how your optimal Blasphemous Blade Build should look in Elden Ring:
| Attributes | Weapon | Armor | Great Rune | Talismans | Seal | Incantations |
|---|---|---|---|---|---|---|
| - Faith: 42 - Vigor: 35 - Endurance: 30 - Mind: 25 - Strength: 25 - Dexterity: 19 - Intelligence: 10 - Arcane: 10 | Sword of Milos | - Briar Armor Set - Lord Of Blood’s Robe - Omen Killer Mask | Rykard’s Great Rune | - Taker’s Cameo - Fire Scorpian - Carian Filigree Crest - Radagon’s Sorseal - Great-Jar’s Arsenal | Godslayer Seal | - Black Flame - Flame, Cleanse Me - Flame, Grant Me Strength - Blessing of the Erdtree - Ritual of the Black Flame - Rallying Standard |
Location Of Blasphemous Blade In Elden Ring
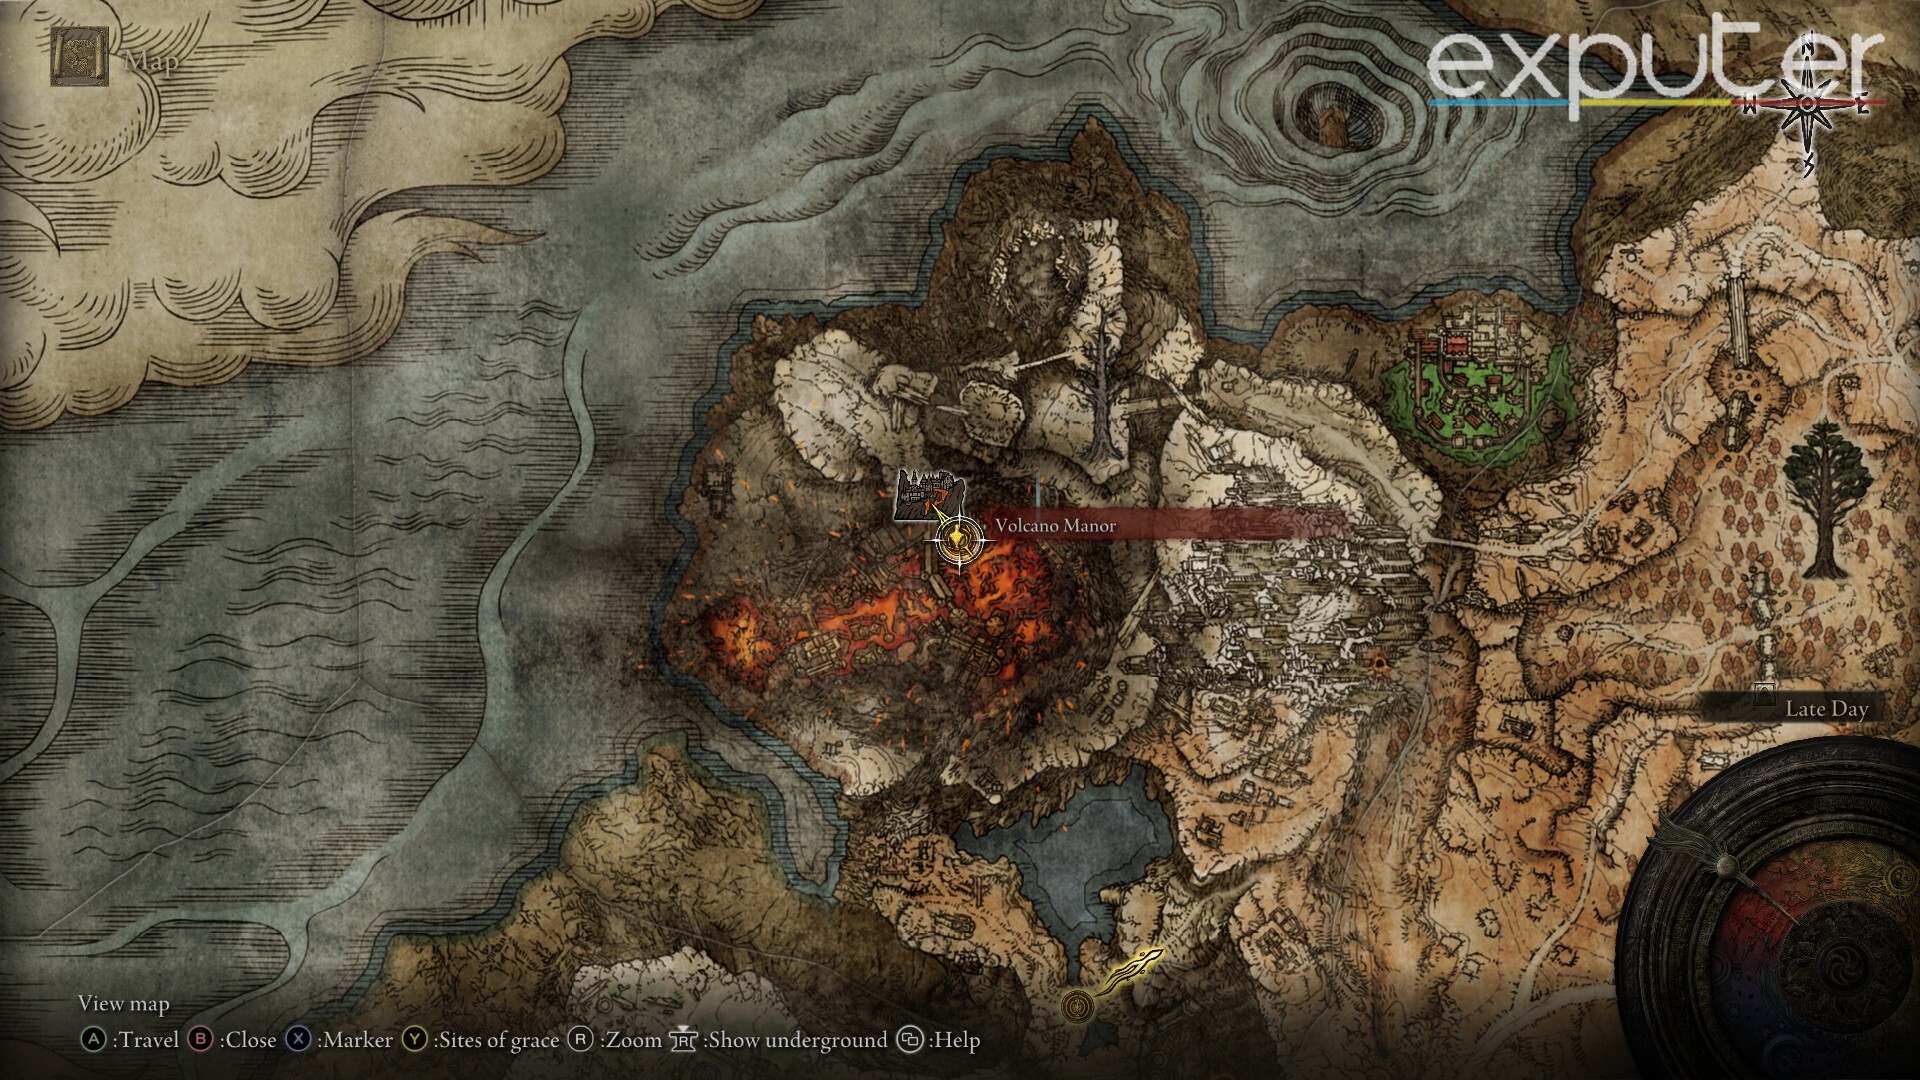
Blasphemous Blade is a Remembrance weapon, which means it can only be acquired after trading in the respective boss’s soul (in this case, Rykard’s soul) for the boss’s weapon. The trade can be made by visiting Enia in the Roundtable Hold.
There are two ways to reach Rykard in Elden Ring:
- Explore Volcano Manor until you find a waygate that will take you directly to the Audience Chamber, where Praetor Rykard can be fought.
- Tanith’s Questline: Talk with Lady Tanith in the Volcano Manor, join her covenant, and do her bidding until she decides you are fit to meet her lord.
Blasphemous Blade Stats & Info
| Stats | Attack | Guard |
| Physical | 121 | 72 |
| Magic | 0 | 39 |
| Fire | 78 | 54 |
| Light | 0 | 39 |
| Holy | 0 | 39 |
| Critical/ Boost | 100 | 50 |
| Stats | Scaling | Requirements |
| Strength | D | 22 |
| Dexterity | D | 15 |
| Faith | D | 21 |
- Effect: 4% of max HP + 40 flat HP is restored per enemy killed.
- Ash of War: Taker’s Flame
- Skill Effect: 10% of max HP + 150 flat HP is replenished
- Upgraded via Somber Smithing Stones
Blasphemous Blade is your primary weapon in the build, with other elements complementing its effects or stats. On its own, it’s an excellent weapon with impressive stats.

Flame-Shroduing Cracked Tear can further amplify the flame damage dealt by Taker’s Flame. In addition to its passive HP restoration, its Ash of War “Taker’s Flame” also restores a hefty portion of your health per hit and deals pure fire damage that scales with Faith. Overall, it is one of the best weapons of Elden Ring that can be used all the way to the endgame.
Stat Requirements
The build I will discuss here is a melee-focused build that includes some incantations for applying buffs to your character. So overall, the stats will be divided mainly between your Strength, Dexterity, and Faith.
- Vigor: 35
- Mind: 25
- Endurance: 30
- Strength: 25
- Dexterity: 19
- Faith: 42
- Intelligence: 10
- Arcane: 10
Off-hand Weapon – Sword of Milos
| Stats | Attack | Guard |
| Physical | 141 | 68 |
| Magic | 0 | 36 |
| Fire | 0 | 36 |
| Light | 0 | 36 |
| Holy | 0 | 36 |
| Critical/ Boost | 100 | 44 |
| Stats | Scaling | Requirements |
| Strength | D | 15 |
| Dexterity | D | 19 |
- Location: Dropped by Dung Eater in Subterranean Shunning-Grounds, Leyndell.
- Effect: Restores 5 FP per enemy killed
- Ash of War: Shriek of Milos
- Blood loss Buildup: 55
- Upgraded via Somber Smithing Stones
Paring any greatsword with Blasphemous Blade will unlock its dual-sword moveset. That said, if I had to pick the sword that complements the stats of Blasphemous Blade the most, it would be Sword of Milos. This weapon restores a portion of your FP per enemy killed, and combining it with the Blasphemous Blade, which restores HP per enemy defeated, you have the best of both worlds.
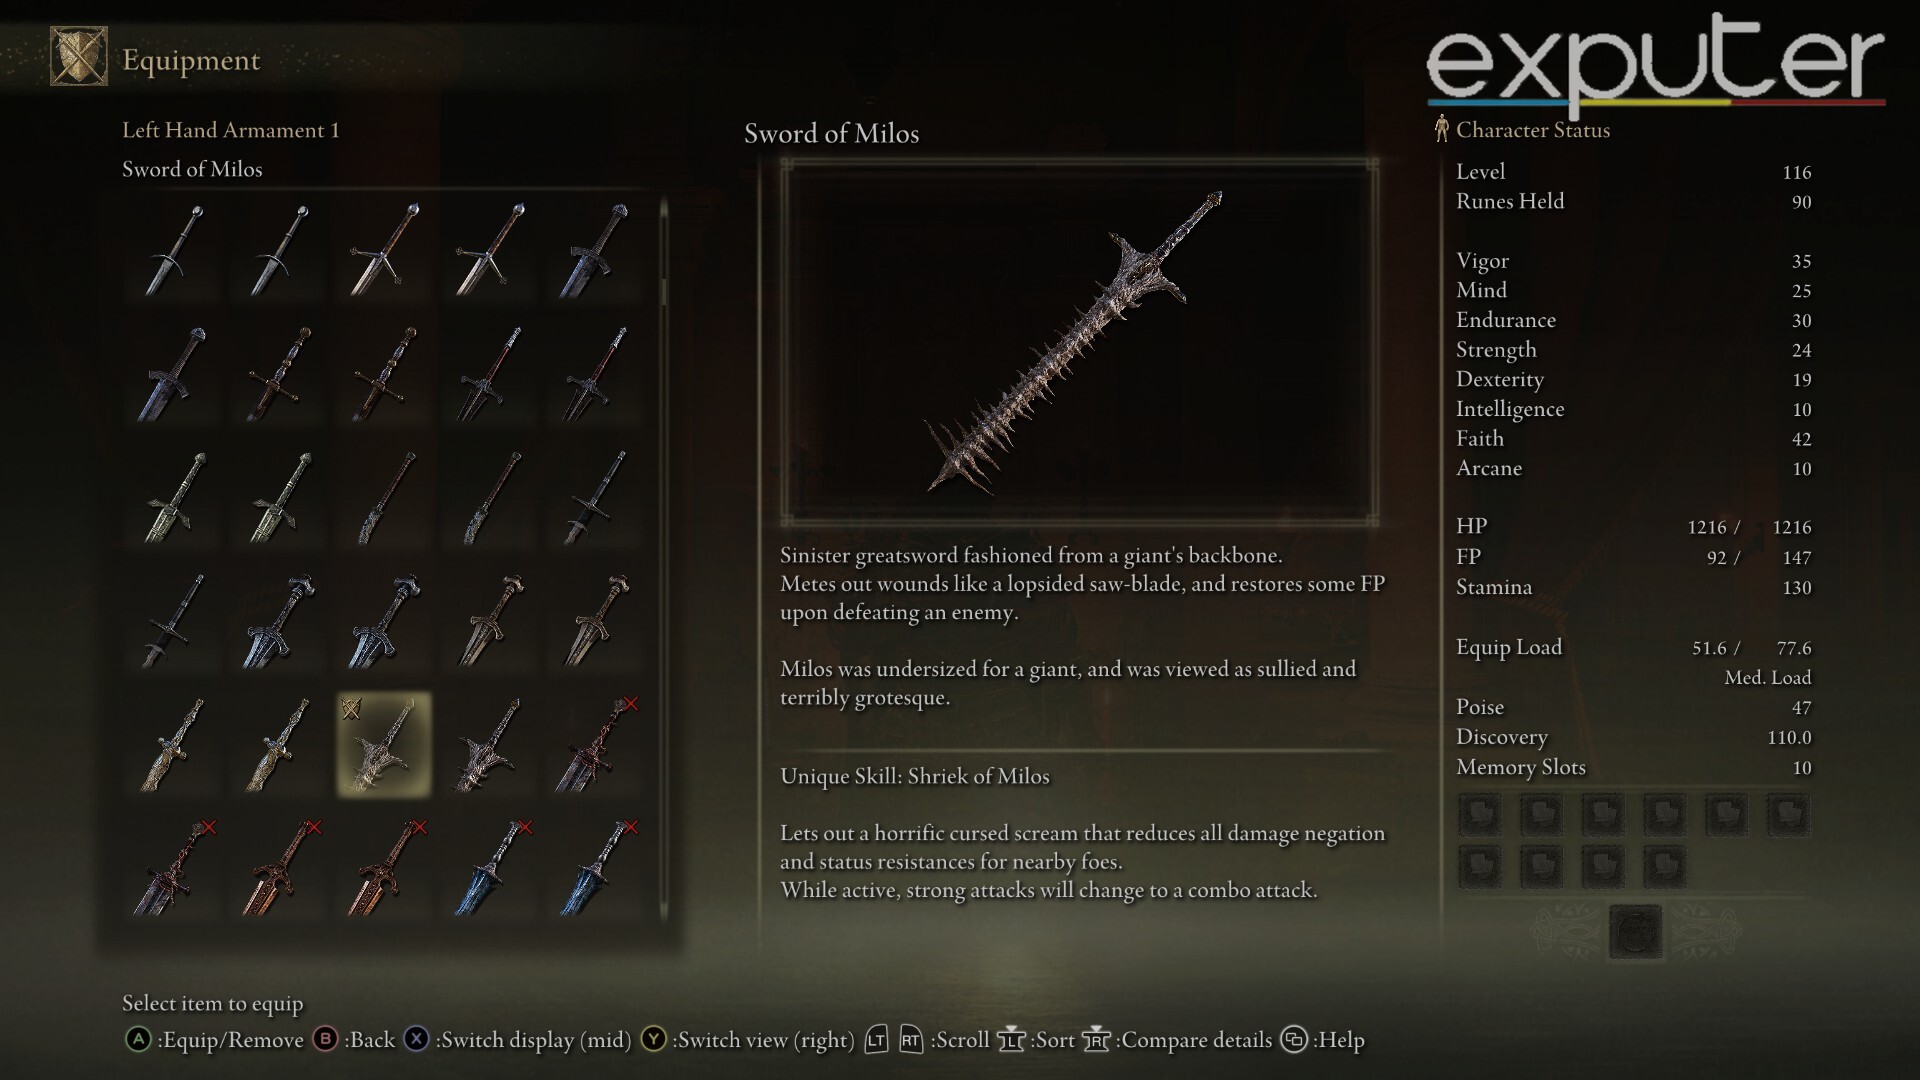
Shriek of Milos allows you to debuff all nearby enemies and changes your heavy attack into a three-hit combo. Debuffing your adversaries at the start of the battle is an excellent way to gain the upper hand.
Best Armor Sets
| Armor Set | Physical | Vs Strike | Vs Slash | Vs Pierce | Magic | Fire | Light | Holy |
|---|---|---|---|---|---|---|---|---|
| Briar Armor Set | 25.5 | 22.6 | 26.5 | 24.6 | 21.7 | 24.6 | 17.8 | 21.7 |
| Lord Of Blood’s Robe & Omen Killer Mask | 12.4 | 12.8 | 11.1 | 11.1 | 13.1 | 15.6 | 16.2 | 16.9 |
To select the best armor for the Blasphemous Blade, you need to check if the said armor has the best possible stats while being below the heavy roll limit and the right aesthetic that fits the devilish nature of the build. While there are numerous armor sets or various armor combinations you can choose from, I recommend these two:
Briar Armor Set
Damage Negation:
| Physical | Vs Strike | Vs Slash | Vs Pierce | Magic | Fire | Light | Holy |
| 25.5 | 22.6 | 26.5 | 24.6 | 21.7 | 24.6 | 17.8 | 21.7 |
Resistance:
| Immunity | Robustness | Focus | Vitality | Poise |
| 113 | 140 | 86 | 80 | 47 |
- Location: To obtain Briar Armor, first, you must defeat Elmer Briar in the Shaded Castle and then buy his armor from Enia in Roundtable Hold.
Lord Of Blood’s Robe & Omen Killer Mask

Damage Negation:
| Physical | Vs Strike | Vs Slash | Vs Pierce | Magic | Fire | Light | Holy |
| 12.4 | 12.8 | 11.1 | 11.1 | 13.1 | 15.6 | 16.2 | 16.9 |
Resistance:
| Immunity | Robustness | Focus | Vitality | Poise |
| 92 | 35 | 45 | 75 | 23 |
- Omen Killer Mask Location: Dropped by Omenkiller, wandering near the Lower Capital Church Site of Grace in Leyndell.
Best Talismans
To optimize the this build in Elden Ring, focus on talismans that raise your stats to meet and exceed the recommended requirements and enhance your weapon’s skill, Taker’s Flame. These talismans will help you improve your character’s capabilities and combat effectiveness.
Taker’s Cameo
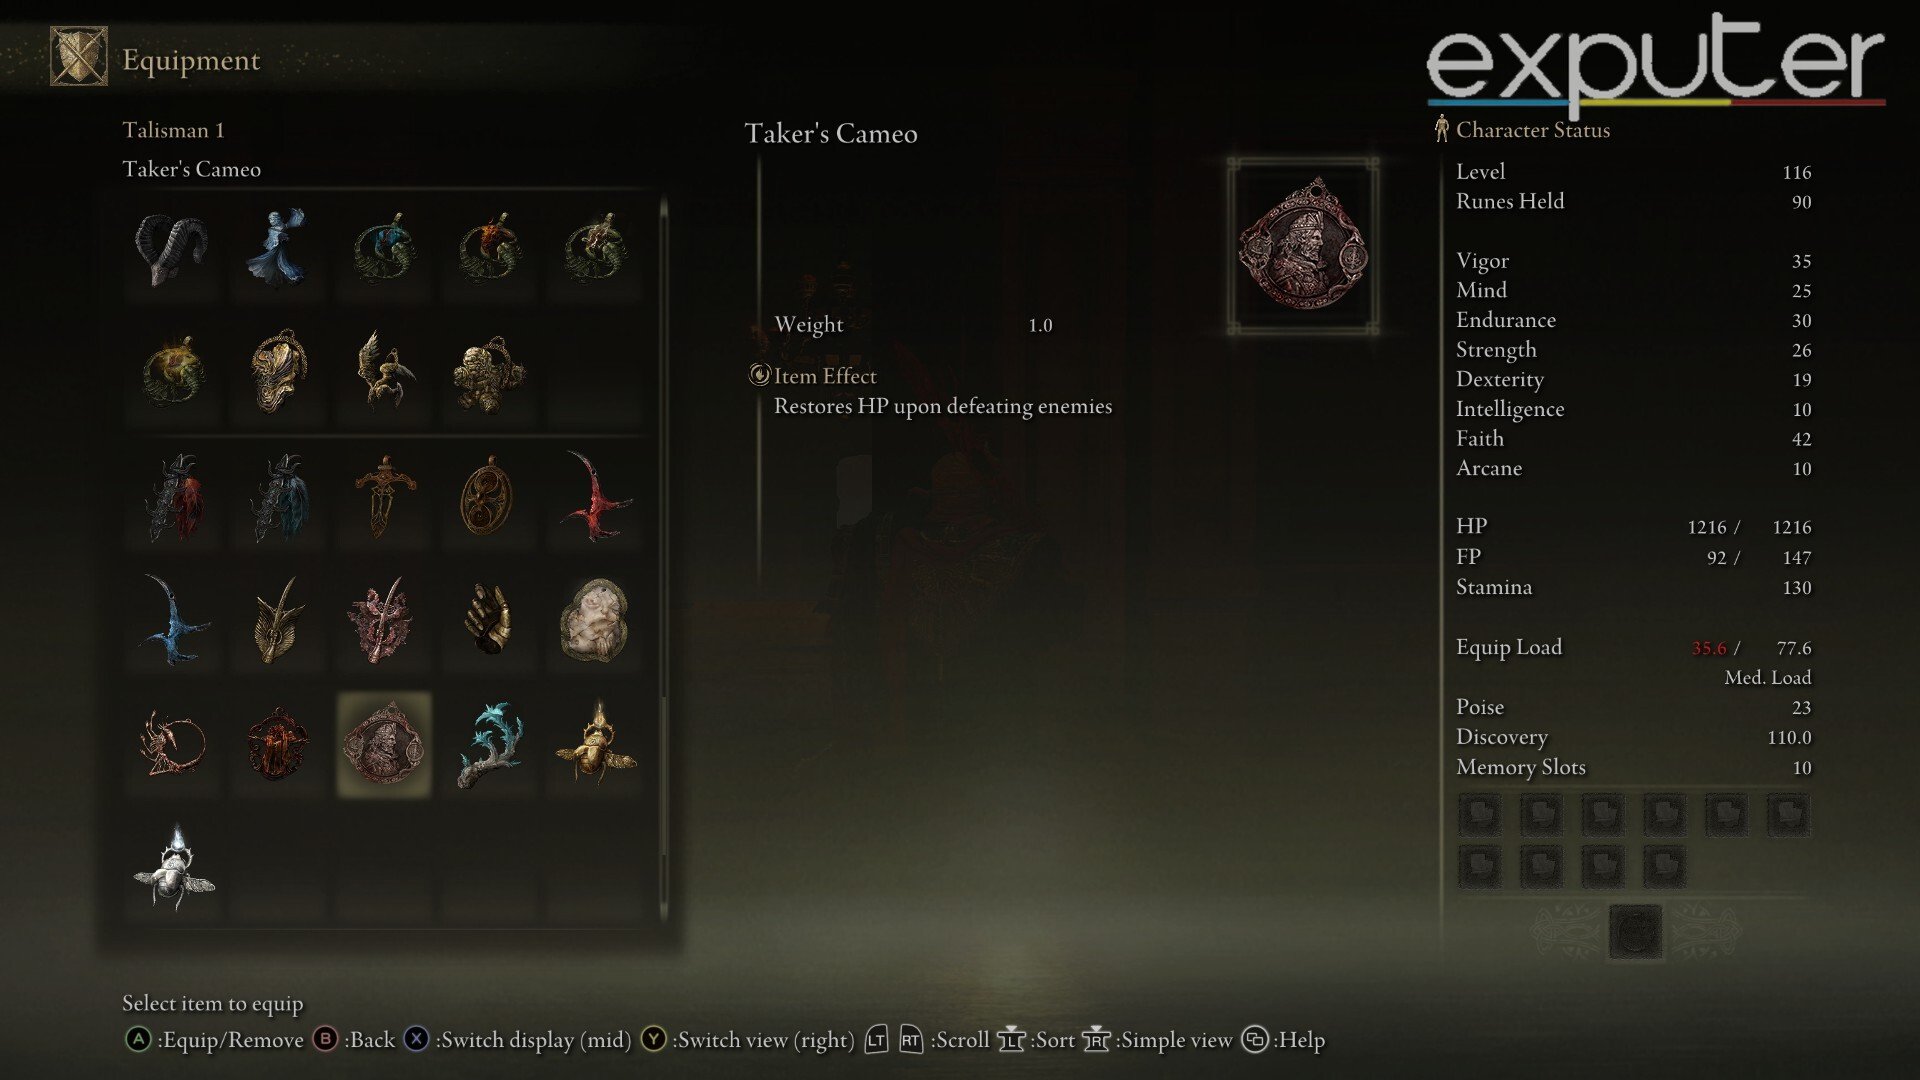
- Location: Taker’s Cameo can be obtained by completing Lady Tanith’s questline in Volcano Manor. Tanith gives you this talisman after you take down her third assassination target, Juno Hoslow.
- Effect: 3% + 30 Hp restored per enemy killed.
Taker’s Cameo complements the Taker’s Flame skill. This will give a decent boost to your passive healing that comes with your weapon.
Fire Scorpion
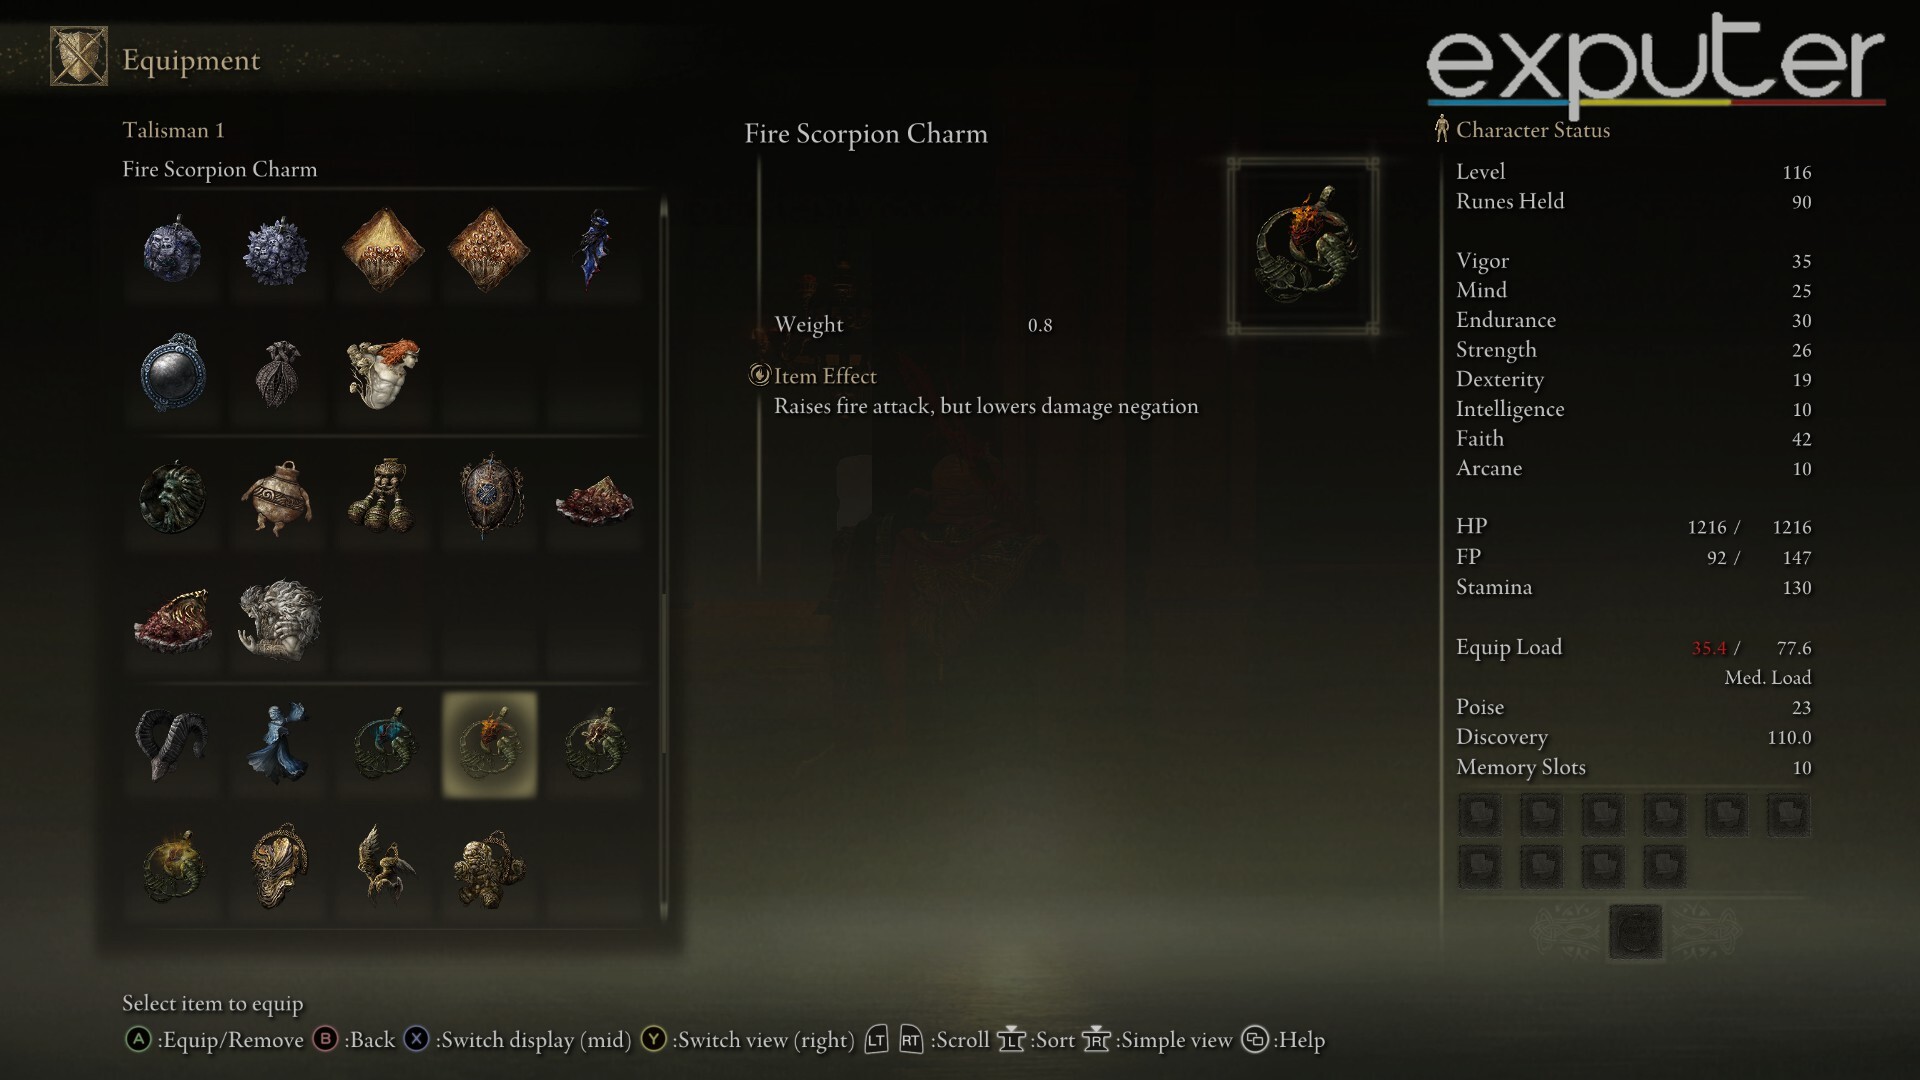
- Location: Inside Fort Laiedd, run past the guards and head upstairs. Once on the upper rampart, to your northwest, you will find a wooden platform on the other side of the broken wall. Jump on the wooden platform and take the talisman from the ghost.
- Effect: Increases Fire damage by 8% and Physical damage by 15%.
Taker’s Flame also deals fire damage to your enemies. To enhance this effect, you can pair it with a Fire Scorpion Charm talisman, which raises the fire damage and the physical damage of your attack.
Carian Filigreed Crest

- Location: Can be purchased from War Counselor Iji after talking to Raani in Ranni‘s Rise.
- Effect: Decreases skill FP consumption by 25%.
Normally, I like to have a higher number of HP Flasks under my belt, but at the same time, the importance of FP flasks cannot be neglected, as FP is essential for incantations and skills. So, to minimize the consumption of FP by skills, Carian Filigreed Crest is a good choice.
However, to minimize the FP consumption of incantations, go with the Primal Glintstone Blade Talisman.
Radagon’s Sorseal
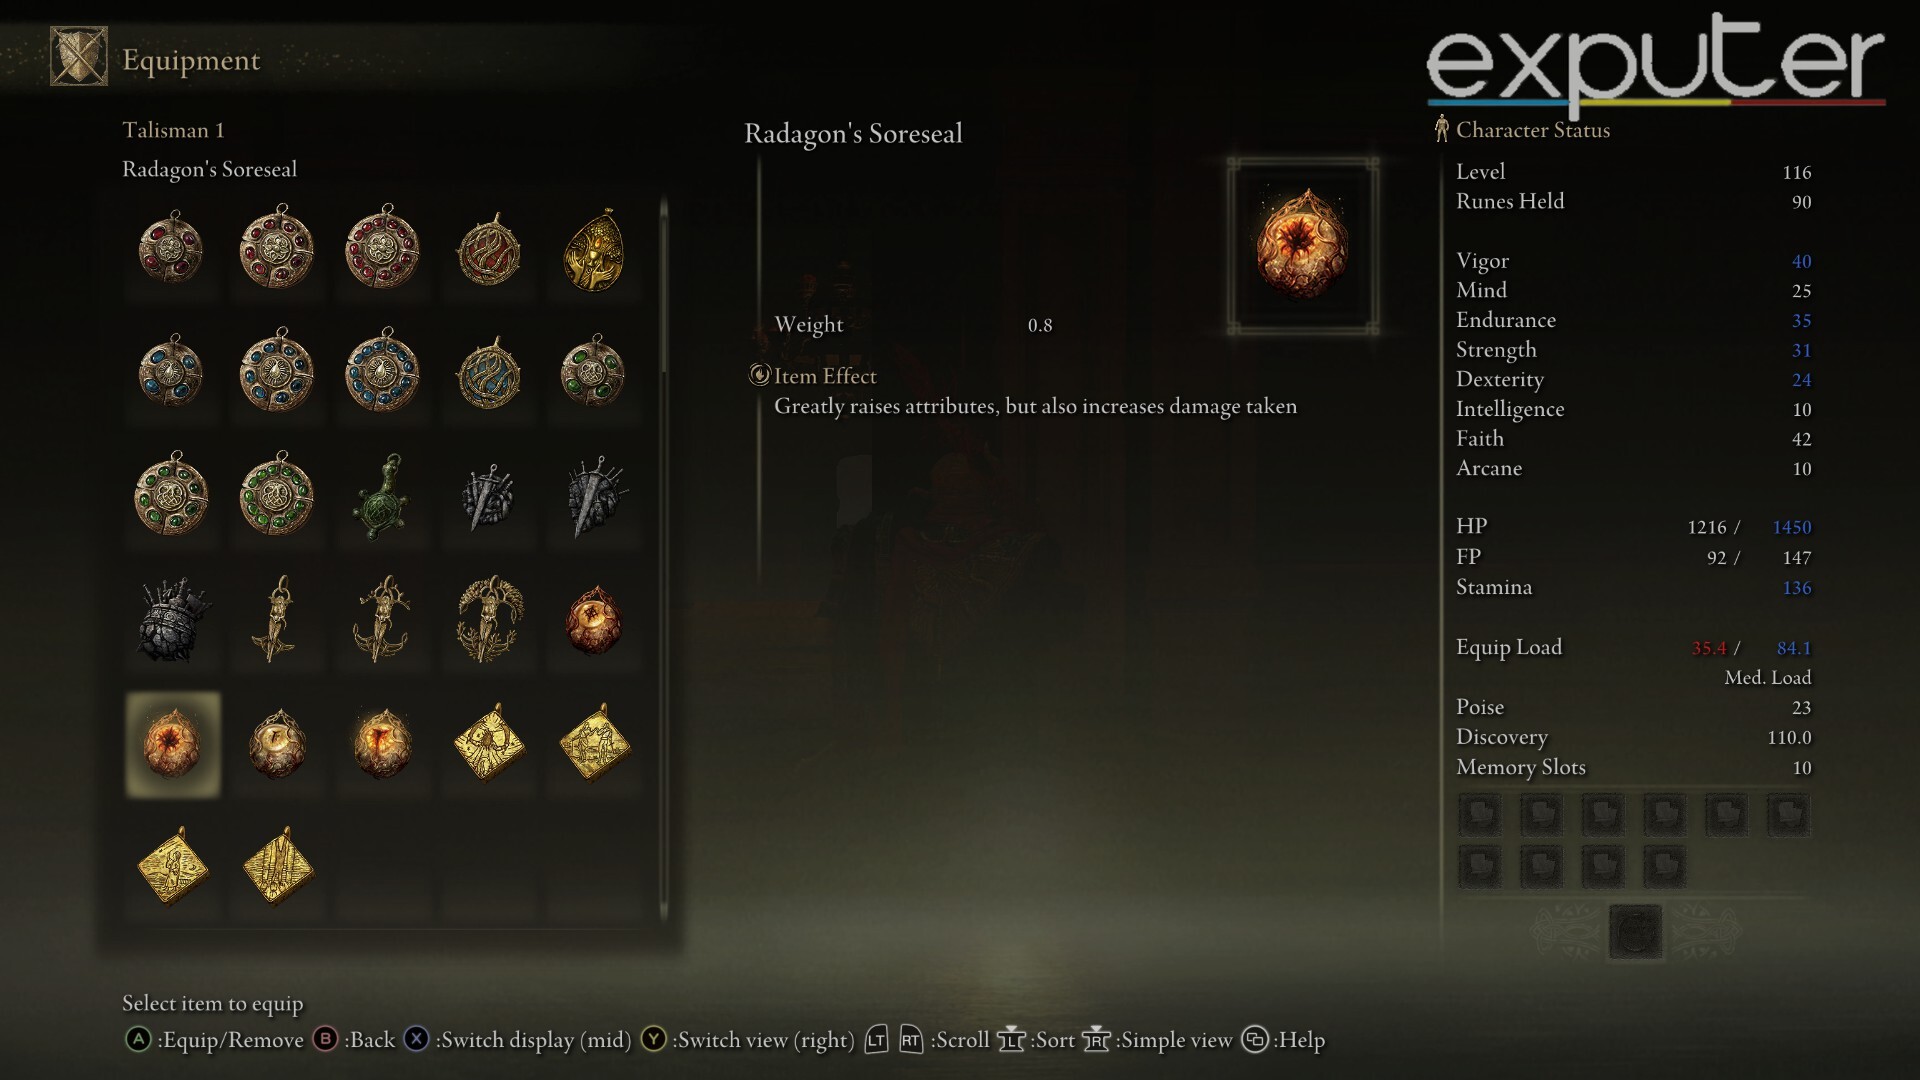
- Location: Found corpse beneath the opening of the roof in Fort Faroth.
- Effect: Increases Vigor, Endurance, Strength, and Dexterity by 5 each.
One of the best ways to increase your main stats during the early-mid game is by equipping the Marika/Radagon’s Sorseal. While both of these Sorseals raise different attributes, I have chosen Radagon’s Sorseal here because it can help you with Dexterity and Strength.
Great-Jar’s Arsenal- Optional
- Location: Reward for defeating the three NPCs as a part of The Great Jar challenge in Dragonborrow, Caelid.
- Effect: Greatly improves max equip load
It’s obvious that with the increase of armor or weapon load, your weight limit may go out of the medium load limit, which is why I recommend using the Great-Jar’s Arsenal as a temporary solution to the problem. It’s up to you which talisman you choose to replace this with.
Great Rune
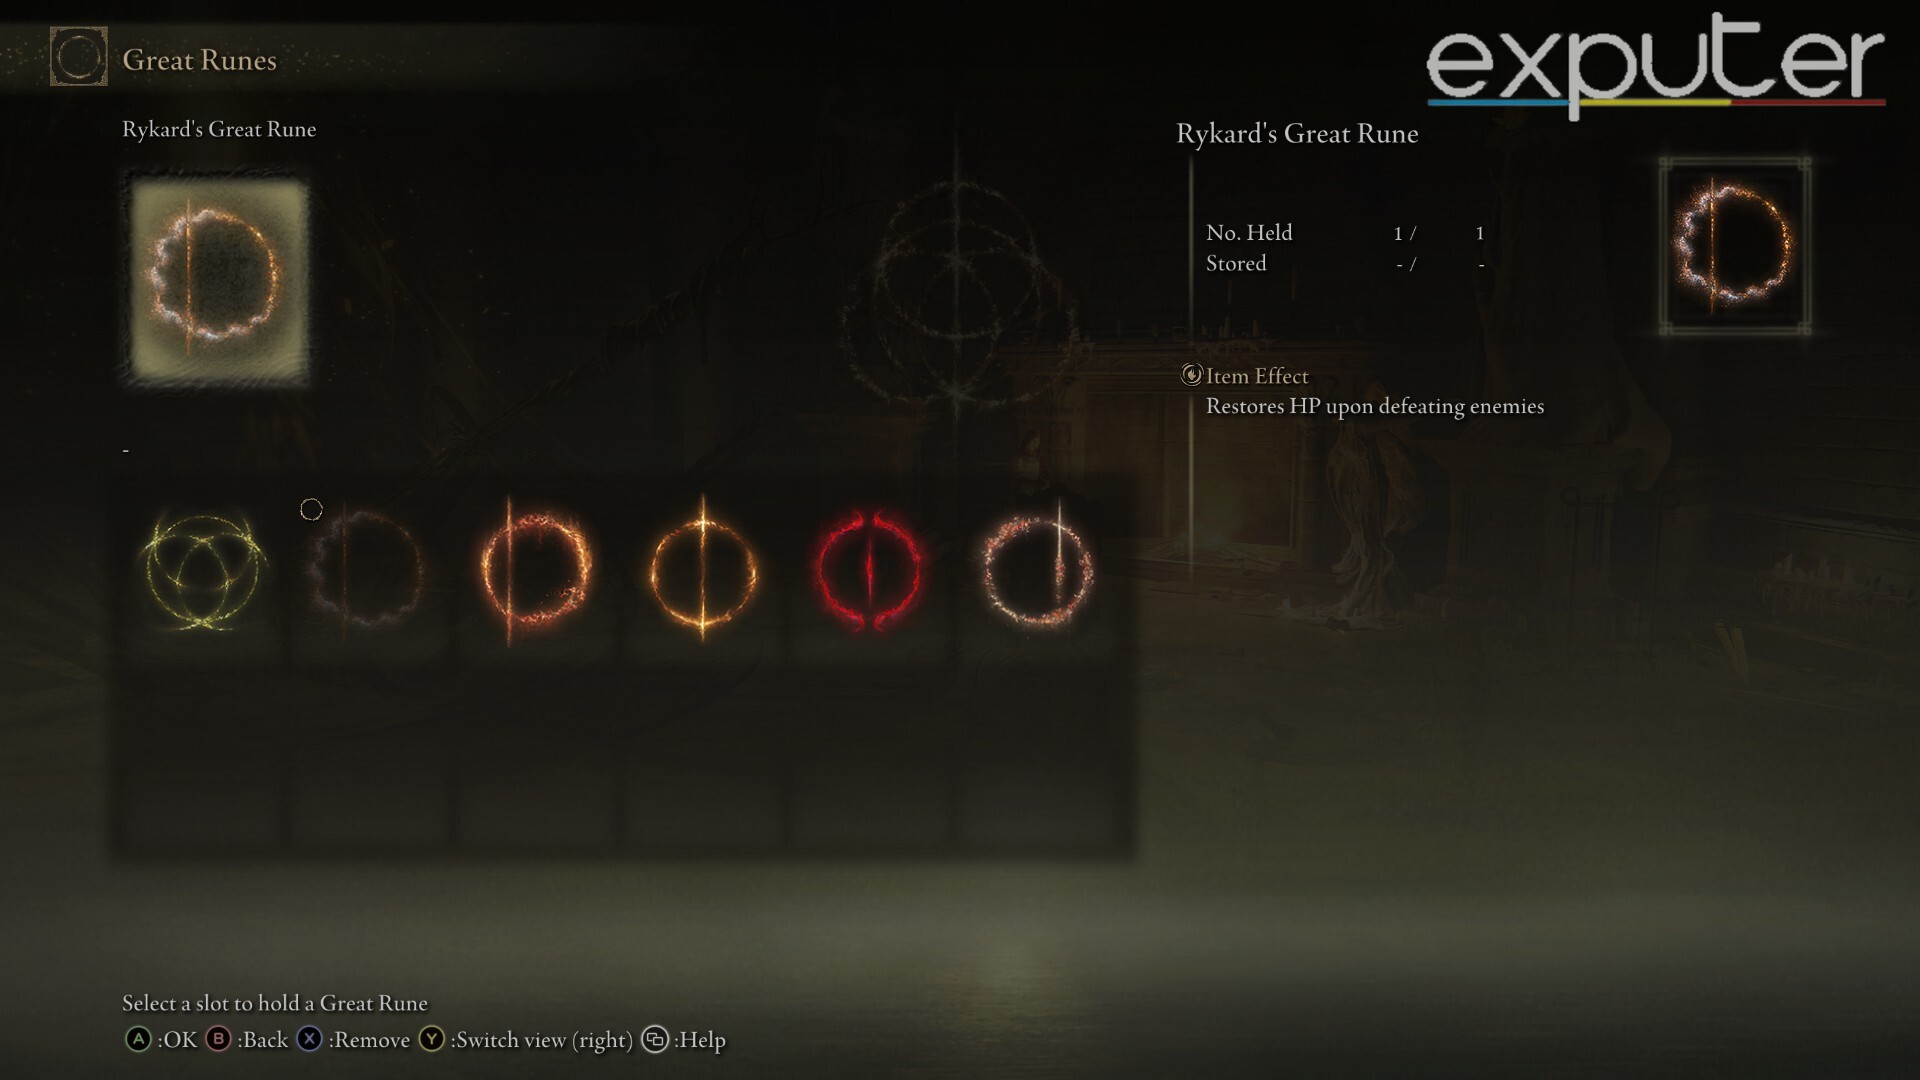
- Location: Dropped by Rykard upon defeat
- Effect: HP is restored per enemy kill
The Great Runes grant various passive effects and elevate your stats to varying degrees, and the best rune for the build is Rykard’s Great Rune.
Best Incantations
For the Blasmphemous Blade build in Elden Ring, I will be suggesting incantations that not only boost your physical attack but also improve your damage negation, HP recovery, and fire damage.
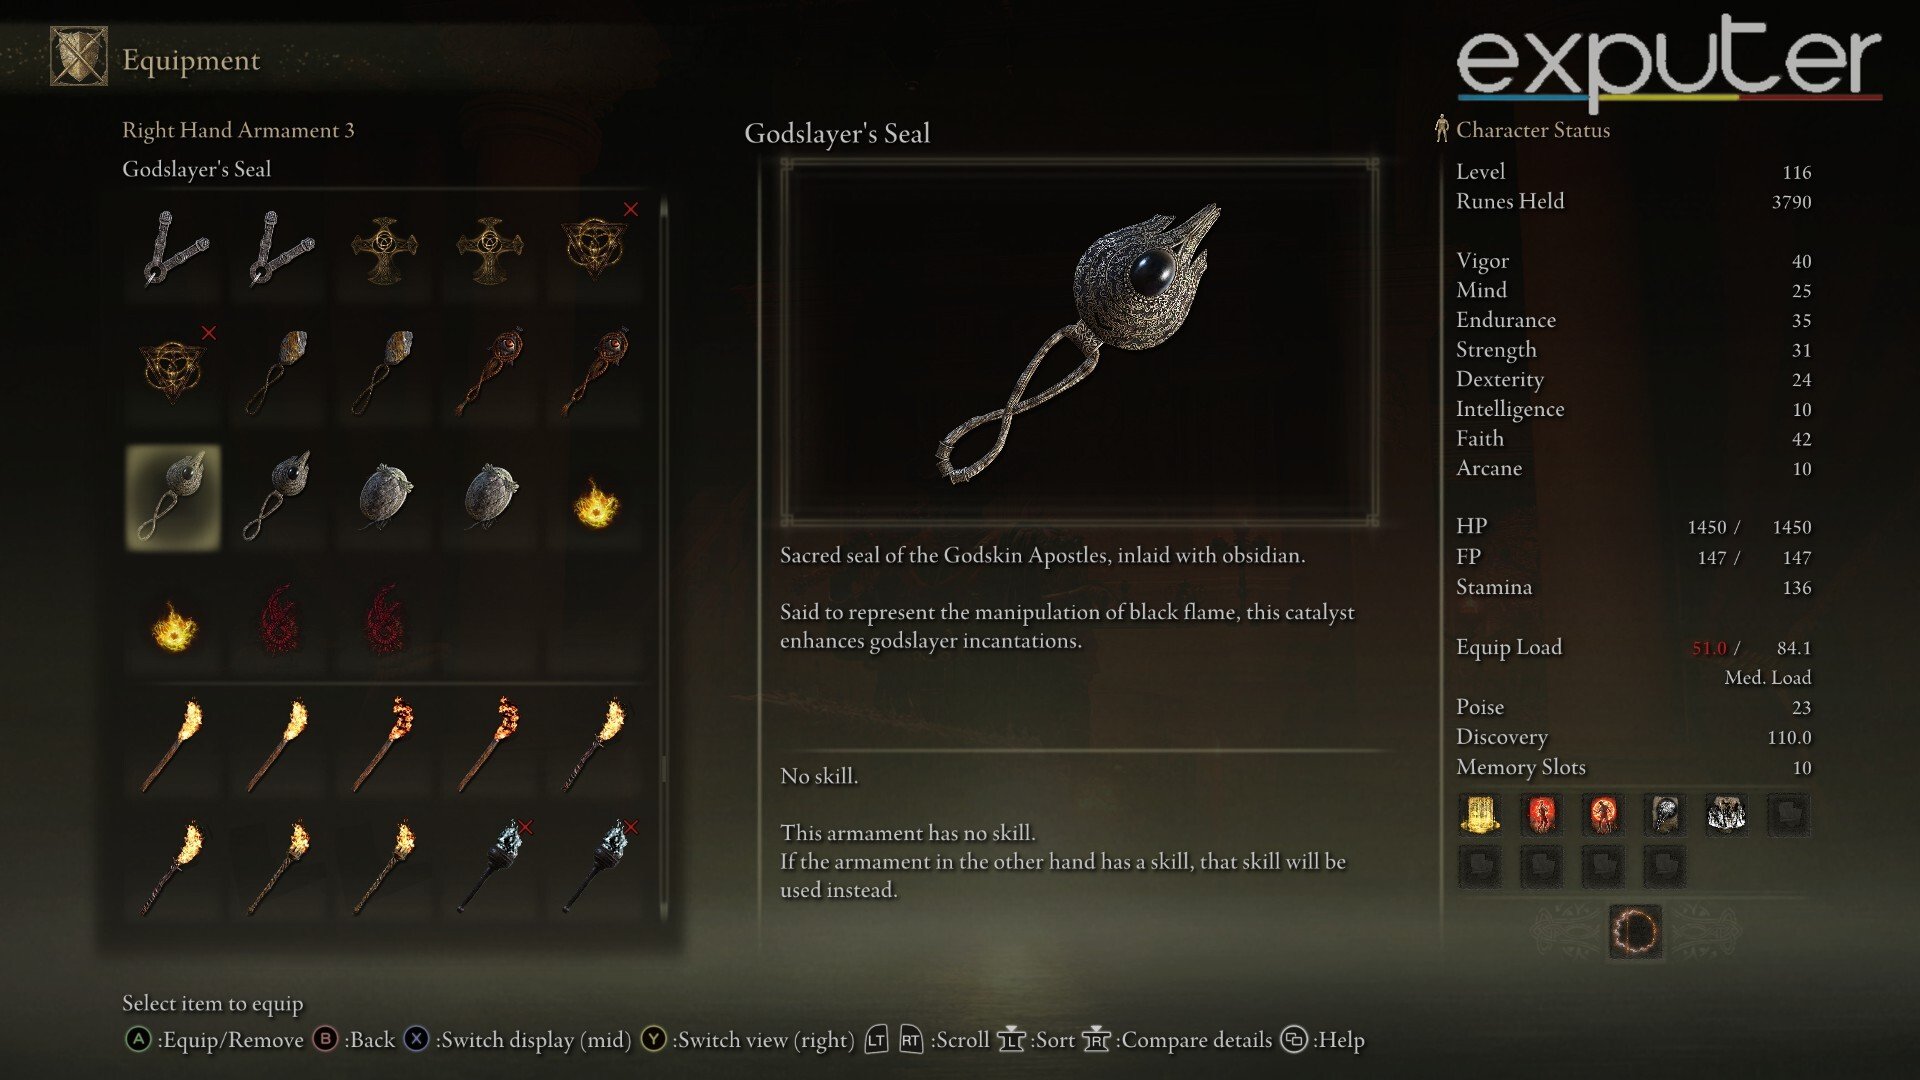
Godslayer’s Seal
| Stats | Attack | Guard |
| Physical | 25 | 25 |
| Magic | 0 | 15 |
| Fire | 0 | 15 |
| Light | 0 | 15 |
| Holy | 0 | 15 |
| Critical/ Boost |
100 | 15 |
| Stats | Scaling | Requirements |
| Strength | E | 12 |
| Dexterity | D | 21 |
| Incantation Scaling | 129 | – |
Most of the incantations listed here use the Godslayer incantations, and the Godslayer’s seal further amps up their effectiveness by 10%. I am going with Godslayer incantations instead of the normal flame because of the insane damage black flames deal. Godslayer Seal is located in Stormveil Castle.
Black Flame

- FP Cost: 18
- Slot Used: 1
- Requirements: Faith 20
- Location: Available for purchase after giving Godslayer Prayer book to Brother Corhyn.
The use of Black Flame is pretty much the same as other fireball attacks in the game, but its overtime damage makes this unique. Additionally, charging it increases its damage by 30%.
Flame, Cleanse Me
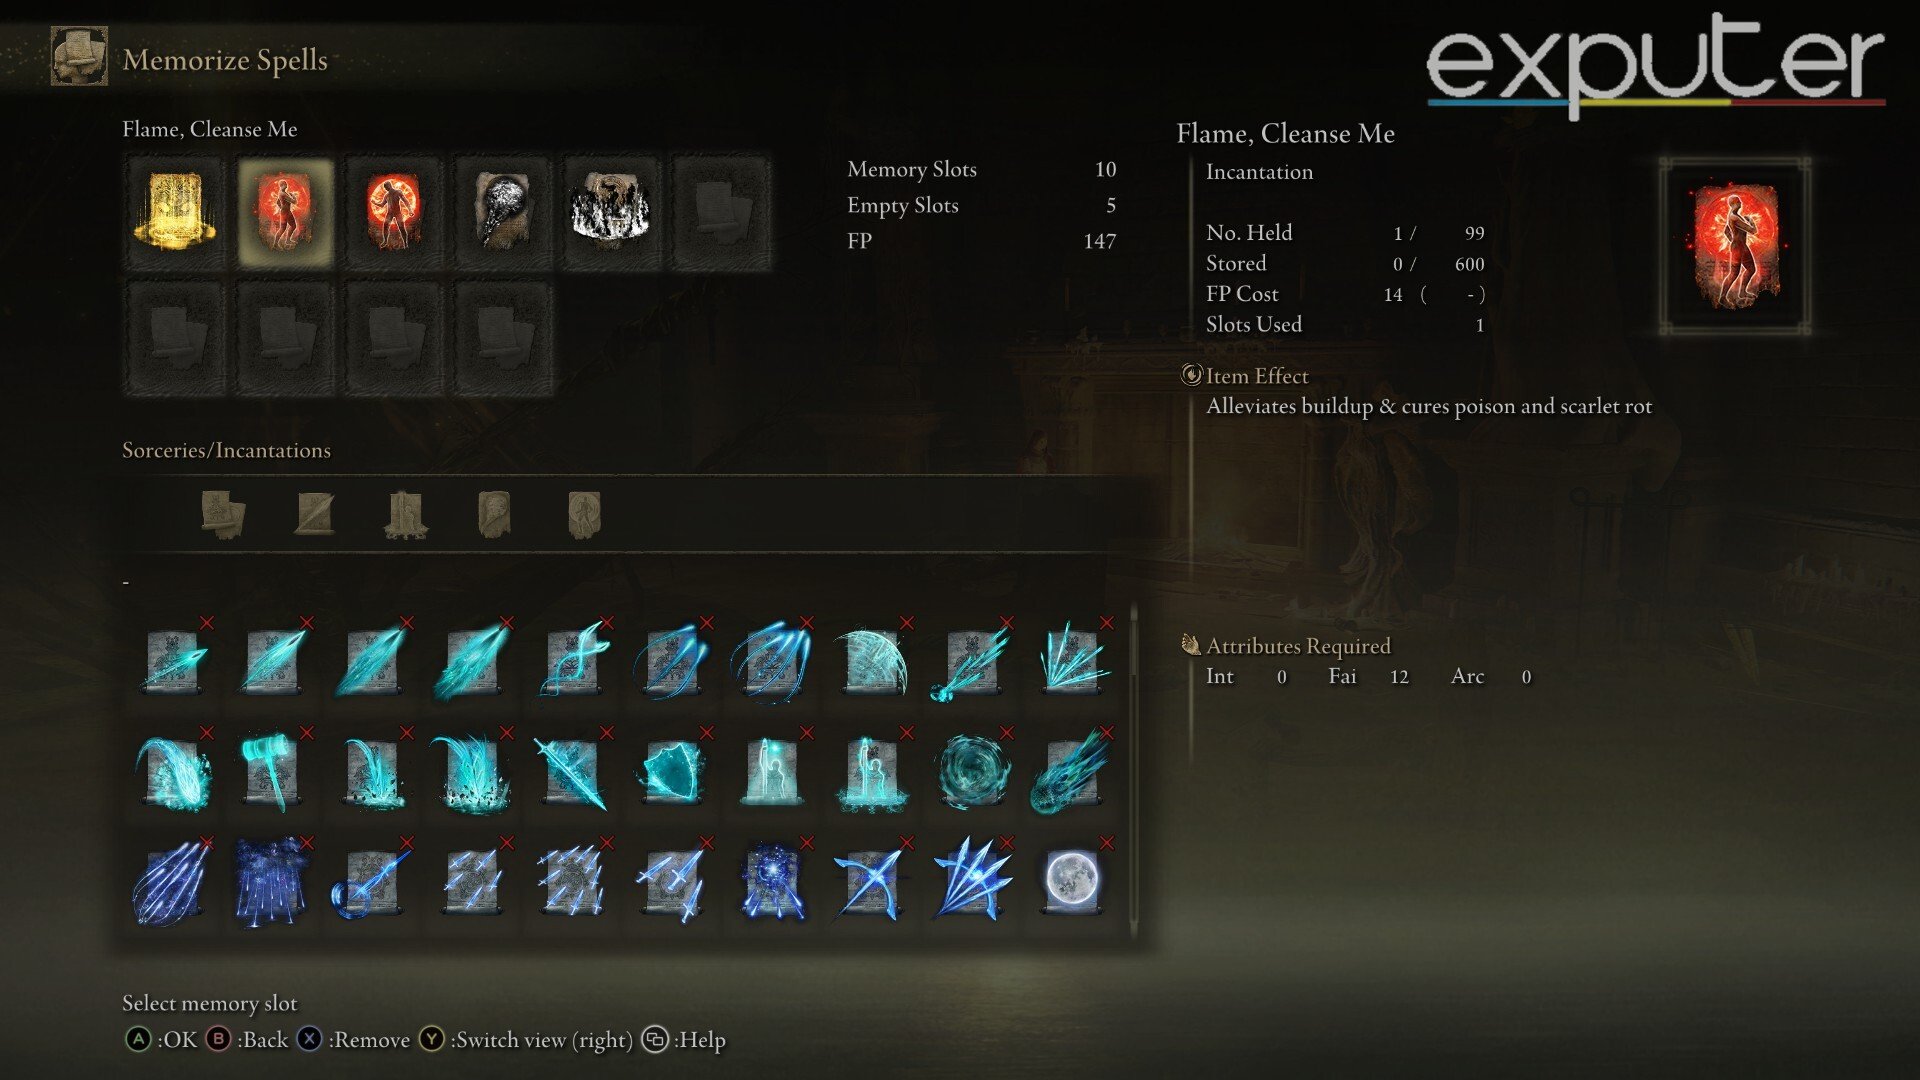
- FP Cost: 14
- Slot Used: 1
- Requirements: Faith 12
- Location: Found on a corpse southeast of the Church of Vows.
Flame, Cleanse Me is an incantation that I would’ve recommended regardless of the build because of how effective it is. This incantation alleviates the buildup of Scarlet Rot and Poison, which is something very useful when exploring regions like Caelid, Miquella Haligtree, and other swamps.
Flame Grant Me Strength

- FP Cost: 28
- Slot Used: 1
- Requirements: Faith 15
- Duration: 30 seconds
- Location: Located on a body between the two wandering Flame Chariots behind Fort Gael.
Flame, Grant Me Strength is one of the best buff incantations in Elden Ring, and it works extremely, especially with this build. It enhances both your Physical and Fire damage by 20%, both of which are the staple of the build. I recommend using this before every fight to have an edge.
Blessing Of The Erdtree
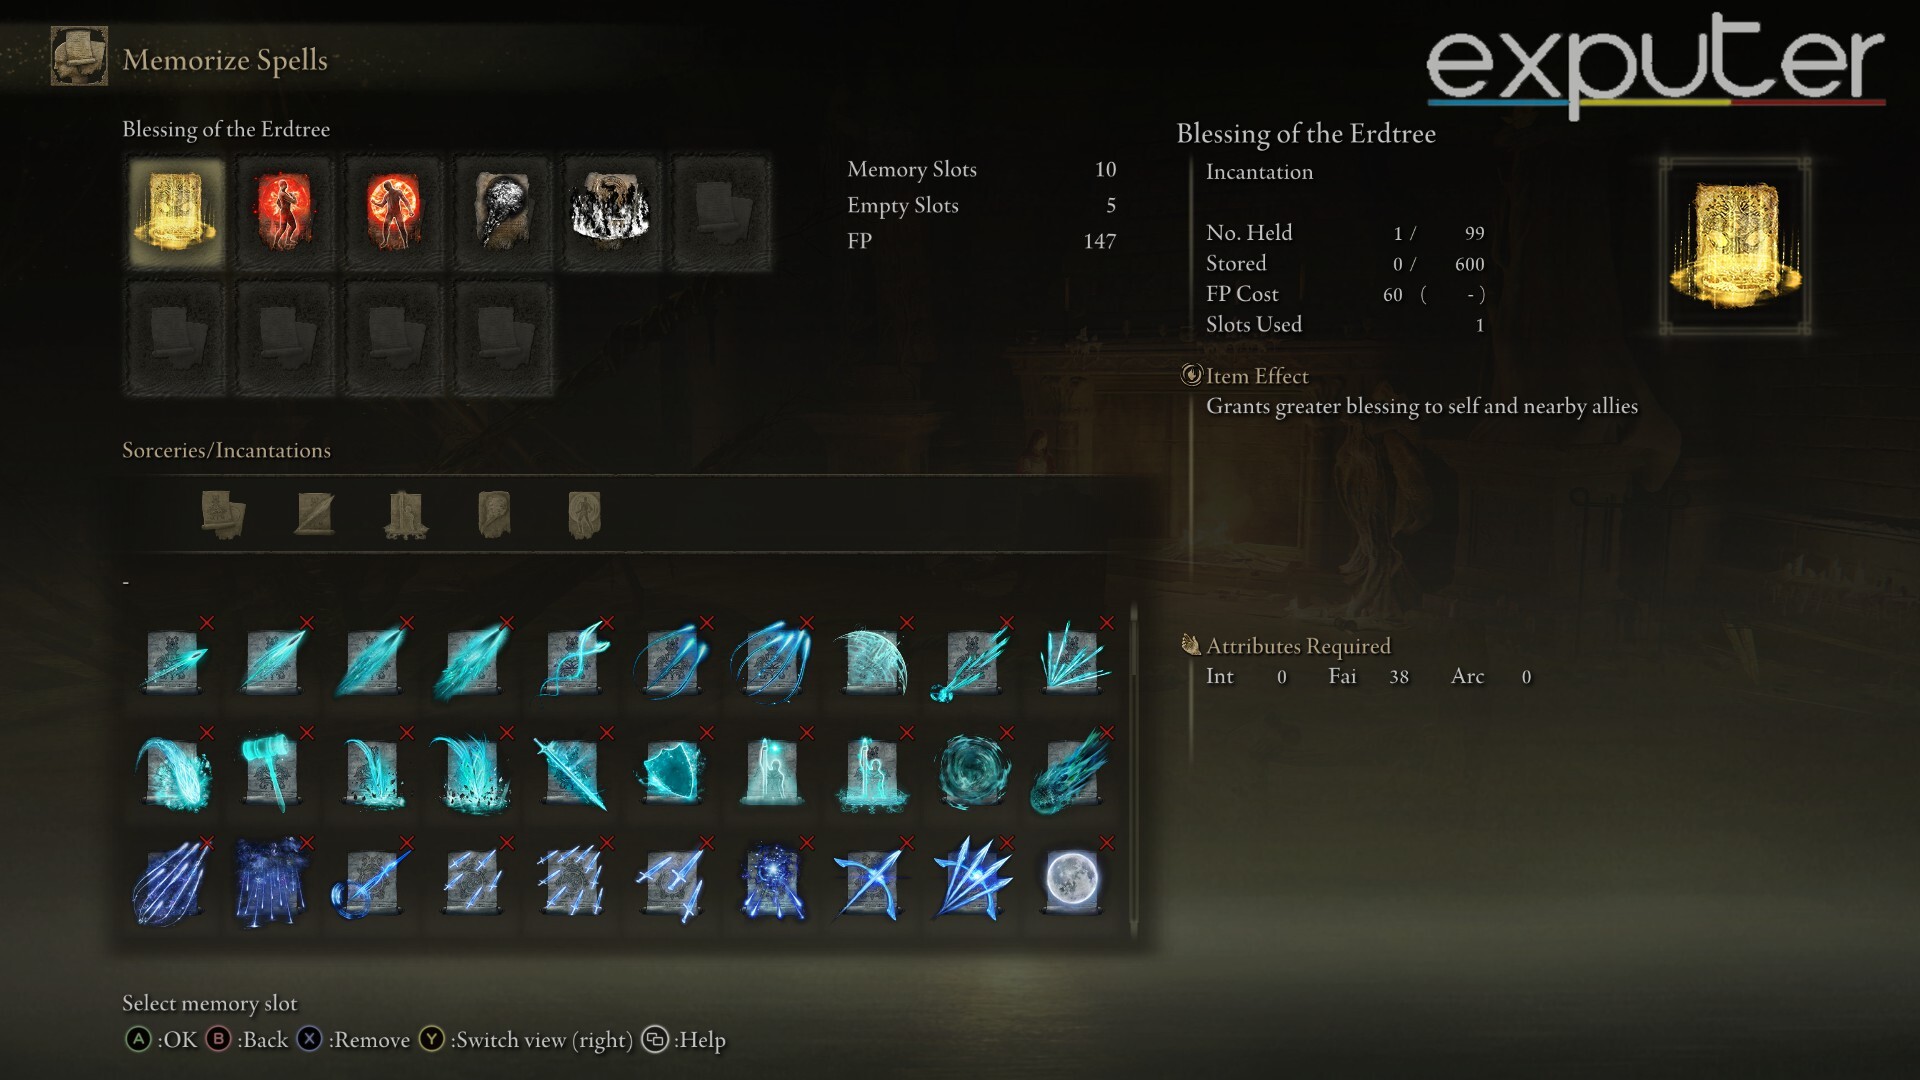
- FP Cost: 60
- Slot Used: 1
- Requirements: Faith 38
- Duration: 90 seconds
- Location: Queen’s Bedchamer, Leyndell.
Blessing of the Erdtree is a potent buff ideal for pre-fight preparation. It not only boosts your character but also benefits your party members. As a standalone spell, it serves as an excellent healing ability, restoring 12 HP per second for 90 seconds, totaling 1,080 HP healing. Remember that its effect doesn’t stack with Flame, Grant Me Strength, so you’ll need to choose between the two before a battle.
Black Flame Ritual
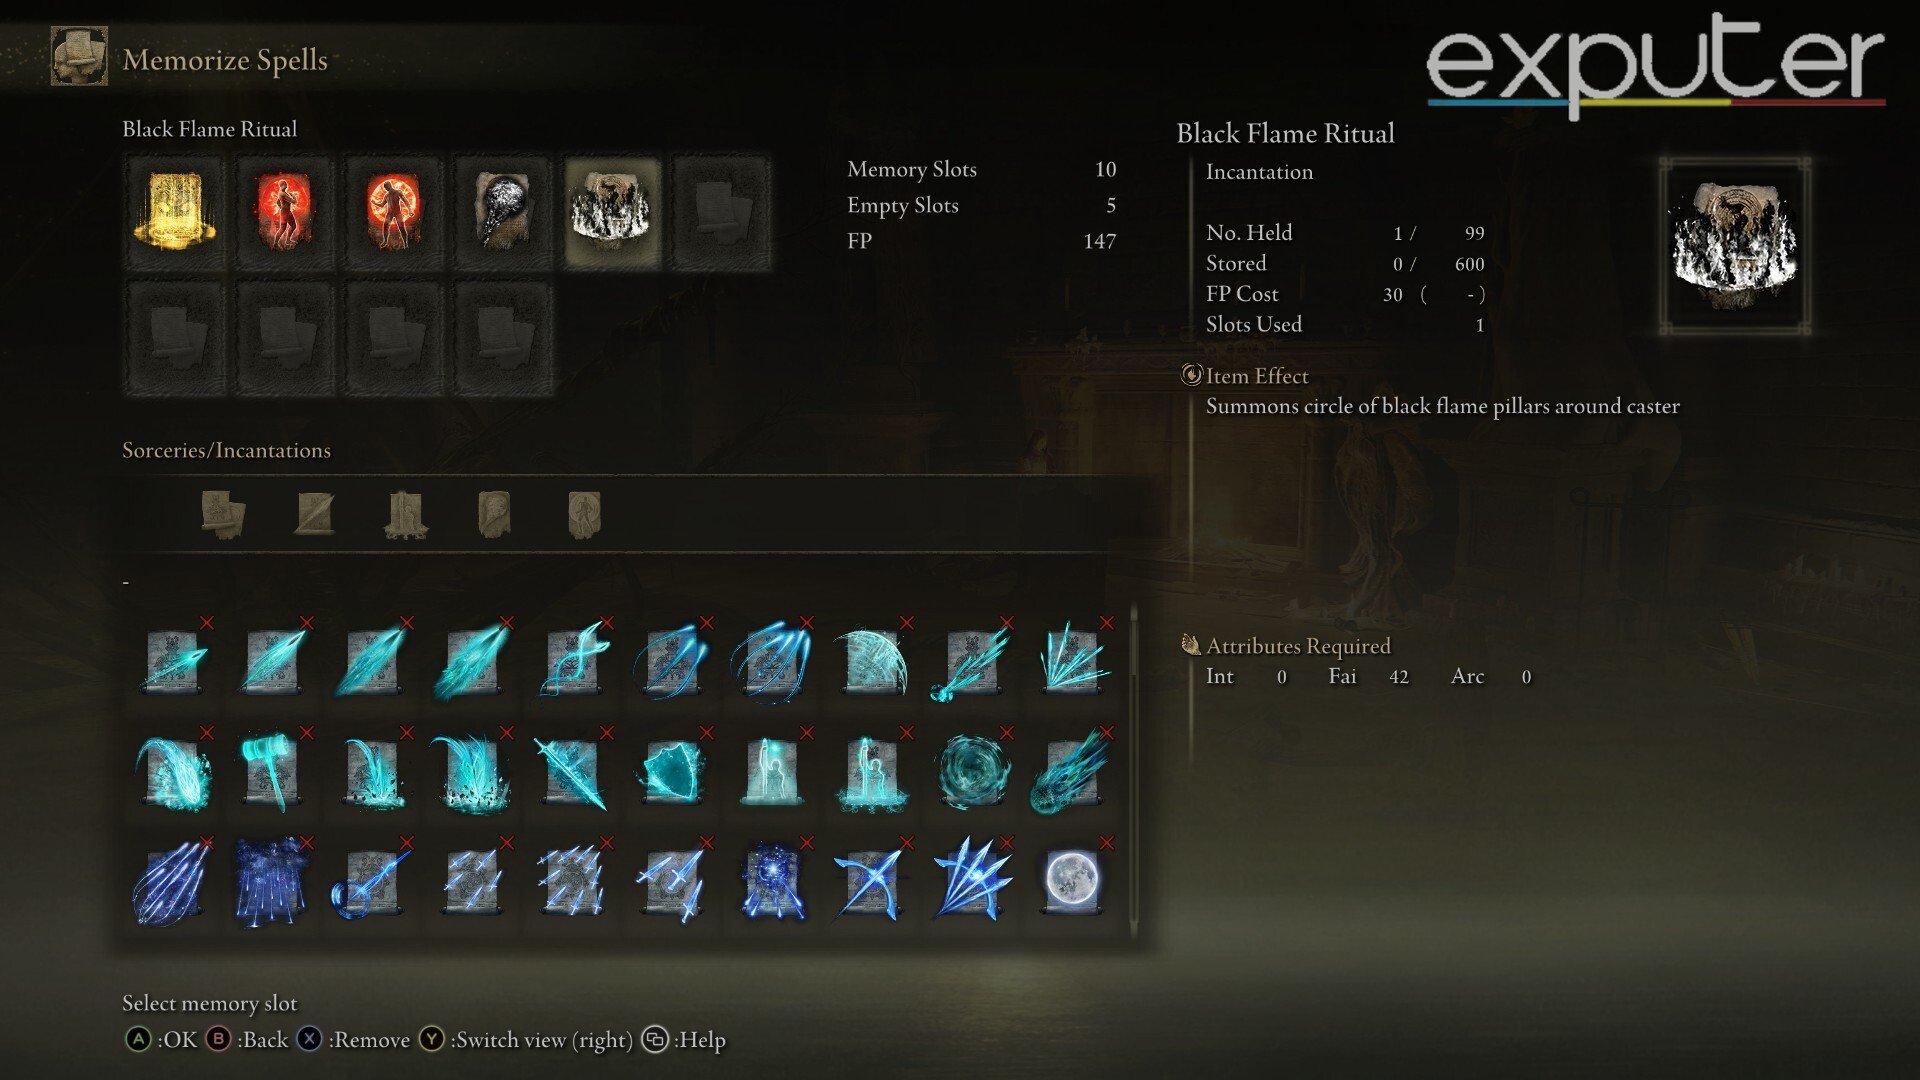
- FP Cost: 30
- Slot Used: 1
- Requirements: Faith 42
- Location: Drop from Spirit-Caller Snail boss fight at the end of Spirit-Caller Cave.
Black Flame Ritual is an excellent AoE attack to keep the gank squad at bay. Upon casting, it summons a circular black flame around him that deals fire damage to anyone near the ring.
Rallying Standard

- FP Cost: 30
- Slot Used: 1
- Duration: 30 seconds
- Requirements: Str 24, Dex 14
- Location: Drop from Commander O’Neil in Swamp of Aeonia.
I know Rallying Standard is not an incarnation, but its use in battles is definitely comparable to them. Rallying Standard is an Ash of War exclusive to the Commandar’s Standard. It basically does the same thing as Golden Vow but better, which is increasing your damage by and damage negation by 20%.
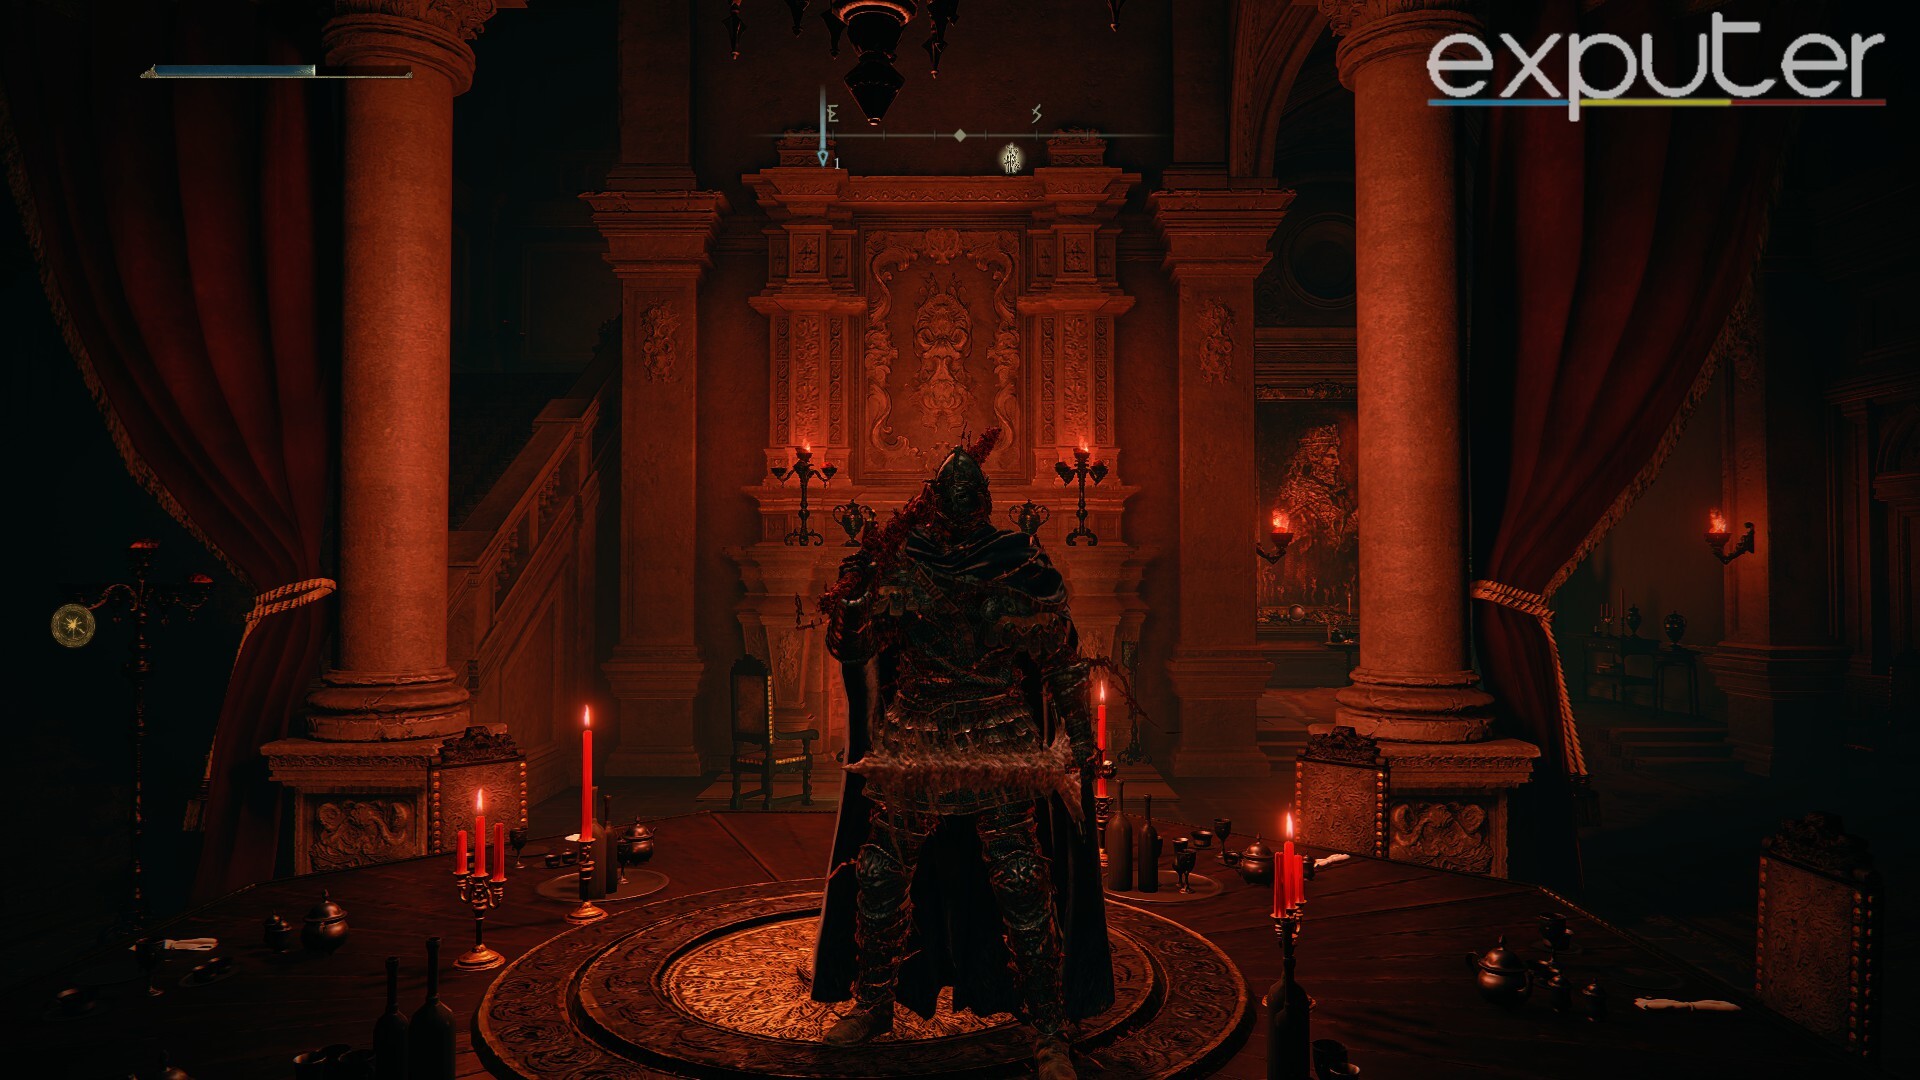
My Experience Using The Blasphemous Blade
When I fought Rykard to get the Blasphemous Blade in Elden Ring, I thought he would be a difficult boss, but he was probably the easiest because of his gimmicks and the fact they’re easily discoverable. That being, the weapon Rykard drops is excellent.
So, when I was out of flasks or didn’t want to use them, I simply used the Taker’s Flames, Ash of War of the weapon that restores 10% of the overall health. It is a pretty useful weapon, and as it has a high strength requirement, it does significant poise damage.
Elden Ring has no shortage of fantastic builds. The amount of creative freedom you can have with each build is unparalleled. For more builds that are centered around weapons, check out our guides on Rivers of Blood Build, Moonveil Build, Sword of Night and Flame Build, and Giant Crusher Build.
For builds that are designed around specific classes, consider reading our guides on Confessor Build, Vagabond Build, Pyromancy Build. and Intelligence Build. This concludes our guide on Elden Ring Blasphemous Blade Location and Build.
Next:
- Elden Ring: Morning Star Location
- Elden Ring: Poison Mist Location
- Elden Ring: All Map Fragment Locations
Thanks! Do share your feedback with us. ⚡
How can we make this post better? Your help would be appreciated. ✍